
meta title: Replace Laptop Battery HP: An Australian DIY Guide | Screen Fixed
meta description: Is your HP laptop battery dying fast? Learn when and how to replace your HP laptop battery with our expert guide. Serving Brisbane and Australia-wide.
It’s a feeling every laptop user in Australia knows well: that sudden panic when your HP laptop dies right in the middle of something important. Your machine was once your ticket to freedom, but now it feels more like a desktop, permanently tethered to the wall.
alt text: An HP laptop showing a low battery warning on its screen while plugged into a charger on a desk.
Maybe your battery drains in what feels like minutes, or the laptop shuts down abruptly despite the indicator showing plenty of charge left. These are all classic signs that your battery has reached the end of its life. The good news is, a straightforward HP laptop battery replacement is usually all it takes to restore your machine's portability and performance, saving you from the expense of buying a new one. This guide will walk you through the process, from identifying the problem to giving your laptop a new lease on life.
When to Replace Your HP Laptop Battery
Figuring out the right time to replace your battery isn't just guesswork; your laptop is probably already giving you some pretty obvious hints. Ignoring them can lead to lost work, constant frustration, and a device that’s no longer portable.
Understanding Battery Lifespan
The most common red flag is a seriously diminished runtime. If a battery that once gave you hours of freedom now barely lasts 30 minutes, its internal cells are on their last legs. This is a natural process that happens after around 300-500 charge cycles. You might also experience sudden shutdowns, even when the battery icon says you have 30% or 40% left. This is a classic symptom of a battery that can no longer supply stable power when you need it.
Physical and Performance Warnings
Beyond just how long it lasts, there are other critical signs to look out for. Notice your laptop getting unusually hot while charging, or taking far longer than it used to to hit 100%? That’s a strong indicator of a failing battery.
A much more urgent sign is any physical swelling or bulging. If you see the laptop case starting to warp, the trackpad pushing upwards, or the keyboard flexing, you need to act fast.
A swollen lithium-ion battery is a serious safety hazard. Stop using and charging it immediately. A bulging battery has a much higher risk of leaking dangerous chemicals or, in rare but serious cases, catching fire.
This is a real issue for HP owners here in Australia. Our hot summers can really accelerate battery degradation, and finding genuine parts for older models adds another layer of difficulty. We see it all the time in community discussions, like one user whose HP 15s-eq2 series battery dropped from 55% to 40% in just five minutes of light use. While most batteries have a one-year warranty, Australian data suggests that around 28% fail prematurely, partly due to our climate.
Catching these signs early means you can sort out a replacement before you're left with a dead laptop. A timely replace laptop battery hp service—whether you do it yourself or bring it to a pro—can give your machine a whole new lease on life. If any of this sounds familiar, our experts at Screen Fixed Brisbane can quickly diagnose the issue and get your HP running like new again.
Finding the Right Battery and Tools for Your HP Model
Jumping into a repair without the right parts is a classic rookie mistake. Trust me, there's nothing more frustrating than getting a laptop opened up only to realise you've bought the wrong battery or don't have the right screwdriver. When you're ready to replace the battery in an HP laptop, a bit of prep work makes all the difference.

alt text: An open HP laptop on a repair mat surrounded by essential tools for a battery replacement.
The entire job really boils down to one critical piece of information: your laptop's full model number. This isn't just "HP Spectre" or "HP Pavilion." You need the specific identifier, something like "HP Pavilion 15-cs3000" or "HP Envy x360 13-ay0001au". Think of this number as the key that unlocks all the correct parts for your machine.
Usually, you can find it printed on the bottom case, often in tiny text near all the regulatory symbols. If it's rubbed off over time, no worries. Just click the Start Menu in Windows, type "System Information," and look for the "System Model" line.
Locating the Correct Battery Part Number
With your laptop model in hand, finding the right battery is much easier. Every HP battery has its own unique part number—sometimes called a "Spare Part Number" or "HP Part No."—printed right on the label. If you have an older HP with an external battery you can just pop out, you're in luck. Simply unclip it and read the number.
For most modern laptops with internal batteries, you’ll have to open up the device to see the part number on the battery itself. An easier first step is to search online for your exact laptop model number followed by "battery part number." This usually gets you what you need.
You're looking for a code that looks something like "HT03XL" or "919701-850". This number is the most reliable way to make sure you're ordering the perfect match. It's also vital to check that the specs align, like voltage and Wh ratings, which are detailed for components like Li-ion 18650 battery cells with specific technical data.
Genuine vs High-Quality Aftermarket Parts
When you start shopping, you'll see a couple of options. Genuine HP-branded parts are always a safe bet, but they can be pricey and sometimes impossible to find for laptops that are a few years old. This is where high-quality, OEM-equivalent batteries from a trusted Australian supplier like Screen Fixed come in.
The one thing you absolutely must avoid is the cheap, no-name batteries from anonymous sellers on massive online marketplaces. They often use low-grade cells, skimp on essential safety circuits, and can cause all sorts of problems, from poor performance to genuine safety risks.
A good supplier rigorously tests their parts to ensure they meet or exceed the original specs. It gives you the performance and safety you need without the hefty price tag. While the process is a bit different from finding a new battery for a Macbook Air, the core idea is the same: always prioritise quality.
Gathering Your Essential Toolkit
Once your new battery is on its way, it’s time to get your tools ready. Using the right gear isn't just about making the job easier; it's about protecting your laptop from scratches, stripped screws, and electrical damage. You don't need a professional workshop, just a few key items.
Before you start, run through this quick checklist to make sure you have everything you need for a smooth and safe battery replacement.
HP Battery and Tool Checklist
| Item | How to Identify or Select | Why It's Important |
|---|---|---|
| Replacement Battery | Match the HP Part No. (e.g., HT03XL) or Laptop Model (e.g., Pavilion 15-cs3000). | Ensures compatibility, correct voltage, and a perfect physical fit. |
| Precision Screwdriver Set | Look for a set with Phillips #00, #0, and Torx T5/T6 bits. | HP laptops use various tiny screws; the wrong bit will strip them. |
| Plastic Prying Tools | Often called spudgers. Look for thin but durable plastic tools. | Safely separates plastic clips on the case without scratching or cracking it. |
| Anti-Static Wrist Strap | Any basic electronics wrist strap that can connect to a metal ground point. | Prevents electrostatic discharge (ESD) from frying sensitive motherboard components. |
| Soft Cloth or Mat | A microfibre cloth or a self-healing cutting mat works well. | Protects your laptop's lid from scratches when you work on it upside down. |
| Screw Organiser (Optional) | A magnetic mat or even a simple ice cube tray will do. | Helps you keep track of tiny screws of different lengths to ensure correct reassembly. |
With these tools lined up, what might seem like a daunting task becomes a very manageable and rewarding project. It’s how you bring that old laptop back to life, restoring its performance and freedom from the power cord.
Setting Up Your Workspace for a Safe Repair
Before you even dream of cracking open your laptop, let's talk about setting the stage. Prepping your workspace is hands-down the most important part of any successful DIY repair. A clean, organised area isn't just for convenience; it's a critical safety measure, especially when a lithium-ion battery is involved.
Think of it like being a surgeon for your tech. You need a clear, well-lit surface with enough room to lay out your tools and parts without anything getting lost or rolling off the table. A simple microfibre cloth or a cutting mat is a great idea to protect your laptop's lid from getting scratched up while you work.
Power Down and Disconnect Completely
Rule number one in the electronics repair playbook: kill all power. And I don't just mean clicking "Shut Down" in Windows. You need to perform a complete power-down to make sure there's no residual charge hanging around in the circuits, just waiting to cause a short.
Start by properly shutting down your HP laptop through the Start Menu. Once it's completely off, unplug the AC adapter from both the wall socket and the laptop itself. Got anything else plugged in? A mouse, an external drive, a USB hub? Disconnect all of it. This completely isolates the machine, making it safe to open up.
Managing the Risk of Static Electricity
One of the biggest silent killers of electronic components is electrostatic discharge (ESD). It’s that tiny zap you sometimes feel, but it's more than enough to fry the delicate circuitry on your laptop's motherboard for good. Your body can build up a surprising amount of static just by walking across a carpet.
This is where an anti-static wrist strap becomes your best friend. It’s a simple but absolutely essential tool that safely grounds you. You just wear the strap and clip the other end to a large, unpainted metal object—a desk leg or the metal case of an unplugged desktop PC works perfectly. This creates a safe channel for any static build-up to discharge, protecting your laptop's guts.
A wooden table is a great non-conductive surface to work on. Try to avoid working on carpet or wearing clothes made of wool or synthetics, as they're notorious for generating static.
Handling Lithium-Ion Batteries with Care
The lithium-ion battery in your laptop packs a serious punch of energy, and it demands respect. If one gets punctured, bent, or otherwise mishandled, it can lead to a dangerous chemical reaction called thermal runaway. That's a technical term for a fire.
And this isn't just a hypothetical risk. In Australia, HP once had to recall over 3,405 lithium-ion battery packs for models like the Pavilion dv6000 because of a serious fire hazard from overheating. This history is a stark reminder of why handling these batteries carefully and using high-quality replacements is so crucial.
If you open your laptop and find the old battery is swollen, puffy, or leaking fluid, stop what you're doing immediately. Don't try to force it out or pry at it with sharp metal tools. A swollen battery is under a lot of internal pressure and is far more volatile. In this scenario, the safest bet is to get professional help. For anyone comfortable with diagnostics, it's also worth knowing how to test continuity with a multimeter to check for other potential electrical gremlins during a repair.
Your Hands-On Guide to Swapping an HP Laptop Battery
Alright, you've got your workspace sorted and your tools laid out – now for the main event. This is where we get our hands dirty and give your HP laptop a new lease on life. Don't think of this as a stuffy technical manual; imagine you've got an experienced tech from our Screen Fixed workshop right there with you, pointing things out as you go.
We'll take this one step at a time, from opening the case to seating the new battery. It doesn't matter if you're tackling a newer HP Envy with an internal battery or an older Pavilion where it's a bit easier to get to – the fundamental steps are pretty much the same.
Before you even think about picking up a screwdriver, this infographic nails the absolute basics of staying safe.
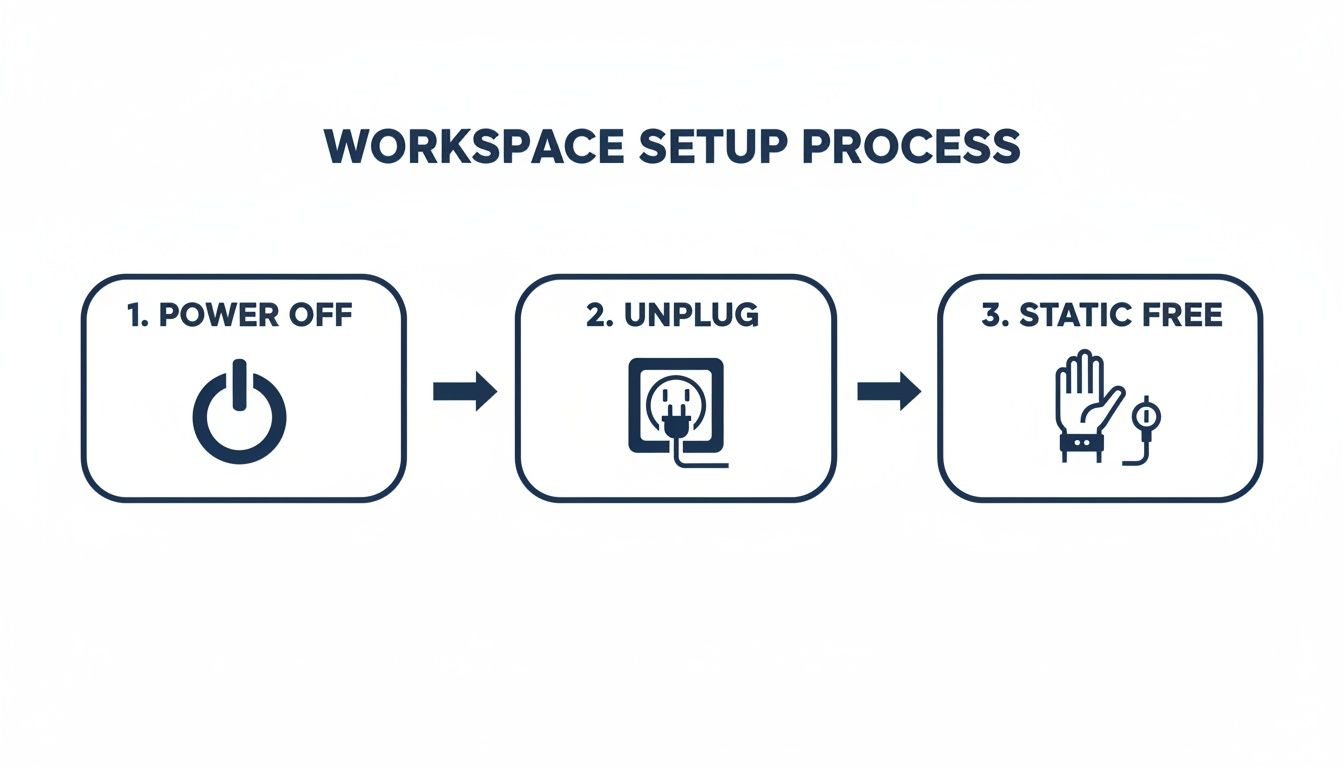
alt text: Infographic showing three icons for safe repair: power off, unplug charger, and wear an anti-static strap.
Seriously, don't skip this. Powering off, unplugging, and making sure you're static-free is the non-negotiable starting point for any electronics repair.
Gaining Access to the Internals
The first real step for any internal HP laptop battery replacement is getting that bottom case off. Flip your laptop over onto your soft mat. Most HPs use a handful of small Phillips or Torx head screws to hold the bottom panel on. Be warned: some models hide a couple of screws under the rubber feet, so gently pry those up with a plastic tool just to be sure.
Once the screws are out, resist the urge to just pull the cover off. This is where a plastic prying tool or a spudger becomes your best friend.
A Pro Tip from the Screen Fixed Crew: Grab a magnetic screw mat or even an old ice cube tray to keep your screws organised. HP loves using different length screws, and forcing a long one into a short hole is a fast track to a damaged motherboard.
Start at a corner and gently work your prying tool into the seam between the bottom case and the main chassis. You'll hear and feel little plastic clips releasing with a soft 'pop'. Just work your way around the entire laptop, nice and slow. Rushing this bit is how you end up with broken clips and scratched plastic.
Safely Disconnecting the Old Battery
With the bottom case off, the battery is usually the first thing that grabs your attention – it's typically a big, black, flat rectangle held in by a few more screws. But before you touch anything else, you must disconnect it from the motherboard.
Look for the wires running from the battery to a small port on the main board. The connector is often a small, delicate plug with multiple pins. Whatever you do, don't pull on the wires. Use a plastic spudger or even your fingernails to gently push the connector straight out of its socket. It's designed to slide out horizontally without much force.
Once it's disconnected, you can go ahead and remove the screws holding the old battery down. With those out, lift the battery out of the chassis. Be gentle with it and set it aside somewhere safe, well away from any metal.
Installing and Connecting the New Battery
Time for the satisfying part. Grab your new battery and carefully lower it into the exact spot the old one came from. You'll see the screw holes line up perfectly.
Go ahead and secure the new battery with the screws you just took out. No need to crank down on them – just get them snug. Now that it's physically in place, it's time to reconnect it.
This is a step where a gentle touch is key. Line up the battery connector with the port on the motherboard and carefully slide it in until it's flush. You might feel a subtle click as it seats properly. Give it a little visual check to make sure it’s straight and all the way in. A loose connection is the #1 reason a laptop fails to power on after a battery replacement.
If you get stuck identifying the screws in your machine, our guide on different screw drive types is a great little resource to have handy.
Reassembling and Final Checks
Before you snap that bottom case back into place, just pause for a quick look around inside. Did you accidentally nudge any other little ribbon cables loose, like the ones for the keyboard or trackpad? It should all look exactly as it did before, just with a fresh, new battery sitting there.
Now, carefully line up the bottom cover and press down firmly around the edges. You'll hear those plastic clips make a satisfying snapping sound as they lock back in. Put all the screws back in, making sure the right length goes into the right hole. If you pulled the rubber feet off, pop them back on.
And that's it for the hardware side of things! You've just done the heavy lifting. The next job is to power it up and calibrate the new battery, which is crucial for teaching your laptop how to properly read its new power source for maximum performance.
Calibrating Your New Battery for Peak Performance
Right, the hard part is over. You’ve successfully swapped out the old battery for a new one, and your HP laptop is all buttoned up again. It’s tempting to dust off your hands and call it a day, but hold on—there’s one final step that’s absolutely crucial for getting the most out of your new investment: battery calibration.
Think of it this way: your laptop's software and the new battery need a proper introduction. Calibration is just that—a process to sync the new power source with your system. It essentially teaches your laptop the battery's true upper and lower limits, making sure the percentage you see on screen is an accurate reflection of the power you actually have left.
Skip this, and you might find your laptop abruptly dying at 20% or stubbornly sitting at 99% even after hours of charging. Calibrating properly ensures you squeeze every last minute of runtime out of your new battery and even helps extend its overall lifespan.
The Simple Calibration Cycle
The good news is that this whole process is surprisingly straightforward. You don't need any fancy software, just a bit of patience to run through one full power cycle. This sets the baseline for your laptop’s power management system.
Here’s the simple method our technicians at Screen Fixed always recommend:
- Charge to 100%: Plug your laptop in and let it charge all the way to 100% without interruption. To be safe, leave it plugged in for at least another hour after it hits full capacity.
- Drain to 0%: Now, unplug the charger and just use your laptop normally until it shuts down completely on its own. If you want to speed things up, play a long YouTube video or do something a bit more demanding than typing in a document.
- Recharge to 100%: Once it's completely out of juice, plug it back in and let it charge all the way back to 100%, this time without using it.
That’s it. This single, complete cycle is usually all it takes. Your laptop's internal sensor now knows the battery’s true capacity, which means more accurate readings and better overall performance for you.
Using HP Diagnostics to Verify Battery Health
Once you've calibrated, you can get some extra peace of mind by confirming the system recognises the new battery and sees it as healthy. HP actually has a fantastic built-in tool for this called HP PC Hardware Diagnostics UEFI.
Getting to it is easy. Just restart your laptop and repeatedly tap the F2 key the moment it starts booting up. This will launch a diagnostic menu where you can run all sorts of specific hardware tests.
The screenshot below shows exactly what you’re looking for—the Component Tests menu inside the HP diagnostics tool.
alt text: Screenshot of the HP PC Hardware Diagnostics UEFI menu showing Component Tests options like Memory, Power, and Storage.
From here, navigate over to the "Power" section and run a "Battery Check." The test will give you a clear status report, usually something like "OK" or "Normal," which is your confirmation that the installation was a success and the battery is communicating properly with the motherboard.
This final check is more important than you might think. When the battery and system software are communicating correctly, all the built-in safety features and performance optimisations work as intended. It's a simple step that helps prevent issues that could lead to premature failure down the road.
This process is particularly relevant here in Australia, where HP's ongoing battery safety programs have really put a spotlight on the importance of well-managed power systems. Since 2016, these programs have led to recalls and essential BIOS updates designed to manage potentially faulty batteries. You can learn more about HP's safety initiatives in Australia here. By properly calibrating your new battery, you’re ensuring it works in perfect harmony with these system-level controls, which is a win for both safety and longevity.
Common Questions About HP Laptop Battery Replacement
Even with the best guide in hand, it’s normal to have a few questions before you dive into an HP laptop battery replacement. We get it. To give you that extra bit of confidence, we’ve put together answers to some of the most common queries we hear from our customers right here in Brisbane and across Australia.
How Can I Be Sure My HP Laptop Battery Needs Replacing?
Besides the obvious signs like your battery life getting ridiculously short or the laptop suddenly dying, there’s a more scientific way to check. Your HP laptop actually has a built-in diagnostic tool that can give you a straight answer.
To get to it, restart your laptop and start tapping the F2 key repeatedly as it boots up. This will launch the HP PC Hardware Diagnostics utility. From there, you can run a specific test on your battery. It’ll generate a clear status report and tell you if the battery has hit the end of its life.
Of course, if you ever see the laptop’s case starting to bulge or the trackpad being pushed up from below, stop what you're doing. That’s a critical sign of a swollen battery that needs immediate and very careful attention.
Is It Safe to Use a Non-Genuine Battery in My HP Laptop?
That's a really important question. While a genuine, HP-branded battery is always a solid choice, they can sometimes be tricky to find or a bit pricey, especially for models that are a few years old. The good news is that a high-quality, OEM-equivalent battery from a trusted Australian supplier like Screen Fixed is a perfectly safe and reliable alternative.
These parts are manufactured and rigorously tested to meet or even exceed the original specifications, so you can trust them to perform correctly and, most importantly, safely.
A word of caution: we strongly advise against buying those super-cheap, unbranded batteries from massive online marketplaces. They often use inferior cells, skip proper safety circuits, and can pose real risks, from just not working well to being a potential fire hazard. A quality-tested part is always the smarter, safer investment for your machine.
My Laptop Won't Turn On After the Replacement! What Should I Do?
First off, don't panic! This is one of the most common things people run into after a repair, and it's almost always a simple connection issue.
The first move is to carefully reopen your laptop and take a close look at the battery's main ribbon cable. Make sure it's fully and securely seated in its connector on the motherboard. Even being off by a millimetre can stop the power from flowing.
While you're in there, just give everything a quick visual scan to make sure no other small cables were accidentally nudged loose in the process. If it all looks good, try a hard reset: with the new battery and the AC adapter disconnected, press and hold the power button for about 30 seconds. Then, reconnect everything and try turning it on again.
How Do I Responsibly Dispose of My Old Laptop Battery in Australia?
Proper disposal is absolutely crucial. You should never, ever toss an old lithium-ion battery into your regular household rubbish bin. It's not just bad for the environment; it’s a serious fire risk for waste collection trucks and recycling facilities.
Luckily, recycling them correctly in Australia is pretty straightforward. You can drop off your old laptop battery for free at any B-cycle collection point. You'll find these conveniently located in major retailers all over the country, including places like Officeworks, Bunnings, and ALDI. Your local council’s website is also a great resource for information on e-waste disposal days or dedicated drop-off locations.
Choosing to replace your battery doesn't just extend your laptop's life; it’s a great move for sustainability. If you're interested in the bigger picture, you can Learn more about the Right to Repair movement. It's a fantastic way to be both budget-conscious and eco-friendly.
Feeling confident but would rather leave it to the professionals? The team at Screen Fixed is here to help. Our expert technicians can handle your HP laptop battery replacement quickly and safely, using only high-quality parts. Book your repair with Screen Fixed Brisbane today!
Disclaimer: Screen Fixed is an independent repair service provider and is not affiliated with HP Inc. All brand names, trademarks, and logos mentioned are the property of their respective owners. Any use of third-party brand names is for identification purposes only and does not imply endorsement.