
Meta Title: MacBook Pro Screen Replacement Guide | Screen Fixed Brisbane
Meta Description: Need a replacement screen for your MacBook Pro? Our guide covers diagnosis, costs, and repair options in Australia. Contact Screen Fixed Brisbane for help.
When your MacBook Pro screen starts flickering, goes completely black, or looks like a spiderweb after a drop, it's easy to assume you need a replacement screen for your MacBook Pro. This is a common problem, but before you start shopping for parts, it’s worth taking a moment to make sure the screen is actually the problem.
Some display issues can be sneaky, looking like a hardware failure when they’re really just a software hiccup. A few quick checks can save you a lot of time, money, and hassle, and help you find the right solution.
Diagnosing Your MacBook Pro Display Problem
A dead display can stop your work in its tracks, but jumping straight to buying a new screen isn't always the smartest move. The first step is to figure out if we're dealing with physical damage or a simple software glitch.
Sometimes, a software bug can perfectly mimic a hardware failure. The good news is that fixing it can be as easy as a keyboard shortcut, saving you the cost and effort of a full repair. By running through a few quick diagnostic steps, you can be confident in your next move.
Start with Software Troubleshooting
Before you even think about grabbing a screwdriver, let's look at the most common software culprits. These steps are quick, non-invasive, and often solve the problem without you ever having to open up your MacBook.
- Reset the SMC and PRAM/NVRAM: The System Management Controller (SMC) is the brain behind low-level functions like power and fans, while the PRAM/NVRAM remembers things like screen resolution and startup disk selection. A quick reset can often shake out any weird display bugs that have crept in.
- Boot in Safe Mode: Starting your Mac in Safe Mode is a great diagnostic tool. It loads only the absolute essential system software. If your screen suddenly works perfectly in this mode, you've likely got a piece of third-party software or a rogue startup item causing the trouble.
- Check Display Settings: It sounds almost too simple, but you'd be surprised how often an incorrect resolution or a wonky colour profile can cause strange visual problems. Just pop into System Settings > Displays and make sure everything looks right.
Identifying Physical Screen Damage
If the software tricks didn't do the job, it's time to inspect the hardware. Physical damage is usually pretty obvious, but some signs can be more subtle. A close look will tell you for sure if a replacement screen for your MacBook Pro is what you need.
Look for the classic signs of impact, like spiderweb cracks across the glass or deep scratches. You might also spot dead pixels, which show up as tiny black or coloured dots that never change. Other dead giveaways include vertical or horizontal lines running across the screen, weird discolouration, or the dreaded "stage light" effect at the bottom—a clear sign of a damaged flex cable.
For those who are a bit more hands-on, learning how to check for electrical faults can be a big help. Our guide on how to test continuity with a multimeter is a great place to start for basic electrical troubleshooting.
When you see these kinds of symptoms, a hardware repair is almost always the only way forward. Once you've confirmed it's physical damage, you can confidently start looking for the right replacement part, knowing you’ve already ruled out all the easier fixes.
Finding the Right Screen for Your MacBook Pro Model
Ordering the wrong replacement screen for a MacBook Pro is a common, frustrating, and often expensive mistake. With dozens of models released over the years—each with its own specific components—getting the exact part number is absolutely essential for a successful repair.
You might find a screen that looks identical, has the same dimensions, and seems like a perfect fit, only to discover it doesn't work because of a slightly different connector or incompatible firmware. The model number is your key to getting the right part.
To get this right the first time, it helps to follow a clear diagnostic process, moving from initial software checks to hardware identification, and finally, making the right repair decision.

Alt text: A flowchart illustrating the MacBook Pro screen diagnosis process, starting with software checks, moving to hardware inspection, and ending with repair options.
This flow shows why a methodical approach is so important. You need to be sure you've nailed down the correct model before you even think about ordering parts.
Start with Your MacBook Pro's Model Identifier
Every MacBook Pro has a few different identifiers, but the most important one for ordering parts is the Model Number. This usually starts with the letter 'A' followed by four digits (like A2338). This number is the quickest way to narrow down the jungle of available parts to find a compatible screen.
To pin down your model, you need to know exactly where to look. Here's a quick guide to locating both the model number and the even more specific serial number.
MacBook Pro Model Identifier Locations
| Identifier Type | Location on Device | Where to Find in macOS |
|---|---|---|
| Model Number (Axxxx) | On the bottom case, printed in small text near the hinge alongside regulatory information. | This 'A' number is not directly visible in macOS. |
| Model Identifier | Not printed on the device itself. | Click the Apple logo > About This Mac > System Report. It's in the Hardware Overview. |
| Serial Number | Usually printed on the bottom case, near the model number. | Click the Apple logo > About This Mac. It's the first thing you'll see. |
| Original Packaging | The serial number and model details are printed on a sticker on the box. | N/A |
Knowing the 'A' number is your first crucial step, but for a truly foolproof match, you sometimes need to dig a little deeper, especially for models that had mid-cycle hardware updates.
Verify with the Serial Number to Be Sure
While the 'A' number identifies the general model family, the Serial Number is a unique code for your specific machine. Think of it as your MacBook’s fingerprint. It provides a much more detailed hardware profile, pinpointing the exact production run, which can be critical for sourcing certain parts.
With the serial number in hand, head over to Apple's official "Check Coverage" page. Pop in your serial number, and it will confirm the exact model and year (e.g., "MacBook Pro (13-inch, M1, 2020)"). This simple step removes all guesswork and confirms you're on the right track.
The Ultimate Method: Get the Part Number Off the Old Screen
Model and serial numbers are great, but the most accurate, guaranteed-to-work method is to identify the part number directly from the original screen assembly itself. Yes, this means you have to carefully open up the MacBook to get to the back of the LCD panel, but it’s the professional standard. Our technicians at the Screen Fixed Brisbane workshop do this all the time to guarantee a perfect match.
Once you have the panel out, look on the back for stickers with barcodes and a bunch of alphanumeric codes. You’re hunting for the manufacturer's part number, which will look something like "LP133WQ1" (from LG Philips) or "B133HAK01.0" (from AU Optronics).
Searching for a replacement screen for your MacBook Pro using this exact part number is the absolute best way to ensure 100% compatibility with the connectors, resolution, and firmware. It takes all the doubt out of the equation.
Comparing Replacement Screen Options
Once you’ve figured out you definitely need a replacement screen for your MacBook Pro, you'll find yourself looking at a market flooded with different quality levels and price tags. It’s crucial to understand that not all screens are created equal, and knowing the difference will help you make a smart choice that balances cost, quality, and how long the repair will actually last.
The screen you pick impacts everything, from how vibrant and accurate the colours are to the display's brightness and overall lifespan.
OEM and Service Pack Screens: The Gold Standard
Right at the top of the quality pyramid, you’ll find OEM (Original Equipment Manufacturer) and Service Pack screens. These are the exact same parts Apple uses in its factories and Authorised Service Provider centres. They’re built to the highest possible standards, guaranteeing perfect compatibility, colour accuracy, and brightness every time.
Choosing an OEM or Service Pack screen means you are restoring your MacBook Pro to its original, fresh-out-of-the-box condition. The visual quality will be completely indistinguishable from a brand-new machine. While they are easily the most expensive options, they give you total peace of mind and the best performance money can buy.
Refurbished Original Screens: A Sustainable Middle Ground
A fantastic—and eco-friendly—alternative is a refurbished original screen. These are genuine Apple screens that have been professionally restored to like-new condition. In many cases, the original LCD or OLED panel is perfectly fine, but the outer glass was cracked. A specialised process is used to separate the damaged glass and bond a new layer onto the original, fully functional display panel.
This method keeps the most critical part of the display intact: the original Apple Retina panel. That means you hang onto the original colour depth, refresh rate, and brightness levels. The quality of the refurbishment can vary, so it’s vital to buy from a reputable supplier who stands behind their work with a solid warranty.
Aftermarket Screens: The Budget-Friendly Option
Finally, we have aftermarket screens. These are brand-new screens made by third-party companies that have no affiliation with Apple or its official suppliers. Quality in this category is all over the place, ranging from premium screens that are almost identical to OEM, all the way down to very cheap versions with obvious flaws.
High-quality aftermarket screens can be excellent value, offering pretty decent performance for a fraction of what an original part costs. Lower-end options, however, usually come with trade-offs like:
- Colour Accuracy: Colours might look washed out, overly saturated, or have an odd colour temperature.
- Brightness Levels: The screen might not get as bright as the original, which can make it tough to use in sunny rooms or outdoors.
- Longevity: Cheaper components are often more likely to fail down the line, developing dead pixels or backlight problems over time.
While aftermarket screens are the most affordable, it’s a classic case of "you get what you pay for." They're a solid choice for budget-conscious repairs, especially on older models. The key is to source them from a trusted seller who offers a good warranty.
To really get your head around the tech, you can learn more about the differences between LCD, OLED, and AMOLED displays in our guide, as the underlying panel technology plays a huge role in quality.
MacBook Pro Screen Types Compared
Sorting through the jargon can be confusing, so let’s break down the main differences in a simple table. This should help you quickly see how each screen type stacks up in terms of quality, cost, and who it’s best suited for.
| Screen Type | Quality & Performance | Typical Cost | Best For |
|---|---|---|---|
| OEM / Service Pack | The absolute best. Perfect colour, brightness, and compatibility. Identical to a new MacBook Pro. | $$$$ (Highest) | Professionals, designers, and anyone who wants a flawless, factory-spec repair without compromise. |
| Refurbished Original | Excellent. Retains the original Apple Retina panel, so visual quality is nearly identical to OEM. | $$$ (High) | The eco-conscious user and anyone looking for a great balance of OEM quality and a more reasonable price. |
| Aftermarket | Varies widely. High-end ones are good; cheap ones have noticeable compromises in colour and brightness. | $ - $$ (Low to Medium) | Budget-conscious repairs, older MacBook models, or situations where perfect visual fidelity isn't the top priority. |
Ultimately, the right screen for you depends on your budget and how you use your MacBook. If you’re a creative professional who relies on perfect colour accuracy, investing in an OEM or high-quality refurbished screen is a must. But if you’re just trying to get an older machine back up and running for basic tasks, a good aftermarket screen can be a perfectly sensible choice.
Avoiding Common Compatibility Mistakes
Choosing the right type of replacement screen for your MacBook Pro is a huge step, but the success of the repair really comes down to the smallest details. A new display can look absolutely identical to the original, right down to the bezel and camera cutout, yet completely fail to work once you've installed it. That frustrating outcome is almost always due to tiny, hidden compatibility issues.
These subtle differences can trip up even experienced technicians. Small variations in connectors or internal cables can render an otherwise perfect-looking screen completely useless for your specific MacBook.
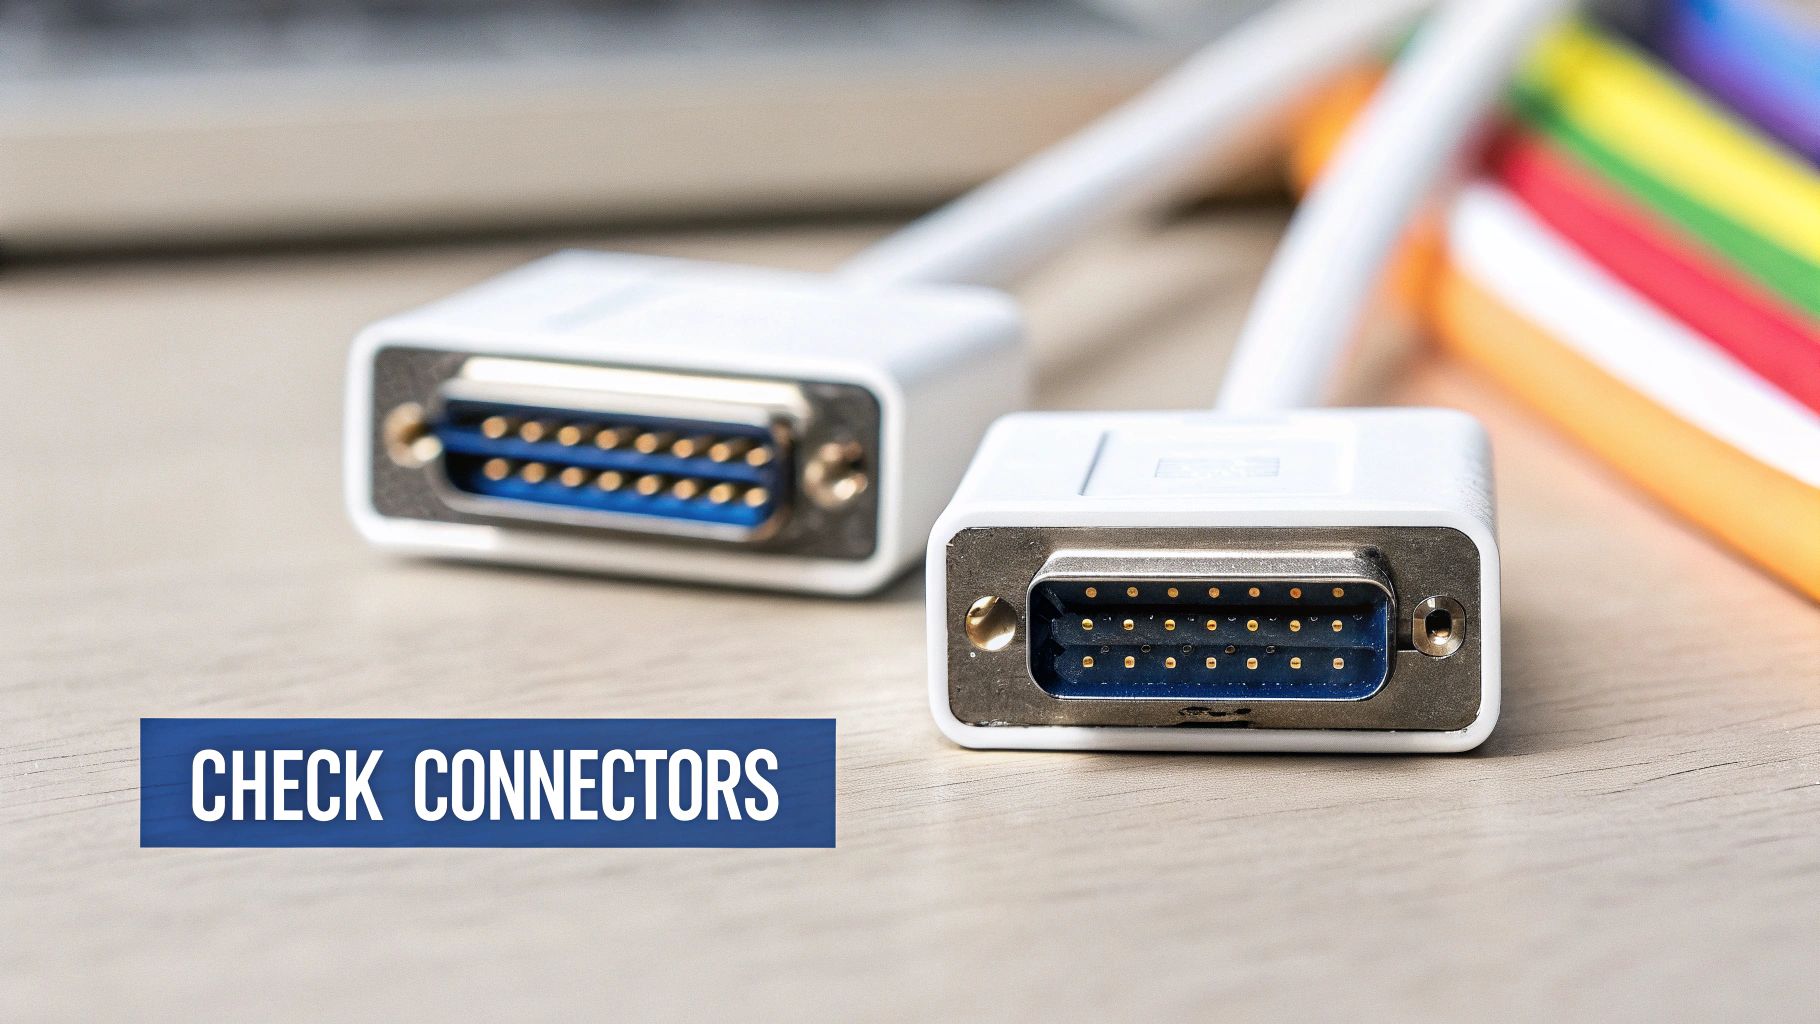
Alt text: Close-up of internal MacBook Pro cable connectors, highlighting the importance of matching them perfectly during a screen replacement.
By understanding these common pitfalls before you even start, you can turn a potentially infuriating experience into a smooth and successful repair.
Mismatched Connectors and Cables
The most common compatibility trap is mismatched connectors. Over the years, Apple has used all sorts of connectors for the main display (the LVDS or eDP cable), the webcam, and the ambient light sensor. A screen from a 2017 model might have a connector that's just a millimetre different from a 2018 model, making it physically impossible to plug in.
This is exactly why verifying the part number from your original screen is so critical. It’s the only way to be sure every single connection point will line up perfectly. Always double-check these three key connections:
- Main Display Connector: This is the big one, carrying the video signal.
- Camera Connector: This smaller cable powers your FaceTime HD camera.
- Backlight and Sensor Connectors: These manage screen brightness and clever features like True Tone.
A simple trick? Take a clear photo of your original screen's connectors before you order a replacement. It can save you a major headache later on.
The True Tone and Ambient Light Sensor Problem
Modern MacBook Pros, especially those from 2018 onwards, feature Apple's True Tone technology. This system uses an ambient light sensor to automatically adjust the screen's colour temperature to match the room you're in, making for a much more natural viewing experience.
The catch is, this sensor is often paired to the original logic board from the factory. Swapping the screen can sometimes break this functionality, even if you use a genuine Apple display. In many cases, the ambient light sensor data must be transferred from the old screen to the new one using specialised tools. Without this step, you may lose True Tone functionality permanently.
If True Tone is a must-have for you, it’s worth discussing this with your parts supplier. Better yet, choose a professional repair service like Screen Fixed Brisbane, where technicians have the right equipment to handle these sensor transfers properly.
Lamination, Bezels, and Finish Variations
Beyond the electronics, simple physical differences can cause problems too. Apple has used different screen finishes (glossy vs. matte anti-glare) and bezel colours (silver vs. space grey) across its lineup. Ordering a screen with a space grey bezel for a silver MacBook Pro will technically work, but it’s going to look odd.
More critically, the way modern screens are built presents its own challenges. Most newer MacBook Pro displays are laminated, which means the glass, digitiser, and LCD panel are all fused into a single unit. This makes them incredibly thin but also far more delicate and difficult to repair.
The fragility of these modern displays has become a big issue in the Australian market. There have been multiple reports of screens on newer M-series models cracking spontaneously, a vulnerability that highlights just how important careful handling is during a repair. You can learn more about these widespread MacBook screen issues from user discussions on Apple's forums. This inherent fragility means that trying a DIY repair on a laminated display carries a much higher risk of causing more damage.
What's a MacBook Pro Screen Replacement Going to Cost in Australia?
Alright, let's talk brass tacks. When you're staring at a cracked or dead MacBook Pro display, the number one question is always, "How much is this going to set me back?" In Australia, the cost for a replacement screen for your MacBook Pro can swing wildly, and it all boils down to a few key things.
The path you take for the repair—whether you go straight to Apple, find a good independent repair shop, or decide to get your hands dirty with a DIY job—is the single biggest factor affecting the final price.
What Goes Into the Final Price?
That quote you get for a screen replacement isn't just a number plucked out of thin air. It’s a calculation based on the specific guts of your machine.
Here’s what really determines the cost:
- MacBook Pro Model and Year: It's no surprise that newer models, especially those with Retina, Liquid Retina XDR, or laminated displays, use more expensive screen assemblies. An M3 Pro screen is going to be in a completely different price universe than one for a 2015 model.
- The Screen Itself: As we've covered, the part you choose makes a huge difference. A top-of-the-line OEM screen, a high-quality refurbished original, or a more wallet-friendly aftermarket part will all have very different price tags.
- Labour Costs: When a pro does the job, you're paying for their time and skill. This cost can vary a fair bit between Apple's official service centres and independent shops like Screen Fixed Brisbane.
Apple's Official Service vs. Independent Repair Shops
When your screen is busted, you’ve basically got two main choices: head to an official Apple Store or find a local, independent repair specialist. The price difference between these two can be pretty staggering.
Going through Apple guarantees you'll get genuine parts, but that peace of mind comes with a serious premium. Independent repair shops usually offer much more competitive pricing. Because they can source high-quality parts directly and run with lower overheads, they can pass significant savings on to you without cutting corners on quality.
This price gap is a well-known reality in the Aussie market. For instance, you'll often see authorised service providers quoting anywhere from $700 to $900 AUD for older 13-inch models. A third-party specialist might do the exact same repair for $250 to $600 AUD. You can dig into a detailed cost analysis of Australian MacBook repairs to see the numbers for yourself. It really shows the incredible value that a trusted independent repairer can offer.
Don't Forget About Australian Consumer Law
It's also super important to know your rights under Australian Consumer Law (ACL). The ACL gives you automatic guarantees for products and services, which can sometimes cover repairs even after Apple's standard one-year warranty has expired.
If your screen has failed because of a manufacturing defect and not because you dropped it, you might be entitled to a repair or replacement at no cost. This law is in place to protect you from problems that shouldn't have happened in the first place. You can learn more about how Australian consumer law impacts Mac warranties from online discussions.
Tools and Checks for a Successful Repair
A successful DIY MacBook Pro repair begins long before you touch a single screw. Proper preparation is what separates a smooth, satisfying job from a costly disaster. Having the right tools on hand and running through a pre-flight checklist will protect your data, your device, and your sanity.
A clean, organised workspace and the correct equipment are non-negotiable if you want a professional result.
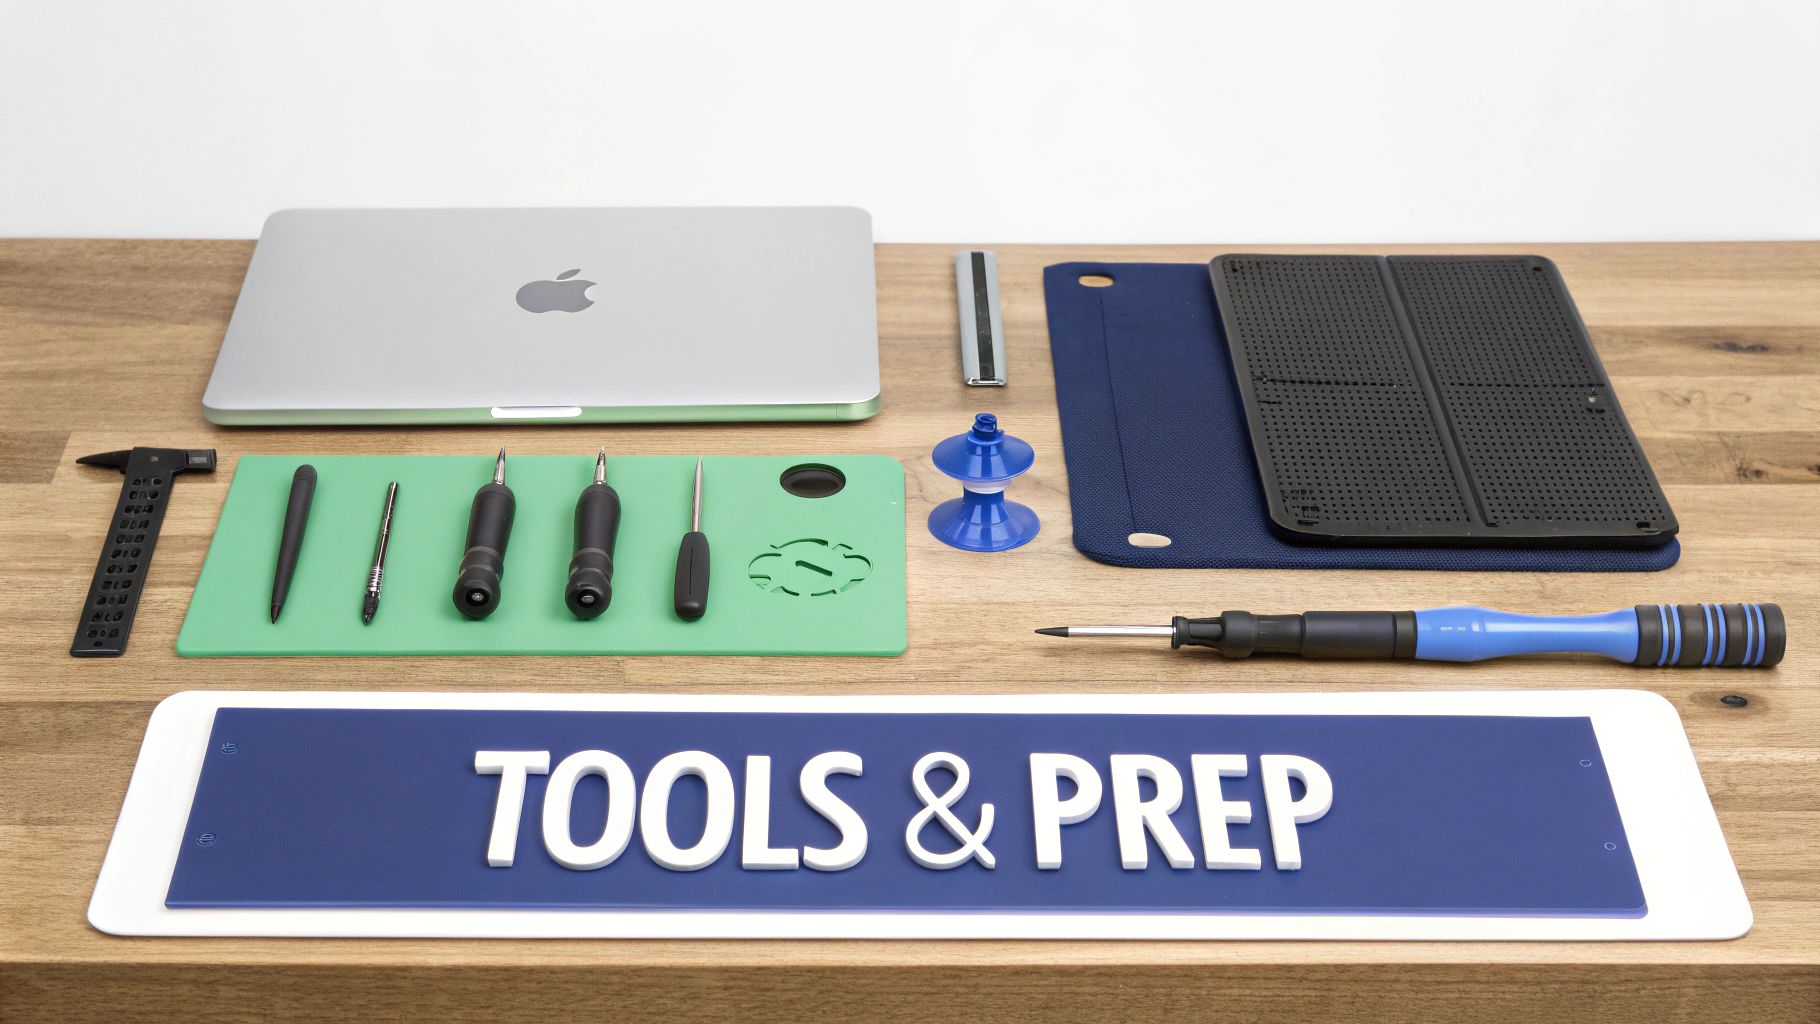
Alt text: Essential repair tools like precision screwdrivers and spudgers laid out next to a MacBook Pro on a workbench.
Gathering Your Essential Toolkit
Trying a screen replacement with the wrong tools is a sure-fire way to end up with stripped screws and cracked plastic. Apple uses very specific, non-standard screws, so a generic screwdriver set won't cut it. You absolutely need a precision toolkit designed for electronics.
Your essential toolkit should include:
- Pentalobe Screwdrivers: You can't even get the back cover off without the P5 size pentalobe.
- Torx Screwdrivers: For the internal components, you'll need various Torx sizes, most commonly T3, T5, and T8.
- Spudgers and Opening Picks: These plastic tools are used to safely pry open the casing and disconnect delicate ribbon cables without causing a short circuit.
- Suction Cup: A small suction cup gives you a safe way to lift the screen assembly.
- Magnetic Mat or Screw Tray: An organised system for keeping track of all the tiny, easily-lost screws.
These specialised screwdrivers are the key to getting your MacBook apart without causing damage. You can learn more about the unique role of pentalobe screwdrivers for iPhone and MacBook repairs in our detailed guide.
Your Pre-Repair Safety Checklist
With your tools ready, it's time to run through the most important safety checks. Rushing this stage is where most DIY repairs go terribly wrong.
The Golden Rule of Electronics Repair: Always, without exception, disconnect the battery before you touch any other internal component. A single accidental slip with a metal tool on a powered logic board can cause a catastrophic short circuit.
Before you start, follow these steps meticulously:
- Perform a Full Data Backup: Use Time Machine or another service to create a complete backup of your system. Always prepare for the unexpected.
- Power Down Completely: This means a full shutdown, not just closing the lid and putting it to sleep.
- Establish a Clean, Well-Lit Workspace: You need a clear, static-free surface with good lighting to see what you’re doing.
This careful preparation is the hallmark of any successful repair, whether it's done at home or in a professional workshop.
Got Questions About Your MacBook Pro Screen Replacement? We've Got Answers.
We've walked through the big stuff, from spotting the real problem to dodging those annoying compatibility headaches. To finish up, let's tackle the questions that pop up most often when you're staring down a screen repair.
Getting straight answers is the best way to move forward with confidence, making sure you’re totally ready for a successful repair.
How Long Will This Actually Take?
The honest answer? It really depends. An experienced technician in a workshop like Screen Fixed Brisbane can often knock out a MacBook Pro screen replacement in a couple of hours. That's because they've got the right gear, quality parts on hand, and have done it a hundred times before.
If you're going the DIY route, it’s smart to block out at least half a day. Rushing is the number one cause of accidental damage, like tearing a delicate cable. So, take your time and keep those tiny screws organised.
Will a Third-Party Repair Mess Up My Warranty?
This is a big one. If your MacBook is still inside Apple's one-year warranty, getting an independent repair shop to do the work could give Apple a reason to deny a future claim on that specific part.
However, your rights are stronger than you might think. Your entire warranty isn't automatically voided. More importantly, Australian Consumer Law gives you serious backup, effectively extending warranty protection on MacBooks to three years from the purchase date for manufacturing defects. This means screen failures that aren't from accidental damage might be covered long after Apple's standard warranty expires.
Is It Cheaper to Just Replace the Whole MacBook?
For most models, repairing the screen is way more cost-effective than buying a whole new MacBook. A replacement screen, particularly a top-notch refurbished or aftermarket part, costs just a fraction of a new machine.
The main exception is with really old MacBooks, where the cost of the repair starts to creep up on the device's actual resale value. In those situations, you have to weigh the repair cost against the perks of upgrading to a newer model.
A good rule of thumb: If the repair costs less than 50% of what a similar new model would set you back, it’s almost always the smarter financial move. It's not just cheaper—it's a whole lot better for the planet, too.
Can I Really Do This Myself?
Tackling a DIY replacement screen for a MacBook Pro is definitely doable, but it's not a walk in the park. Whether you'll succeed really comes down to three things: your patience, your tools, and your model. Working on older, non-laminated screens (usually pre-2016 models) is much more forgiving for a first-timer than dealing with modern, fused displays.
If the idea of handling paper-thin ribbon cables and dozens of microscopic screws makes you break out in a cold sweat, a professional repair is your best bet. It takes away the risk and gives you the peace of mind that comes with a warranty.
If you’ve decided a DIY repair isn’t for you, or if you simply want a fast, guaranteed fix, the experts at Screen Fixed are here to help. We have the tools, expertise, and high-quality parts to get your MacBook Pro looking sharp again.
Book your MacBook repair with Screen Fixed Brisbane today!
Disclaimer: Apple, MacBook, and MacBook Pro are trademarks of Apple Inc., registered in the U.S. and other countries. Screen Fixed is an independent repair service and is not affiliated with or authorised by Apple Inc.