
meta_title: Mac Air Battery Replacement Guide | Screen Fixed Brisbane meta_description: Is your MacBook Air battery dying too fast? Our complete guide covers DIY Mac Air battery replacement, signs you need a new one, and professional options in Brisbane.
Is your MacBook Air dying too fast or shutting down out of the blue? These are classic signs that your battery might be on its last legs. The problem is a failing battery doesn't just reduce your unplugged time; it can slow down your whole machine and lead to unexpected shutdowns right when you need it most. A Mac Air battery replacement is often the most direct and cost-effective solution to restore your laptop's performance and freedom.
This guide will walk you through everything you need to know, from identifying the warning signs to deciding between a DIY swap and a professional service, helping you make the best choice for your device.
Knowing When to Replace Your MacBook Air Battery
It’s a familiar story. The MacBook Air that once powered through a full workday now barely makes it to lunchtime. This slow decline in battery life is the most common sign that it's time for a replacement, but it’s not the only one.
Sometimes, the battery gives up more dramatically. Your Mac might die without warning, even when the battery icon shows 20% or 30% charge left. This usually happens because an old battery can't deliver stable power when the system is under load. In the worst-case scenarios, a completely failed battery can stop your Mac from turning on at all. If you're stuck there, we've got a guide for when your MacBook Air is not turning on.
alt text: MacBook Air showing the 'Service Recommended' battery warning on a wooden desk.
Here's a quick checklist to help you spot the trouble signs before they become a major headache.
H3: MacBook Air Battery Health Symptoms Checklist
| Symptom | What It Looks Like | Severity Level |
|---|---|---|
| Rapid Draining | Your battery percentage drops much faster than it used to, even with light use. | Mild to Moderate |
| Sudden Shutdowns | The laptop powers off unexpectedly, often showing 20% or more charge left. | Moderate to Severe |
| "Service Recommended" | A warning appears in the battery menu, directly from macOS. | Severe |
| Slow Performance | Your Mac feels sluggish, especially when not plugged in. | Moderate |
| Overheating | The bottom of the laptop gets unusually hot during charging or normal use. | Moderate |
| Physical Swelling | The trackpad is difficult to click or the case looks slightly warped. | Critical (Stop using immediately!) |
This table covers the most common red flags. If you're ticking off more than one of these boxes, it’s probably time to dig a bit deeper.
H3: Heeding the "Service Recommended" Warning
Thankfully, your Mac has a built-in health check that cuts through the guesswork. Just hold down the Option key and click the battery icon in your menu bar. If you see "Service Recommended," that’s macOS telling you straight up: the battery's health is severely degraded.
This warning means the battery can no longer hold a decent charge and might be slowing your laptop's performance to avoid those sudden shutdowns. You can keep using it, sure, but you'll be tethered to a power outlet and likely dealing with a slower machine.
H3: Understanding Battery Cycle Counts
Beyond that warning, the cycle count provides the hard data you need. One charge cycle is counted every time you use up 100% of your battery's capacity—but it doesn't have to be all at once. For example, draining your battery to 50% and recharging it twice equals one cycle.
You can find this number easily:
- Click the Apple Menu (top-left corner).
- Go to About This Mac > System Report.
- Under the Hardware section, click Power.
You'll see "Cycle Count" listed there.
Apple states most modern MacBook Air batteries are designed to last up to 1,000 full charge cycles while retaining about 80% of their original capacity. For most people, that works out to be around 3–5 years of solid use before the battery is officially "consumed."
Key Takeaway: While the "Service Recommended" warning is your Mac waving a red flag, a cycle count creeping up toward 1,000 is the concrete proof that your battery is chemically aged and needs to be replaced.
Once you’ve confirmed the battery is the problem, you can start planning the swap. To squeeze a little more life out of it while you wait, check out these tips on how to extend your laptop battery life. But if the signs are all there, a fresh battery is the only thing that will bring back that brand-new feeling of freedom and performance.
Getting Ready for a Successful DIY Battery Swap
Jumping straight into a Mac Air battery replacement without a plan is a recipe for frustration. A bit of prep work turns a potentially tricky job into a smooth, satisfying project. Think of this as your pre-flight checklist, ensuring you have the right parts, the right tools, and the right mindset before you touch a single screw.
Good preparation is about more than just convenience; it’s about protecting your Mac. When you're working with delicate electronics, you need a clean, organised space and a clear head. Rushing things or using the wrong tools is a fast track to stripped screws or damaged components.
H3: Correctly Identifying Your MacBook Air Model
This is the single most critical first step. Not all MacBook Airs are built the same, and their batteries are definitely not interchangeable. Ordering the wrong battery is a common mistake that wastes time and money.
Finding your exact model is easy. Just flip your MacBook Air over. You’ll see the model number printed in tiny text on the bottom case, starting with an 'A' followed by four numbers (like A1466).
You can also find it in macOS:
- Click the Apple Menu in the top-left corner of your screen.
- Select About This Mac.
- A window will pop up showing your model name and year, for example, "MacBook Air (13-inch, Early 2015)".
Use this info to grab the correct battery. At Fixo, we make sure our product listings clearly state which models each battery is compatible with, taking the guesswork out of it for you.
H3: Assembling Your DIY Toolkit
Having the right tools is non-negotiable. It might be tempting to use what you have in a drawer, but Apple uses proprietary screws that need very specific drivers. If you try to use a standard Phillips head on a Pentalobe screw, you'll strip it in a heartbeat.
Here’s a quick rundown of the essentials you'll need for this job:
- Pentalobe P5 Screwdriver: This is for the star-shaped screws on the bottom case of most MacBook Air models.
- Torx T5 Screwdriver: You'll need this for the smaller screws holding the battery itself to the main chassis.
- Plastic Spudger or Pry Tool: This is vital for safely disconnecting the delicate battery connector from the logic board. Never use metal tools for this step—you're asking for a short circuit.
- Tweezers: These are surprisingly helpful for handling tiny screws and connectors without dropping them.
Honestly, a comprehensive DIY repair kit is your best bet. These kits bundle the correct battery with all the necessary tools, so you have everything in one package. You can also dig deeper into the world of Apple screws by checking out our guide to Pentalobe screwdrivers for iPhone and MacBook repairs.
H3: Creating a Safe Workspace
Safety first—for both you and your MacBook. You're about to handle a powerful lithium-ion battery and sensitive electronics, so setting up your workspace properly is key.
Find a clean, well-lit, and flat surface. A kitchen table or a desk works perfectly. I recommend laying down a soft, lint-free cloth to protect your Mac’s aluminium case from scratches. Most importantly, you need to deal with static electricity.
An anti-static wrist strap is a small investment that provides huge peace of mind. It grounds you, preventing any accidental static discharge from frying the sensitive components on the logic board.
Before you start, make sure your MacBook Air is completely powered off, not just sleeping. Disconnecting the old battery should be the absolute first thing you do once the bottom case is off. This kills the power to the system and prevents accidental shorts.
Finally, come up with a system for your screws. The screws on the bottom case are often different lengths. A magnetic mat is great, but even a simple ice cube tray works wonders for keeping them sorted. This little bit of organisation will save you a massive headache when it's time to put everything back together.
Your Hands-On Guide to Replacing the Battery
Alright, this is where the fun starts. We're going to dive into the full replacement process with clear, actionable steps that anyone can handle. The most important thing here is to take your time—patience is the key to a successful Mac Air battery replacement.
Before you crack open the case, do a quick check to make sure you've got everything from the previous section ready to go. You should have your MacBook model confirmed, all the right tools laid out, and a clean, static-free workspace. A little prep work now makes the whole job run smoother.
This diagram sums up the prep stages we've covered, ensuring you're properly set up for success before a single screw comes out.
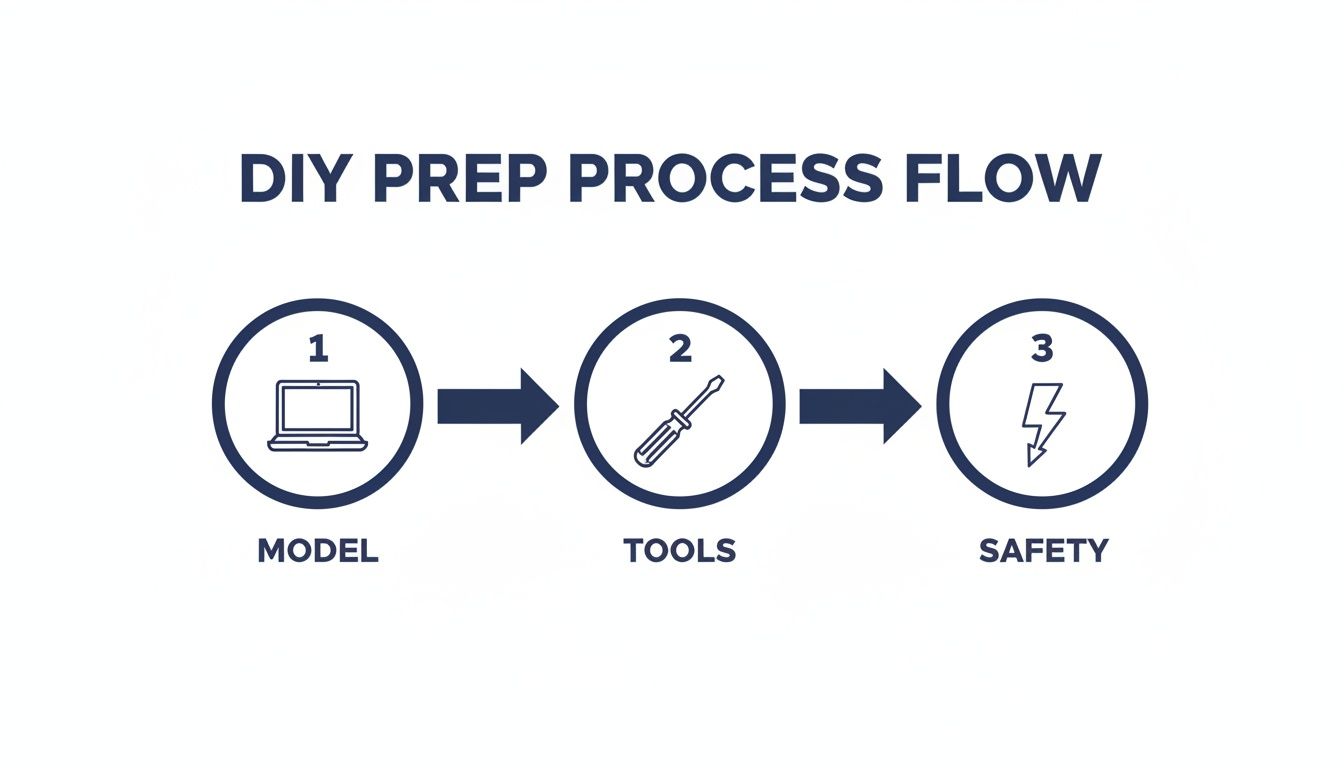 alt text: Process flow diagram for MacBook Air battery replacement: Identify Model, Gather Tools, and Ensure Safety.
Following this flow—checking your model, getting the tools, and thinking about safety—will help you dodge the most common mistakes people make.
H3: Opening the Bottom Case Without Damage
The first physical step is getting that bottom aluminium case off. Grab your P5 Pentalobe screwdriver and carefully loosen the screws around the outer edge. It's worth remembering that on many MacBook Air models, the two screws closest to the hinge are longer than the rest.
This is where having an ice cube tray or a magnetic mat really pays off. Keeping track of which screw belongs where is a small detail that makes reassembly much less frustrating.
Once all the screws are out, the case won't just lift off. It’s held on by a couple of small clips inside. Use a plastic pry tool (or just your fingernails) to gently lift the case up near the hinge, then work your way around the edges. You shouldn’t need to force it; a little wiggling is usually all it takes.
H3: Safely Disconnecting the Battery Connector
With the case off, you'll see the logic board and the big, black battery assembly. Your absolute first priority is to disconnect the old battery. This step cuts the power to the whole system and prevents any accidental short circuits that could instantly kill your logic board.
The battery connector is a small, wide plug attached to the board. Use your plastic spudger—never use a metal tool for this—to gently pry the connector straight up and away from its socket. It should pop off with very little effort.
Crucial Tip: Never pull on the battery wires themselves. Always use a spudger to lift the connector from its base on the logic board. This prevents damage to the delicate socket and wires.
H3: Removing the Old Screwed-In Battery
On many MacBook Air models, the battery is simply held in place by several Torx T5 screws. Work your way around, removing each screw and placing them in your organiser. Keep an eye on where they came from, as some might be different lengths.
After you've removed all the screws, the battery should lift right out. If it feels stuck, double-check you haven't missed a sneaky screw hiding under a piece of tape. Don't try to force it.
H3: Tackling Glued-In Batteries with Patience
Newer MacBook Air models throw a spanner in the works: the battery cells are stuck down with seriously strong adhesive strips. This makes removal a more delicate and time-consuming job. You cannot just pry the battery out, as you could puncture a cell—and that’s a major fire hazard.
The trick here is patience and the right solvent. A small amount of isopropyl alcohol (90% or higher) can be dripped around the edges of each battery cell.
Let the solvent work its magic for a few minutes to soften the glue. Then, take a plastic card or a spudger and slowly and gently work it under the battery, gradually separating it from the case. This is a slow, methodical process. Whatever you do, don't bend or twist the battery cells.
H3: Installing and Aligning the New Battery
Once the old battery is out, take a moment to clean any leftover adhesive from the chassis. This ensures the new battery will sit perfectly flat. If your new battery came with its own adhesive strips, apply them to the case in the designated spots.
Carefully place the new battery into the enclosure, making sure it lines up with the screw holes. The fit should be exact. If you need to apply new adhesive, our guide on using double-sided tape for phone and tablet repairs has some handy tips.
Next, reconnect the new battery's connector to the logic board. You should feel a firm click as it seats into place. Make sure it's sitting evenly and is fully connected. After that, replace all the Torx screws to secure the battery, but be careful not to overtighten them.
With the new battery locked in, you can reattach the bottom case. Start all the Pentalobe screws by hand first to make sure they're threaded properly, then tighten them down. Don't forget to put the two longer screws back in their original spots near the hinge. And that's it—the physical part of the job is done.
Calibrating Your New Battery for Peak Performance
You’ve done the hard part and successfully swapped the battery. Great job! But before you finish, there’s one final, critical step to get the most out of that fresh battery: calibration.
Think of it like this: your Mac’s brain (the power management system) and the new battery need a proper introduction. Calibration allows your Mac to learn the battery's true upper and lower limits. Without this, you might see your Mac shut down unexpectedly, even when it says you have 30% charge left. It’s all about making sure the percentage you see on screen is accurate.
H3: Why Calibration Is a Non-Negotiable Step
Skipping calibration is one of the most common mistakes after a DIY replacement. Your new battery has a tiny microprocessor to track charge, but your MacBook's System Management Controller (SMC) also keeps its own records. Calibration gets them on the same page, syncing them up so they work together perfectly.
Taking the time to do this helps you avoid frustrating problems, such as:
- Inaccurate Battery Readings: The last thing you want is your Mac dying mid-sentence when it claimed to have plenty of juice left.
- Reduced Runtimes: If the system doesn't know the battery's true capacity, it might not use it all, cutting your unplugged time short.
- Incorrect Cycle Count Reporting: Calibration helps reset the system's log, so it knows it’s working with a brand-new battery.
In short, you’re training the software to understand the new hardware. It’s a small investment of time that pays huge dividends in reliability.
H3: The Simple Four-Step Calibration Process
This process is straightforward but requires some patience. You’ll need to let the battery run through a complete power cycle without interruption, so it’s a good idea to do this overnight.
-
Charge to Full and Wait: Plug in your charger and let the battery charge all the way to 100%. Once it hits full, leave it connected for at least another two hours. This ensures the battery cells are truly topped off.
-
Use Your Mac Until It Shuts Down: Unplug the charger and use your MacBook Air as you normally would. The goal is to completely drain the battery until the Mac shuts itself down. Don't just put it to sleep—it needs to be fully depleted.
-
Let It Rest: Once your Mac has turned off, leave it be. Let it sit unplugged for at least five hours. This allows the battery to cool and settle before you charge it back up.
-
Charge to Full Uninterrupted: Finally, plug the charger back in. Let it charge all the way to 100% without using it or unplugging it. Once it's fully charged, your battery is officially calibrated and ready to go.
By completing this cycle, you've taught your Mac the exact upper and lower limits of its new power source. This simple but vital procedure is the key to maximising the lifespan and accuracy of your replacement battery.
H3: Verifying a Successful Installation
With the calibration done, it’s a good idea to quickly check that macOS recognises your new battery correctly.
Just head to the Apple Menu > About This Mac > System Report. In the new window, find and click on Power in the left-hand sidebar. You should see a "Cycle Count" of 1. This is the confirmation you’re looking for—it means the system sees it as a brand-new battery, ready to give your MacBook Air a new lease on life.
DIY vs Professional Repair in Australia
So, your MacBook Air definitely needs a new battery. Now you’re at a crossroads: do you tackle the Mac Air battery replacement yourself, or hand it over to a professional? Both are perfectly good options here in Australia, but they suit different people.
Going the DIY route can be incredibly satisfying and is usually the most budget-friendly path. On the flip side, a professional repair offers pure peace of mind. You’re paying for expertise, speed, and the guarantee that if anything goes wrong, it’s their problem, not yours.
H3: Comparing the Costs in Australia
Let’s talk numbers. A DIY kit is hands-down the most economical way to go. You get the battery and all the specific tools required in one affordable package.
Independent professional repair shops, like the excellent services you find in Brisbane, sit in a nice middle ground. They deliver expert service, often quicker and for less money than going directly to Apple. This is the sweet spot if you want a warranty and professional experience without the premium price tag.
In Australia, replacing your MacBook Air’s battery is a smart financial decision. Apple Australia’s official battery service fee often hovers around AU$159 for many models. Meanwhile, independent Aussie repairers and parts suppliers typically offer packages anywhere from AU$120 to AU$250. When you consider a new MacBook Air can set you back over AU$1,400, this repair cost is usually less than 15% of a new device's price. You can dive deeper into the cost-effectiveness of this repair in Australia through various industry analyses.
H3: Weighing the Pros and Cons
To get a clear picture, it helps to see the trade-offs side-by-side. Your final decision will likely boil down to what you value most: saving cash, convenience, or the security of a professional job.
H3: MacBook Air Battery Replacement Options in Australia
Choosing how to replace your MacBook Air's battery involves weighing up cost, time, and risk. The table below breaks down the key differences between doing it yourself, using a local professional service, and going directly to Apple in Australia.
| Attribute | DIY Replacement (with Fixo Kit) | Professional Repair (e.g., in Brisbane) | Official Apple Service |
|---|---|---|---|
| Upfront Cost | Lowest (cost of parts & tools) | Moderate (parts + labour) | Highest (premium service fee) |
| Time Investment | 1-2 hours of your own time | Minimal (drop-off/pick-up) | Can take several days |
| Warranty | Warranty on the part only | Warranty on part and labour | Comprehensive service warranty |
| Risk Factor | You are responsible for any damage | Low, repairer assumes risk | Virtually zero risk to you |
| Best For | Confident DIYers, budget-conscious users | Busy professionals, those wanting peace of mind | Users who prioritise official service at any cost |
Ultimately, this comparison highlights that there’s no single "best" choice for everyone. Your decision depends on your personal comfort level with technology, your budget, and how urgently you need your MacBook Air back in action.
The key difference really boils down to risk and warranty. With a DIY repair, you save money but accept the risk. With a professional service, you pay a bit more for the safety net of expertise and a guarantee on the work.
If you're technically inclined and enjoy a hands-on project, the DIY path is a fantastic way to save money. But if your Mac is a critical tool for work or study and you just can't risk a mistake, booking a professional Mac Air battery replacement with a trusted local service is the smarter, worry-free investment.
How to Responsibly Dispose of Your Old Battery
Congrats, you've successfully swapped out your MacBook Air's battery! But before you call it a day, there's one last, crucial step. That old lithium-ion battery is classified as hazardous e-waste and needs to be handled the right way.
Simply throwing it in the regular rubbish bin is a definite no-go. These batteries are a serious fire risk in garbage trucks and at landfill sites, not to mention the chemicals inside can harm the environment.
 alt text: Woman handing an old MacBook Air battery to a recycling centre employee.
H3: Finding Local E-Waste Options in Australia
The good news is that Australia has a solid network of free e-waste recycling points, so you won't have to go far to find a safe drop-off spot.
Here are some of the most common places to look:
- Local Council E-Waste Facilities: Almost every local council has a dedicated recycling centre or runs collection days where you can drop off old batteries for free. A quick search on your local council's website will provide locations and opening times.
- Major Retailers: Many electronics retailers have in-store recycling programs. Officeworks, for example, has battery collection bins in their stores across the country.
- MobileMuster: While their main focus is phones, many of their drop-off points also accept loose batteries.
As a quick safety measure, it's smart to put a small piece of clear sticky tape over the metal connector terminals of the old battery. This stops any chance of it short-circuiting.
H3: Using Apple’s Free Recycling Program
Apple also runs a brilliant, no-cost recycling service. You can take your old MacBook Air battery to any Apple Store or an Authorised Service Provider, and they’ll ensure it's recycled correctly.
Their program focuses on recovering valuable materials like aluminium and cobalt, feeding them back into manufacturing instead of letting them go to waste. According to Apple's battery recycling initiatives in Australia, this is a huge part of their environmental strategy. A simple battery swap can keep a laptop going for years longer, delaying the need to produce a new one.
Disclaimer: Screen Fixed is an independent repair service and is not affiliated with Apple Inc. All brand names and trademarks are the property of their respective owners.
Common Questions About MacBook Air Batteries
When it comes to a Mac Air battery replacement, a few questions always pop up. Let's tackle the most common ones to give you some quick, clear answers.
H3: How Long Does a Replacement Take?
If you're doing this yourself, I'd block out a good 60–90 minutes. This is especially true if it's your first time opening a MacBook. It's not a race, and giving yourself that buffer means you can work carefully without feeling rushed.
In a professional shop, it's often a same-day job. Depending on how busy we are, we can usually get it done within a few hours.
H3: Will a DIY Repair Void My Warranty?
This is a big one. If your MacBook Air is still covered by Apple's one-year warranty or AppleCare+, then yes, opening it up yourself could void the warranty for anything related to the battery or the parts you touch.
However, most people looking to replace a battery are well past their warranty period anyway, so it's usually not an issue.
H3: Is a Bulging MacBook Case Dangerous?
Absolutely, yes. A swollen or bulging battery is a serious safety hazard. It's a clear sign of an internal failure and it poses a genuine fire risk.
If you see your MacBook's case bulging, stop using it and unplug it immediately. Do not try to charge it.
If you're not comfortable performing the replacement yourself, this is one of those times it's best to leave it to the pros. Get in touch with a professional service right away so they can handle the safe removal and disposal.
If the idea of a DIY repair feels daunting or you simply want the peace of mind that comes with a professional touch, we're here to help. Book your repair with Screen Fixed Brisbane today for a fast, reliable, and guaranteed Mac Air battery replacement.