
Meta Title: Double Tape Adhesive: A Pro Guide for Device Repairs Meta Description: Learn how to choose and apply double tape adhesive for phone and tablet repairs. Get a lasting, professional fix with our step-by-step guide.
When you're dealing with a device repair, a high-quality double tape adhesive is the secret sauce holding it all together. It’s the invisible force securing the screen, back glass, and all the sensitive internal bits, keeping your device solid and sealed. This isn't just sticky tape; it's a specialised component, engineered for the precise demands of modern electronics. Has your phone screen started lifting at the corners? This is often a sign of failing adhesive, a common problem we see in our repair shops.
The Unsung Hero of Your Device Repair
Ever seen a phone with a screen that’s lifting just a tiny bit at the corner? Or heard a faint rattle from the back cover after a DIY fix? Nine times out of ten, the culprit is failed adhesive. In today’s gadgets, this material is doing a lot more than just sticking parts A and B together. It’s a custom gasket, creating a seal that's absolutely vital to the device’s design and lifespan.
Using the right double tape adhesive is a non-negotiable for any repair that’s built to last. It’s what separates a quick, temporary fix from a reliable solution that feels like it just came out of the box. A proper bond delivers a few key wins:
- Structural Integrity: It shores up the device's frame, stopping the kind of flexing and creaking that can wreak havoc on internal components.
- Environmental Sealing: It acts as a barrier, keeping out the dust, moisture, and other gunk that can cause short circuits or fry delicate electronics.
- Aesthetic Finish: It guarantees a clean, gap-free fit between parts like the screen and frame, preserving that sleek, factory-fresh look.
Breaking Down the Layers
At its heart, every double tape adhesive is built from three simple but critical layers. Each one has a specific job, and they all work in concert to create a bond that’s both strong and clean. Getting your head around this structure is the first step to mastering its use in any repair, whether you're doing a simple battery swap or a complex screen replacement for an iPhone in Brisbane.
This diagram breaks down how the three core components—the carrier, adhesive, and liner—fit together.
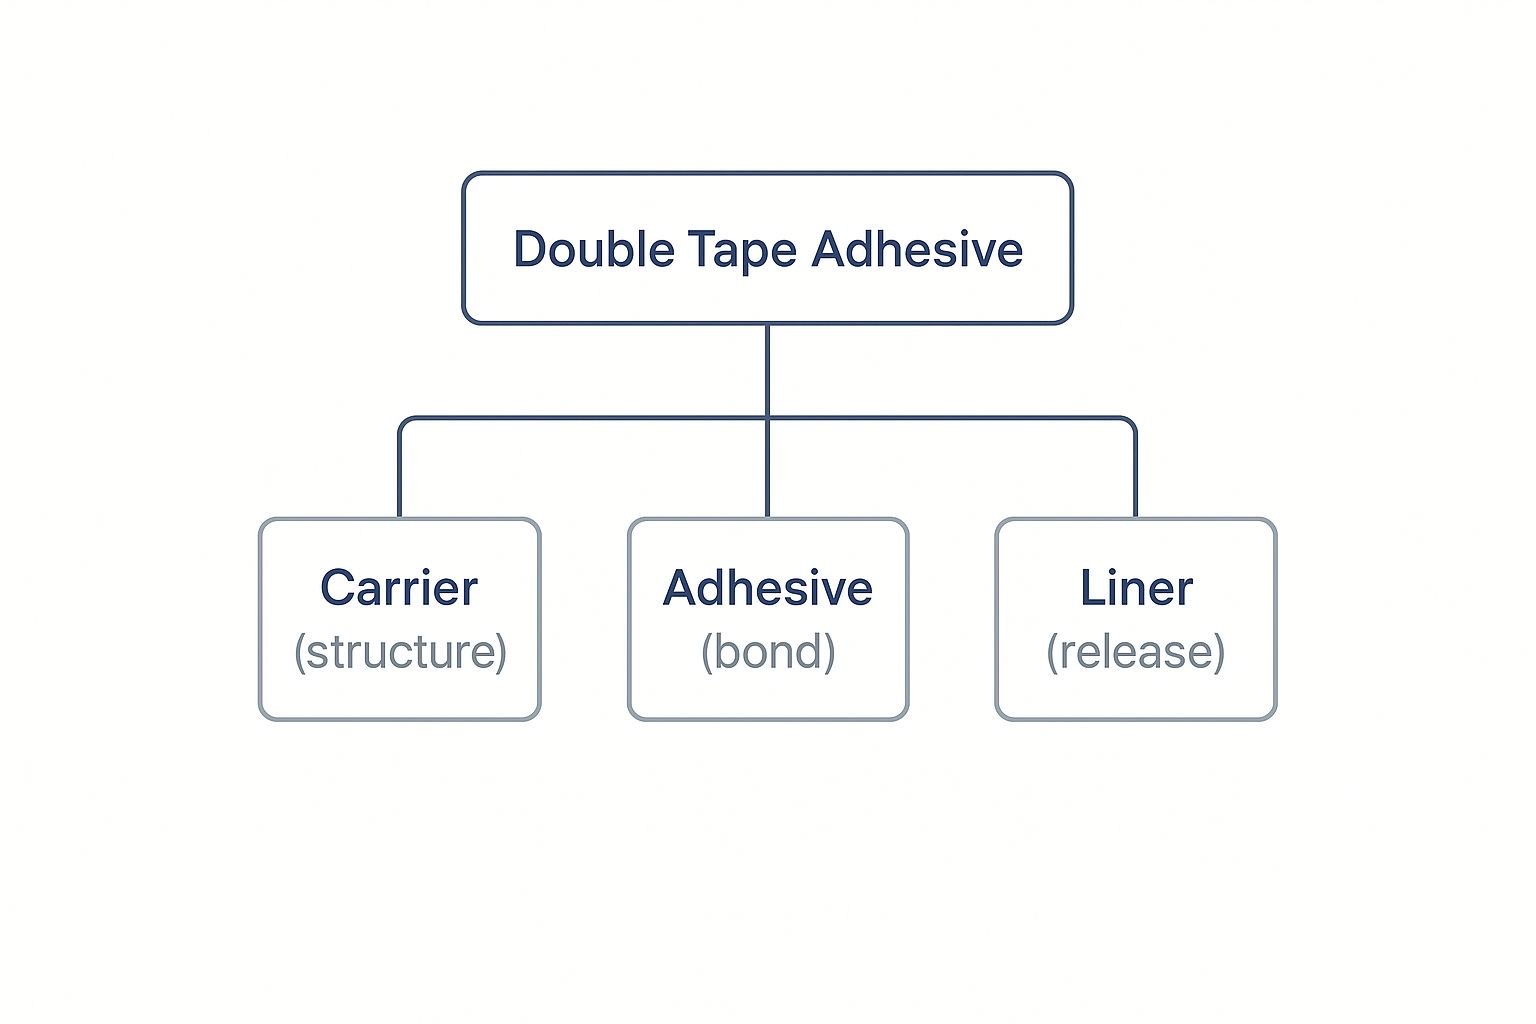 Alt text: An infographic explaining the three layers of double tape adhesive: the liner, the adhesive, and the carrier.
As you can see, the carrier gives it structure, the adhesive delivers the stick, and the liner keeps it all protected until you're ready to go. Think of it this way: the carrier is the backbone, the adhesive is the muscle, and the liner is the shield. Nail this one element, and you’re well on your way to a repair that doesn’t just work, but lasts.
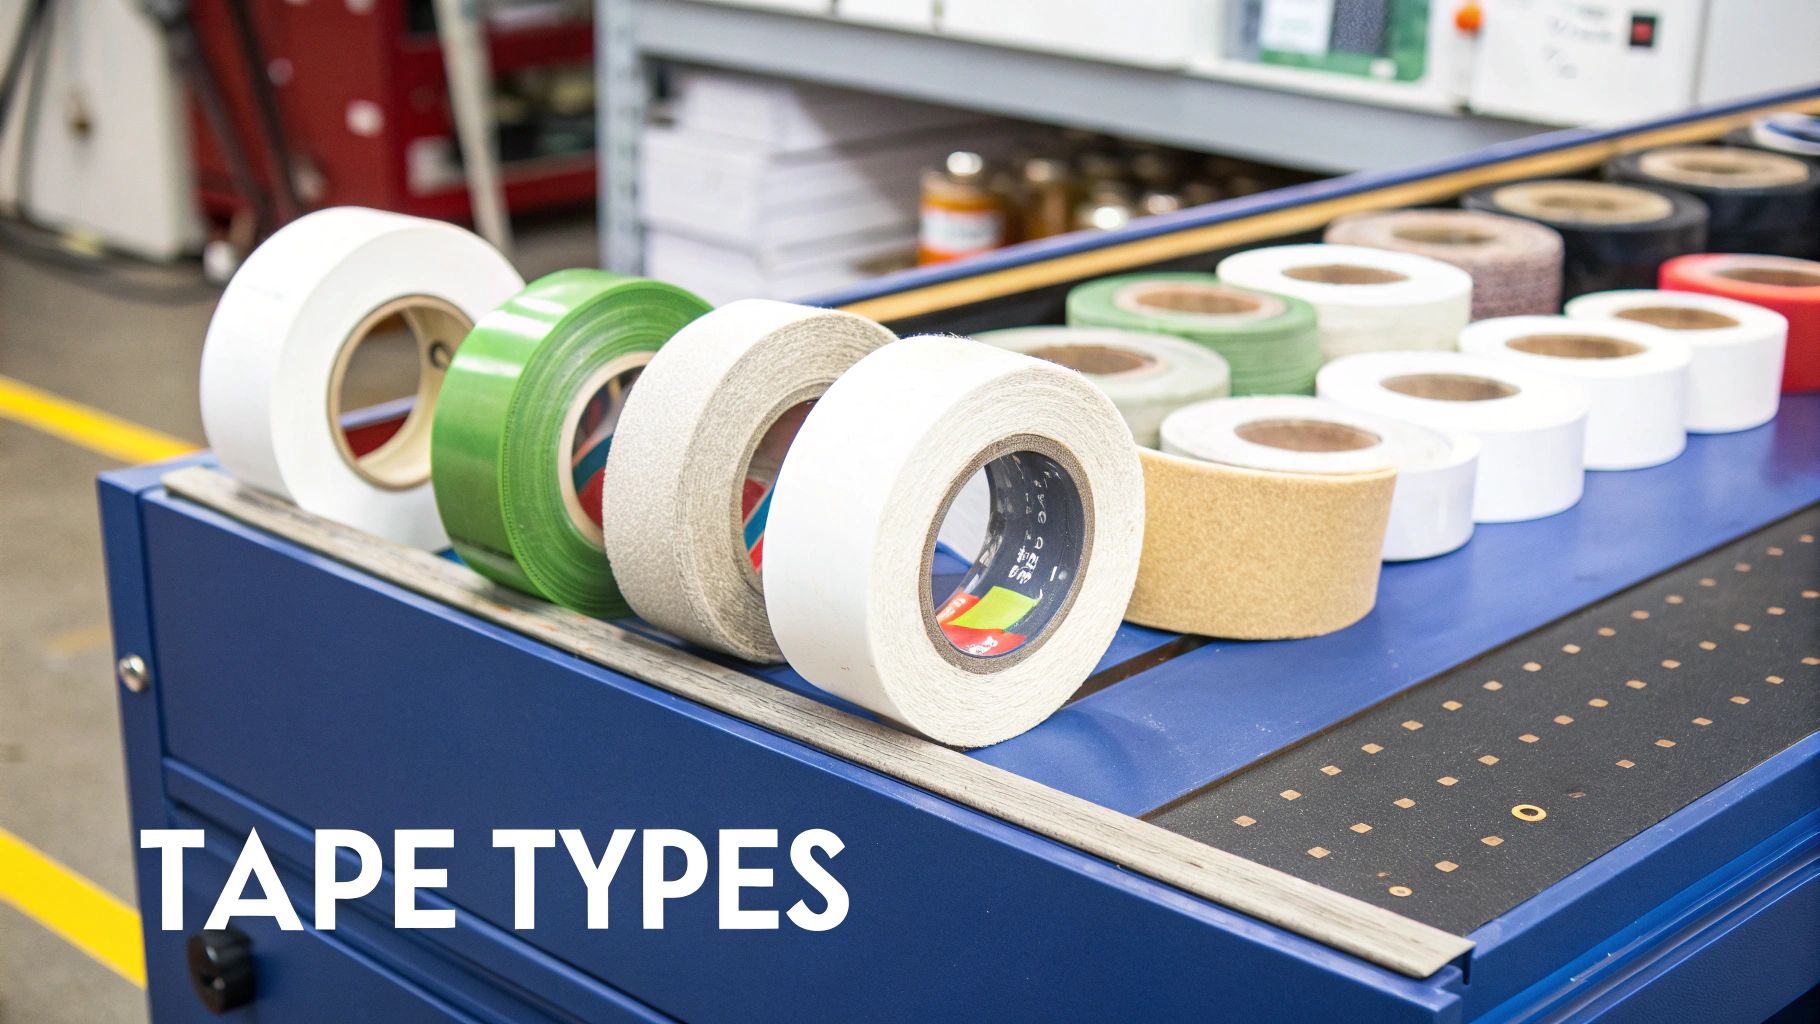
Decoding the Different Types of Repair Tapes
 Alt text: A roll of black double-sided adhesive tape ready for a device repair.
Picking the wrong double tape adhesive for a device repair is a bit like using masking tape to fix a leaky pipe—it’s just not going to hold. Not all tapes are created equal, and in the world of electronics, those differences are critical. The tape holding your phone’s screen in place is engineered very differently from the one securing the battery.
This variety isn’t just for show; it’s a direct response to the diverse jobs that need doing inside a single device. A screen needs a strong, rigid bond that can resist twisting, whereas a battery might need a more flexible adhesive that can handle a bit of heat. This is exactly why repair professionals have an arsenal of specific tapes on hand.
Understanding Adhesive Materials
The "stickiness" of the tape comes down to its adhesive formula. In electronic repairs, two main types dominate the field: acrylic and silicone. Each has distinct properties that make it the right tool for different jobs.
-
Acrylic Adhesives: These are the real workhorses of device repair. They create a powerful, long-lasting bond and are fantastic at resisting UV light and temperature changes, which is vital for components exposed to the elements, like screens.
-
Silicone Adhesives: Known for their exceptional heat resistance, silicone-based tapes are your go-to for anything near components that generate warmth, like processors or charging circuits. They stay stable even when things heat up.
The growing need for these specialised materials is clear when you look at the market. Global demand for double-sided tape is expected to climb from around $11.9 billion in 2025 to $18.5 billion by 2035. This boom is driven by industries like electronics that demand precise, lightweight bonding solutions that screws and glues just can't offer.
Carrier Materials Make a Difference
The carrier is the backbone of the tape, the material sandwiched between the two sticky layers. It provides structure and thickness, and the material used here dramatically changes how the tape behaves and where it should be used.
The carrier material dictates key properties like thickness, flexibility, and gap-filling ability. Choosing the right carrier is just as important as choosing the right adhesive.
You’ll commonly run into two main types of carriers in mobile phone repairs:
-
Foam Carriers: Think of that black tape sealing your phone screen—that’s often a foam tape. The compressible foam fills tiny gaps between the screen and the frame, creating a cushioned, dust-proof, and water-resistant seal. It’s perfect for surfaces that aren’t perfectly flat.
-
Film Carriers: These are ultra-thin plastic carriers, typically made of polyester. They’re used when you need a super-thin, precise bond for things like securing a battery or a flexible circuit cable. For instance, a dedicated Galaxy A9 rework adhesive sticker kit uses pre-cut film carriers for a perfect, factory-like fit.
To give you a clearer picture, here’s a quick breakdown of the most common tapes you'll find in electronics repair.
Common Double Tape Adhesive Types in Electronics Repair
| Tape Type (Carrier/Adhesive) | Key Properties | Common Application | Best For |
|---|---|---|---|
| Acrylic Foam Tape | Strong bond, shock absorption, excellent gap-filling, water resistance. | Attaching screens and back glass, sealing device frames. | Creating strong, cushioned seals on slightly uneven surfaces. |
| Polyester (PET) Film Tape | Very thin, high tensile strength, stable at high temperatures. | Securing batteries, flex cables, and internal components. | Applications needing a thin, precise bond without adding thickness. |
| Tissue Tape | Thin, conformable, easy to tear by hand. | Mounting small components, nameplates, and light trim. | General-purpose internal bonding where high strength isn't critical. |
| Silicone Adhesive Tape | High-temperature resistance, bonds well to silicone surfaces. | Securing components near heat sources like processors or PCBs. | High-heat environments where acrylic adhesives might fail. |
Knowing these distinctions empowers you to make smarter choices for your repairs. While our focus is on electronics, you can broaden your knowledge by exploring how other tapes are used in different industries, for example by understanding branded Kraft tape and its role in commercial packaging.
How to Choose the Right Adhesive for Your Repair Job
When it comes to double tape adhesive, picking the right one isn't about finding the "strongest" tape on the shelf. It's about playing matchmaker—pairing the tape's specific qualities with the demands of the job. Getting this right is the difference between a repair that looks and feels factory-fresh and one that starts falling apart in a few weeks.
The decision boils down to a few key things: the materials you’re bonding, the state of the surfaces, and what you need the adhesive to do.
Think of it like this: you wouldn't use a sledgehammer to tap in a tiny nail. In the same way, the adhesive you’d use for a perfectly flat, brand-new tablet screen is worlds away from what you need for a phone with a slightly bent frame.
Assess the Surfaces and Gaps
First things first, take a close look at the parts you’re putting back together. Are you sticking glass to metal? Plastic to plastic? Different adhesives are cooked up with formulas that bond better to specific materials.
But it’s not just about the material—you have to consider the landscape of the surface. A fresh-out-of-the-box phone frame is perfectly flat. One that’s taken a tumble? It might have tiny, almost invisible bends and dings. This is where the thickness of your adhesive tape becomes a massive deal.
A classic DIY repair mistake is slapping an ultra-thin adhesive onto an imperfect surface. This creates tiny air pockets and weak spots, wrecking the seal and the device's structural strength.
For instance, a slightly warped phone frame will have minuscule gaps that a thin film tape just can't bridge. In a case like that, a thicker acrylic foam tape is your best mate. It’s got a bit of squish to it, allowing it to mould into those imperfections and create a solid, cushioned seal that keeps dust and moisture out.
Match Strength to the Application
While you definitely need a strong bond, grabbing the strongest tape you can find isn't always the smart move. The real goal is to mimic the bond strength the manufacturer used—strong enough to hold tight, but not so aggressive that the next person doing a repair (even if it's you) has a nightmare getting the device open.
Using an adhesive that’s way too strong can lead to a cracked screen or a mangled frame during the next disassembly.
Think about these common repair jobs:
- Tablet Screen Repair: These big glass panels need a high-strength acrylic adhesive. It has to be rigid and tough to stop the large surface from lifting or flexing.
- Battery Replacement: Here, you want a good, solid hold, but it also needs to be removable. That's exactly why manufacturers use special pull-tab adhesive strips designed to stretch and release without a fight.
- Back Glass Fitting: A lot like screens, this job needs a strong, often foam-based adhesive that can also soak up minor knocks and provide a water-resistant seal.
Pre-Cut Adhesive vs Tape Rolls
Finally, you’ve got to choose your weapon: a pre-cut adhesive kit or a roll of tape you cut yourself. Honestly, there's a place for both in any technician's toolkit.
Pre-cut adhesive kits are your precision tool. They’re made for specific models, like an iPhone screen replacement in Brisbane, and they take all the guesswork out of it. Every edge and corner gets a perfect seal. For beginners or anyone aiming for a flawless, factory-quality finish, this is the way to go.
Tape rolls, on the other hand, are the versatile workhorses. They're cheaper and absolutely vital for custom jobs or repairs on less common devices where you just can't find a pre-cut kit. Sure, they demand a bit more skill to apply neatly, but they are a must-have for any serious repairer. Making the right choice here is all about working efficiently and getting a reliable result, every single time.
A Step-by-Step Guide to Applying Adhesive Like a Pro
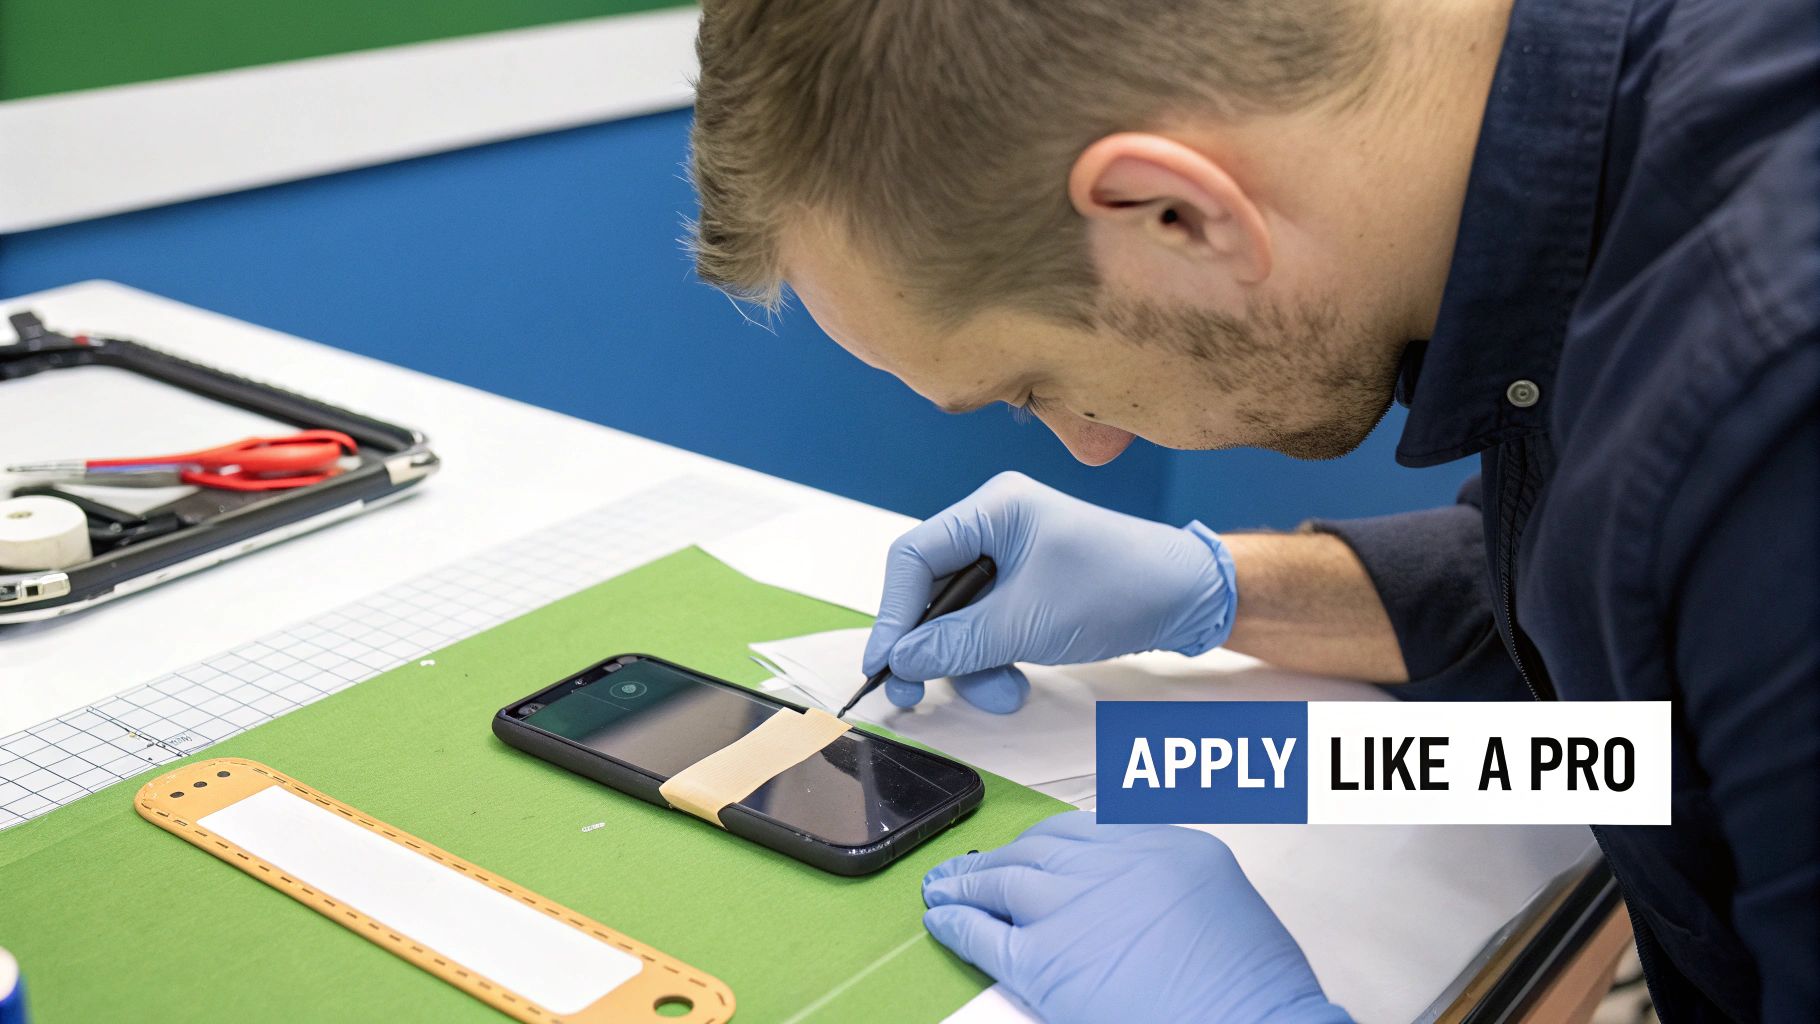 Alt text: A technician carefully applying double tape adhesive to a smartphone frame during a repair in Brisbane.
Caption: iPhone 14 Pro screen replacement in Brisbane.
Alt text: A technician carefully applying double tape adhesive to a smartphone frame during a repair in Brisbane.
Caption: iPhone 14 Pro screen replacement in Brisbane.
Getting a perfect, lasting bond with double tape adhesive isn't about luck—it's all about technique. So many DIY repairs fail at this exact stage, not because of a dodgy part, but because the adhesive wasn't applied correctly. A single fingerprint, a speck of dust, or uneven pressure is all it takes to ruin the entire seal.
But don't worry, getting it right is pretty straightforward once you know the process. If you master these fundamental steps, you can dodge common mistakes like air bubbles and weak spots, ensuring your repair holds up just as well as a professional one. It all begins with a perfectly clean slate.
Prepare Your Surfaces Meticulously
This is the big one. The single most critical step is preparing the surface. Any leftover gunk—oils from your fingers, old adhesive, or dust—will stop the new adhesive from forming a strong bond. This is a non-negotiable first step.
To get a truly pristine surface, high-purity isopropyl alcohol (IPA) is the industry go-to. A concentration of 90% or higher is what you want, as it evaporates quickly without leaving any film or residue behind.
- Initial Cleaning: First, gently scrape away any large chunks of old adhesive. Use a plastic spudger to avoid scratching the frame or other components.
- Solvent Application: Lightly dampen a lint-free cloth or a quality cotton swab with your IPA. Don't oversaturate it; you don't want liquid seeping into sensitive areas of the device.
- Thorough Wiping: Carefully wipe down every surface where the new adhesive will sit. Pay extra attention to the corners and edges, as that’s where grime loves to hide.
The goal here is a surface that’s surgically clean. When you get this right, you’ve laid the perfect foundation for the adhesive to grab onto and form the strongest possible connection.
Handle and Align with Precision
Once your surfaces are spotless, the next challenge is handling the tape itself without contaminating it. The natural oils on your skin are the enemy of a good bond, so precision is key.
Using a pair of fine-tipped tweezers is the best way to go. This lets you peel the adhesive from its backing and position it accurately without ever touching the sticky side with your fingers.
The moment you touch the adhesive, you introduce contaminants that instantly reduce its bonding power. Always use tools like tweezers for placement to ensure a clean, strong application.
If you're using a pre-cut adhesive, like the iPhone 11 Pro Max Pre-Cut LCD Frame Adhesive, alignment becomes much, much easier. These kits are designed to be a perfect fit, so just take your time lining up the adhesive with the cutouts and edges on the device frame.
For those using a tape roll, lay it down slowly, starting from one end and smoothly working your way along the frame. A common mistake is stretching the tape, which can cause it to lift later on. Once it's in place, apply firm, even pressure along the entire length. This activates the pressure-sensitive bond and squeezes out any potential air bubbles. This final press is what locks everything down for a secure, long-lasting repair.
Safely Removing Old Adhesive Without Causing Damage
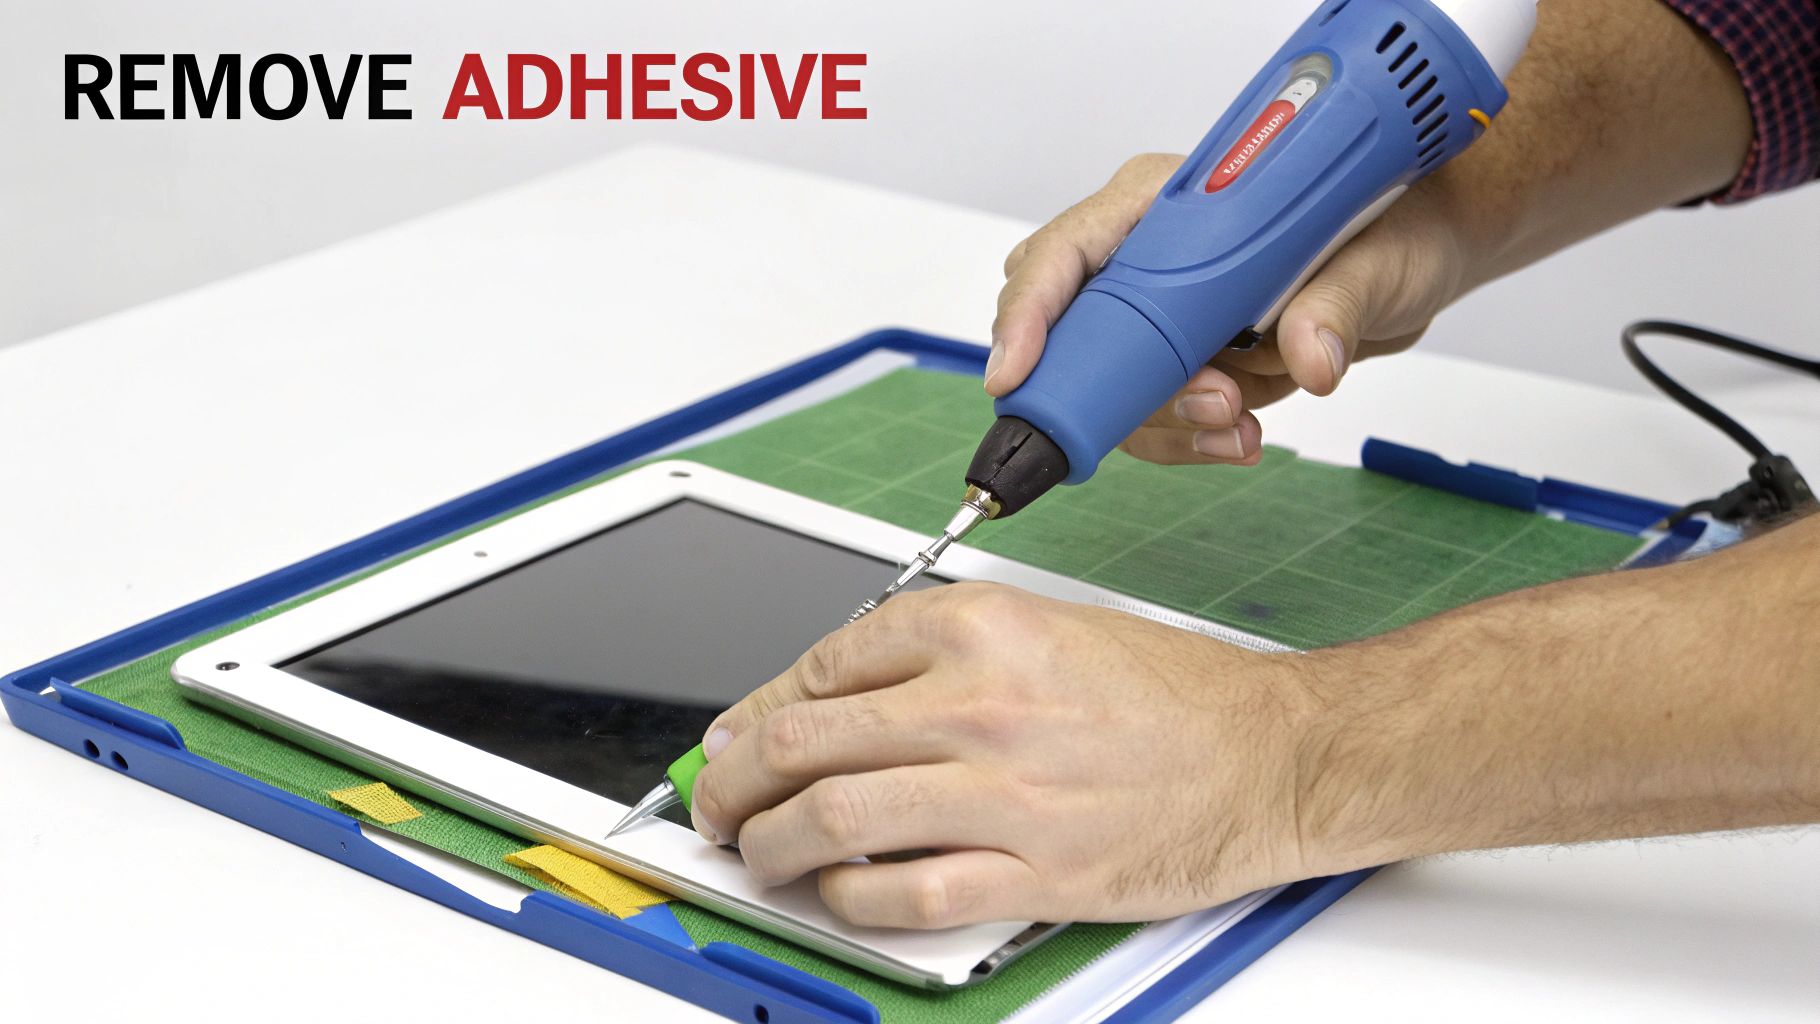 Alt text: A technician carefully removing old adhesive from a smartphone frame with a plastic tool.
Before you can lay down a fresh strip of double tape adhesive, you've got to deal with the gunk left behind. Honestly, getting rid of old, stubborn adhesive is often the trickiest part of any device repair. One wrong move and you could end up with scratches, cracks, or worse, damaged components.
The aim isn't just to scrape the old stuff off; it's to create a perfectly clean, pristine surface for the new bond to grab onto. This takes a bit of patience and the right mix of heat, tools, and technique. A "safety first" mindset here is what separates a clean, professional-looking repair from a very expensive mistake.
Using Heat to Soften the Bond
Old adhesive can feel like it’s been welded to the frame, but a little bit of heat is your best mate. Applying gentle, controlled warmth softens the adhesive right up, breaking down its chemical structure and making it much, much easier to peel away.
A heat gun on a low setting (around 60-80°C) or even a hairdryer will get the job done. The key is to keep it moving constantly around the edges of the device. Never focus the heat on one spot for too long, especially near the battery or any plastic parts, as too much heat can cause permanent damage.
Always apply heat indirectly and keep it moving. The goal is just to warm the frame enough to soften the adhesive, not to cook the internals. A few seconds of focused heat is all you should ever need.
Choosing the Right Tools for the Job
Once the adhesive is softened, you need the right tools to lift it off without leaving a single mark. Metal tools are an absolute no-go here. They can easily scratch glass screens, gouge plastic frames, or slice through fragile flex cables before you even realise what's happened.
Here’s what your removal toolkit should look like:
- Plastic Spudgers or Pry Tools: These are your go-to workhorses for scraping away the bulk of the softened glue. They're firm enough to lift the gunk but soft enough that they won't damage the device's surfaces.
- Isopropyl Alcohol (IPA): Grab a high concentration (90% or higher) of IPA and apply it with a lint-free cloth or a cotton swab. This will dissolve any sticky residue that's left behind, and it evaporates cleanly, leaving a perfect surface for the new adhesive.
- Plastic Razor Blades: For those extra stubborn patches, a plastic razor blade gives you a bit more leverage than a spudger without the scratching risk that comes with metal blades.
Some parts, like batteries, are often held in place with special pull-tab adhesives. For these, it's critical to use the proper removal technique instead of just trying to pry them out. You can see great examples of these in replacement kits, like these iPhone 6 battery adhesive strips, which are designed to come out cleanly when pulled correctly. Taking the time to prep the surface properly is the best way to guarantee your new adhesive performs exactly as it should, ensuring your repair is built to last.
The Bigger Picture of Adhesives in Australia
While we spend our days focused on the tiny strips of double tape adhesive holding your phone together, it's worth zooming out to see where this stuff actually comes from. The quality and types of tapes available to us in the repair world are directly shaped by bigger industrial trends happening right here in Australia. Believe it or not, what happens in sectors like construction and automotive often sparks the innovation that eventually lands in the high-performance adhesives we rely on for electronics.
This connection to the wider industry is a huge plus. It means technicians at shops like Screen Fixed Brisbane get access to some seriously advanced materials. To really get it, think about how adhesives are crucial in complex processes like Printed Circuit Board (PCB) design and assembly – it’s the same world of precision bonding, just on a different scale.
Local Market Growth and Trends
The Australian adhesives market is massive, which tells you there's a huge demand for quality bonding solutions across the board. In 2024, it was valued at a whopping USD 600.35 million, and it's on track to climb over USD 737 million by 2028.
A huge driver for this growth is the push for more sustainable, high-performance products, which lines up perfectly with the global shift towards more eco-friendly tech. You can dig deeper into the numbers on the Australian adhesives market on Mordor Intelligence. At the end of the day, this focus on quality and innovation means better, more reliable materials are available for your device repairs.
Common Questions About Using Double Sided Adhesive
Even with the best instructions in front of you, a few questions always seem to pop up when you're working with double sided adhesive tape. To clear up any lingering doubts, we've put together the most common queries we hear from DIY repairers and seasoned techs alike. These quick, practical answers should give you the confidence you need for your next repair.
Can I Reuse Double Sided Tape?
The short answer here is a hard no. You should never, ever reuse adhesive tape after prying off a screen or back cover. Once it's been applied, stretched out, and then peeled away, its ability to create a strong bond is pretty much gone.
When you reuse tape, you're also reapplying a strip that's now covered in dust and tiny bits of debris. This creates a weak seal that’s almost guaranteed to fail. You'll end up with dust inside your device, potential moisture damage, or the part you just fixed will simply come loose again. Always start fresh with a new adhesive for a secure, professional result.
Is Stronger Always Better for Repairs?
Not at all. While you definitely need a strong bond, "stronger" doesn't automatically mean "better." Some industrial-strength adhesives create such a powerful bond that they make any future repairs a nightmare, often leading to cracked screens or damaged frames when you try to open the device again.
The real goal is to match the original manufacturer's specifications. You're looking for an adhesive that holds everything together securely during normal use, but can still be removed with the right techniques—like a bit of gentle heat—when another repair is needed down the line.
How Long Does Adhesive Take to Cure?
Most of the pressure-sensitive adhesives used in electronics create a decent initial bond almost instantly once you apply firm pressure. But the adhesive is still working, continuing to cure and build up to its maximum strength over a longer period.
While you can usually start using the device pretty soon after the repair, it’s a good idea to let it sit for a few hours if you can, maybe under some light, even pressure from clamps. For the best possible, full-strength bond that will last, waiting up to 24 hours is the ideal scenario before you put the device through any heavy use.
If you’re not confident in tackling adhesive work yourself, don’t risk a bad repair. Book your repair with Screen Fixed Brisbane today, and let our experts ensure your device is sealed perfectly and securely.
Disclaimer: All third-party brand names and trademarks, such as iPhone and Galaxy, are the property of their respective owners. Screen Fixed is an independent repair service and is not affiliated with these brands.