
meta title: iPhone 14 Pro Max Back Glass Replacement Guide | Screen Fixed
meta description: Cracked your iPhone 14 Pro Max? Our guide covers DIY vs. professional back glass replacement, tools needed, and costs. Book your repair in Brisbane.
That shattered back on your iPhone 14 Pro Max is more than just an eyesore. It's a genuine problem that compromises the phone's structural integrity and, more importantly, its water resistance. Once that factory seal is broken, the delicate internal components are left vulnerable to moisture and dust. The iPhone 14 Pro Max back glass replacement is known across the repair industry as one of the most challenging jobs, thanks to the incredibly tough materials and powerful adhesives Apple uses.
Understanding the Back Glass Repair Challenge
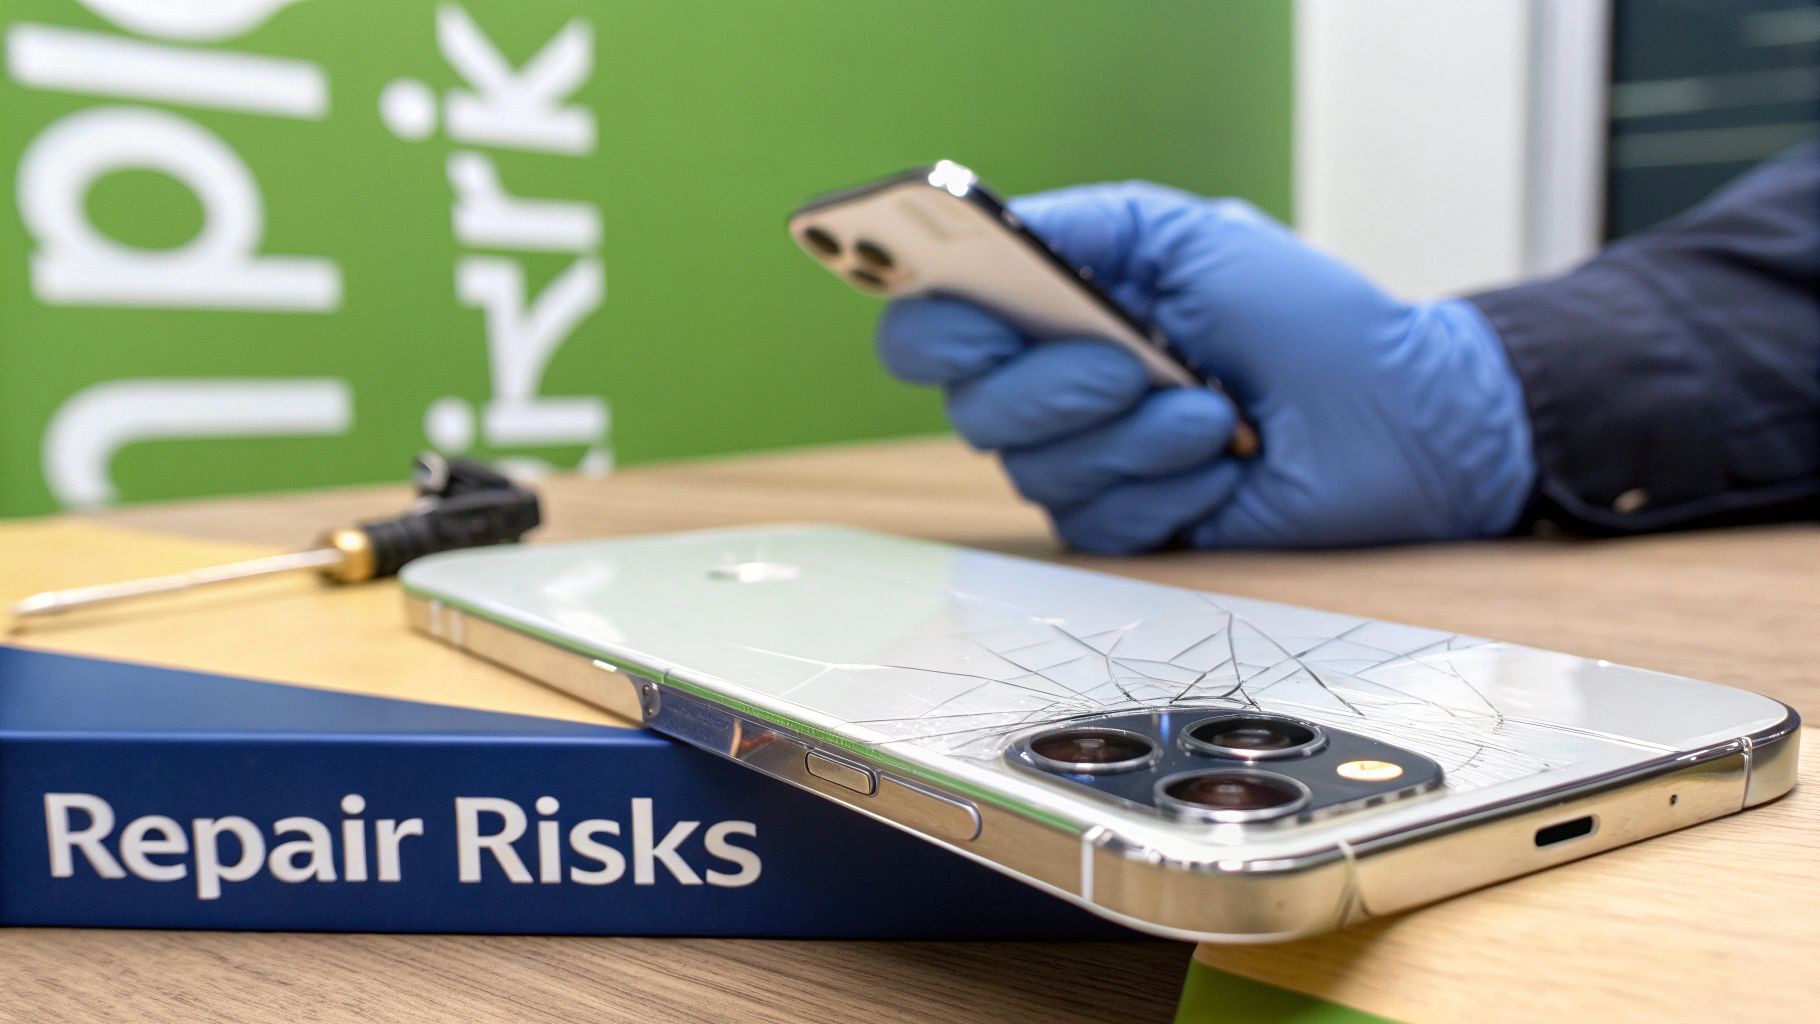
alt: A cracked iPhone 14 Pro Max back glass next to repair tools, illustrating the complexity of the replacement process.
caption: iPhone 14 Pro Max back glass replacement in Brisbane requires precision and specialised equipment.
That spiderweb of cracks might look straightforward, but the repair is anything but. Unlike replacing a screen, which is a self-contained module, the back glass is fused directly to the phone's frame with an industrial-grade adhesive. This design choice makes the phone incredibly durable out of the box, but it also turns the repair into a painstaking and delicate procedure.
Attempting this repair without the proper equipment or technical expertise can lead to irreversible damage. This job demands precision, a great deal of patience, and a steady hand, making it a true test of a technician's skill. Whether you're a seasoned professional at an iPhone repairs Brisbane workshop or a brave DIY enthusiast, understanding the challenges ahead is crucial.
The Problem with Strong Adhesives and Tough Glass
Let's be clear: Apple doesn't make this job easy. The back glass is secured with a powerful epoxy that doesn't just stick—it cures, forming a permanent bond with the metal chassis. This isn't your average adhesive strip. To even begin to soften it, you need consistent, carefully controlled heat.
Not enough heat, and the adhesive won't budge, likely causing the glass to shatter even more as you try to pry it off. Too much heat, and you risk damaging critical components sitting just millimetres away. We're talking about parts like:
- The Wireless Charging Coil: A paper-thin, delicate component essential for both Qi and MagSafe charging.
- The MagSafe Magnet Array: The ring of magnets that allows accessories to snap on perfectly.
- Internal Flex Cables: Fragile ribbon cables connecting key parts of the logic board.
Even the glass itself, which Apple calls "Ceramic Shield," is designed to resist shattering. Ironically, this makes it incredibly difficult to remove in small, manageable pieces once it's already broken.
The real challenge here is separating two materials—glass and metal—that have been bonded with an adhesive that was never meant to come apart. This is exactly why specialised, professional techniques are often the only way to achieve a clean result.
Two Professional Repair Methods
Because this repair is so complex, technicians have developed two primary methods for an iPhone 14 Pro Max back glass replacement. Each has its own pros, cons, and equipment requirements, and they truly separate a quick patch-up from a professional-grade restoration.
The Manual Heat-and-Pry Method
This is the traditional, hands-on approach. It involves carefully using a heat gun or a dedicated heat plate to warm sections of the back glass to around 80-100°C. Once the adhesive softens, the technician uses fine pry tools and blades to meticulously chip away the broken glass, one tiny piece at a time. It's slow, labour-intensive, and demands extreme care, especially around the camera bump and the edges of the frame. You can learn more about the intricacies of iPhone back glass repair in our detailed article on the topic.
The Laser Separation Technique
This is the modern, high-tech solution. A specialised laser machine is calibrated to burn away the adhesive layer right through the glass, without damaging the glass itself or the metal frame beneath it. The laser essentially vaporises the glue, which allows the back glass to be lifted off in larger, much cleaner pieces. This technique is faster, significantly safer for the phone's internals, and has become the gold standard for high-volume repair shops, including many offering iPhone repairs in Brisbane. It massively reduces the risk of nicking that fragile wireless charging coil and leaves a pristine surface ready for the new adhesive.
Gathering Your Essential Tools and Parts
Trying to tackle an iPhone 14 Pro Max back glass replacement without the right gear is a recipe for disaster. It’s like trying to perform surgery with a butter knife—you’ll likely do more harm than good. The success of this delicate job hinges on having the correct tools and a high-quality replacement part before you even think about starting.
Think of this as your pre-flight checklist. Taking a few minutes to get everything lined up will save you from frustrating mid-repair scrambles. This preparation is what separates a clean, professional fix from a botched job.
The DIY Toolkit Essentials
For a one-off DIY repair, you don't need a full workshop. But you absolutely cannot skimp on the basics. A manual removal relies on a few key items working together to defeat the stubborn factory adhesive without destroying the phone.
At a minimum, your toolkit should have:
- A Reliable Heat Gun: This is your main tool against Apple's industrial-strength glue. A standard hairdryer won't be effective. You need something that can deliver consistent, controllable heat to soften the adhesive without frying the sensitive components underneath.
- Safety Gear: This is non-negotiable. Shattered back glass is incredibly sharp. You’ll need a pair of shatter-resistant safety glasses to protect your eyes from tiny shards and cut-resistant gloves for your hands.
- Quality Pry Tools: You'll want a mix of thin metal spudgers, plastic picks (like guitar picks), and a very thin blade or an iFlex tool. These are crucial for getting that initial separation and carefully working the glass away from the frame.
A common rookie error is buying a cheap, flimsy plastic tool kit that snaps under pressure. Spend a few extra dollars on a decent kit from a trusted supplier like Fixo. It makes the job ten times easier and seriously reduces the risk of scratching the iPhone's metal frame.
Professional-Grade Equipment
For a repair shop handling these jobs daily, efficiency and precision are key. While a heat gun gets the job done, it's slow and leaves room for human error. This is why technicians at Screen Fixed Brisbane and around the country have moved on to more specialised gear.
The real game-changer is the laser separation machine. This piece of equipment uses a high-precision laser to burn away the adhesive layer under the glass, freeing it from the frame. The beauty of it is that it does this without flooding the device with excessive heat that could damage the wireless charging coil or other delicate internals. This machine turns a painful, hour-long manual job into a quick, clean, and much safer process.
To give you a clearer picture, here’s a quick comparison of what you’ll need versus what a pro would use.
Essential Toolkit for Back Glass Replacement
This table outlines the core tools for a successful back glass replacement, comparing the essentials for a one-off DIY job with the recommended setup for a professional repair shop.
| Tool/Component | DIY Essential | Professional Recommendation | Notes and Best Practices |
|---|---|---|---|
| Heat Source | Heat Gun | Laser Separation Machine | A heat gun requires constant motion to avoid heat spots. A laser machine offers precision and safety for internal components. |
| Safety Gear | Safety Glasses, Cut-Resistant Gloves | Yes, always | Non-negotiable. Glass shards are unpredictable and extremely sharp. |
| Prying/Separating | Metal Spudgers, Plastic Picks, iFlex | Specialised Pry Blades, Motorised Removal Tools | Pros use tools designed for high-volume work that minimise frame damage. |
| Adhesive/Glue | T-7000 or B-7000 Glue | Cold Press Glue or Pre-Cut Adhesive Sheets | Cold press glue ensures a stronger, more even bond without heat curing, mimicking the factory finish. |
| Clamps/Press | Small Spring Clamps | Professional Screen Press or Clamping Jig | A proper press applies even pressure across the entire surface, which is critical for a waterproof seal. |
| Cleaning | Isopropyl Alcohol, Microfibre Cloth | Ultrasonic Cleaner, Adhesive Remover Solvents | Professional-grade solvents make short work of stubborn factory adhesive residue. |
Ultimately, while a DIYer can achieve a good result with basic tools and a lot of patience, the professional toolkit is designed to deliver faster, safer, and more consistent results every time.
Choosing Your Replacement Back Glass
This is arguably the most critical decision you'll make. The market is flooded with options, from cheap glass that feels like plastic to premium parts that are indistinguishable from the original. Your choice directly defines the final look, feel, and durability of the repair.
Here’s a simple breakdown of what you'll find:
- High-Quality Aftermarket Glass: These parts are made to match original specifications. Good quality ones have excellent colour accuracy, sit perfectly flush with the frame, and come with the correct camera lens housing pre-installed. They offer a great balance between cost and quality.
- OEM-Grade (Service Pack) Glass: This is as close as you can get to a brand-new part from the factory. These are often sourced from the same supply chains Apple uses, guaranteeing a flawless fit, perfect colour match, and original durability. They are the most expensive option but deliver a factory-fresh result.
For any technician in Australia, finding a reliable local supplier is crucial. It means getting quality-checked parts delivered quickly, without the long waits and risks associated with overseas vendors. This ensures your iPhone 14 Pro Max back glass replacement not only looks perfect but also lasts.
Mastering the Back Glass Removal Process
With your tools ready and workspace prepped, you're at the most critical stage of the iPhone 14 Pro Max back glass replacement: the removal. This is where patience and precision are non-negotiable. Whether you're using the manual heat-and-pry method or an advanced laser, the goal is the same—get the shattered glass off without damaging any delicate internals.
The Manual Heat and Pry Method
This is the traditional, hands-on approach. It's labour-intensive but achievable with the right tools and finesse. The process revolves around carefully applying heat to soften Apple's strong adhesive just enough so you can separate it from the frame.
Success here boils down to temperature control. You need to keep things hovering around 80°C to 100°C.
- Too little heat? The adhesive stays solid. Prying the glass will cause it to splinter into countless tiny, sharp pieces, making your job much harder.
- Too much heat? You could damage the battery, the sensitive wireless charging coil, or even the logic board.
Always keep your heat gun moving in a constant, sweeping motion, warming up one small section at a time. Never let it sit in one spot for more than a few seconds.
Once a section is heated, the real work begins. Use a thin metal pry tool or an iFlex blade to find a starting point, usually at the corners where the glass is weakest. Gently slide your tool between the glass and the metal frame, lifting slightly.
Pro Tip: Listen carefully as you work. You should hear a faint crackling sound as the adhesive gives way. If you hear the sharp crunch of glass breaking further, ease off the pressure and apply a little more heat to that spot.
Working around the triple-camera bump is the trickiest part. The lenses and housing are extremely fragile. Use a fine-tipped tool and meticulous, tiny movements to chip away the glass, ensuring you never put direct pressure on the camera lenses.
Professional Laser Removal Technique
For a professional workshop like Screen Fixed Brisbane, the manual method is often too time-consuming and risky. This is where specialised laser machines come in, representing a massive leap forward in repair technology.
The infographic below highlights the difference in tools and process between a DIY approach and a professional laser-assisted one.
alt: A diagram comparing a manual repair toolkit with a professional automated laser machine for iPhone back glass replacement.
caption: Professional laser separation versus manual tools for iPhone 14 Pro Max back glass repair in Brisbane.
As you can see, professional gear automates the hardest part of the repair. A laser machine doesn't just soften the adhesive; it precisely burns it away.
These machines use specific software profiles calibrated for each iPhone model. The laser fires through the glass, targeting only the epoxy layer underneath. It essentially vaporises the glue, breaking its bond with the frame instantly without transferring a dangerous amount of heat to the phone's internals. For more insights on how Australian professionals handle this, you can check resources from reputable sources like iFixit.
Critical Safety Precautions with Lasers
While incredibly effective, laser machines demand strict safety protocols.
- Proper Ventilation: Burning adhesive releases fumes. A proper ventilation system or fume extractor is essential.
- Accurate Calibration: The laser's power, speed, and focal length must be perfectly set. Incorrect settings can etch the metal frame or damage components.
- Eye Protection: Technicians must always wear proper laser safety goggles.
After the laser process, the back glass can often be lifted off in large, easy-to-handle pieces with minimal prying. This not only makes the repair faster but also leaves a perfectly clean frame surface, which is crucial for the next step.
Common Mistakes to Avoid
No matter which method you choose, a few common slip-ups can turn a promising repair into a costly disaster.
- Damaging the Wireless Charging Coil: This is the number one casualty. The coil is paper-thin and sits right under the glass. An aggressive pry or scrape can easily sever its delicate connections.
- Scratching the Frame: Careless use of metal tools can leave deep, ugly scratches on the iPhone's stainless steel frame.
- Forgetting MagSafe Magnets: Be careful not to dislodge or damage the circular array of magnets for MagSafe while removing the glass.
- Leaving Glass Shards Behind: Even the tiniest sliver of old glass left on the frame will prevent the new back glass from seating properly, compromising the seal and fit.
By understanding these risks and moving with methodical care, you can navigate the removal process successfully.
Preparing the Frame for a Flawless Installation

alt: An iPhone 14 Pro Max frame being prepped for new back glass installation, with cleaning tools nearby.
caption: Preparing the iPhone 14 Pro Max frame is a critical step for a seamless repair in Brisbane.
With the shattered glass gone, it’s tempting to think the hardest part is over. However, this next stage is what truly separates an amateur fix from a professional-grade iPhone 14 pro max back glass replacement. Preparing the frame perfectly isn't just a suggestion—it's the foundation for a seamless, durable, and water-resistant final product.
Think of the iPhone's frame as a canvas. You shouldn't apply new adhesive over old residue, tiny glass shards, or dust. This step demands patience, but the payoff is a repair that looks and feels brand new.
Cleaning the Frame for a Perfect Bond
Your main goal is to return the frame to its original, pristine condition. The factory adhesive is notoriously stubborn, and even after clearing away the large glass pieces, you'll be left with a tough residue clinging to the metal edges.
To tackle this, you'll need:
- Isopropyl Alcohol (99%): Your best friend for dissolving leftover adhesive without harming the phone's finish.
- Stiff-Bristled Brush: An old toothbrush or a specialised electronics cleaning brush is ideal for scrubbing gunk out of the frame's channels.
- Microfibre Cloth: Crucial for wiping away residue without leaving lint.
- Fine-Tipped Pry Tool: A metal spudger can help scrape out stubborn bits from tight corners, but be careful not to scratch the frame.
Start by dampening your brush with isopropyl alcohol and methodically scrubbing the entire perimeter, paying extra attention to the corners and the area around the camera housing. As the alcohol dissolves the glue, wipe it clean with your microfibre cloth.
A common mistake is rushing this cleaning process. A tiny speck of old glass or glue can create a high spot, preventing the new back glass from sitting flush and completely compromising the water-resistant seal.
Applying the Adhesive with Precision
Once the frame is spotless and dry, it's time to lay down the new adhesive. The quality of your glue and your application are critical. While pre-cut adhesive sheets are an option, most pros prefer liquid adhesives like B-7000 or T-7000 for creating a custom, gap-free seal.
The trick is to apply a thin, consistent bead of glue directly into the channel where the original adhesive was. Don't use too much—excess glue will squeeze out and create a mess, or worse, seep into internal components. A continuous line with no breaks is essential for a complete seal.
For a deeper dive into adhesives, check out our guide on the differences between two-sided sticky tape and liquid glues.
Setting the New Back Glass
This is the moment of truth. With the adhesive applied, work quickly but carefully to align and set the new back glass. Handle the new panel by its edges to avoid getting fingerprints on the inside surface.
Line up the camera bump first; this is your anchor point. The camera lenses must slot perfectly into the holes on the new glass. Once aligned, gently lower the rest of the panel into place, ensuring it sits evenly within the frame on all sides.
Press down gently but firmly around the entire perimeter to help the adhesive create a solid bond. The glass should sit completely flush with the metal frame. If you spot any high spots or gaps, you have a very small window to make tiny adjustments before the adhesive starts to cure.
Finalising the Repair and Quality Control
The new back glass is in place, but don't pack up your tools yet. This final stage of the iPhone 14 Pro Max back glass replacement ensures a durable and fully functional repair. It’s all about making sure the new glass is securely bonded and that every feature works as it should.
First, the adhesive needs to cure properly. This requires applying consistent, gentle pressure across the whole surface to create a perfect, gap-free seal. A pro shop might use a dedicated screen press, but you can achieve a solid result with small, rubber-tipped spring clamps.
Securing the New Back Glass
When using clamps, placement is key. The goal is even pressure all the way around to avoid cracking the new glass or damaging the screen.
Here’s the best way to clamp it:
- Lay a soft microfibre cloth over both the screen and the new back glass to prevent scratches.
- Place clamps along the top, bottom, and both sides of the phone.
- Use at least 6-8 clamps to distribute the pressure evenly.
- The tension should be firm enough to hold the glass flush, but not so tight that you see stress on the display.
With the clamps in place, let the adhesive cure. For standard B-7000 or T-7000 glue, allow a minimum of 4-6 hours. However, for the strongest possible bond, leaving it clamped for a full 24 hours is recommended. If you're curious about how different adhesives behave, our guide on UV adhesive glue has some great info on curing properties.
Performing a Thorough Quality Control Check
Once the glue has fully set, it’s time for the final inspection. This quality control (QC) check is a non-negotiable step for any professional and is just as important for a DIYer.
A meticulous QC process isn't just about double-checking your work; it's about guaranteeing the device is returned in perfect working order. For professional shops like Screen Fixed Brisbane, this step is fundamental to building trust.
Your final checklist should cover these critical tests:
- Wireless Charging Functionality: Place the iPhone on a Qi-certified wireless charger. Ensure it starts charging immediately and maintains a steady connection.
- MagSafe Accessory Connection: Test a MagSafe accessory. It should snap firmly into place and, if it's a charger, begin charging instantly.
- Physical Seal Inspection: Run your fingertip around the entire perimeter where the glass meets the frame. It should be perfectly flush with no gaps, high spots, or squeezed-out adhesive.
- Camera Lens Clarity: Check the rear camera lenses for any dust, smudges, or adhesive residue trapped inside. Take a few photos to confirm there are no blurry patches.
- Button and Port Check: Test the side and volume buttons to ensure they are tactile and responsive. Plug in a charging cable to check the port.
By running through these checks, you can be confident that your iPhone 14 Pro Max back glass replacement is a complete success.
Got Questions About iPhone Back Glass Replacement? We've Got Answers
Even with a detailed guide, tackling a job as intricate as an iPhone 14 Pro Max back glass replacement can leave you with questions. We’ve gathered the most common queries to provide clear, straightforward answers.
Which is Cheaper to Fix: The Back Glass or the Screen?
This answer often surprises people. At first glance, you’d think the back glass would be cheaper, but that's rarely the case. A back glass repair is almost always more labour-intensive and time-consuming than a screen replacement.
While the glass panel itself might cost less than a premium OLED display, the effort required to remove the shattered glass and stubborn adhesive means the job can often cost the same as, if not more than, a screen replacement.
How Long Does This Repair Actually Take?
The timeframe depends on your tools and experience. A professional workshop with a laser separation machine can complete the job in about 2 to 3 hours.
If you're going the DIY route with a heat gun and pry tools, plan accordingly. A first-timer could easily spend 4 to 6 hours on the repair, factoring in cleaning and glue application.
Can I Still Use a Case if the New Glass Isn't Perfectly Flush?
Technically, you can, but you absolutely shouldn't. If the new back glass isn’t sitting perfectly flush, it’s a major red flag. It indicates that something is wrong—perhaps there's leftover adhesive or a tiny shard of glass you missed.
A poorly fitted back panel doesn't just look bad; it compromises the phone's structural integrity and eliminates any water resistance. Forcing a case over an uneven back creates pressure points that will almost certainly cause the new glass to crack.
What's the Going Rate for a Professional Replacement in Australia?
Cost is always a key consideration. In the Australian repair market, a professional iPhone 14 Pro Max back glass replacement typically costs between AUD $149 and AUD $199. Most premium repair shops charge around the AUD $180 mark.
When you weigh that against the cost of a new device, it's a sensible investment to restore your phone to its original condition. You can get a better idea of these local repair costs and services here.
Whether you’re looking for high-quality parts for your own repair or prefer to leave it to the professionals, Screen Fixed Brisbane has you covered. Book your repair with Screen Fixed Brisbane today or check out our range of parts and tools.
Disclaimer: iPhone, MagSafe, and Ceramic Shield are trademarks of Apple Inc. Screen Fixed is an independent repair service and is not affiliated with Apple Inc.