---
meta_title: "iPhone Back Glass Repair Guide (2024) | Screen Fixed Brisbane"
meta_description: "Cracked your iPhone's back? Our detailed guide covers DIY iPhone back glass repair risks, tools, and steps. Find out when to call the experts in Brisbane."
---
That spiderweb of cracks on your iPhone's back isn't just a cosmetic issue; it's a structural failure waiting to happen. An **iPhone back glass repair** is a notoriously difficult task because, unlike a screen, the glass is fused to the frame with an industrial-strength adhesive, making it one of the most challenging smartphone fixes out there.
This guide will walk you through the problem, explain the solution, and help you decide if a DIY repair is the right move or if it's time to call in the professionals.
## Understanding the iPhone Back Glass Challenge
That shattered back glass does more than just ruin your iPhone's sleek look. It compromises the device's structural integrity, creating an open door for dust, debris, and moisture to seep in and damage sensitive internal components. A minor crack today can easily lead to a completely dead phone tomorrow.
Before you even think about starting a DIY fix, you need to understand what makes this job so different from a simple screen replacement. Apple engineers designed the back glass to be a permanent part of the iPhone's chassis. It's bonded with an incredibly powerful, epoxy-like adhesive that doesn't just stick—it cures, forming a rock-solid bond across the entire surface.
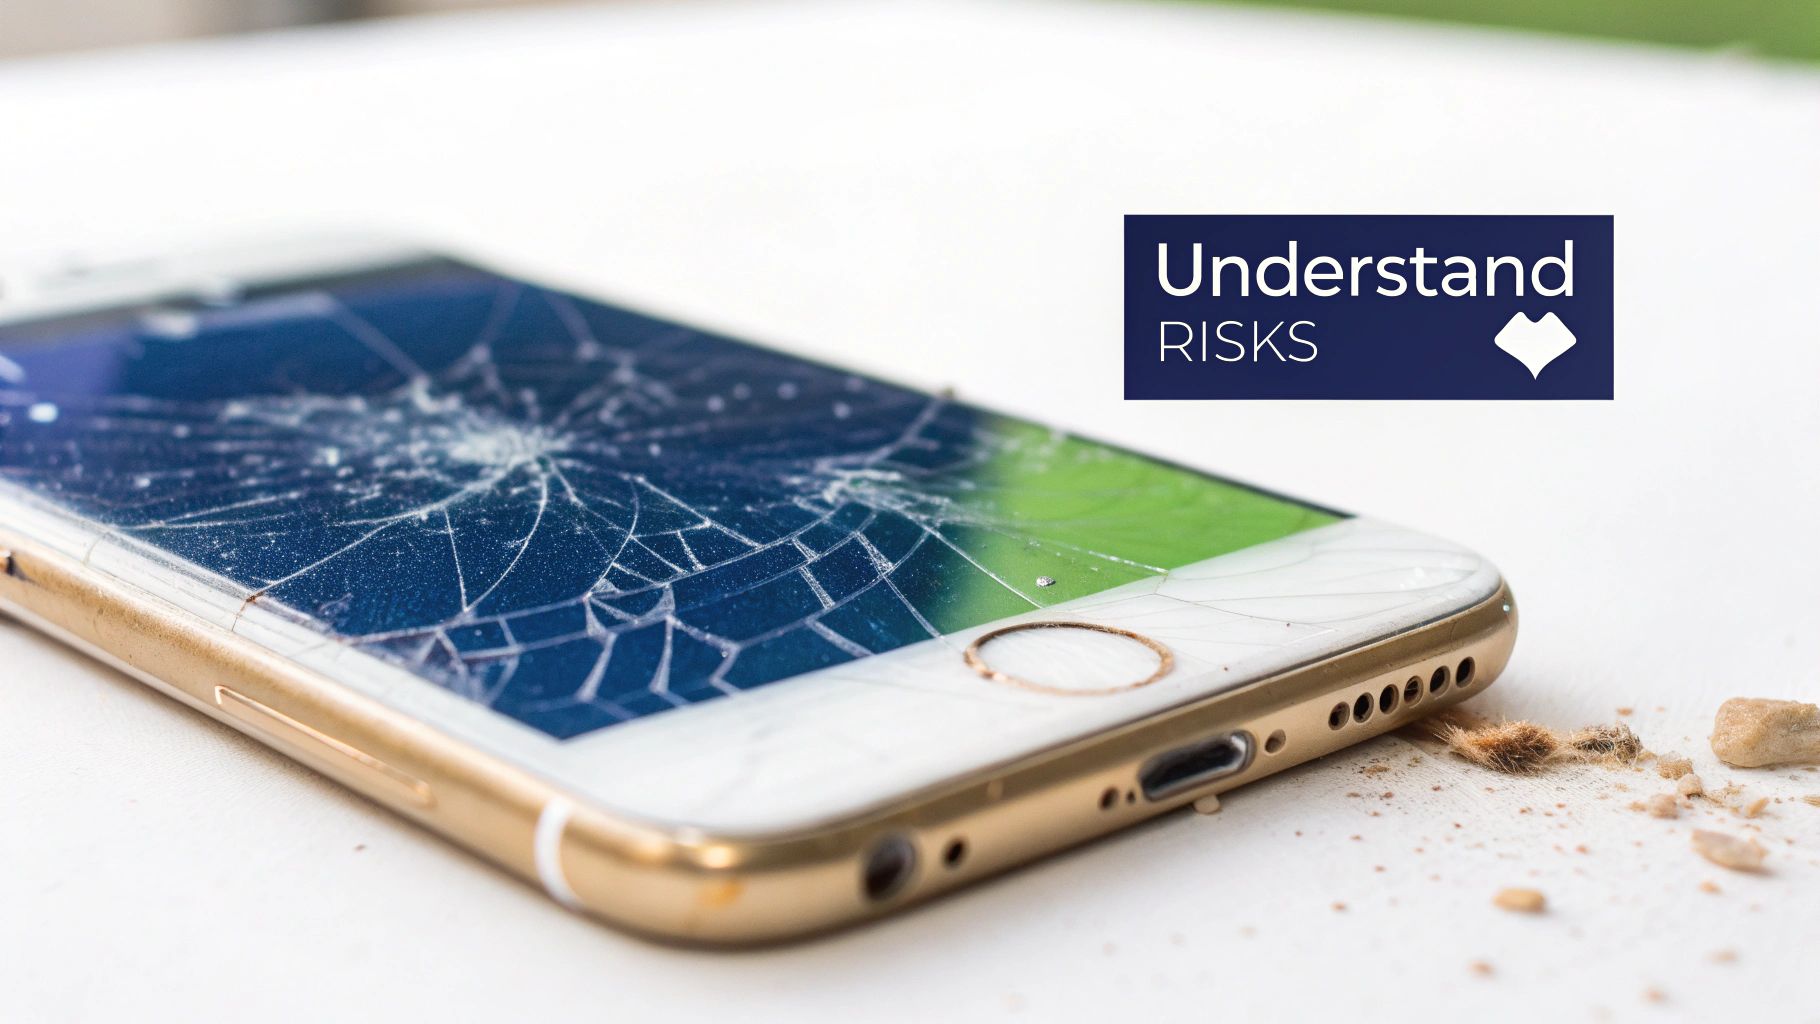
*iPhone back glass shattered, a common but difficult repair.*
### Why Is This Repair So Difficult?
The complexity of an iPhone back glass repair boils down to a few key factors that every DIY enthusiast must respect:
* **Extreme Adhesive Strength:** This isn't your average glue. It requires significant, controlled heat to soften, and even then, it refuses to peel away easily. You'll be chipping away at it, piece by tiny piece.
* **Fragile Internal Components:** Sitting right underneath the glass is the delicate wireless charging coil. One slip of a pry tool can easily puncture it, instantly killing a key feature of your phone.
* **Risk of Frame Damage:** Removing the glass means chipping away at hundreds of tiny shards. If you apply too much force, you can scratch, bend, or warp the metal frame. If that happens, the new glass will never sit correctly.
* **Specialised Tools Required:** The pros don't use hairdryers from the bathroom. They use precision-controlled heat guns and, increasingly, laser machines that methodically burn away the adhesive layer without frying the phone's internals.
> The reality is that this repair tests the absolute limits of patience and precision. Without the right approach, you risk turning a cosmetic issue into a costly, multi-component failure. For most people, a professional **iPhone Repairs Brisbane** service is the safer, more reliable option.
Here in Australia, this repair is widely recognised as a highly technical job. Professional repair shops often need at least **30 minutes**—and sometimes longer for newer models—due to the painstaking process of removing the old adhesive and fitting the new glass perfectly.
For context, the cost for a professional back glass replacement can range from **AUD $159** to over **AUD $300**, depending on your iPhone model and the severity of the damage.
This guide is designed to give you a clear-eyed view of what the DIY journey really involves. We’ll walk you through the risks and rewards, helping you decide if tackling this challenge is worth the potential savings or if your device is better off in the hands of the experts at **Screen Fixed Brisbane**.
## Putting Together Your Repair Toolkit
Trying to replace an iPhone's back glass without the proper gear is asking for trouble. This isn't a job for a hairdryer and a kitchen knife; you need specialised tools designed for delicate electronics. If you don't use them, you risk turning a simple cosmetic fix into a very expensive headache. Honestly, setting up your workstation properly before you even touch the phone is probably the most critical part of the whole process.
When you have everything laid out and within arm's reach, you won't be scrambling for a tool halfway through the job. That’s usually when mistakes, like dropping a screw or tearing a cable, tend to happen. A clean, well-lit space with a magnetic mat to keep track of those impossibly tiny screws is non-negotiable. This is less about convenience and more about setting yourself up for success from the get-go.
### The Must-Have Gear for the Job
Your toolkit is what stands between a shattered phone and one that looks brand new. While you could hunt down each tool one by one, grabbing a complete kit is often the smarter move. A good quality **[smartphone repair tool kit](https://www.fixo.com.au/products/smartphone-repair-tool-kit)**, for instance, bundles almost everything you need into one neat package, which saves a lot of time and hassle.
Here’s a look at the absolute essentials you'll need:
* **Variable-Temperature Heat Gun:** This is your most important tool, hands down. Unlike a regular hairdryer, it gives you consistent, controllable heat. You'll want to aim for around **80°C to 100°C** to soften that notoriously tough adhesive without cooking the delicate components like the battery or logic board.
* **Safety Goggles and Gloves:** When glass shatters, tiny shards can fly everywhere. Protecting your eyes is a must. A good pair of gloves will also save your hands from both the sharp glass and the heat from the gun.
* **Metal and Plastic Prying Tools (Spudgers):** You’ll need a mix of both. A thin metal pry tool is perfect for getting that initial separation at the edge of the glass. After that, you'll switch to flexible plastic spudgers for working around sensitive cables and components to avoid causing any shorts or scratches.
* **Suction Cup:** A small suction cup acts like a handle, allowing you to gently lift the glass panel once the glue has softened. This creates the small gap you need to slide your prying tools in.
* **Precision Screwdriver Set:** iPhones are notorious for using tiny, proprietary screws like pentalobes and tri-points. Your standard screwdriver set from the garage just won't cut it; you need specific bits made for Apple devices.
### Finding the Right Replacement Back Glass
With your tools ready, the next big decision is the replacement glass itself. The part you choose will have a huge impact on the final look, feel, and durability of your repaired phone. You'll typically find two main options out there.
**Aftermarket vs. OEM Parts**
* **Aftermarket Panels:** These are third-party copies. The main advantage is that they're cheaper and easy to find, but the quality can be all over the place. Some might have slight colour mismatches or an imperfect fit, and the glass itself might not be as tough as the original.
* **OEM (Original Equipment Manufacturer) Panels:** These are parts made by the same companies Apple uses. They are a perfect match in colour, fit, and quality, but they're usually pricier and can be harder to source.
> For most DIY repairs, a high-quality aftermarket part from a reputable Australian supplier like Fixo hits the sweet spot between cost and quality. It ensures you're not fitting a cheap, brittle panel that’s just going to crack again in a month.
One final, crucial detail to look for is whether the replacement glass comes with **pre-installed adhesive**. Trust us, sourcing a panel with the adhesive already on it will save you a massive headache. It guarantees an even application and a far stronger bond than you'd get trying to wrangle messy adhesive strips yourself, which is key to a professional, long-lasting repair.
## Navigating the Disassembly Process
Right, this is where your patience and precision really get put to the test. Taking apart an iPhone to replace the back glass is a delicate operation, and one slip-up can turn a straightforward repair into a much bigger headache. Whether you're working on an iPhone 12 or a newer iPhone 14, the general idea is the same, but you’ll notice small differences in how components and cables are laid out.
First things first, and this is crucial: completely power down the phone. Don't just lock the screen. Hold down the buttons until you see "slide to power off" and shut it down properly. This single action is your best defence against accidentally shorting the logic board while you're working inside.
### Applying Heat with Precision
The factory adhesive Apple uses is notoriously strong. Your mission is to soften it with just enough heat to make it pliable, without cooking sensitive components like the battery. For this, a heat gun set between **80°C and 100°C** is your best friend.
Start by heating the edges of the back glass, keeping the heat gun moving in a constant circular motion. Never let it linger in one spot for more than a few seconds. You'll want to focus most of your attention on the perimeter of the frame, as that's where the adhesive bond is at its most stubborn.
After a minute or two of heating, gently test the adhesive's softness with a thin pry tool. If there's still a lot of resistance, back off and apply a bit more heat. Seriously, patience is everything here. Rushing this step is how you end up with a cracked frame or damaged internals.
This visual guide breaks down the essential workflow for a safe repair, from getting your safety gear on to having the right tools and parts lined up.
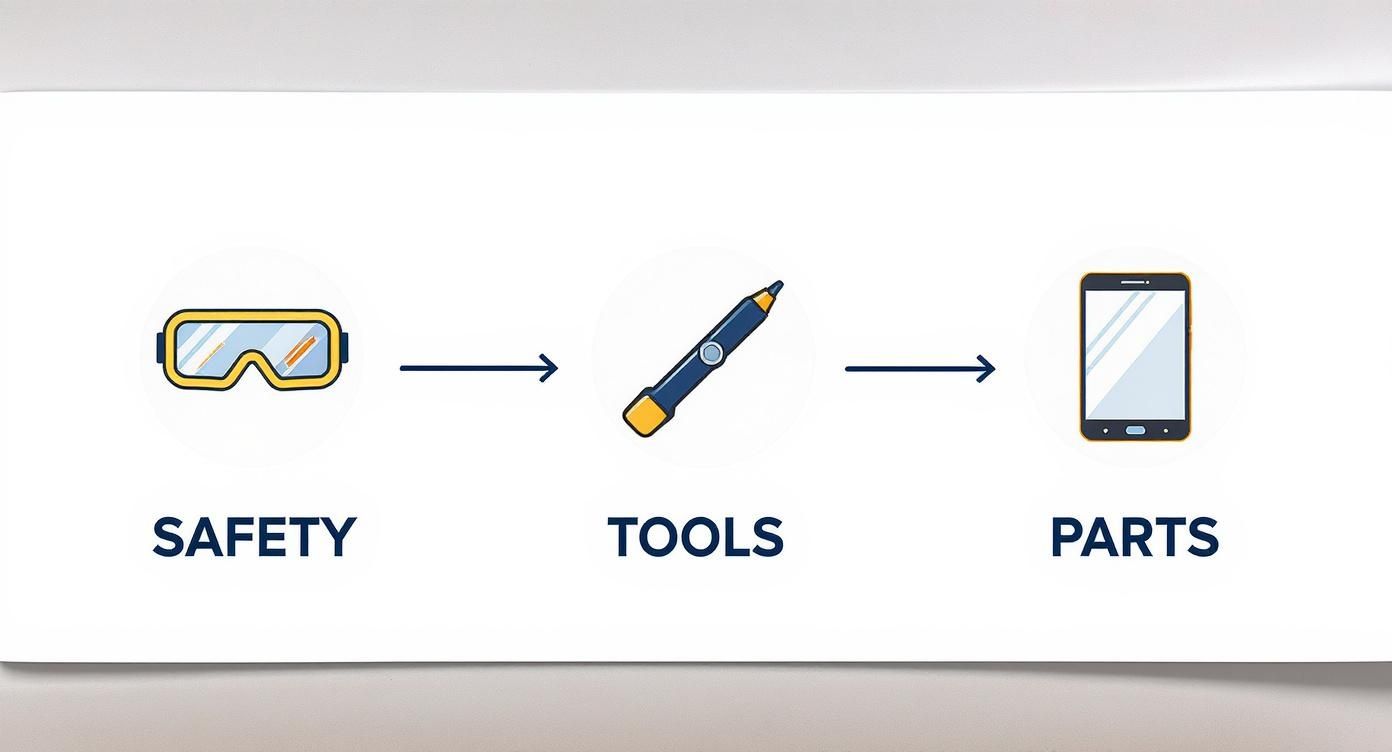
*An infographic showing the key steps for a safe iPhone back glass repair.*
As you can see, a successful job is built on a foundation of safety, followed by the correct tools and high-quality replacement parts. Get those right, and you're halfway there.
### The Painstaking Task of Glass Removal
Once that adhesive has softened up, the real grind begins. Forget any ideas about a clean peel; you're going to be chipping away hundreds of tiny, razor-sharp glass fragments. This is why wearing your safety goggles and gloves is completely non-negotiable.
Find a corner where the glass is already heavily shattered and use a thin metal spudger to get underneath the first piece. The goal is to create a small opening you can work from. With an entry point established, you can slowly and carefully start lifting and prying away small sections of glass.
> A critical point to remember is the location of the wireless charging coil. This delicate, copper-coloured component sits directly beneath the centre of the glass. Puncturing it with a pry tool will permanently disable wireless charging. Work cautiously around this area, using only shallow movements.
This is a slow, methodical process. You'll almost certainly need to reheat the glass multiple times as the adhesive cools down and grabs hold again. It’s far better to apply heat in short bursts and remove small pieces than to get impatient, use too much force, and risk damaging the phone's frame or other parts.
### Working Around Sensitive Areas
The area around the camera bump is particularly tricky. The glass here is often thicker and bonded more securely. On top of that, the camera lenses themselves are incredibly fragile and easy to scratch.
* **Camera Lenses:** Switch to a plastic pry tool when working near the camera module. It significantly lowers the risk of scratching the lenses.
* **Flex Cables:** Be mindful of the various flex cables running just beneath the surface. These connect components like the flash and microphone, and nicking one will cause that feature to stop working.
On newer models like the iPhone 14, the MagSafe magnet array adds another layer of complexity. This circular arrangement of magnets sits around the charging coil. You need to be extra gentle when prying glass from this area to avoid dislodging the magnets or messing up their alignment.
A common scenario we see is a phone with a back that's completely spiderwebbed. A great trick for these is to apply a layer of packing tape over the entire back before you start. This helps contain the thousands of tiny glass shards as you chip them away, making the whole process cleaner and safer. It’s a simple tip that can save you a lot of frustration.
Disassembly is, without a doubt, the hardest part of an **iphone back glass repair**. It demands a steady hand and an almost meditative level of focus. If you feel yourself getting frustrated, take a break. It's much better than pushing through and making a costly mistake. And if at any point you feel like you're in over your head, just remember that professional services are equipped to handle these complex repairs safely and efficiently.
## Preparing the Frame for a Perfect Fit
Getting the shattered back glass off is a huge milestone, but don't celebrate just yet. What comes next is arguably just as important for a repair that actually lasts. You need a perfectly clean frame to serve as the foundation for the new glass panel, ensuring a seamless fit and a rock-solid bond.
Think of it like painting a wall. You wouldn't just slap a fresh coat over old, peeling flakes and dirt, would you? The same logic applies here. Any leftover adhesive gunk or tiny glass shards will stop the new back glass from sitting flush. This creates ugly gaps and, more importantly, compromises the phone's structural integrity and its seal against dust and moisture.
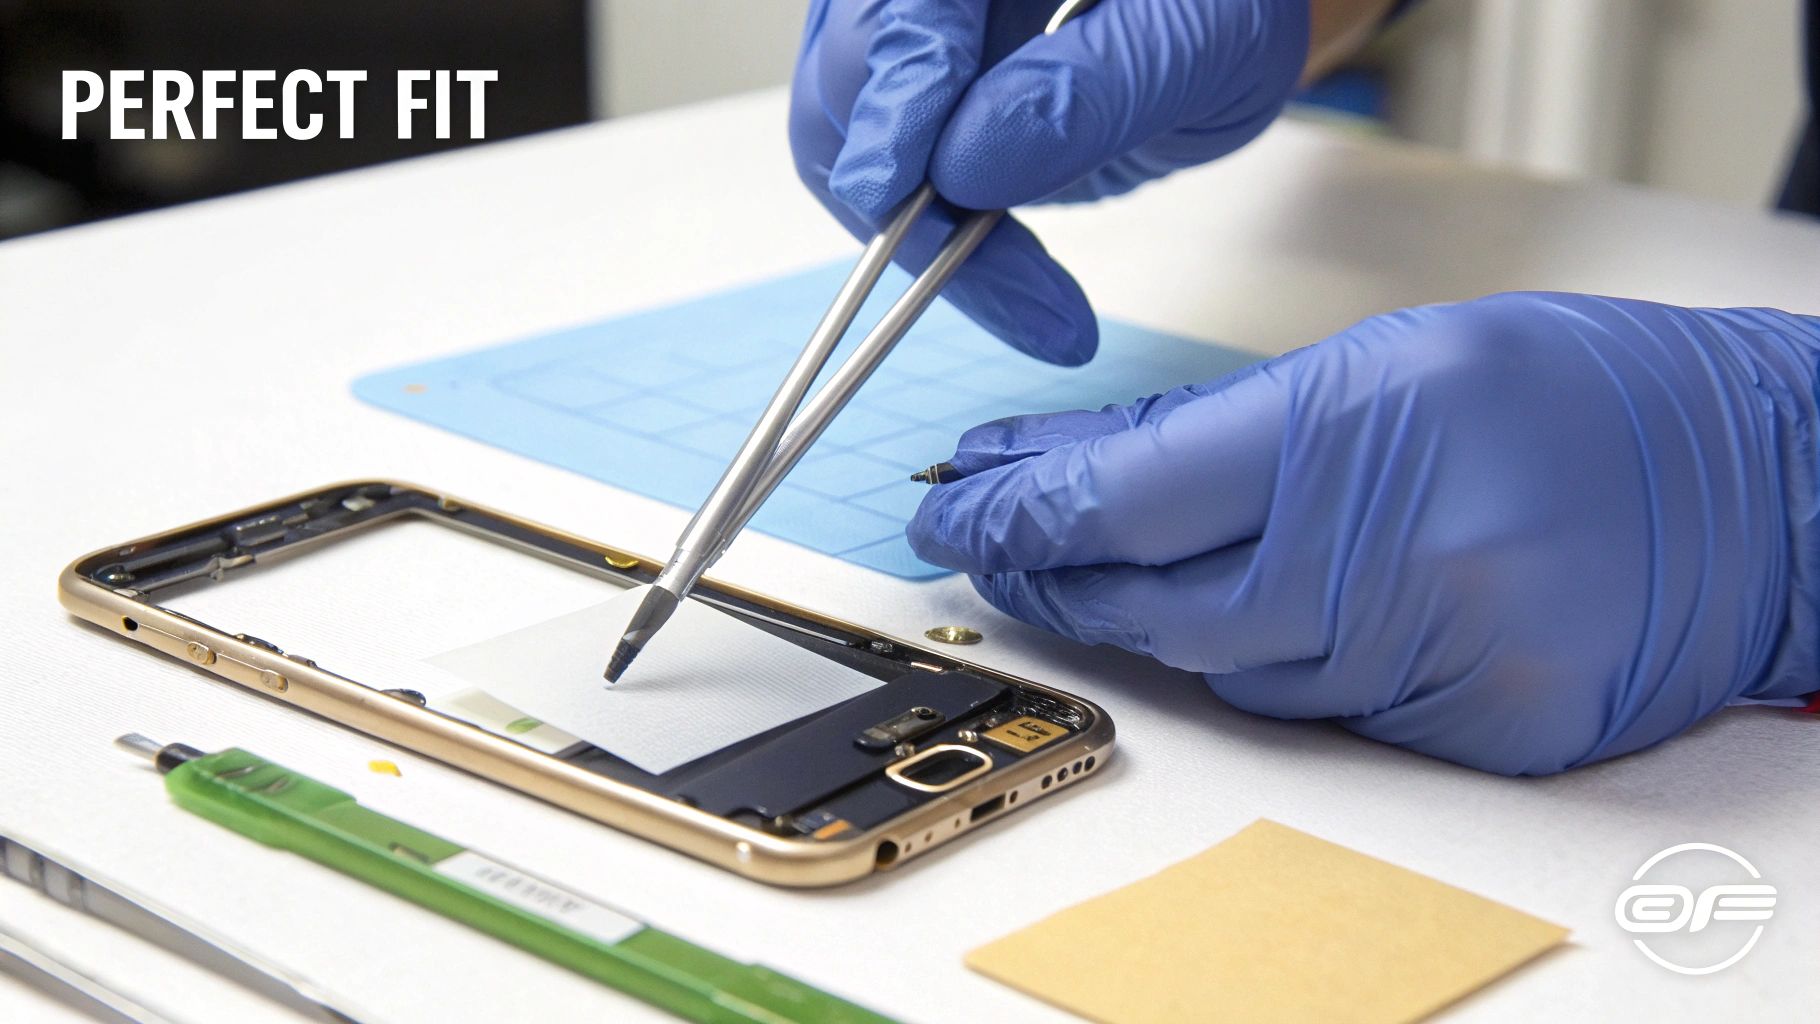
*A clean iPhone frame is essential for a proper seal with new back glass.*
### Achieving a Spotless Surface
The goal is to get the iPhone's metal frame looking like it just came off the factory line—before any glass was ever applied. This takes a bit of patience and the right tools, as you'll be tackling both stubborn glue and microscopic glass fragments.
Grab a flat metal spudger or a razor blade and hold it at a low angle. Gently scrape away any of the larger, obvious chunks of adhesive. The key here is *gently*. You don't want to gouge or scratch the metal finish, as deep marks can mess with the final fit just as much as leftover glue can.
For the finer cleaning, you'll need a solvent.
* **Isopropyl Alcohol (IPA):** High-concentration IPA (**99%** is what we use in the shop) is excellent at breaking down that sticky residue. Pop a small amount onto a lint-free cloth or a cotton swab and work in small, circular motions.
* **Adhesive Remover:** For the really stubborn spots, a dedicated adhesive remover can be a lifesaver. Just use it sparingly and make sure it doesn't drip onto any of the internal components.
A stiff-bristled brush is also your best friend for getting into the tight corners and channels of the frame, digging out any hidden debris. Once you think you're done, do a final check. Run your finger along the entire perimeter. If you feel any bumps or sticky spots, get back to cleaning until it's perfectly smooth to the touch.
### Applying New Adhesive with Precision
With the frame looking pristine, it's time to lay down the new adhesive. This is another step where taking your time pays off big time. If your replacement back glass came with pre-installed adhesive, you're in luck—that's the easiest and most reliable way to go. If not, you'll be working with adhesive strips.
When you're using separate strips, you have to be meticulous. Start at one corner and carefully lay the adhesive along the inner edge of the frame, making sure it doesn't overlap itself or hang over the sides. The goal is a complete, unbroken perimeter around the phone. This is where understanding how [double-sided tape adhesive works](https://www.fixo.com.au/blogs/news/double-tape-adhesive) really makes a difference in the quality of the final bond.
> A classic rookie mistake is leaving small gaps in the adhesive, especially around the corners. These gaps become weak points, letting in dust and eventually causing the new glass to lift at the edges. Take your time and get that complete coverage.
### Aligning and Securing the New Glass
Alright, this is it—the final, high-stakes moment. You really only get one shot to place the new back glass correctly. This adhesive is incredibly strong and doesn't forgive misalignment.
Start by carefully peeling the protective backing film off the adhesive. Hold the new glass panel by its edges, and use the camera module as your guide. The camera cutout is your most reliable reference point. Once the cameras are lined up perfectly, gently lower the rest of the panel into place.
Don't press down yet! Take a second to look at the phone from every angle. Is the glass perfectly centred? Is it flush with the metal frame on all sides? If it's even slightly off, you'll get an imperfect seal and a cheap-looking finish.
Once you're happy with the placement, go ahead and apply firm, even pressure across the entire surface. Start from the centre and work your way out to the edges. This activates the pressure-sensitive adhesive and locks everything in.
For the strongest possible bond, we recommend using clamps designed for phone repair.
* Apply four soft-jaw clamps, one at each corner.
* Use just enough pressure to hold the glass firmly. Over-tightening is a quick way to crack your brand-new panel.
* Let the device sit for at least an hour. A few hours is even better, as it gives the adhesive plenty of time to fully cure.
This careful preparation and assembly process is what separates a shoddy DIY job from a repair that looks and feels factory-fresh. The satisfaction of doing it yourself is immense, especially when you consider the costs. Looking at repair pricing statistics in Australia, a typical **iPhone back glass repair** will set you back around **AUD $169**, making it a pricey fix. Pulling it off yourself is a great way to save a significant chunk of change.
## Knowing When to Trust a Professional
A successful DIY project isn’t just about getting the job done; it’s about knowing when to stop. Recognising your own limits is a skill, not a failure. When you're dealing with something as intricate as an iPhone back glass repair, pushing past a clear red flag can turn a manageable problem into an expensive disaster.
<iframe width="100%" style="aspect-ratio: 16 / 9;" src="https://www.youtube.com/embed/JvYBmhAbY4Q" frameborder="0" allow="autoplay; encrypted-media" allowfullscreen></iframe>
Sometimes, the decision is made for you the moment you get the old glass off. If you uncover unexpected damage underneath, the smartest move is to put the tools down and take a breath. Forcing the issue without the right expertise can easily multiply your final repair bill.
### Red Flags That Signal It's Time to Stop
Certain issues are simply beyond the scope of a standard DIY kit. They require the diagnostic tools and steady hands of a seasoned technician. If you run into any of the following, it’s a clear sign to seek professional help.
* **A Bent or Dented Frame:** If the drop was hard enough to warp the phone's metal chassis, a new back glass will never sit flush. A pro can assess if the frame can be straightened or if a full housing replacement is the only way forward.
* **Stubborn Glass Refusing to Budge:** You've applied heat correctly and patiently, but the glass shards are practically fused to the frame. Applying more force is a surefire way to damage the frame, puncture the battery, or sever a crucial cable.
* **Suspected Internal Damage:** The moment you see a torn flex cable, a punctured battery, or a damaged wireless charging coil, it’s game over for the DIY attempt. These are complex, component-level repairs that are incredibly risky without specialised training.
### The Financial Dilemma for Aussie iPhone Users
Let’s be honest, many Australians find themselves in a tough spot with a broken phone. The high cost of professional repairs often pushes people toward risky DIY fixes that can, ironically, end up costing a whole lot more.
This financial pressure is a real issue. A Vodafone-supported study found that a staggering **19.1% of Australians** are walking around with cracked screens simply because they can’t justify the repair costs. Among Apple users specifically, over **35%** have shelled out up to **$250** for repairs, with nearly **12%** paying as much as **$500**.
This economic reality makes the DIY route incredibly tempting, but you have to weigh the risks. A botched repair can easily double the final cost, turning a potential saving into a significant financial hit. For a deeper dive into what influences repair pricing, our guide on [iPhone screen repair costs](https://www.fixo.com.au/blogs/news/iphone-screen-repair-cost) provides some valuable context.
> Opting for a professional isn't admitting defeat; it's making a strategic financial decision. When a DIY repair goes sideways, the expertise of a technician becomes an investment, not an expense.
### When Screen Fixed Is the Smartest Choice
This is exactly where a trusted service like Screen Fixed becomes invaluable. If your DIY iPhone back glass repair hits a wall, you don’t have to figure it out alone. Our team has the specialised equipment and experience to take over complex situations, from fixing bent frames to replacing damaged internal components.
Instead of risking further damage, you can bring your device to us. We offer expert **iPhone repairs Brisbane** residents rely on to turn a challenging DIY attempt into a successful, professional-grade fix. We can safely finish the job, ensuring your iPhone is restored correctly and reliably.
Don't let a difficult repair snowball into a costly mistake. If you’re feeling out of your depth, the smartest move you can make is to hand it over to the experts. **Book your repair with Screen Fixed Brisbane today**.
## Common Questions About Back Glass Repair
Even with the best guide in hand, it’s completely normal to have a few questions buzzing around before you dive into an **iPhone back glass repair**. Getting some straight answers helps you know exactly what you’re signing up for. Let’s clear up a few of the most common ones.
### How Long Does a DIY Repair Actually Take?
If this is your first time tackling this job, be honest with yourself and block out a solid **3 to 4 hours** of uninterrupted time. Yes, an experienced tech can knock it out in under an hour, but they’ve got hundreds of these under their belt. Rushing is the number one reason people make expensive mistakes, like nicking the battery or scratching up the frame.
That time estimate isn't just for yanking the old glass off, either. It covers everything:
* Setting up your workspace properly so you don't lose screws.
* Patiently heating and methodically chipping away the old glass.
* Scraping every last bit of old adhesive from the frame—this part takes longer than you think!
* Carefully aligning the new glass and giving the adhesive time to cure properly.
### Will My iPhone Still Be Water Resistant?
The short answer is no. In a home environment, it's pretty much impossible to restore the original factory IP rating for water resistance. While using a high-quality adhesive and getting a perfect seal will give you solid protection against everyday dust and a bit of rain, you absolutely should not consider the device waterproof anymore.
> Professional shops use specialised presses and premium seals to get as close as possible to the factory standard. Even then, it’s always smart to be extra cautious around water after any major repair.
### What if I Damage the Wireless Charging Coil?
This is the big one. The wireless charging coil is incredibly thin and fragile, sitting right under the glass. If you puncture or tear it while chipping away at the broken shards, that’s it—your iPhone’s wireless charging is gone for good.
It’s one of the most significant risks you take on with a DIY repair. Fixing a damaged coil means buying another part and starting a much more involved repair, adding cost and complexity to the job. Honestly, this is a key reason why many people decide to trust professional **iPhone repairs Brisbane** services for such a delicate task. Taking this on yourself means you have to accept that risk.
***
*Disclaimer: Apple, iPhone, and MagSafe are trademarks of Apple Inc., registered in the U.S. and other countries. Screen Fixed is an independent repair service and is not affiliated with Apple Inc.*
For all your repair needs, from high-quality parts and professional-grade tools to complete DIY kits, trust **Fixo**. We provide everything you need to get the job done right.
[Explore our full range of parts and tools at Fixo](https://www.fixo.com.au)
