
Ever wondered how repair professionals get that flawless, bubble-free finish on a phone screen? The secret weapon is often UV adhesive glue, a special liquid that only hardens—or cures—when hit with ultraviolet light. This unique property is a game-changer for delicate electronics repairs, giving technicians all the time they need for perfect alignment before creating an incredibly strong, optically invisible bond. If your phone screen is cracked but the display underneath is fine, this clever adhesive might be the key to a perfect repair.
The Secret to Seamless Screen Repairs Explained
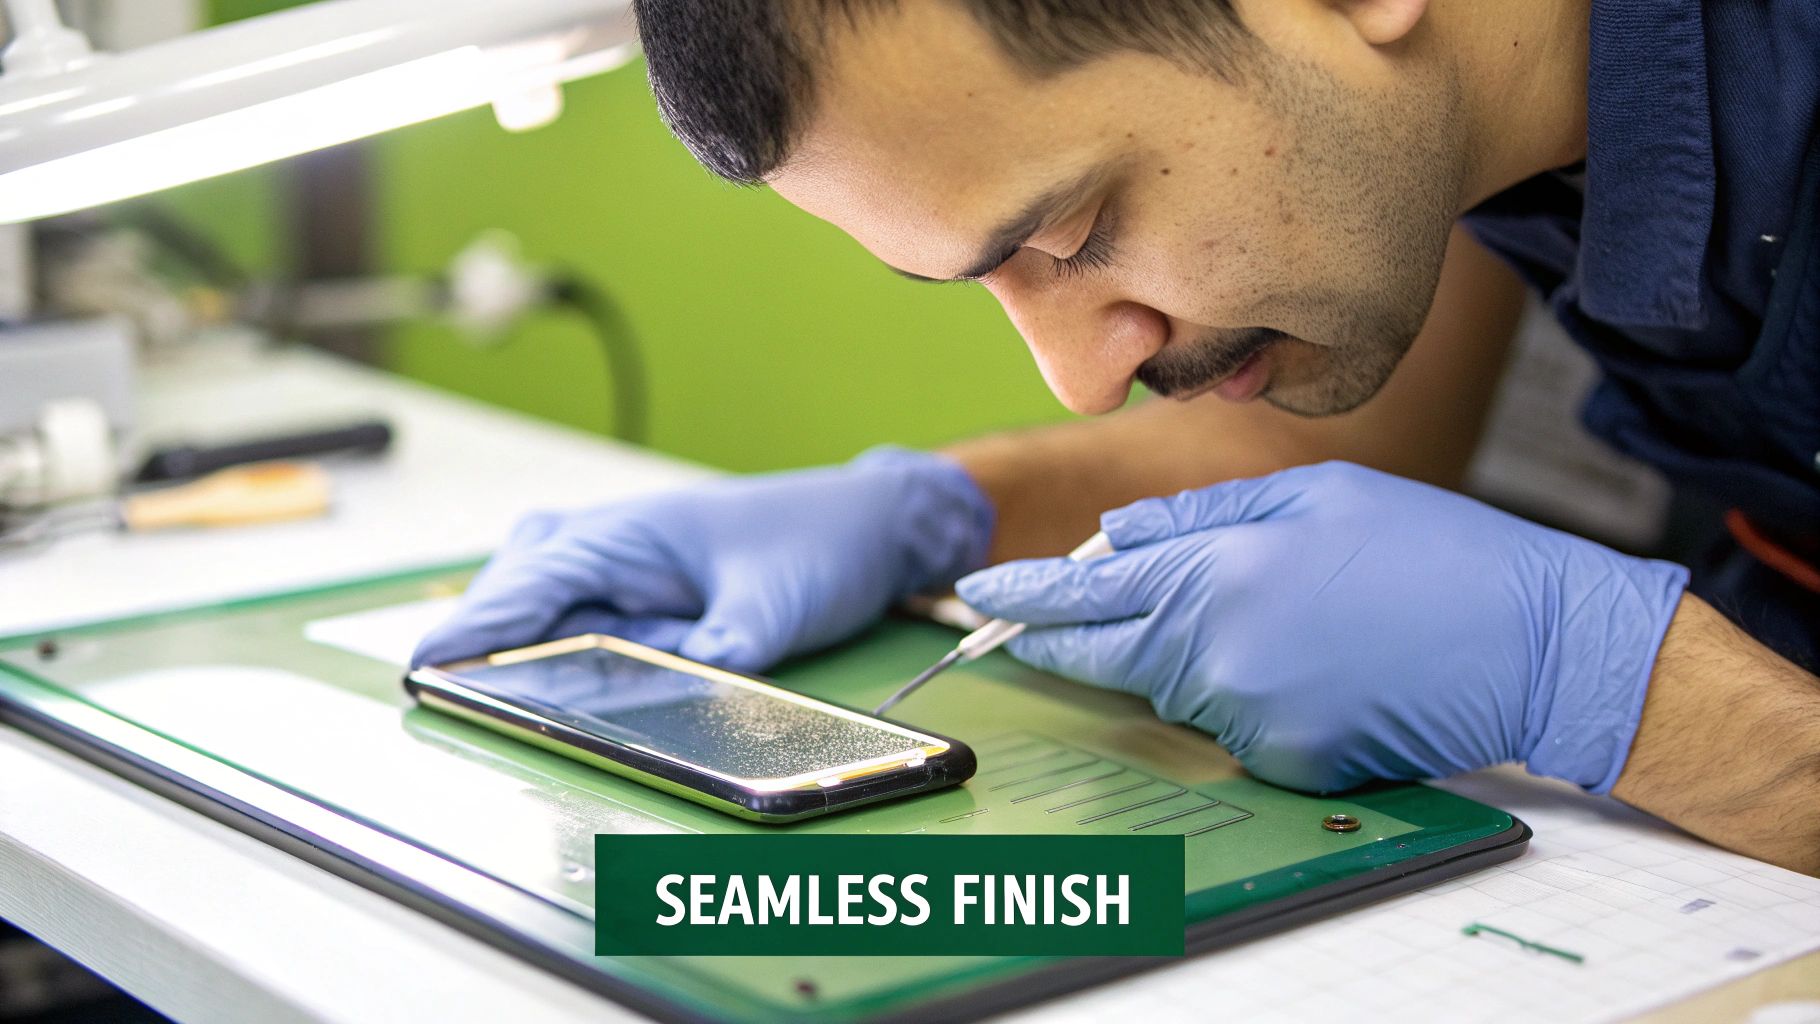
iPhone 14 Pro screen replacement in Brisbane using precision UV adhesive.
If you've ever had a screen replaced using traditional adhesive strips, you might be familiar with their downsides. Tiny air gaps can get trapped between the glass and the display, causing a weird rainbow effect or messing with touch sensitivity. Over time, those strips can also lose their grip, leading to the screen lifting at the edges—a frustrating problem we call delamination.
UV adhesive glue, known in the trade as Liquid Optically Clear Adhesive (LOCA), eliminates these issues. It's a liquid polymer that flows into every microscopic gap between the new screen and the digitiser, creating a solid, uniform layer once cured. This is how the experts at Screen Fixed Brisbane ensure a factory-quality finish.
Why UV Curing Is a Game Changer
The real magic of UV glue is its curing process. Unlike standard glues that start drying the second they hit the air, UV glue stays liquid. This gives a technician plenty of time to nudge the new screen into the perfect position, lining it up precisely with cameras, sensors, and edges without feeling rushed.
Once everything is perfectly aligned, a specific wavelength of UV light triggers a chemical reaction called photopolymerisation. This process solidifies the liquid adhesive in seconds, locking it into a permanent, durable bond. This on-demand curing provides a level of control that's absolutely essential for high-stakes repairs on expensive devices like iPhones.
Key Takeaway: The ability to cure the adhesive after positioning the screen is the single biggest advantage of UV glue. It removes the pressure and risk of misalignment you get with traditional adhesives, leading to a much cleaner, factory-quality result.
From Industrial Labs to Your Local Repair Shop
Originally, UV-cured adhesives were reserved for high-precision industries like aerospace and medical device manufacturing, where a flawless bond is non-negotiable. But as the technology became more accessible and affordable, savvy repair experts realised its huge potential for consumer electronics. These days, any top-tier repair service will likely use UV glue to restore a device to its original look and feel.
This shift mirrors a broader trend in Australia's industrial sector. In fact, UV-cured technology is the fastest-growing segment in the local adhesives market, projected to expand at around 7% annually between 2024 and 2029. This growth is all down to its efficiency and precision—qualities that are just as valuable for fixing a smartphone as they are for assembling complex industrial electronics.
The superior results from UV glue make it the gold standard for many screen replacements. If you're keen to learn more about the basics, our guide on how to repair a phone screen properly offers a deeper look and really highlights why specialised materials like this are so important.
Your Essential Toolkit for a Flawless UV Glue Repair
Trying to use UV adhesive glue without the right gear is a recipe for disaster. It’s the difference between a clean, professional-looking repair and a sticky, frustrating mess. Getting your toolkit sorted before you start isn't just a suggestion; it’s the key to a bond that will actually last. It’s about more than just having the tools – it's about knowing why each one is so important.
The most critical piece of kit, besides the glue itself, is your UV light source. Look, I know those cheap UV torches are tempting, but most of them just don't have the specific wavelength or power needed to cure the adhesive properly. You really need a dedicated UV curing lamp to make sure the glue hardens evenly and completely, creating a bond as strong as the factory intended. Not enough power means you'll be left with a tacky, weak mess that completely undermines the whole repair.
Preparing for a Perfect Bond
Before you even think about applying a drop of glue, your workspace and the device parts need to be spotless. This is where high-purity isopropyl alcohol is your best friend. The standard rubbing alcohol you find at the chemist just won't cut it – it's full of water and other junk that leaves behind a film, preventing the UV glue from bonding properly.
You need 99% isopropyl alcohol (IPA) to wipe down every surface, from the screen to the device frame. This stuff evaporates in a flash, taking all the fingerprints, oils, and dust with it. Any of that grime left behind can cause weak spots or those awful bubbles under the screen. Pair your IPA with a lint-free microfibre cloth to avoid leaving tiny fibres trapped in the adhesive.
The Unsung Heroes of the Toolkit
Beyond the big items, a few smaller tools play a massive role in getting that flawless finish. These are the things that separate the amateurs from the pros, and what experienced techs in Brisbane rely on for every single job.
- Nitrile Gloves: Don't even start without them. They keep the corrosive oils from your skin off the components and, more importantly, protect your hands from the uncured adhesive, which can be a real skin irritant.
- Safety Glasses: You’re dealing with liquid chemicals and intense UV light. It’s just common sense to protect your eyes from an accidental splash or direct exposure to the lamp.
- Precision Dispenser or Syringe: Squeezing the glue straight from the bottle is asking for trouble. A syringe with a fine-tip needle is the only way to get total control over how much glue you use and exactly where it goes.
- Playing Cards or Plastic Shims: Here’s an old-school trick that works wonders. A simple deck of cards is perfect for creating even gaps and shimming the screen to just the right height for a perfectly flush fit.
An organised workspace is a safe and efficient one. Always lay out your tools on a clean, flat surface before you begin. Knowing exactly where everything is means you won't be fumbling around when the glue is spreading and every second counts.
Choosing the Right UV Adhesive Glue
Not all UV glues are the same. They come in various viscosities, which is just a fancy way of saying how thick or thin they are. Picking the right one is completely dependent on what you're repairing. For a standard flat smartphone screen, you’ll want a lower viscosity (thinner) glue. It flows easily and uses capillary action to spread evenly across the surface.
But if you’re working on a curved display, like on some Samsung models or an Apple Watch, you absolutely need a higher viscosity (thicker) glue. This thicker formula is less likely to run over the curved edges before you can hit it with the UV light. Using the wrong type can lead to a weak bond or a huge, hard-to-clean mess.
This level of detail is what makes a professional repair stand out from a DIY attempt. It’s just as critical as choosing the right kind of adhesive tape for other jobs, a topic we cover in our guide on double tape adhesive.
To help you make the right choice, here's a quick guide to different UV glue viscosities and where they shine.
UV Adhesive Glue Selection Guide
| Viscosity Level | Best For | Example Application | Pro Tip |
|---|---|---|---|
| Low | Flat screens and small gap-filling | iPhone screens, glass back covers on flat devices | Spreads very quickly. Apply a line down the centre and let it spread naturally to avoid bubbles. |
| Medium | Mildly curved screens and general-purpose use | Samsung Galaxy "Edge" models (e.g., S8/S9/S10 series) | Offers a good balance between flow and control, making it a versatile choice for many jobs. |
| High | Sharply curved displays and larger gap repairs | Apple Watch screens, modern waterfall displays | This thicker glue won't run as easily, giving you more time to align the screen perfectly. |
| Gel / Paste | Non-running applications and component securing | Securing small components on a motherboard (non-conductive) | Use for vertical applications or when you need the adhesive to stay exactly where you put it. |
By getting these essentials lined up, you're setting yourself up for a smooth, successful repair that you can be proud of.
The Pro's Method for Applying and Curing UV Adhesive Glue
Knowing the theory is one thing, but putting it into practice is where a good repair becomes a great one. Getting the hang of applying and curing UV adhesive glue isn't about ticking off boxes on a checklist. It’s more about understanding the feel and flow of the process—an art guided by precision. It all starts with a surface so clean you could eat off it and finishes with a bond that's often stronger than the original factory seal.
Forget just squeezing a blob of glue onto a screen and hoping for the best. Pro technicians have fine-tuned their methods to ensure the adhesive spreads perfectly, pushing out every last air bubble to create an invisible, flawless seal. This is what separates a DIY-looking fix from a repair that’s completely indistinguishable from new.
This diagram breaks down the entire workflow into its three non-negotiable phases.
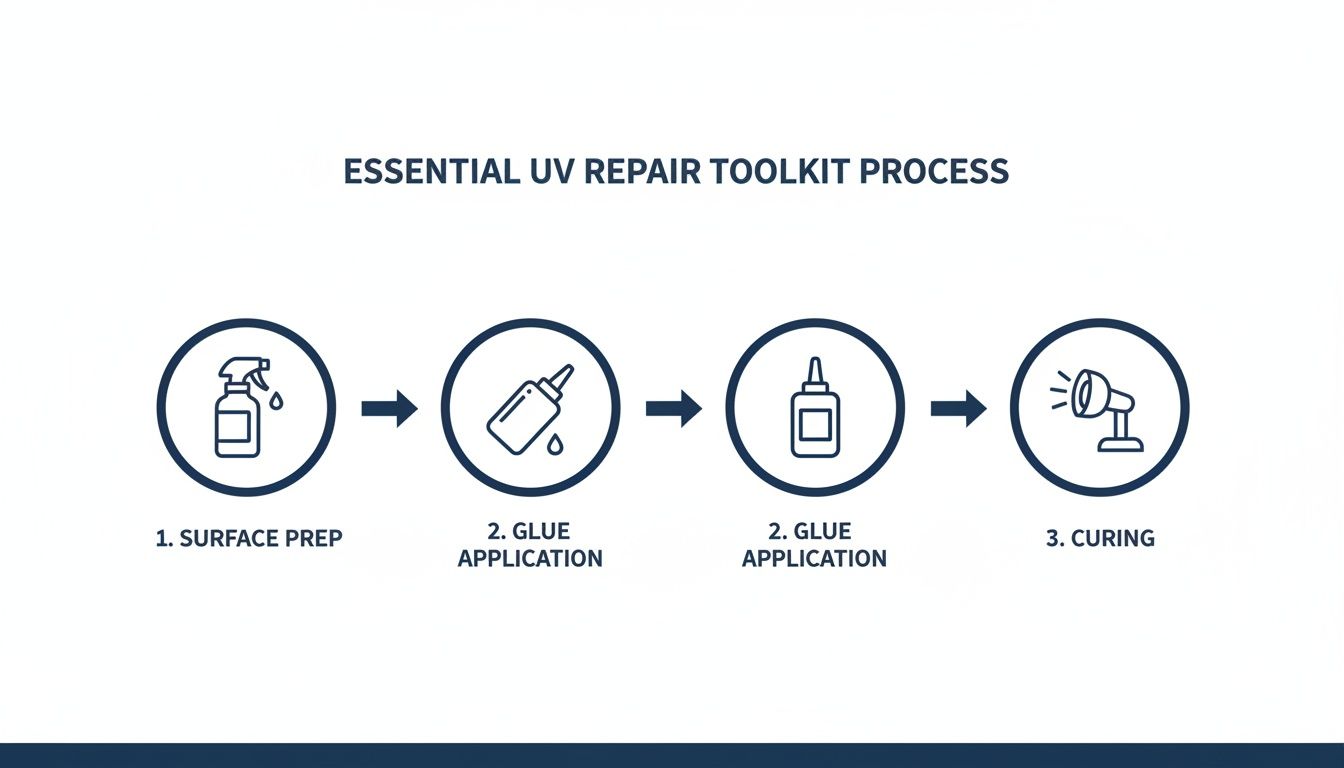
The professional UV glue process: prepare the surface, apply the adhesive, and cure with UV light for a perfect bond.
As you can see, a successful job is all about following a methodical sequence. Each stage builds on the last, leading to that perfect, professional finish.
Perfecting the Surface Preparation
You can have the best glue in the world and the steadiest hands in the business, but if your surface isn't immaculate, the repair is doomed from the start. Your goal is to eliminate every single trace of dust, fingerprint oil, and old adhesive residue. This isn't just a suggestion; it's the golden rule.
Start with a thorough clean of the device's frame and the underside of the new glass, using 99% isopropyl alcohol and a lint-free cloth. Any speck of dirt left behind will create a weak spot in the bond or, even worse, show up as an ugly bubble or blemish under the new screen. Pay extra close attention to the edges and corners where old glue loves to hide.
Pro Tip: After the alcohol wipe-down, hit the surfaces with some compressed air or a manual dust blower. This blasts away any final microscopic particles you can't see. Always work in a bright, clean space so you can spot any rogue dust before it's too late.
Mastering the Art of Application
How you lay down the liquid adhesive is everything. It directly impacts how the glue spreads. The goal is to create an even layer that lets capillary action—the natural tendency of liquid to flow into tight spaces—do the heavy lifting, pushing air out towards the edges as you lower the new glass.
Pros generally stick to two main methods, depending on the screen's size and shape.
- The Single-Line Method: This is your go-to for most standard smartphone screens. Just dispense a single, steady line of UV glue right down the centre of the LCD, from top to bottom. It creates a clean, predictable path for the glue to spread outwards.
- The 'X' Pattern Method: This works much better for bigger screens, like tablets, or displays with weird shapes. An 'X' ensures the adhesive reaches all four corners more efficiently as it flows out from the middle.
No matter which pattern you use, getting the amount right is crucial. Too little, and you'll end up with dry spots and a weak bond. Too much, and you'll have a sticky mess that can seep into the earpiece, camera, or other sensitive parts. It takes a bit of practice, but aiming for enough glue to cover about 70-80% of the area once it spreads is a solid starting point.
The Gentle Art of Setting the Glass
With the glue in place, it’s time for the most delicate part of the whole operation. You don't press the new glass down; you lower it. Gently. Start by aligning one edge perfectly (usually the top or bottom) and just let gravity take over.
Let the glass settle slowly onto the liquid adhesive. You’ll see the glue start to spread out from the centre in a pretty mesmerising way, pushing the air ahead of it. This is capillary action happening in real-time. If you spot an air bubble forming, apply some very light pressure nearby to guide it toward the edge before the glue traps it.
Patience is key here. Rushing or pressing down too hard will trap air, which is almost impossible to get out once the screen is fully seated. For a great visual guide on this, check out our post on installing a NuGlas UV glue screen protector.
The Two-Stage Curing Process
Curing is the magic step that turns the liquid resin into a rock-solid bond. A common rookie mistake is to just blast it with UV light for five minutes and call it a day. The professional approach uses a two-stage cure to guarantee perfect alignment and maximum strength.
- The 'Tack' Cure: As soon as the glass is perfectly aligned and the glue has spread completely, give it a quick 'tack' cure. This means hitting it with the UV lamp for just 10-15 seconds. This flash cure is just enough to get the glue tacky, locking the screen in place so it can't shift around.
- The Full Cure: After the tack cure, you can safely clean up any minor glue squeeze-out from the edges with an alcohol wipe. Now, you’re ready for the main event. Place the device under the UV lamp for the full cycle, which is typically around 3-5 minutes. Make sure to move the light around to give the entire screen even exposure. This final step creates the toughest, most permanent bond possible.
Common Mistakes to Avoid During Your Repair
Even the most seasoned techs run into trouble with UV adhesive glue. The good news? Most of these stuff-ups are totally preventable if you know what to watch out for. Think of this as your field guide, built from real-world repair fails, to help you sidestep the common traps that turn a simple job into a sticky mess.
One of the most common and infuriating issues is the dreaded air bubble. You've cleaned everything perfectly, applied the glue, and gently lowered the screen... only to see a tiny pocket of air staring back at you. Don't panic, and whatever you do, don't cure it yet.
The trick is to act before the glue even thinks about setting. Grab a plastic spudger or use your gloved fingertip to apply very gentle, steady pressure near the bubble. The goal is to "walk" it out towards the nearest edge of the screen. This needs a light touch—pushing too hard will just misalign the screen or, worse, create even more bubbles. A little patience here will save you from a dodgy-looking finish.
Managing Glue Overflows
Applying too much adhesive is another classic rookie error. It's so easy to underestimate how far a single drop will spread, and before you know it, it's seeping towards the earpiece speaker, front camera, or other sensitive spots. If this happens, you need to act fast, well before you bring out the UV lamp.
Your best mate in this situation is a cotton swab lightly dampened with 99% isopropyl alcohol.
- Wick Away the Excess: Carefully use the tip of the swab to absorb the overflow. The key is to dab, not wipe or scrub. Wiping will just smear the liquid adhesive everywhere. Let the cotton wick it up cleanly.
- Precision Cleaning: For tight areas like a speaker grille, use a fine-tipped swab or a fresh, lint-free cloth wrapped around a precision tool.
- Final Inspection: Before you even reach for the UV lamp, inspect every single opening and crevice. Make sure no stray glue is left behind. Cured glue in a speaker grille is an absolute nightmare to remove.
Crucial Tip: Always start with slightly less glue than you think you need. You can usually add a tiny drop more if an area looks dry, but trying to clean up a major overflow is a much bigger, messier problem.
Solving Curing Complications
So, you’ve done everything right, but after the final cure, the surface still feels tacky or the bond just isn't solid. This is almost always a curing problem, and it usually boils down to two things: your UV lamp or the glue itself. A tacky finish is a dead giveaway that the chemical reaction hasn't completed properly.
An underpowered UV lamp is the usual culprit. Those cheap UV torches you see online often don't have the specific wavelength (typically 365-405nm) or the power needed to get a full, hard cure. If you're getting weak bonds, it’s time to invest in a proper curing lamp made for this kind of work.
The other possibility? Expired adhesive. UV adhesive has a shelf life, and old glue simply won't cure properly, no matter how good your lamp is. Always check the expiration date on the bottle.
The boom in UV adhesives isn't just a trend in local repair shops; it's part of a huge global market. Estimates put the worldwide UV adhesive market anywhere from USD 1.0 to over 2.5 billion, with expected growth rates of 6–8.5%. This scale helps drive down costs and push technology forward, which is why we're seeing it used more and more here in Australia for everything from electronics to medical devices. You can read more about these global trends to see just how big this technology is becoming.
If you’re still facing issues and just want a perfect result without the stress, it might be time to call in the professionals. For a flawless repair, book your iPhone repairs in Brisbane with us at Screen Fixed, and we’ll make sure you get a perfect, factory-quality bond every time.
Handling and Storing UV Adhesive Safely
Let's be honest, whenever you're working with chemicals like UV adhesive glue, a bit of common sense and respect for the materials goes a long way. While it’s completely safe for DIY repairs when you do things properly, skipping the basic safety steps is just asking for trouble. This is about more than just getting a flawless repair; it's about keeping yourself safe while you work.
You've got a few things to manage, from the fumes of the uncured adhesive to the intense light from your curing lamp. The good news is that with the right gear and a little preparation, you can easily handle these risks and concentrate on getting that professional-looking finish on your device.

Safe storage and handling of UV adhesive glue require protective gear and keeping bottles in a cool, dark place.
Creating a Safe Workspace
First things first, get your repair area set up correctly. Good ventilation isn't optional when you're dealing with liquid UV glue. The smell isn't exactly overpowering, but the fumes can be irritating if you're cooped up in a stuffy room for a while.
Cracking a window or pointing a small fan nearby is usually all it takes to get enough air moving. This simple move helps scatter any of the volatile organic compounds (VOCs) the adhesive gives off before it's cured, making your workspace a lot safer and more pleasant.
Your personal protective equipment (PPE) is just as critical. Always, always wear nitrile gloves. They don't just keep greasy fingerprints off delicate components; they create a barrier between your skin and the adhesive, which can cause irritation or even an allergic reaction for some people.
And a big one: never fire up a UV curing lamp without proper eye protection.
- UV-Blocking Safety Glasses: These are non-negotiable. Staring into a UV lamp, even for a second, can cause serious, permanent damage to your eyes. Your regular sunnies won't cut it—you need safety glasses specifically rated to block UV radiation.
- Nitrile Gloves: They offer much better chemical resistance than latex and are far less likely to trigger allergies.
- A Clean, Organised Surface: A tidy bench prevents clumsy spills and stops you from scrambling to find a tool right when you need it most.
Proper Storage to Preserve Your Adhesive
How you store your UV adhesive is just as crucial as how you use it. Get this wrong, and you won't just weaken the glue; you could make it completely useless for your next job. The main thing to remember is that this stuff cures with UV light—and yes, that includes the sunlight streaming through your window.
There's a reason UV adhesive comes in those solid black, opaque bottles: to completely block out ambient UV light. Let sunlight hit the liquid glue, even briefly, and it can start curing right there in the bottle, turning it into a worthless, goopy gel.
To get the most out of your glue and make sure it works perfectly every time, just follow these simple storage rules.
- Keep It in the Original Container: Whatever you do, don't transfer the adhesive into a clear bottle. That original light-proof container is vital for keeping it fresh.
- Store in a Cool, Dark Place: A cupboard or a drawer, well away from direct sun and other heat sources, is perfect. Heat can break down the chemical compounds over time, which will mess with the glue's bonding strength.
- Ensure the Cap Is Sealed Tightly: This keeps the adhesive from drying out and stops airborne dust and moisture from getting in and contaminating it.
By following these straightforward safety and storage habits, you're setting yourself up for a repair that's not only successful but also done the right way.
Your UV Adhesive Questions Answered
Even after you've got the tools and watched the tutorials, questions always pop up when you're in the middle of a job. Using UV adhesive glue takes a bit of finesse, and the little details can feel tricky the first time around.
This section is your go-to guide for those common "what if" moments. Think of it as a chat with an experienced tech, giving you the clear answers you need to build your confidence before you even start. These are the things other guides often gloss over, but they can make all the difference to your final result.
Can I Use UV Glue on Any Type of Screen?
While it’s a brilliant tool, UV adhesive isn't a one-size-fits-all solution. It’s specifically made for glass-only repairs where the LCD or OLED display underneath is still working perfectly, and you're just swapping out the top layer of cracked glass. You'll see this a lot on older Samsung models and certain smartwatches.
Most modern phones, especially iPhones, are a different story. They come with integrated display assemblies where the glass, digitiser, and display are all fused together. For those, you replace the entire screen unit – no UV glue needed. The magic of UV glue is in bonding a separate piece of glass to a display, not installing a pre-made screen assembly.
How Do I Remove Cured UV Glue If I Make a Mistake?
Honestly, getting rid of fully cured UV glue is a nightmare, which is why getting it right the first time is so critical. Once cured, the adhesive becomes a hard, permanent polymer. If you've made a big mistake—like curing the screen with a massive bubble trapped underneath—removing it is a high-risk job involving heat and special tools.
Pros will carefully use a heat gun to soften the adhesive to around 80-90°C, making sure not to cook the display itself. Then, they use incredibly fine wire or plastic razor blades to painstakingly slice through the softened glue. It's slow, tedious, and one wrong move can kill the delicate display underneath. That's why if a major error gets cured, your best bet is often to see a professional.
Expert Insight: The best way to deal with removal is to avoid it entirely. Double-check your alignment, meticulously scan for bubbles, and only hit that UV lamp for the final cure when you are 100% happy with the placement. A few extra minutes of prep work can save you hours of heartache.
Will the UV Glue Damage My Phone's Display?
When you use it correctly, UV adhesive is completely safe for your phone’s display. The glue itself is formulated to be non-corrosive and optically pure, meaning it won’t eat away at any components or distort the image.
The real consideration is the UV light used for curing. The risk is minimal, but it’s there if you do things incorrectly. Sticking to the recommended two-stage curing process—a quick 15-second tack cure to set the screen, followed by a full 3-5 minute cure—is perfectly fine. Problems only pop up if you were to use some kind of industrial-strength UV lamp for way too long, which could potentially yellow the display's polariser film. The UV lamps made for phone repair are designed to work well within safe limits.
How Is UV Glue Different From Regular Super Glue?
This is a big one. Never, ever use super glue (cyanoacrylate) for a screen repair. It might seem like a fast and easy fix, but it will absolutely destroy your display.
As super glue cures, it releases fumes that create a white, hazy residue known as "frosting" or "blooming." This film is impossible to clean off and will permanently cloud your screen, not to mention your camera lenses. On top of that, super glue isn't optically clear and creates a rigid, brittle bond that will crack under the normal flexing and temperature changes a phone goes through every day.
UV adhesive glue, on the other hand, is engineered specifically for this job. It cures into a perfectly clear, slightly flexible layer that moves with the device and stays completely invisible. It's the right tool for the right job.
If you’ve run into trouble with a DIY repair or just want the peace of mind that comes with a professional touch, don't hesitate to get in touch. Our technicians are experts in handling these precise and delicate repairs.
For a guaranteed flawless finish without the stress, trust the team at Screen Fixed. We have the tools and expertise to handle any repair, ensuring your device looks and works like new. Book your professional iPhone repairs in Brisbane with us today.
Disclaimer: iPhone, Samsung, Samsung Galaxy, and Apple Watch are trademarks of Apple Inc. and Samsung Electronics Co., Ltd., respectively. Screen Fixed is an independent repair service and is not affiliated with or endorsed by these brands.