
Meta Title: The Ultimate Guide to Two Sided Sticky Tape | Screen Fixed
Meta Description: Learn how to choose and apply two sided sticky tape for phone repairs. Get pro tips from Screen Fixed for a lasting, professional-quality fix.
Ever seen a phone screen start to lift at the edges after a DIY repair? This is a classic problem, and almost every time, the culprit is the wrong adhesive. This guide is all about the unsung hero of durable device repairs: high-quality two sided sticky tape. Using the right tape is the secret to ensuring your repair lasts, keeping your device sealed and protected from the elements.
The Secret to a Lasting DIY Phone Repair
The specialised tape used by professionals is worlds apart from the stuff you have in your craft drawer. It's engineered to create a perfect, long-lasting seal that keeps dust out and all the important bits and pieces secure. It's time to forget those frustrating, temporary fixes and learn how to get the job done right, just like the experts at Screen Fixed Brisbane.
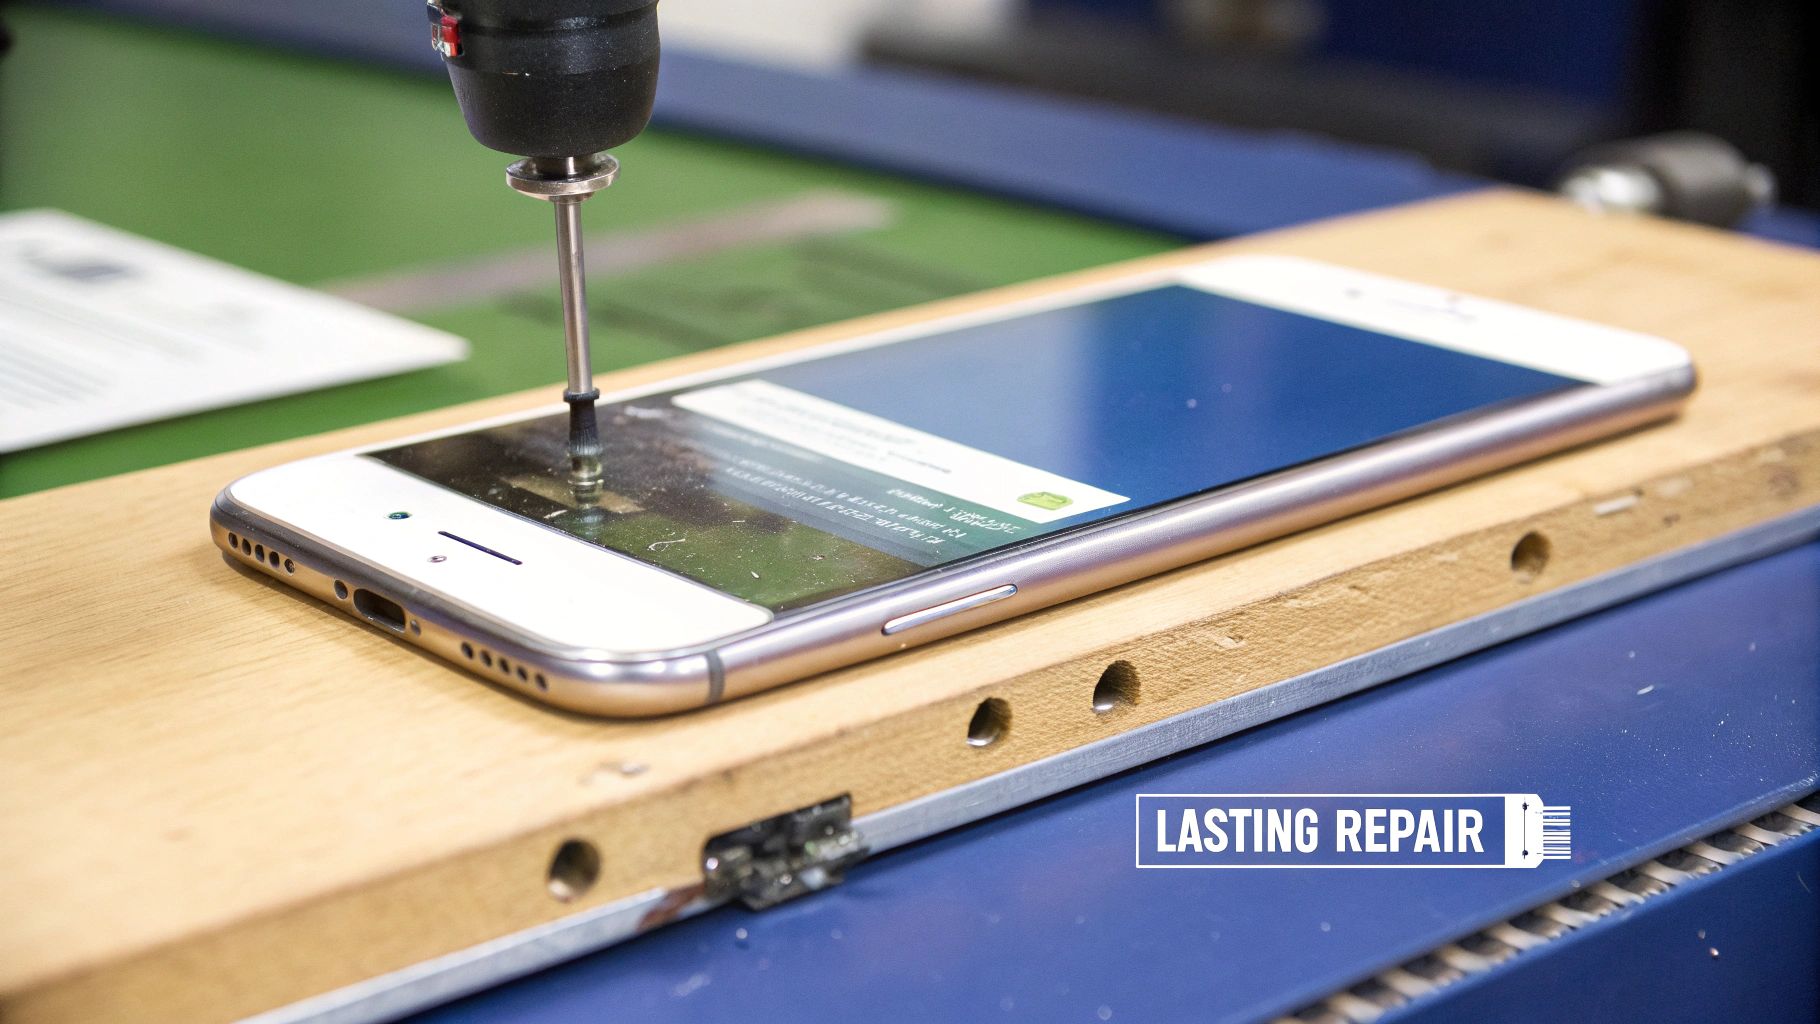
alt="A technician carefully applying two sided sticky tape to a mobile phone frame during a repair."
caption="An iPhone 14 Pro screen replacement in Brisbane requires precise adhesive application."
This isn't just about sticking things together. Using the correct adhesive is absolutely fundamental to the structural integrity and longevity of your device after you've worked on it. A weak bond can lead to a whole cascade of problems, from annoying screen creaks to catastrophic damage from dust and moisture getting inside.
Why Specialised Tape Is Non-Negotiable
Unlike your standard craft tape, which is only really good for paper and light materials, the electronic-grade two sided sticky tape we use in repairs has specific properties that are essential for mobile devices:
- Exceptional Shear Strength: It’s designed to resist the sliding forces that happen every time you handle, drop, or shove your phone in your pocket.
- Precise Thickness: This stuff is manufactured to incredibly tight tolerances—often just fractions of a millimetre—to make sure everything fits back together with a flush, factory-like finish.
- Thermal Resistance: It holds its bond strength even when your device heats up from charging or a heavy gaming session.
The demand for these specialised adhesives is massive. In fact, the Australian adhesive tape market was valued at roughly USD 2.04 billion, driven heavily by its use in the electronics sector for creating those invisible, durable bonds without needing screws.
When you attempt a repair without the right materials, you're not just risking the screen; you're compromising the entire device. A proper seal is your first line of defence against environmental damage.
Choosing the correct tape and tools is half the battle. If you're putting together your own set of tools, taking a look at a comprehensive phone screen repair kit can give you a much better idea of the professional-grade equipment needed for a successful outcome. This ensures you have everything from the right adhesive to the proper opening tools before you even think about starting.
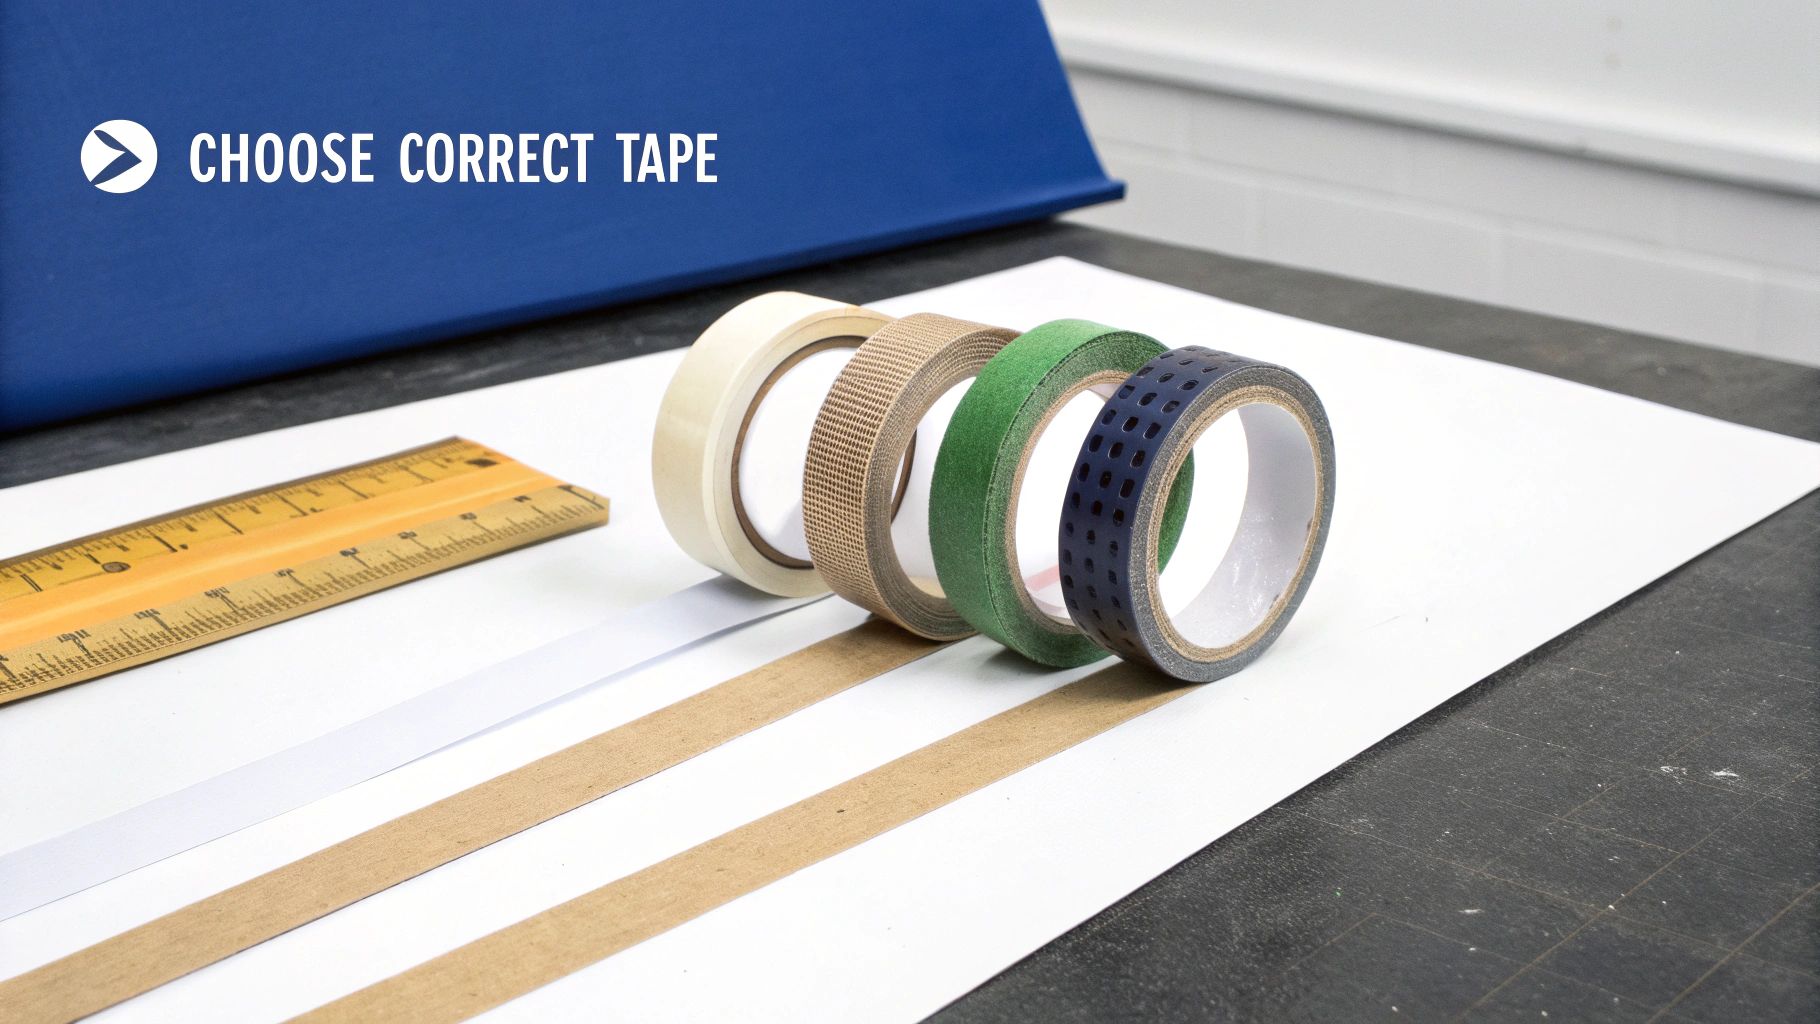
How to Choose the Right Tape for Your Device
Grabbing the wrong tape can quickly turn a straightforward repair into a recurring nightmare. Picking the right two sided sticky tape isn't just about finding something that sticks; it's about selecting an adhesive that's been specifically engineered for the tight tolerances and unique demands of a modern electronic device.
The two main players you'll come across in the repair world are acrylic and silicone adhesives. Acrylic adhesives give you a really strong, durable bond that stands up well to temperature shifts and UV exposure, which is why they’re perfect for sealing screens. Silicone-based tapes, on the other hand, are much more flexible. This makes them ideal for parts that might need a bit of repositioning or are attached to curved surfaces, like the back of a smartwatch.
alt="A technician applying precise strips of two sided sticky tape to the frame of a smartphone."
caption="Precision is key when applying adhesive for iPhone repairs in Brisbane."
This move away from tiny screws and clips towards advanced adhesives is a huge trend, and not just in electronics. The global market for double-sided tape is expected to blow past USD 29 billion by 2035, mostly because it offers massive advantages over old-school fasteners.
To help you get a clearer picture, here’s a quick rundown of the tapes you’ll most likely be choosing between.
Comparing Tapes for Phone and Watch Repairs
This table breaks down the most common types of two-sided sticky tapes we use in the workshop. Think of it as a cheat sheet to help you match the right adhesive to your specific repair job, whether you're working on a phone screen or a smartwatch back.
| Tape Type | Key Feature | Best For | Avoid For |
|---|---|---|---|
| Tesa 61395 | Ultra-thin, very high tack | Sealing phone screens flush to the frame | Heavy components needing shock absorption |
| 3M 300LSE | Strong bond on low-energy surfaces | Attaching plastic back covers, camera lenses | Jobs requiring flexibility or repositioning |
| Silicone Tape | Flexible, repositionable, good sealant | Smartwatch backs, curved components | High-stress bonds like main screen adhesion |
| Foam Tape | Shock absorption, fills gaps | Battery adhesion, internal component cushioning | Any application where a flush fit is critical |
Each tape has its place, and knowing the difference is what separates a temporary fix from a lasting, professional-quality repair.
Matching Tape Thickness to Your Device
Beyond the chemical makeup of the adhesive, thickness is a deal-breaker. Tapes for phone repair are measured in millimetres and are incredibly thin for a good reason. If you use a tape that’s even a fraction of a millimetre too thick, you’ll end up with a noticeable gap between the screen and the frame.
That gap doesn't just look bad; it completely compromises the device's seal against dust and moisture. For instance, an iPhone screen repair demands an ultra-thin, high-tack tape to make sure the display sits perfectly flush. A back glass replacement, however, might benefit from a slightly different tape that’s designed more for shock absorption.
Choosing the right adhesive is a critical decision in any electronic repair. To dive deeper into the specifics, check out our guide on the best double tape adhesive for various repair scenarios.
Failing to match the tape to the job is a classic rookie mistake. A weak adhesive might let go within a few weeks, causing the screen to lift. A tape that's too thick can create pressure points on the new display, leading to bright spots or even cracks down the line. Taking a moment to select the correct two sided sticky tape is what ensures your repair isn't just successful, but durable—just like a professional fix from our team here at Screen Fixed Brisbane.
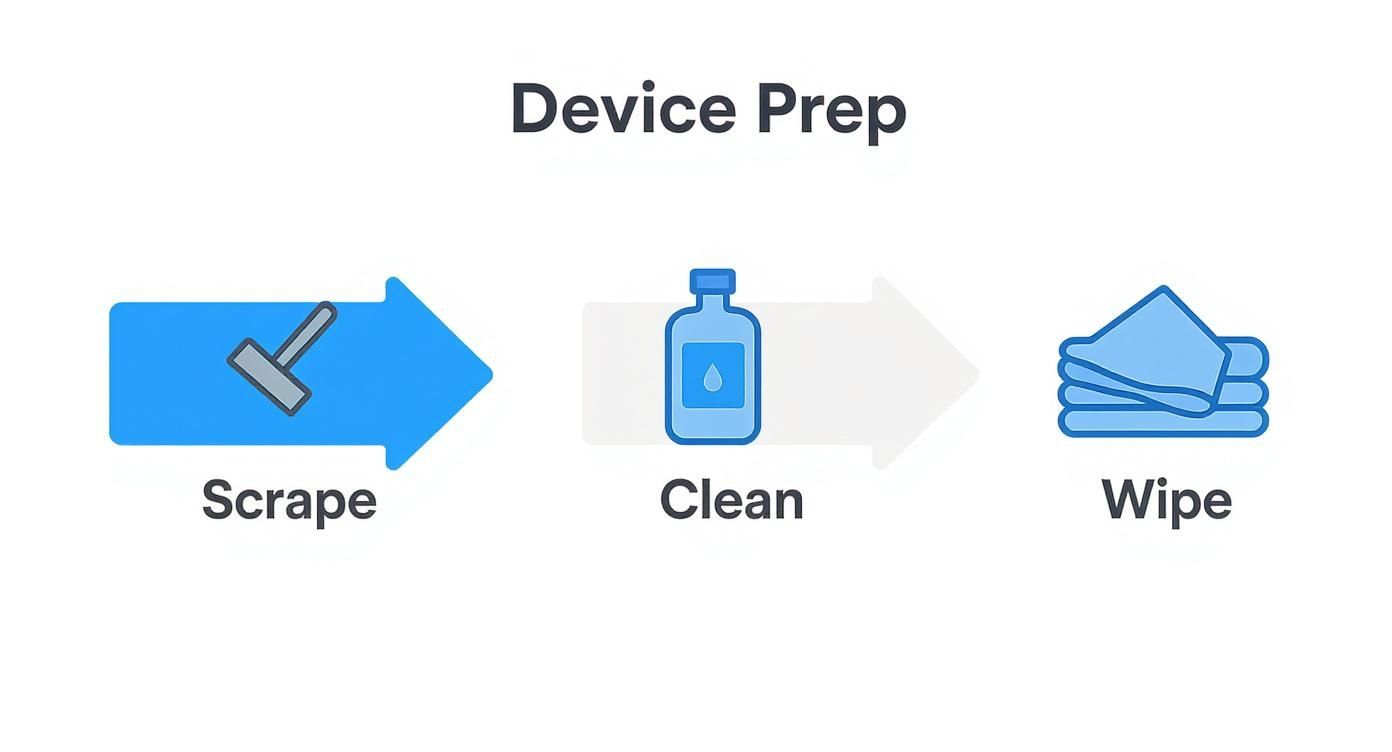
Preparing Your Device for a Flawless Bond
Even the best two sided sticky tape is useless if you stick it onto a dirty surface. I’ve seen it time and time again—the real strength of a repair comes down to how well you prep the device. Any leftover dust, finger oils, or old adhesive will absolutely ruin the bond. This prep stage is what separates a quick patch-up from a professional, long-lasting fix.
Your go-to tool here is 99% isopropyl alcohol. Don't even think about grabbing a household cleaner like Windex from under the sink. Those products are packed with surfactants (soapy chemicals) and other additives that leave behind a residue. It’s an invisible film that’s notorious for causing DIY repairs to fail because it stops the new adhesive from getting a proper grip.
The Cleaning Process
Getting the surface ready isn't just a quick wipe-down; it's a meticulous process. You'll need some lint-free wipes or cloths because regular tissues or paper towels fall apart and leave tiny fibres behind, which are just as bad as dust for compromising the seal.
Let's say you're cleaning out the narrow frame channels on a Samsung phone.
- First, grab a plastic spudger (a special prying tool) and gently scrape away any bigger chunks of old adhesive. Be firm but careful not to gouge the frame.
- Next, put a little isopropyl alcohol on your wipe and meticulously clean every millimetre of the surface where the new tape will go.
- Pay extra attention to the corners and edges—that's where grime loves to hide and where seals most often fail.
A perfectly clean surface ensures the adhesive can form a 100% effective bond. Skipping this is like trying to paint a dusty wall. The new layer just won't stick properly, and you'll be disappointed with the results pretty quickly.
This is also the perfect moment to double-check that you have all the right tools for the rest of the job. While the device is open, you don't want to get stuck without the right screwdriver. You can read up on the specific drivers for different models in our guide to Pentalobe screwdrivers for iPhone and MacBook repairs.
Once the surface is spotless and, just as importantly, completely dry, you're ready to apply the new two sided sticky tape. Taking these few extra minutes to nail the preparation is the single best investment you can make for the longevity of your repair.
Mastering the Application Technique
Applying hair-thin strips of two sided sticky tape takes a steady hand and a bit of practice. Honestly, the difference between a professional, long-lasting seal and a screen that starts lifting after a week often boils down to the small details. Let's walk through the method our own technicians use every day.
The first and most common mistake? Touching the adhesive. The natural oils on your fingerprints can instantly contaminate the tape and seriously weaken the bond. To get around this, always handle the tape with tweezers. This little trick gives you pinpoint control and keeps the adhesive perfectly clean for the strongest possible hold.
Before you even think about peeling off the backing, cut your strips to the perfect length. Lay them carefully along the very edge of the device's frame, making sure they're completely flat and free of any bubbles or wrinkles.
alt="A steady hand applies two sided sticky tape with tweezers to a phone's frame."
caption="Applying adhesive strips with tweezers ensures a clean bond for a durable repair."
The Art of Peeling and Pressing
Once your tape is perfectly positioned, you've reached the next delicate step: removing the protective backing. Use the sharp point of your tweezers to gently lift a tiny corner of the backing film. Peel it back slowly and at a sharp angle—this helps prevent you from accidentally pulling the adhesive strip up along with it.
A weak seal is often just a matter of not applying enough pressure after reassembly. The adhesive on most high-quality repair tapes is pressure-sensitive, which just means the bond activates and strengthens with firm, even force.
After placing the new component (like a screen or back glass), apply consistent pressure across the entire surface. You can use proper repair clamps if you have them, or even just place the device under a stack of heavy books for a few hours. This simple but crucial step ensures the two sided sticky tape makes full contact with both surfaces, creating a solid, uniform seal that will actually last.
Getting a secure bond is everything for a successful repair, especially when you're working on something like the intricate seals in iPhone repairs in Brisbane. Whatever you do, don't rush this final stage; it’s what locks in the quality and durability of your work.
What to Do When Things Go Wrong
Even the most seasoned repair tech runs into hiccups. You’ve done everything right, but the screen just won't sit flush, there's a frustrating gap along the edge, or the new adhesive simply isn't holding. It happens. Let's walk through how to troubleshoot these common problems and turn a potential disaster into a professional fix.
Nine times out of ten, the issue boils down to one of two things: leftover gunk from the old adhesive or using the wrong thickness of tape. If that new screen is lifting slightly on one side, you can almost guarantee a tiny fleck of old glue is still hiding on the frame, creating an annoying high spot.
A weak bond is another classic problem. This usually points to a surface that wasn't perfectly cleaned before application or, more often than you'd think, accidentally touching the sticky side of the two sided sticky tape with greasy fingers.
Fixing a Raised Screen or a Pesky Gap
If you see that the new part isn’t sitting perfectly flush, whatever you do, don't just press harder. That’s a good way to crack a new screen. Instead, gently lift the component off and get your brightest light out to re-inspect the frame.
- Hunt for Old Adhesive: Grab a sharp, non-metallic tool and carefully scrape along the channels where the new adhesive will sit. It's amazing how a tiny, almost invisible remnant can throw the whole fitment off.
- Double-Check Your Tape: Did you grab a thicker foam tape meant for a battery instead of the ultra-thin stuff required for a screen? It's an easy mistake to make when you're in the zone. Make sure you've got the correct type for the job.
The number one reason for a failed seal is rushing the prep work. Seriously, taking an extra five minutes to meticulously clean and inspect the device's frame can save you a world of pain later. A professional-quality repair lives or dies by this attention to detail.
This commitment to doing things right also applies to the materials we choose. Here in Australia, there's a growing push for sustainability in the tape market, with more repairers and customers looking for eco-friendly options. In response, many manufacturers are now offering tapes with water-based adhesives and biodegradable carriers, reflecting a clear shift towards greener solutions in the industry. You can dig deeper into this trend by checking out credible external sources like this research on the global tape market. At the end of the day, when you need a repair to last, choosing quality products always pays off.
Got Questions? We've Got Answers
If you're gearing up for a DIY repair, you've probably got a few questions buzzing around. Here are some quick, no-nonsense answers to the things we get asked most often about using two sided sticky tape.
Can I Just Use Craft Tape for My Phone Screen?
That's a definite no. While it might seem tempting to grab whatever you have lying around, craft tape is a world away from what's needed for electronics. It just doesn't have the strength, heat resistance, or the super-thin profile required.
It’ll fail in no time, leaving your phone’s sensitive internals exposed to dust and moisture. Trust us, you need to stick with professional-grade tape designed specifically for these kinds of repairs.
How Long Does the Adhesive Need to Cure?
The bond feels pretty strong right away, but the real magic happens over the next 24 to 72 hours. That's when most specialised adhesives reach their full, maximum strength.
For the best possible result, we always suggest gently clamping the device or just placing it under a few heavy books for a couple of hours. Also, try to keep it away from moisture and big temperature swings during that initial curing time. It really helps create a seal that's built to last.
A lot of DIYers skip this part, but giving the adhesive a full day to cure is crucial. A little patience here means your repair will hold up against the bumps and knocks of daily life.
What's the Best Way to Get Rid of Old Tape Gunk?
Cleaning off old residue is a job that requires a bit of patience. Start by gently scraping off the bigger chunks with a plastic spudger or opening tool—the key here is gently, as you don't want to scratch the frame.
Next, grab a lint-free cloth or a cotton swab, dab on a tiny amount of 99% isopropyl alcohol, and carefully work away at the leftover gunk. The alcohol will dissolve it, making it easy to wipe clean. Just be meticulous and make sure no liquid drips into the phone itself.
If the thought of tackling this yourself feels like a bit much, the pros at Screen Fixed Brisbane are always here to lend a hand. Book your professional repair today and let our expert technicians handle it for you, ensuring a perfect seal every time.
Disclaimer: All third-party trademarks (including logos and icons) referenced by Screen Fixed remain the property of their respective owners. Unless specifically identified as such, Screen Fixed's use of third-party trademarks does not indicate any relationship, sponsorship, or endorsement between Screen Fixed and the owners of these trademarks. All references to third-party trademarks are to describe the products and services of those parties and are considered fair use.