
When your phone takes an unexpected swim, the clock starts ticking immediately. That sinking feeling in your stomach is a problem many of us Aussies have faced. What you do in the first few minutes can mean the difference between a full recovery and a costly paperweight. The key is to act fast, but act smart.
Your Emergency First Aid Guide for a Wet Phone
That heart-stopping moment your phone plunges into water is something many of us have experienced. It's easy to panic, and that's when well-intentioned mistakes happen. But if you can keep a cool head and follow a few crucial steps, you give your device the best possible chance of survival. The main goal here is simple: cut the power to prevent short circuits and get the phone ready for a proper drying process.
First things first: power it down. If the phone is still on, turn it off right away. If it's already off, great—leave it that way. An electrical current running through wet circuits is what causes the most catastrophic, permanent damage. You have to fight that massive urge to turn it on "just to see if it still works." Winning that battle is your first big step toward saving your phone.
Alt text: A person carefully drying a water-damaged smartphone with a soft cloth.
Immediate Dos and Don'ts
With the power off, your next move is to get rid of anything that might be trapping moisture.
- Do take off the case and pop out the SIM card and any memory cards. This opens up more avenues for air to get in and moisture to get out.
- Don't even think about plugging it in. This is a surefire way to cause a fatal short circuit. If you find your phone not charging after you think it's dry, there's likely a deeper issue that needs professional attention.
- Do gently pat the outside dry with a soft, lint-free cloth. A microfibre cloth is perfect for this job.
- Don't reach for the hairdryer or, even worse, the oven or microwave. Blasting your phone with intense heat can warp the screen, damage the battery, and melt the delicate seals inside.
That old "bag of rice" trick? It’s a myth, and you should definitely skip it. Rice is terrible at absorbing moisture from inside a sealed device. Worse, tiny grains of rice dust and starch can get lodged in the charging port or headphone jack, causing a whole new set of headaches down the road.
To make it crystal clear, here's a quick checklist of what to do versus what to avoid in those critical first moments.
Water Damage First Aid Checklist
| Action (Do This Immediately) | Mistake (Avoid Doing This) |
|---|---|
| Power Off Immediately | Don't try to turn it on "to check it" |
| Remove Case, SIM & SD Cards | Don't shake the phone vigorously |
| Pat Exterior Dry with Soft Cloth | Don't use a hairdryer, oven, or heat source |
| Place in a Dry, Ventilated Area | Don't plug it in to a charger |
| Don't put it in a bag of rice |
Following these simple 'dos' and avoiding the 'don'ts' can dramatically improve the odds of a successful repair.
Assessing the Damage: DIY Fix or Professional Help?
Right, so you’ve pulled your phone from the brink and done the immediate first aid. Now it’s time to put on your detective hat. Before you even think about cracking it open for a DIY fix, you need to get a real sense of just how bad the damage is. Figuring out the severity of the situation will help you decide if this is something you can tackle yourself, or if it’s time to call in the professionals from Screen Fixed Brisbane for a proper look.
Check the Liquid Contact Indicator (LCI)
Your first clue is usually hiding in plain sight. Most modern smartphones, including iPhones and Samsungs, have a tiny little sticker inside called a Liquid Contact Indicator (LCI). This clever little dot changes from white or silver to a tell-tale pink or red the second it gets wet.
Finding it is usually pretty simple, but the location can differ between models:
- Most iPhones: Pop out the SIM card tray. Peer into the empty slot, and you should spot the small indicator.
- Many Samsung devices: You’ll likely find the LCI in the SIM slot here too. On some older models with a removable battery, you might find it in the battery compartment.
If that little dot has turned pink or red, you’ve got undeniable proof that water has gotten past the seals. It’s the very first thing a technician checks, and it's why warranty claims for water damage almost always get knocked back. But don't despair – a triggered LCI doesn’t mean your phone is a goner. It just confirms that we need to dig a little deeper.
Freshwater vs. Saltwater: The Make-or-Break Difference
Here’s something a lot of people don’t realise: not all water is the same when it comes to your phone’s insides. The kind of liquid your phone went for a swim in is probably the single most important factor in whether it can be saved. A quick splash in the kitchen sink is a completely different ball game to a dunk in the ocean.
Freshwater is bad enough, but saltwater is the absolute arch-nemesis of electronics. The salt and minerals in seawater are incredibly corrosive. Once saltwater gets inside and starts to evaporate, it leaves behind a crusty, conductive residue that just loves to eat away at the delicate metal components on the logic board. This corrosion kicks off almost instantly and causes irreversible damage way faster than freshwater ever could.
If your phone took a dip in saltwater, the clock is ticking. Seriously. Corrosion can obliterate critical parts in just a few hours. A DIY repair in this situation is incredibly risky and almost always a job for a professional.
The data doesn't lie. A 2023 survey from a big Aussie repair chain showed that saltwater exposure was responsible for nearly 40% of the worst water damage cases they saw. That same study found that those phones were three times more likely to need a major part replaced—like the entire logic board—compared to phones dropped in fresh water. You can read more about their findings on their page about water damage repairs.
Ultimately, a proper assessment is all about making a smart call. A triggered LCI from a bit of rainwater might be a fix you can handle at home. But if you’re up against a saltwater submersion, the chances of total failure shoot up dramatically. Knowing the difference helps you make that crucial decision: DIY or call for backup.
The DIY Cleaning and Drying Process Explained
If you've had a look and decided a home repair is worth a shot, it's time to roll up your sleeves. This whole process isn't about speed; it's about being careful and methodical. Rushing things now could easily turn a salvageable phone into a permanent paperweight. Before you start, make sure you're working in a well-lit, clean, and static-free space.
Your success here really hinges on having the right tools for the job. You can't just grab any old screwdriver from the shed. Modern smartphones are pieced together with specialised screws and delicate connectors that need specific gear to handle them safely.
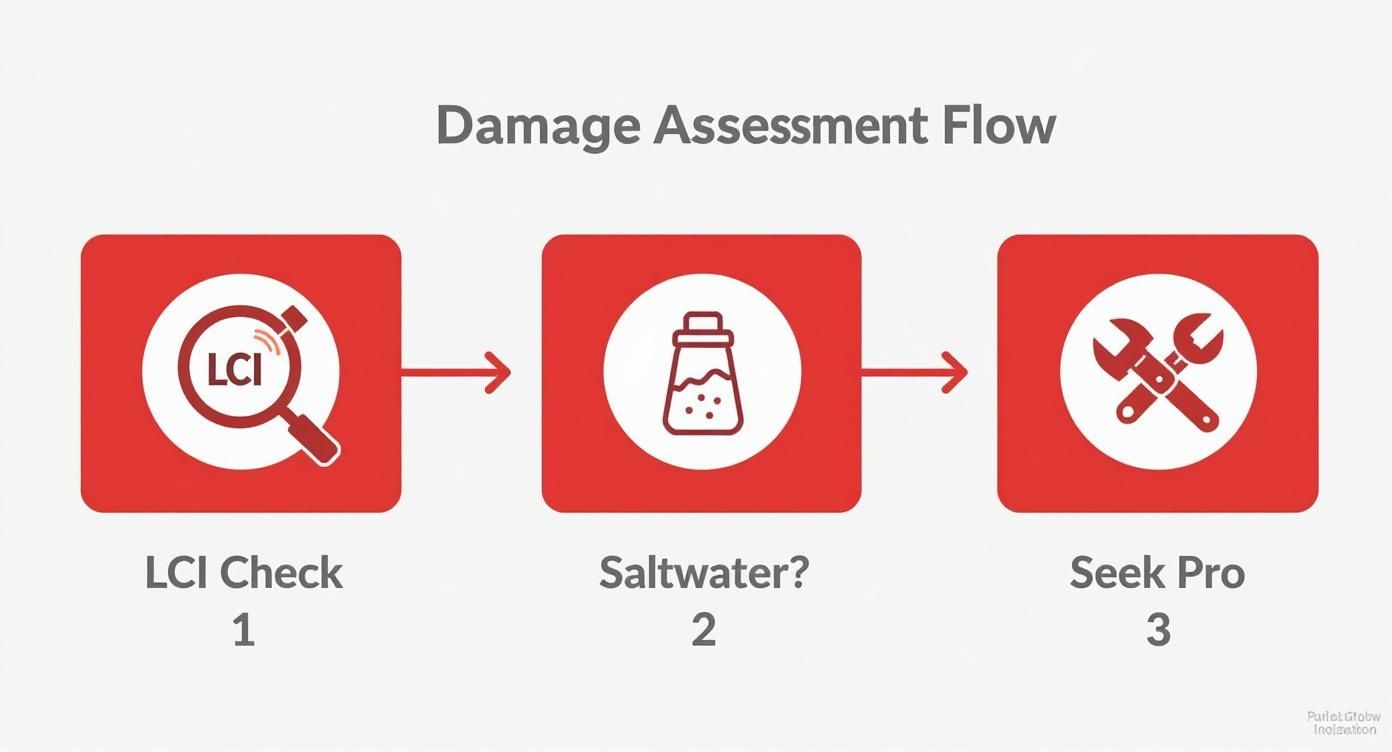
Alt text: An infographic showing the damage assessment process for a water-damaged phone, with icons for LCI Check, Saltwater, and Seek Pro.
As you can see, the first checks are critical. Inspecting the Liquid Contact Indicator and figuring out if saltwater was involved are key—both of which strongly point towards needing professional help.
Gearing Up and Opening the Device
First things first, you need to gather the correct tools. Trying to pry open a phone with a metal butter knife is a classic recipe for scratched casings and cracked screens.
Here’s what you’ll typically need on your workbench:
- Pentalobe Screwdrivers: iPhones use unique five-pointed screws that your standard drivers just won't fit.
- Plastic Spudgers and Opening Picks: These are your best friends. They're non-conductive and designed to gently pry open the casing and disconnect fragile ribbon cables without causing damage.
- Small Phillips Head Screwdriver: Still essential for internal screws on many Android and even some iPhone models.
- Suction Cup: This little gadget helps lift the screen assembly away from the body without you having to apply risky force.
Once you have your kit ready, the first big hurdle is carefully opening the device. It's a good idea to search for a reliable online guide for your specific model, as the procedure varies wildly between phones. Generally, it involves removing the bottom screws, gently heating the screen edges to soften the adhesive, and then using a suction cup and plastic picks to carefully separate the screen from the frame.
A critical piece of advice from the trenches: take photos at every single step. It’s incredibly easy to forget which screw goes where, and putting a long screw in a short hole can permanently fry the logic board. Trust me on this one.
Cleaning the Internal Components
With the phone open, you can now play detective and inspect the internals for signs of moisture or corrosion. You're looking for any white or greenish residue on the logic board, around connectors, and near the battery terminals. This is the mineral gunk left behind as water evaporates, and it’s the very stuff that causes short circuits.
To clean this mess, you’ll need 99%+ isopropyl alcohol and a soft-bristled brush, like a clean toothbrush or a proper anti-static electronics brush. Isopropyl alcohol is the go-to because it displaces water and evaporates quickly without leaving its own residue behind.
Gently dab the alcohol onto the affected areas and use the brush to scrub away any visible corrosion. Pay extra close attention to the small connectors where ribbon cables attach to the logic board—these are common failure points. While this advice is for phones, a general DIY Troubleshooting Guide for computers can offer broader insights into diagnosing and fixing electronic issues.
The Art of Patient Drying
After a thorough cleaning session, the final stage is drying. This is where patience truly becomes a virtue. So many people reach for a hairdryer, thinking heat will speed things up, but this is a huge mistake. The intense, direct heat from a hairdryer can warp plastic components, damage the battery, and even melt delicate solder points on the logic board.
The best method is simply patient air-drying. Nothing fancy. Leave the disassembled phone in a dry, well-ventilated spot for at least 48 hours. Placing it in front of a cool fan can help circulate air and speed up evaporation safely.
It’s a slow, gentle approach, but it ensures every last speck of moisture is gone before you even think about reintroducing power. It's not fast, but it’s the most reliable way to complete a DIY repair for a water-damaged phone.
Reassembling Your Phone and Testing for Success
You’ve patiently dried everything out, and now it’s time for the most delicate part of the entire process: putting your phone back together. This is where those careful notes and photos you took during disassembly really pay off. Reassembly isn't just about going backwards; it’s about precision. One wrong move could create a whole new set of problems.
The key is to take your time. Every single screw, bracket, and cable has a specific home, and mixing them up can be catastrophic. I’ve seen it happen: someone uses a screw that's just one millimetre too long in the wrong spot and punctures the logic board. That’s game over.
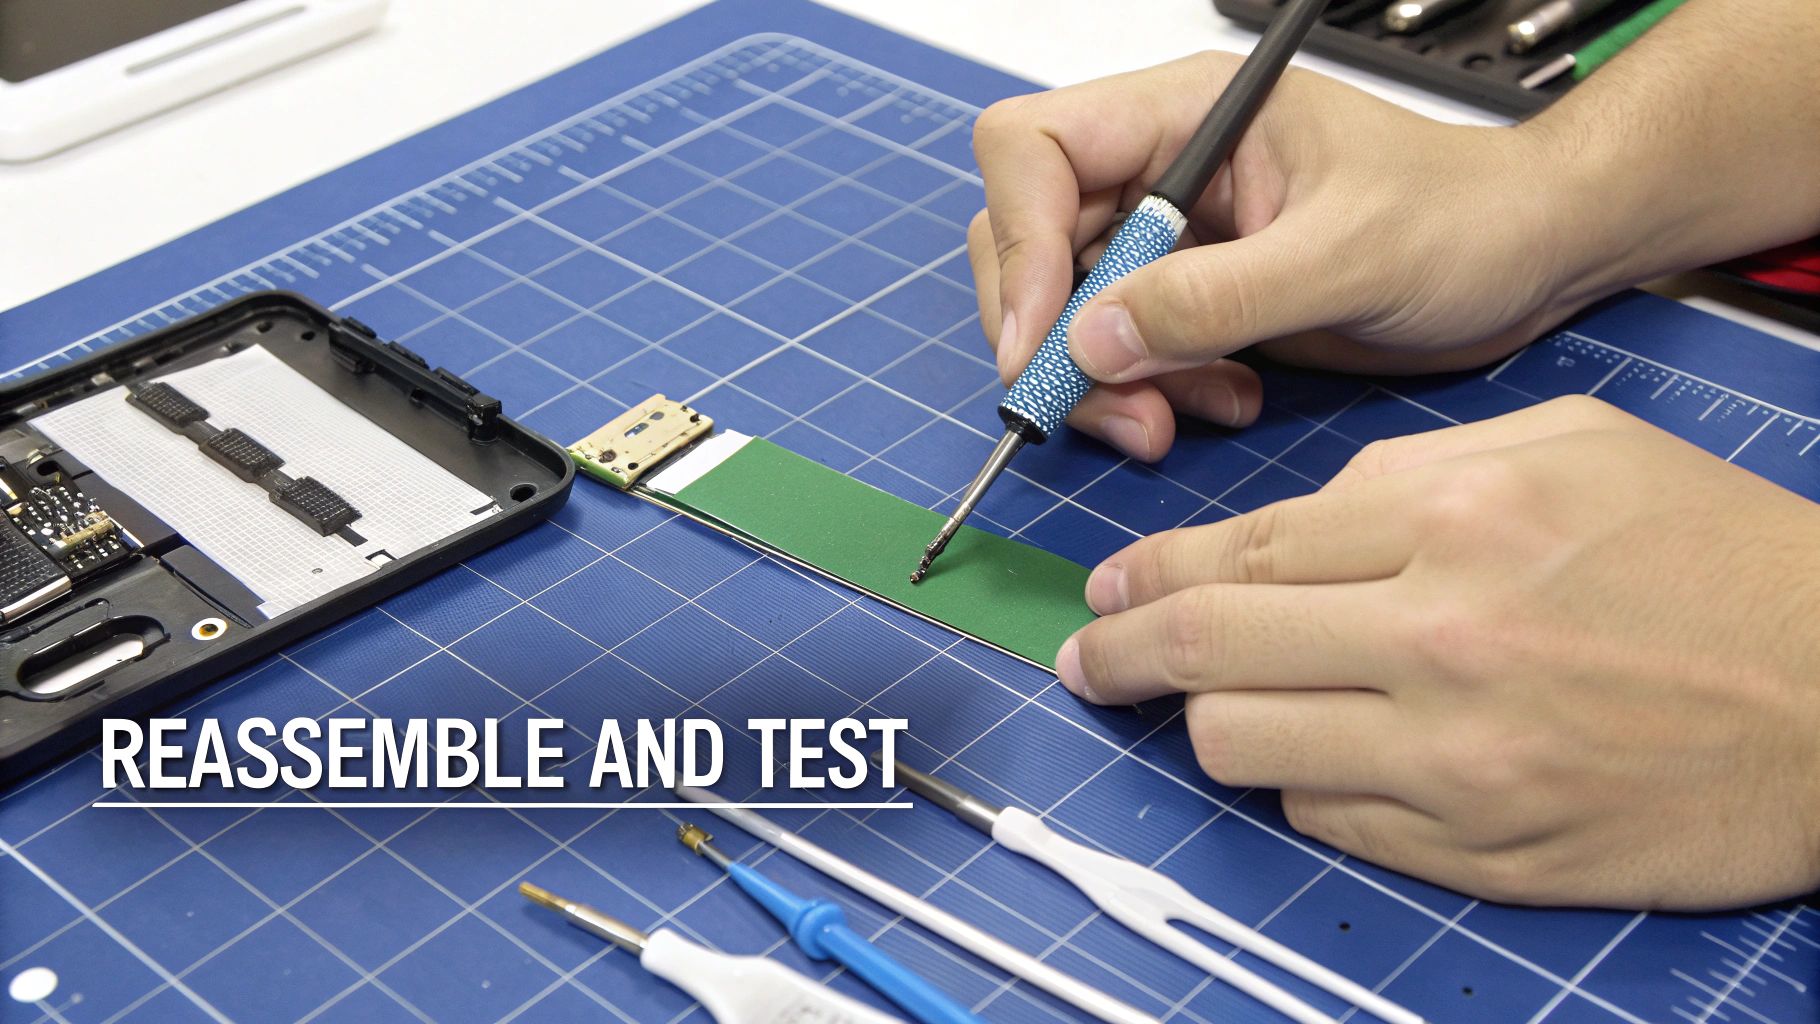
Alt text: A technician carefully reassembling a smartphone on a clean, well-lit workbench.
Carefully Connecting Components
Reconnect each component with a gentle, confident touch. The most fragile parts you’ll handle are the tiny ribbon cables that link the screen, battery, and cameras to the logic board. They tear incredibly easily, so never, ever force them.
- Align Connectors Perfectly: Eyeball the connector and make sure it’s sitting perfectly flat and square over its socket before you apply any pressure at all.
- Use a Spudger, Not Your Fingers: The oils on your fingers can cause issues, and it's hard to apply even pressure. A good plastic spudger or even the back of your fingernail gives you much better control to gently press the connector down until it clicks.
- Listen for the Click: You should hear and feel a soft but distinct click. That’s your signal of a secure connection. If you don't get it, stop. Don't push harder. Lift the connector, realign it, and try again.
Another critical piece of the puzzle is the adhesive that holds the screen in place. When you opened the phone, you broke the original waterproof seal. To get some of that protection back and ensure a snug fit, you'll need fresh adhesive. You can learn more about the right kind to use in our guide on two-sided sticky tape for phone repairs. Getting this part right is what separates a sloppy repair from one that feels professional.
A Structured Testing Sequence
Once that final screw is back in place, it’s the moment of truth. It's tempting to just hit the power button and hope for the best, but a structured testing sequence is a much smarter approach. This helps you systematically check what’s working and what might have been permanently fried by the water.
The point of testing isn’t just to see if the phone turns on. It’s to build a complete diagnostic report. This approach lets you isolate specific faults, so you know exactly which component needs replacing if something’s still off.
Start with the most basic functions and work your way up. This logical progression ensures you don't miss a subtle but important issue.
The Essential Functionality Checklist
- Power On: First things first, does it actually boot up? Watch to see if it gets stuck in a boot loop, where it just keeps restarting itself.
- Screen and Touch Response: Look closely at the display. Do you see any discolouration, dead pixels, or tell-tale water spots under the glass? To test the touchscreen, drag an app icon all over the screen, making sure to cover every corner and edge.
- Audio Functions: Make a test call. Can you hear the other person through the earpiece speaker? Crucially, can they hear you clearly via the microphone? Now, test the main loudspeaker by playing some music or a video.
- Cameras: Open the camera app. Switch between the front and rear cameras. Are the images blurry? Are there spots on the lens? Or do you just get a black screen? Any of these point to a damaged camera module.
- Charging and Connectivity: Plug in a charger. Does the phone recognise it and show that it's charging? Finally, toggle Wi-Fi and Bluetooth on and off to make sure the antennas are working properly.
Once you’ve gone through this checklist, you’ll have a clear picture of your phone's health. If everything works, brilliant! You’ve done it. If you find a function or two has failed, you’ve successfully pinpointed the exact parts that need replacing, which makes your next step much, much clearer.
When to Skip the DIY and Call a Professional
Attempting a DIY repair can be incredibly satisfying, but knowing when to throw in the towel is just as important. A home repair isn't always the right move, and pushing forward when you're out of your depth can turn a fixable phone into an expensive paperweight. There are some very clear signs that it’s time to stop and get a professional involved for your iPhone repairs in Brisbane.
One of the biggest red flags is a phone that stays completely lifeless after you’ve patiently and thoroughly dried it out. If you’ve put it all back together correctly and it still won't power on, the problem is likely a short circuit on the logic board. That’s a repair that goes far beyond a simple component swap.
Recognising Severe Damage
Another critical situation is any kind of saltwater exposure. As we've mentioned, saltwater is brutally corrosive. Even if you manage to clean off the visible gunk, microscopic salt crystals get left behind and will continue to eat away at the delicate circuitry. If you see widespread corrosion—that classic greenish or white fuzz—across the logic board, that's your cue to call for backup.
You should definitely seek professional help if you run into any of these scenarios:
- The device is completely dead after you've carefully dried and reassembled it.
- There's visible, widespread corrosion on the main logic board or connectors.
- The phone was exposed to saltwater, chlorinated pool water, or other corrosive liquids.
- The phone gets stuck in a boot loop (constantly restarting) after you power it on.
The Professional Advantage
This is where the expertise of technicians comes in. Professionals don’t just use a brush and some alcohol; they have specialised tools like ultrasonic cleaners. These machines use high-frequency sound waves to literally blast away hidden corrosion from every tiny crevice on the logic board—a deep clean that’s just impossible to achieve at home.
A professional can diagnose problems at a component level. They can test individual capacitors and resistors on the logic board, and even perform microsoldering to repair tiny broken connections that would otherwise render the phone useless.
Furthermore, the industry has become much more efficient. The average turnaround for water damage repairs in Australia has dropped to just 2-3 days, with costs staying relatively stable. This makes professional service a fast and reliable option.
Ultimately, a DIY attempt is fantastic for managing minor spills. For more complex cases, a professional repair offers a much higher success rate and, frankly, a lot more peace of mind. Should the damage lead to irreversible data loss, knowing where to find professional data recovery services in New Zealand can also be crucial. For related issues, check out our guide on how to find affordable phone screen repair services near you.
Your Top Questions About Water-Damaged Phones, Answered
When your phone takes an unexpected swim, it’s easy to feel panicked. You've probably got a million questions running through your mind. We get it. Here are some clear, no-nonsense answers to the most common questions we hear from customers in your situation.
Does the Old "Phone in a Bag of Rice" Trick Actually Work?
Honestly? No. This is one of those tech myths that just won't go away, and it often does more harm than good.
Rice is terrible at pulling moisture out from the complex internals of a modern smartphone. What it is good at is shedding tiny particles of dust and starch. These can easily find their way into your charging port, speaker grilles, or headphone jack, creating a whole new set of problems for a technician to deal with.
The absolute best thing you can do is switch the phone off immediately. Don't plug it in, don't press any buttons. Just let it air-dry in a spot with good ventilation for at least 48 hours. If you have some silica gel packets lying around, tossing them in a sealed container with your phone is a much better bet than rice. They're actually designed to absorb moisture without leaving a mess behind.
Can I Claim Water Damage on My Phone Warranty in Australia?
It's highly unlikely. Standard manufacturer warranties, whether from Apple, Samsung, or Google, explicitly state that liquid damage is not covered.
Every smartphone has several Liquid Contact Indicators (LCIs) hidden inside. These tiny stickers are usually white, but they permanently change colour to pink or red the second they touch moisture. When you send a device in for repair, checking these LCIs is the first thing a technician does. If they've been triggered, the warranty is automatically voided—no questions asked.
Is It Even Worth Repairing a Water-Damaged Phone?
This really boils down to a few things: the phone's age, its current value, and just how bad the damage is.
For newer, high-end models, a professional repair is almost always cheaper than forking out for a brand-new replacement. An experienced technician can quickly diagnose whether you're looking at a simple fix—like a corroded charging port—or something more serious, like damage to the main logic board.
A proper assessment takes the guesswork out of it. Getting an accurate quote lets you weigh up the cost of repair versus the price of a new device, helping you make a smart financial decision.
If trying to fix it yourself feels like a gamble you're not willing to take, don't wait. The expert technicians at Screen Fixed Brisbane have the specialised tools and years of experience needed to properly diagnose and professionally repair your phone. Book your repair with us today at https://www.fixo.com.au.
Disclaimer: All third-party brand names, such as Apple, iPhone, and Samsung, are trademarks of their respective owners. Screen Fixed is an independent repair service and is not affiliated with these companies.