
That gut-wrenching moment your iPhone slips from your grasp and cartwheels onto the pavement is a feeling most of us know all too well. It’s the problem every smartphone owner dreads: a spiderweb of cracked glass across a once-perfect screen. For anyone with a bit of technical confidence, learning how to replace an iPhone screen yourself is an achievable project, but it’s one that demands patience, precision, and a steady hand.
This guide will walk you through the whole process, from the tools you'll need to the common pitfalls to avoid, helping you decide if a DIY repair is the right move. If it's not, professional services like Screen Fixed Brisbane are always ready to help.
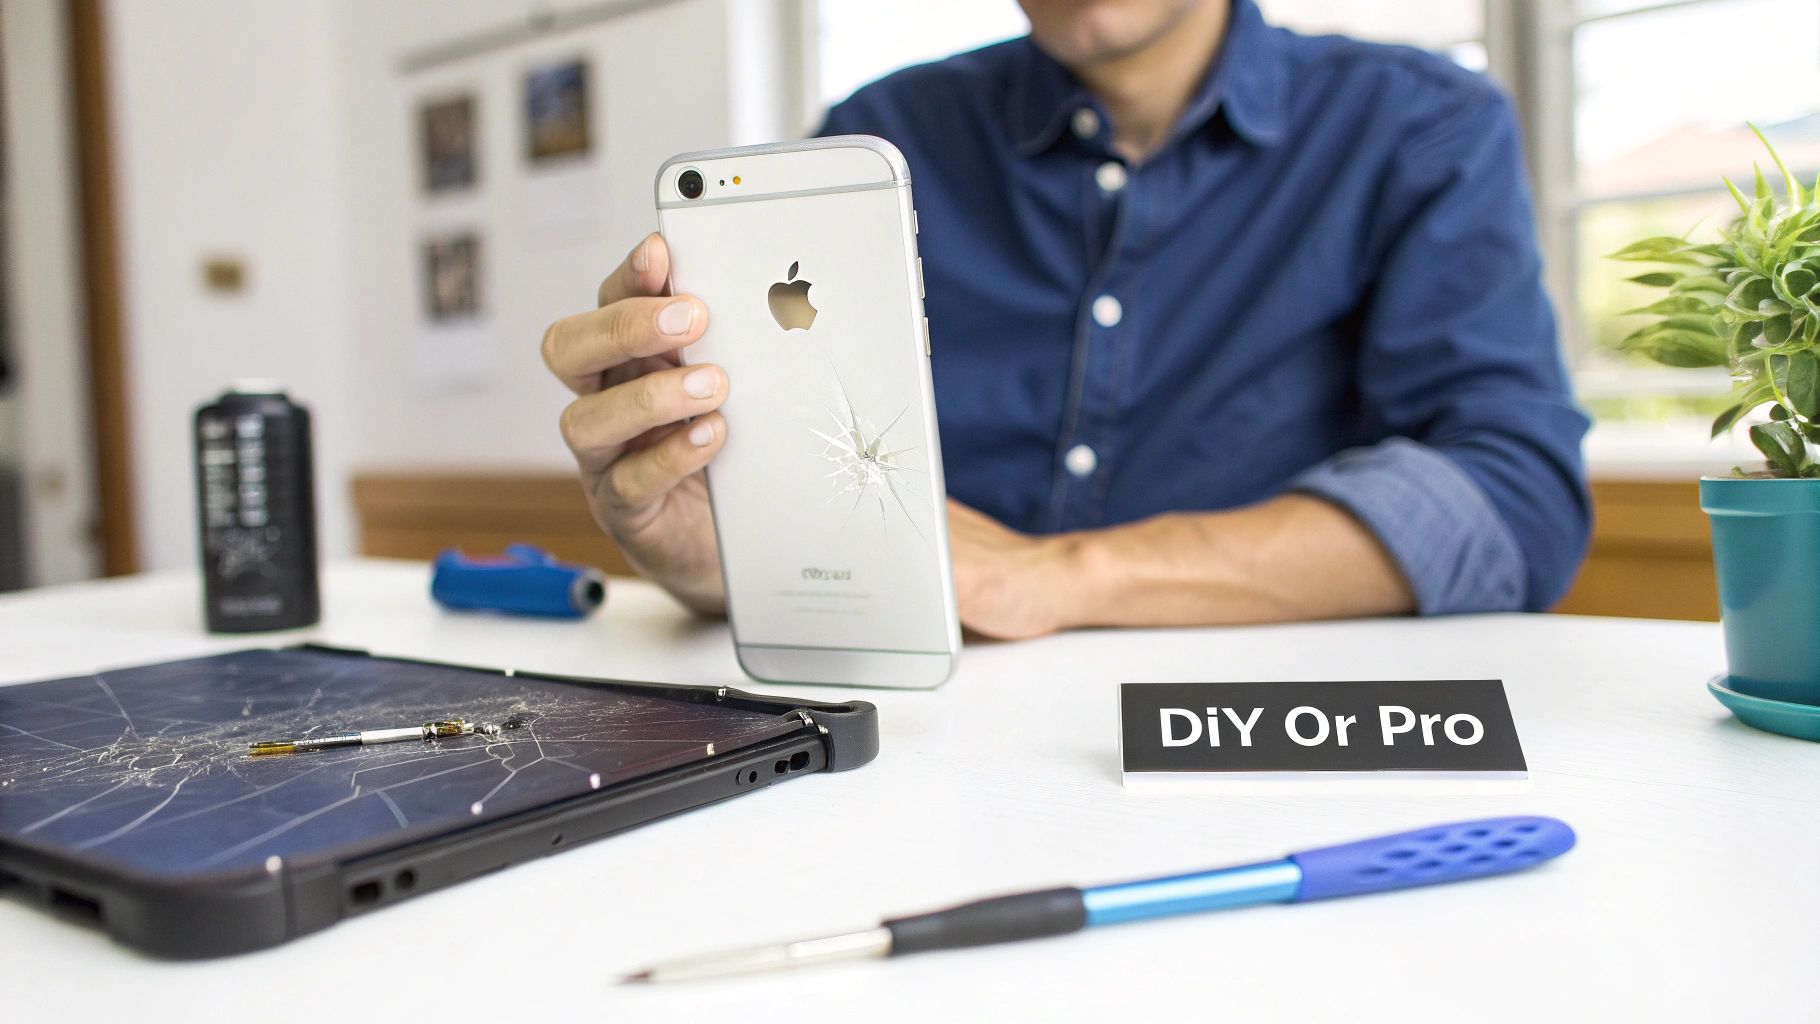
Should You DIY or Go to a Professional?
Alt text: A technician carefully repairing a cracked iPhone screen on a clean work mat.
Caption: An iPhone 14 screen replacement in Brisbane being performed by a professional.
The sight of a shattered screen usually sparks one big question: should I fix this myself or pay a professional?
A DIY repair can be incredibly satisfying and save you a good chunk of cash if you pull it off correctly. But let's be clear—it's not a task to take lightly. Modern iPhones are marvels of engineering, packed with tiny, delicate components that are frustratingly easy to damage if you don't know what you're doing. A simple mistake can turn a cheap fix into an expensive disaster.
On the other hand, professional services like those offering iPhone Repairs Brisbane provide a reliable solution with peace of mind. These technicians have the experience, specialised tools, and access to high-quality parts, and their work is backed by a warranty. The trade-off, of course, is a higher price tag compared to buying a DIY kit.
Key Factors to Consider
Before you jump online and order a replacement screen, you need to have an honest chat with yourself about your skills and the potential risks. This isn't just about saving money; it's about avoiding that nightmare scenario where a simple screen fix spirals into a much more expensive logic board problem.
Think about these points before you start:
- Your Technical Comfort Level: Have you ever tinkered with small electronics before? A successful repair requires a steady hand, good eyesight, and the ability to follow detailed instructions to the letter.
- The Value of Your Time: A first-time screen replacement can easily eat up a few hours. You need to weigh the time you'll spend hunched over tiny screws against the convenience of a professional repair, which is often done in under an hour.
- The Risks of Further Damage: One misplaced screw or a torn ribbon cable can be catastrophic. It could lead to permanent damage, kill features like Face ID, or even turn your expensive iPhone into a paperweight.
Cracked screens are, by a long shot, the most common headache for Australian iPhone users. In fact, screen replacements make up over 60% of all iPhone repairs, mostly thanks to everyday drops.
While fixing an older model might set you back around $150, the premium OLED panels on newer devices like the iPhone 15 can push professional repair costs up to $690 AUD for a Pro Max. This huge cost difference is what makes a DIY repair so tempting. You can learn more about the typical costs of iPhone screen repairs in Australia.
Ultimately, the choice comes down to a balance of cost, risk, and confidence. If you’re patient, organised, and prepared for a challenge, a DIY repair can be a really rewarding experience. But if the thought of handling tiny screws and fragile cables makes your palms sweat, trusting a professional is definitely the smarter path.
Getting Your Toolkit and Workspace Ready
Trying to replace an iPhone screen without the right gear is a recipe for disaster. Think of it like trying to perform surgery with kitchen utensils—it’s going to get messy, frustrating, and you’ll almost certainly do more harm than good. Getting your tools and workspace sorted out before you start is the most important step towards a successful repair. It’s what separates a clean fix from a very expensive mistake.
Finding a Quality Replacement Screen
A successful repair doesn't start when you take out the first screw. It begins with tracking down a high-quality replacement screen. The market is absolutely flooded with cheap, low-grade parts that look the part but fail spectacularly in practice. These screens often lead to terrible display clarity, glitchy or unresponsive touch, and colours that are just plain wrong.
Seriously, investing in a premium replacement screen from a supplier you trust is non-negotiable. It's the only way you’ll get your iPhone’s display looking and feeling like it just came out of the box. If you’re not sure how to spot the difference, take a moment to read up on how to avoid buying low-quality iPhone parts. It's a small time investment that can save you a big headache.
Your Non-Negotiable Toolkit
Once you’ve got a quality screen in hand, you need the right tools for the job. This isn’t a task for that random Phillips head screwdriver rattling around in your junk drawer. iPhones are built with proprietary screws and incredibly delicate connectors that demand specialised equipment.
Here's the essential toolkit I'd recommend for anyone attempting this repair. Without these specific tools, you're just asking for trouble.
| Tool or Item | Primary Function | Why You Absolutely Need It |
|---|---|---|
| Pentalobe Screwdriver | Removing external casing screws | These are the two tiny, star-shaped screws next to the charging port. No other screwdriver will work without stripping them. |
| Tri-Point Screwdriver | Removing internal bracket screws | Secures many internal components. Using the wrong driver here is one of the most common ways people damage their phones. |
| Spudger | Disconnecting ribbon cables | This anti-static tool lets you safely pry open connectors without shorting the logic board. Never use metal for this. |
| Suction Cup | Lifting the screen | Creates a small gap between the screen and frame, giving you a starting point to open the phone. |
| Opening Picks | Slicing adhesive | Used to gently slice through the waterproof adhesive seal without cracking the glass or damaging the frame. |
| Fine-Tipped Tweezers | Handling tiny parts | Essential for managing minuscule screws and guiding delicate ribbon cables back where they belong. |
Beyond these basics, a heat gun (or even a hairdryer on low) can be a lifesaver. A little bit of gentle heat helps soften the waterproof adhesive sealing the screen to the frame, making the opening process much smoother and reducing the risk of you having to use excessive force.
Creating a Safe Workspace
The environment you work in is just as important as the tools you use. A cluttered, dimly lit desk is where screws get lost and costly mistakes are made. Take a few minutes to set yourself up for success.
First, find a clean, flat surface with plenty of bright, direct light. Good lighting is non-negotiable for seeing the microscopic components you'll be handling. A posable desk lamp is perfect.
Next, get organised. The absolute #1 rule of iPhone repair is to keep your screws organised. The screws inside an iPhone are not interchangeable; they vary in length and size, often by fractions of a millimetre.
A simple magnetic mat is your best friend during a screen replacement. It gives you a grid where you can place each screw exactly as it came out of the phone. This prevents a mix-up that could lead to 'long screw damage'—a fatal error where a long screw pierces the logic board, turning your phone into a paperweight.
Finally, watch out for static electricity. A static discharge can permanently fry the sensitive electronics inside your phone. Avoid working on carpet if you can, and an anti-static wrist strap is ideal. If you don't have one, just get into the habit of frequently touching a large metal object to ground yourself and discharge any static build-up. These simple precautions are what ensure your screen replacement ends with a working phone.
A Practical Walkthrough of the Replacement Process
Alright, you’ve got your workspace sorted and your tools laid out. Now for the main event: the screen replacement itself. This is where you need to be focused, patient, and gentle. I'm going to walk you through every critical step, explaining not just what to do, but why each part of the process is so important for a successful repair.
Before you even think about touching a screw, it's essential to get the prep work right. This is your foundation for a smooth repair.

Alt text: Infographic showing the three key stages of preparation for an iPhone screen replacement: setting up a clean workspace, gathering essential tools, and having a quality replacement screen ready.
Think of it this way: a clean space prevents losing tiny screws, the right tools stop you from causing damage, and a quality screen makes the whole effort worthwhile.
Getting Inside: Power Down and First Opening
First thing’s first, and I can't stress this enough: completely power down the iPhone. Hold the side button and a volume button, then slide to power off. Trying to repair a device that's still on is asking for an electrical short that could fry the logic board for good. Don't risk it.
With the phone off, look for the two little pentalobe screws on either side of the charging port. Use your pentalobe driver to carefully remove them and stick them straight onto your magnetic mat. These things are tiny and have a knack for disappearing forever.
Now for the moment of truth—creating that initial gap. Place a suction cup on the lower part of the screen, just above where the home button would be. Press it down for a solid seal, then pull up with gentle, consistent pressure.
You’re not trying to rip the screen off. The goal is just to create a tiny gap, even a fraction of a millimetre, between the screen and the frame. That's all you need to slip an opening pick inside.
Slicing the Adhesive and Opening It Up
Once your opening pick is in that gap, you can start separating the screen. It's held on by a thin, tough waterproof adhesive running around the whole perimeter, and you need to slice right through it.
Gently slide the pick along the edges of the phone. Go slow, especially around the top and side edges where the delicate flex cables live. If you push the pick in too deep or use too much force, you can easily snag and tear one of these vital connectors. A bit of gentle heat from a hairdryer can really help soften this adhesive, making the job much smoother.
With the adhesive cut, the screen will open like a book. On most recent models, it opens from left to right. On older ones, it's bottom to top. It's crucial you know which way your model opens to avoid putting any stress on the display cables.
The Most Critical Step: Disconnecting the Battery
Stop. Before you touch anything else inside, you must disconnect the battery. This is the single most important safety step in any iPhone repair. Working inside with the battery connected is like doing surgery with the power on—one slip with a metal tool could cause a short circuit and kill your phone instantly.
The battery connector is usually under a small metal bracket held down by a few tri-point screws. Carefully remove these screws (keep track of them on your mat!) and lift the bracket off with tweezers.
Now, take a non-conductive tool like a plastic spudger and gently pry the battery connector straight up from its socket. You'll feel a little pop as it disconnects. Once it's off, you can relax, knowing the phone is completely de-energised.
Handling the Display and Sensor Connectors
With the battery safely disconnected, you can move on to the display and front sensor assembly cables. These are also protected by small metal brackets. Remove the screws and brackets, keeping everything organised.
Using your spudger, carefully pop each ribbon cable off the logic board. These connectors are incredibly fragile. Use the flat end of the spudger to lift them straight up. Whatever you do, don't use force or pry at an angle. Damaging the socket on the logic board is an almost impossible fix for a DIYer.
Once all the cables are free, you can completely remove the damaged screen from the phone’s body.
Technician's Insight: The most common point of failure I see with first-time repairs is damage to these delicate flex cables or their connectors. Always use a plastic spudger, take your time, and never force anything. A broken connector often means a trip to a pro for micro-soldering, turning a cheap fix into a very expensive one.
Transferring Components to the New Screen
This is where a lot of DIY repairs go sideways. Your new screen is just that—a screen. It doesn’t come with the front speaker, microphone, ambient light sensor, or the Face ID/Touch ID components. You have to carefully move all of these from your old screen to the new one.
This whole assembly is usually held in with a bunch of tiny screws and a bit of adhesive. Work slowly. Remove each screw and place it exactly where it belongs on your mat. The ambient light and proximity sensors are especially delicate, so a little heat can help loosen any glue holding them.
This is crucial: if you damage the Face ID or Touch ID sensor assembly during this transfer, those features will be permanently disabled. These parts are cryptographically tied to your phone's logic board for security. They simply cannot be replaced. Take extreme care here.
After you’ve moved everything over to the new screen, you’re ready to put it all back together.
Reassembly and Final Testing
Before you seal the phone up, you have to test the new screen. Reconnect the display and sensor cables to the logic board, and only then reconnect the battery. Power the iPhone on and test everything.
- Look for any dead pixels or weird colours on the display.
- Test touch sensitivity all over the screen.
- Check if Face ID or Touch ID is working.
- Make a quick test call to check the earpiece speaker.
If it all checks out, power the phone down and disconnect the battery one last time. Now, it's time to apply a fresh waterproof adhesive seal. This pre-cut strip helps restore some of the phone's original dust and moisture resistance. To get this part just right, check out this guide on the importance of properly applying double-sided tape adhesive for a secure seal.
Carefully place the new adhesive around the frame's edge. Reconnect all the cables, screw the brackets back in, and then gently press the new screen into place. You should feel it click in evenly around the edges. Pop the two bottom pentalobe screws back in, and you're done. Power it on and enjoy your perfectly clear, fully working new screen.
Common Mistakes That Can Wreck Your iPhone
Learning how to replace an iPhone screen can be a really satisfying project, but the road from a cracked display to a perfect repair is littered with potential disasters. Seriously. Even with the best tools and a solid guide, one tiny slip-up can turn a simple fix into a very expensive, irreversible failure. Let's walk through the most common blunders we see every day, so you can sidestep them yourself.
Alt text: A technician's hands working on a disassembled iPhone, highlighting the delicate internal components and potential for mistakes.
The Nightmare of Long Screw Damage
If there’s one mistake that sends a chill down every technician's spine, it’s long screw damage. It sounds so minor, but it is hands-down one of the most catastrophic errors you can make during an iPhone repair. Inside your phone, screws of different lengths hold down various brackets and components.
Mixing them up seems trivial, right? But forcing a screw that's even half a millimetre too long into the wrong hole can be devastating. That screw can pierce right through the multi-layered logic board underneath, completely severing crucial electronic pathways.
This single error can permanently kill your iPhone. The damage is often microscopic and needs advanced micro-soldering skills to even attempt a fix—something far beyond a DIY repair. Using a magnetic mat and meticulously tracking every single screw isn't just a friendly suggestion; it's the only way to prevent this repair-ending mistake.
Applying Too Much Force
Patience is your most valuable tool here. When you hit a part that just won't budge, the gut reaction is to push harder. This is almost always the wrong move and a classic pitfall for first-timers learning how to replace an iPhone screen.
Forcing a connector, prying too hard on the screen, or manhandling a delicate component can set off a chain reaction of problems. You might crack the frame, tear a fragile ribbon cable, or wreck a tiny sensor you didn't even know was there.
The rule of thumb is simple: if it doesn't move with gentle, steady pressure, stop. Take a breath and re-evaluate what you're doing. You might have missed a hidden screw or need to apply a bit of heat to soften up the adhesive. Force is the enemy of a successful repair.
Tearing Fragile Ribbon Cables
The ribbon-like flex cables that connect the display and sensors to the logic board are incredibly delicate. They can tear with surprising ease, and a damaged cable can cause a whole host of issues, from an unresponsive screen to the permanent loss of Face ID.
This usually happens right at the start when you're first opening the phone. Popping the screen open too quickly or in the wrong direction (like opening a book from the wrong side) puts huge stress on these cables. It's also really easy to accidentally snag or slice one with an opening pick if you push it too deep into the frame.
- Go slowly: When you're slicing through the adhesive, keep your pick just under the screen's bezel and no deeper.
- Know your model: Figure out which way your specific iPhone model opens before you start prying. It varies.
- Use a spudger: Never use metal tools to disconnect the cable connectors. A plastic spudger prevents shorts and damage.
Troubleshooting Common Post-Repair Problems
Even when you follow every step perfectly, you might power on your newly repaired iPhone only to find something's not right. Don't panic. Most post-repair issues come from a few common, and often fixable, problems.
If you run into an issue, the first thing to do is power down the device, disconnect the battery, and double-check all of your connections.
Here’s a quick guide to what might be going on:
- Unresponsive Screen: This is almost always a loose display cable. Carefully disconnect and reconnect the main display connector, making sure you feel a gentle "click" as it seats properly.
- Erratic or "Ghost" Touch: This can be caused by a pinched flex cable or, sometimes, a faulty replacement screen. Check that the display cables aren't getting crushed when you close the phone up. If it keeps happening, you might have a defective part.
- No Display or Backlight: Again, check that display connector first. If it's secure, the issue could be a short circuit caused by reconnecting the screen while the battery was still live—a classic rookie error.
By knowing these common mistakes, you can approach your DIY iPhone screen replacement with the caution and precision it demands. This will massively boost your chances of a successful repair. And hey, if you find yourself in over your head, remember that professional help from a service providing iPhone Repairs Brisbane is always a safe and reliable option.
When to Call a Professional
Taking on a DIY screen replacement can be a satisfying project, but sometimes the smartest move is knowing when to tap out and call in the experts. Recognising your limits is just as crucial as knowing how to handle a pentalobe screwdriver, especially when a tiny mistake can snowball into a much bigger, more expensive problem.
Recognising the Warning Signs
Some issues are immediate red flags that should make you put the tools down. If your iPhone's frame is obviously bent or twisted from whatever caused the screen to crack, a new display will never sit properly. Trying to force it into place is a recipe for disaster—you’ll likely crack the brand-new glass or damage sensitive internal parts. It's a classic case of throwing good money after bad.
Another major deal-breaker is any hint of water damage. If your phone took a swim before the screen broke, there could be hidden corrosion creeping across the logic board. Opening it up yourself could make things significantly worse. Only a professional has the right equipment to properly assess and treat liquid damage without causing further harm.
Finally, be honest with yourself. Does the thought of handling ribbon cables thinner than paper and screws you can barely see make your palms sweat? That’s a perfectly valid reason to stop. The immense patience and steady hands needed for this kind of intricate work aren't for everyone, and there’s no shame in that.
The real value of a professional service isn't just the repair; it's the peace of mind. It’s knowing the job is done right by an expert, using high-quality parts, and backed by a warranty that protects your investment.
The True Cost of DIY vs Professional Help
It’s tempting to look at the price of a DIY kit and see nothing but savings. But you need to calculate the true cost. This includes not just the screen and specialised tools, but also the shipping and, most critically, the financial risk if something goes wrong. If you accidentally tear a delicate Face ID cable or cause long screw damage to the logic board, the cost to fix that—if it’s even fixable—will completely overshadow what you would have paid a pro in the first place.
When you opt for a service like iPhone Repairs Brisbane, you're paying one upfront price for a guaranteed result. No hidden costs, no risk of causing more damage. You can get a clearer picture by exploring our breakdown of iPhone screen repair costs.
Here in Australia, you have a few options. While AppleCare+ is a great safety net with its fixed service fees for accidental damage, getting an out-of-warranty repair directly from Apple can be quite pricey. This is where trusted third-party repair shops really shine. They often offer more competitive prices and solid warranties, giving you flexible and reliable choices for your repair. You can learn more about Apple's official repair services and pricing in Australia.
Ultimately, deciding whether to tackle an iPhone screen replacement yourself or call a professional comes down to a simple risk assessment. Weigh the potential savings against the potential for a very costly mistake. If you're facing a complex issue or just don't feel confident, letting a pro handle it is the wisest—and often cheapest—decision in the long run.
Common Questions After Your iPhone Screen Swap
Even when a repair goes off without a hitch, it's totally normal to have some questions floating around. You’ve just performed some pretty intricate surgery on your iPhone, after all. Let's tackle some of the most common things people wonder about after they’ve learned how to replace an iPhone screen.
Is My iPhone Still Water Resistant?
The honest answer is no, at least not like it was when it came out of the box. The moment you open your iPhone, you break the original waterproof adhesive that was meticulously applied at the factory.
While you absolutely should install a new adhesive seal when you put everything back together—and our kits include one—it’s nearly impossible to get that perfect factory seal in a home setting. After a DIY fix, your phone will be much better protected against dust and a light splash than if you left it unsealed, but you should treat it as if it's no longer water-resistant. Be extra careful around water from now on.
Could I Really Lose Face ID or Touch ID?
Yes, and this is probably the single biggest risk you take on with a DIY screen repair. For security, the Face ID and Touch ID sensor assemblies are cryptographically tied to your iPhone's specific logic board. This means you have to carefully transfer the entire original sensor module from your old, broken screen to the new one.
If any part of that assembly or its super-fragile ribbon cables gets damaged in the process, the feature is gone for good. We're talking permanently disabled. There’s no software trick to fix it; the only way to get it back is a costly repair directly from Apple. This step requires your full attention and a very steady hand.
People often ask if a DIY repair is actually cheaper. In Australia, the cost for a pro to do it varies. You might pay around $79 AUD for an older model like an iPhone 7, while a newer iPhone 13 Pro could be closer to $199 AUD. In most cases, this is a whole lot cheaper than buying a new phone. You can find more details about iPhone repair costs in Australia.
What if the New Screen Just Doesn't Turn On?
First off, don't panic. If you’ve put your phone back together and you're getting a black screen or no touch response, the most common issue is simply a loose connection.
Power the phone down completely, disconnect the battery again, and then very carefully reseat the display cables. You should feel a tiny but distinct "click" when they're seated properly. If that doesn't solve it, you might have a faulty part, which is exactly why it’s so important to buy your screen from a trusted supplier that offers a solid warranty.
If doing it yourself feels a bit too daunting, or if you've run into trouble, the expert team at Screen Fixed Brisbane is ready to step in. We handle fast, reliable, and professional iPhone screen replacements using top-quality parts, and we back all our work with a warranty for your peace of mind.
Book your repair with Screen Fixed Brisbane today
Disclaimer: iPhone, Apple, Face ID, and Touch ID are trademarks of Apple Inc., registered in the U.S. and other countries. Screen Fixed is an independent repair service provider and is not affiliated with Apple Inc.