
Meta Title: Fix an iPhone Charger Port | Quick DIY & Pro Tips Brisbane
Meta Description: Is your iPhone not charging? Learn how to fix an iPhone charger port with our easy DIY guide. Clean lint, troubleshoot, and know when to call for a repair.
When your iPhone stops charging, that initial wave of panic is completely understandable. But before you start picturing a hefty repair bill, it's worth knowing that most charging issues aren't a sign of a major hardware failure. More often than not, the culprit is something simple you can fix yourself.
The key is to work through the most common suspects first: the charging cable, the wall adapter, and even the power socket itself. A few quick checks and a simple restart can often get you back up and running without any need for tools or professional repairs. This guide will walk you through the exact steps to diagnose and fix your iPhone charger port.
Getting to the Root of the Charging Problem
That moment of dread when you plug in your phone and the charging icon doesn't appear is a feeling we all know. Your mind might jump straight to a broken charging port, but in our experience, that's rarely the case. It’s usually something far less dramatic that you can sort out in minutes.
Think of it like being a detective. You always check the easy stuff first. Let’s start with the most obvious accessories involved in getting power to your phone.
Is It Your Cable or Adapter?
Your charging cable and wall adapter go through a lot. They get bent, twisted, stepped on, and crammed into bags day after day. This constant stress can cause tiny breaks in the internal wires, even if the outside looks perfectly fine. The same goes for wall adapters—they can fail internally without any visible signs of damage.
The fastest way to rule them out is a quick swap test. Grab a different Lightning or USB-C cable that you know works and try it with your current wall adapter. Still nothing? Now try your original cable with a different, known-good adapter. This simple process of elimination will tell you right away if an accessory is the weak link.
For a deeper dive into why your phone might be on a charging strike, our guide offers some extra troubleshooting tips.
To help you quickly rule out these common issues, here's a simple checklist to work through.
Initial Charging Problem Checklist
| Symptom | Potential Cause | Quick Fix to Try |
|---|---|---|
| No charging at all | Faulty cable or adapter | Test with a known-working cable and adapter. |
| Intermittent charging | Damaged cable or port debris | Try a different cable; inspect the port for lint. |
| "Accessory Not Supported" | Non-certified or damaged cable | Use an MFi-certified cable or an official one. |
| Slow charging | Low-wattage adapter or bad cable | Use the correct wattage adapter; try another cable. |
This table covers the most frequent problems we see. If you've tried these fixes and are still stuck, it's time to check the power source itself.
Checking Your Power Source
Sometimes, the problem isn't your iPhone or its accessories at all. A dodgy wall socket or a dead USB port on your computer can be the real villain. Before you go any further, just plug your charger into a completely different power outlet, preferably in another room.
If you’re charging from a laptop or a power bank, try a different USB port or switch over to a wall outlet instead. If your iPhone suddenly springs to life, you’ve found the cause, and it has nothing to do with your device. It’s a crucial step that can save you a lot of unnecessary stress.
The Simple Power of a Restart
Never, ever underestimate a good old-fashioned restart. Your iPhone's software is incredibly complex, and just like any computer, it can get stuck with minor glitches. These little software bugs can sometimes interfere with basic functions, like recognising when a charger is plugged in.
A quick restart clears out the phone's temporary memory and often resolves these pesky software conflicts. It’s a zero-risk step that takes less than a minute but can instantly fix the problem. If a normal restart doesn't do the trick, a force restart is your next best bet.
By methodically testing your cable, adapter, and power source first, you can confidently rule out over 50% of common charging issues. This diagnostic discipline ensures you don't waste time trying to fix a port that isn't broken.
Once you’ve worked through these initial checks, you’ll have a much clearer picture. If your iPhone still refuses to charge, it’s finally time to suspect the charging port itself and move on to inspecting it for debris.
How to Safely Clean Your Charging Port
Okay, so you've confirmed your cable and power brick are working fine. The next place to look is the charging port itself. Over time, an iPhone's Lightning or USB-C port becomes a magnet for pocket lint, dust, and all sorts of other gunk. Honestly, this compacted debris is the number one reason we see for charging failures.
When the connection between your cable and the internal pins is blocked, your iPhone simply can't get any juice. The good news? Cleaning it out is often all it takes to fix the problem. But this is a delicate operation – rushing in with the wrong tool can quickly turn a simple fix into a permanent headache.
Gathering the Right Tools for the Job
Before you even think about poking around in there, it's vital to grab tools that won't fry the sensitive electronics inside. Our golden rule is to never use anything metallic or conductive. A metal paperclip or pin is a recipe for disaster. It can easily short-circuit the connections and cause irreversible damage to the logic board.
Instead, let's stick to much safer, non-conductive options.
- A Wooden Toothpick: This is our personal go-to. It's thin enough to get inside the port but soft enough that it won't scratch or wreck the delicate contact pins.
- A Can of Compressed Air: Perfect for blowing out any loose dust you've dislodged. Just make sure to use it in short, controlled bursts to avoid forcing any moisture deep inside the phone.
- A Small, Dry, Soft-Bristled Brush: An old, clean toothbrush or a proper anti-static brush can also work wonders for coaxing out stubborn bits of grime.
Whatever you do, don't use your own breath to blow into the port. The moisture can lead to corrosion down the line. Sticking with these simple tools is the best way to clean the port effectively without putting your phone at risk.
The Gentle Cleaning Technique
With your tools at the ready, find a spot with good lighting. Using a torch or another phone's flashlight will help you see exactly what you're up against inside that tiny port.
First things first, power your iPhone completely off. This is a non-negotiable safety step to prevent any potential short circuits while you're working.
Once it's off, take your wooden toothpick and gently insert it into the charging port. Carefully scrape along the inside walls, moving from one side to the other. You're not trying to jab at the pins; the goal is to hook the debris and pull it out. Think of it like scooping the lint out, not pushing it further in. Be patient and take your time. You'll probably be shocked at how much fluff can come out of such a small space.
After you've dislodged the main clump of debris, a few short bursts of compressed air can clear out any remaining dust.
Pro Tip: When you're cleaning, focus your efforts on the 'floor' and 'ceiling' of the port cavity. The delicate charging pins are on that thin central strip, so avoid putting any direct pressure on it. Gently work around it to dislodge the gunk.
Once you’re confident the port is clear, power your iPhone back on and try charging it again. More often than not, you’ll see that satisfying charging icon pop up immediately, confirming a successful fix.
This whole troubleshooting flow—checking your accessories, doing a restart, and then cleaning the port—is the standard process. As this diagram shows, cleaning is what you do after ruling out the simpler stuff.
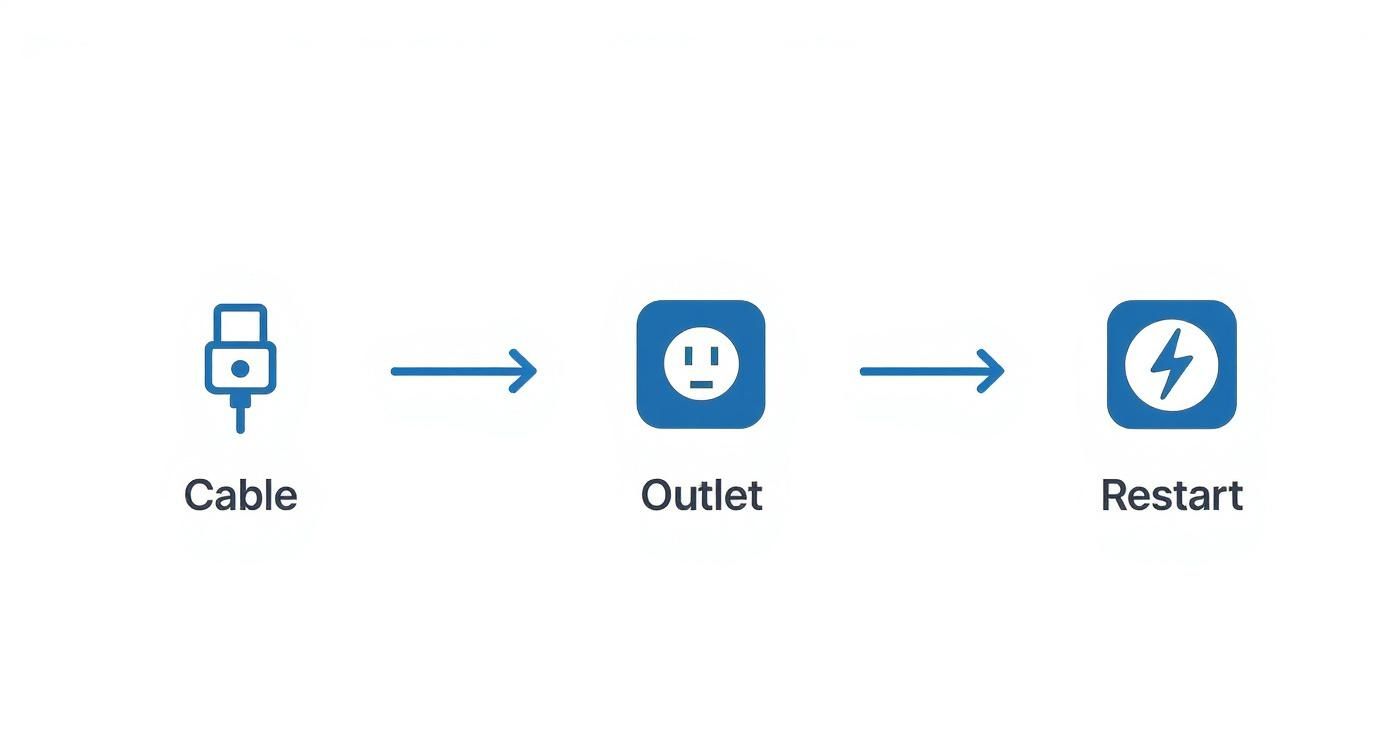
Alt text: Diagram of iPhone charging troubleshooting: check cable, check power outlet, then restart phone.
Caption: This process highlights that physical cleaning is typically addressed after ruling out simpler issues like faulty accessories or power sources.
What if Cleaning Doesn't Work?
If a thorough clean-out doesn't do the trick, it could point to a more serious issue like internal damage or corrosion. It's worth knowing that here in Australia, this is less common than you might think. Data from local service providers shows that a professional clean actually resolves approximately 90-95% of all charging port issues.
A full port replacement is usually only needed in that last 5-10% of cases where there's visible damage to the internal pins or moisture has caused corrosion.
If your phone still isn’t charging, resist the urge to get more aggressive. Repeatedly jamming the cable in or using force will only make things worse. At this point, it's time to consider getting some professional help, which our experts at Screen Fixed Brisbane are always ready to provide.
Going Deeper: Advanced Steps for Stubborn Charging Issues
So, you’ve meticulously cleaned the port and double-checked that your cables and chargers are all in working order, but your iPhone is still playing dead. This is where we need to graduate from the simple fixes and start investigating the more persistent, underlying problems.
It's time to consider two of the more serious culprits: physical damage inside the port and complex software glitches. When cleaning doesn't do the trick, the next logical step is to hunt for signs of damage that go beyond just pocket lint. We're talking about corrosion or electrical faults, which demand a much more careful eye.
Spotting Moisture Damage and Corrosion
Moisture is the absolute nemesis of electronics. It doesn't take a full dunk in the pool; even a little bit of liquid sneaking into the charging port can kick off a corrosive process that eats away at the delicate metal contacts needed to transfer power. This is a super common issue if you live in a humid climate or have just been unlucky enough to get caught in the rain with your phone.
Grab your torch again. You'll need to shine it directly into the port and get a really close look at the tiny, golden pins sitting on that central strip.
- Look for Discolouration: Healthy pins should have a clean, uniform gold colour. If you spot any green, white, or even blackish gunk on them, that’s the tell-tale sign of corrosion.
- Check for a Chalky Texture: Corrosion often leaves behind a powdery or chalky residue on the contacts, which is more than enough to block a solid connection.
- Inspect for Pitting or Breakage: In really bad cases, the pins might look pitted, bent out of shape, or even snapped off completely.
If you see any of these red flags, stop right there. Don't try to scrape the corrosion off. You can easily break the pins, turning a potentially repairable problem into a much more expensive one. This is a clear signal that it's time to let a professional take over.
When Software is the Real Problem
It’s natural to assume all charging problems are hardware-based, but every now and then, the issue lies deep within your iPhone's operating system. A rare but stubborn software bug can stop your device from recognising that it’s plugged into a power source. This can sometimes pop up after a dodgy software update or if a critical system file gets corrupted.
When a simple restart—or even a force restart—doesn’t fix it, the most powerful software solution is a Device Firmware Update (DFU) restore. Think of it as the nuclear option; it’s a much deeper reset than a standard factory restore because it reloads both the software and the firmware of your iPhone from the ground up.
Warning: A DFU restore is a last-resort measure for technically confident users. It will completely wipe every bit of data from your device. If it goes wrong, you could potentially brick your phone. Always, always have a recent backup before you even think about trying this.
A DFU restore is only something you should attempt if you're comfortable with advanced troubleshooting and have completely ruled out every possible hardware issue. For most people, if you've reached this point, it’s safer and far more efficient to get an expert opinion.
Distinguishing between a physical fault and a deep software glitch can be tough. A technician has the diagnostic tools to pinpoint the real cause. If you're technically inclined and still suspect a hardware fault, you can learn more about how to test continuity with a multimeter to check for electrical issues. For the average user, though, this is where professional diagnostics become invaluable.
Knowing When To Get Professional Help
There’s a fine line between a successful DIY fix and a costly, irreversible mistake. While cleaning out pocket lint is often all it takes, there comes a point where pushing on with a home repair is far riskier than calling in an expert.
Knowing the signs that it’s time to hand your phone over to a professional is the smartest call you can make for your device's long-term health. If you've run through all the troubleshooting—different cables, power sources, a gentle clean, and a restart—but your iPhone is still a paperweight, the problem is likely internal. This is especially true if a computer won't even recognise the device when you plug it in.

Alt text: A gloved hand using a magnifying glass to inspect an iPhone logic board, symbolising professional iPhone repairs Brisbane.
Caption: A professional technician carefully inspecting an iPhone 13 logic board in Brisbane.
Clear Signs of Permanent Damage
Certain symptoms are non-negotiable red flags. If you spot any of the following, it’s best to step away from the tools and let a technician take a look.
- Bent or Broken Internal Pins: A close look inside the port might reveal that the delicate contact pins are visibly bent, broken, or missing. This kind of physical damage is impossible to fix without specialised tools and a replacement part.
- Visible Scorch Marks or a Burning Smell: Any sign of burning, like black marks around the port or a distinct electrical smell, points to a serious short circuit. Don't even think about trying to charge a device in this state—it's a massive safety hazard.
- A Loose or Wobbly Port: If your charging cable feels wobbly and loose even after you've cleaned the port, the internal housing itself might be broken. This physical failure requires a full replacement of the charging port assembly.
Trying to tackle these issues at home is just asking for trouble.
The Risks of DIY Port Replacement
It might seem tempting to order a replacement part online and attempt the fix yourself. But be warned: this is one of the most intricate repairs you can attempt on an iPhone. The charging port is soldered to a delicate flex cable that weaves through the phone’s internals and connects directly to the logic board—your iPhone's brain.
A single slip of a tool during a DIY replacement can sever a crucial flex cable or, even worse, damage the logic board itself. This can turn a simple charging issue into a completely dead device, making a professional repair far more expensive or even impossible.
Technicians have the micro-soldering skills, specialised equipment, and experience to perform this repair safely. Unless you are a seasoned electronics repair hobbyist, the risk just isn’t worth the potential savings. Sourcing a quality part is another challenge; many online sellers offer low-grade components that fail quickly. Getting a reliable iPhone XR charger port replacement part, for instance, means going through a trusted supplier with proper quality control.
Professional Repair Is Faster and More Affordable Than You Think
Before you write off your device or start budgeting for a new one, it's worth seeing what a professional fix actually involves. Here in Australia, the timeline for sorting out charging issues is surprisingly quick. Most repairs at independent shops are done within 15 minutes to two hours, often on a walk-in basis.
A professional deep clean, which solves the vast majority of problems, is significantly cheaper than the alternatives offered by official brand service centres. Choosing a professional repair isn't just about getting your phone back faster. It's a cost-effective and sustainable choice that saves you hundreds compared to buying a new device and keeps another piece of e-waste out of landfill. When your DIY efforts hit a wall, professional help is the safest, fastest, and smartest way forward.
How to Stop Your Charging Port From Breaking Again
Alright, so your iPhone is charging properly again. Fantastic. Let's keep it that way. The secret to avoiding this headache in the future isn't some complex maintenance schedule; it's just about building a few simple, smart habits to minimise wear and tear.
Putting a little bit of care into how you handle your phone day-to-day can massively extend the life of your charging port. Think of it as a few seconds of prevention now to save you the cost and frustration of another repair down the line.
Alt text: White iPhone SE charging on a wooden surface, showing proper charging habits to protect the port.
Caption: An iPhone 12 charging correctly on a flat, stable surface.
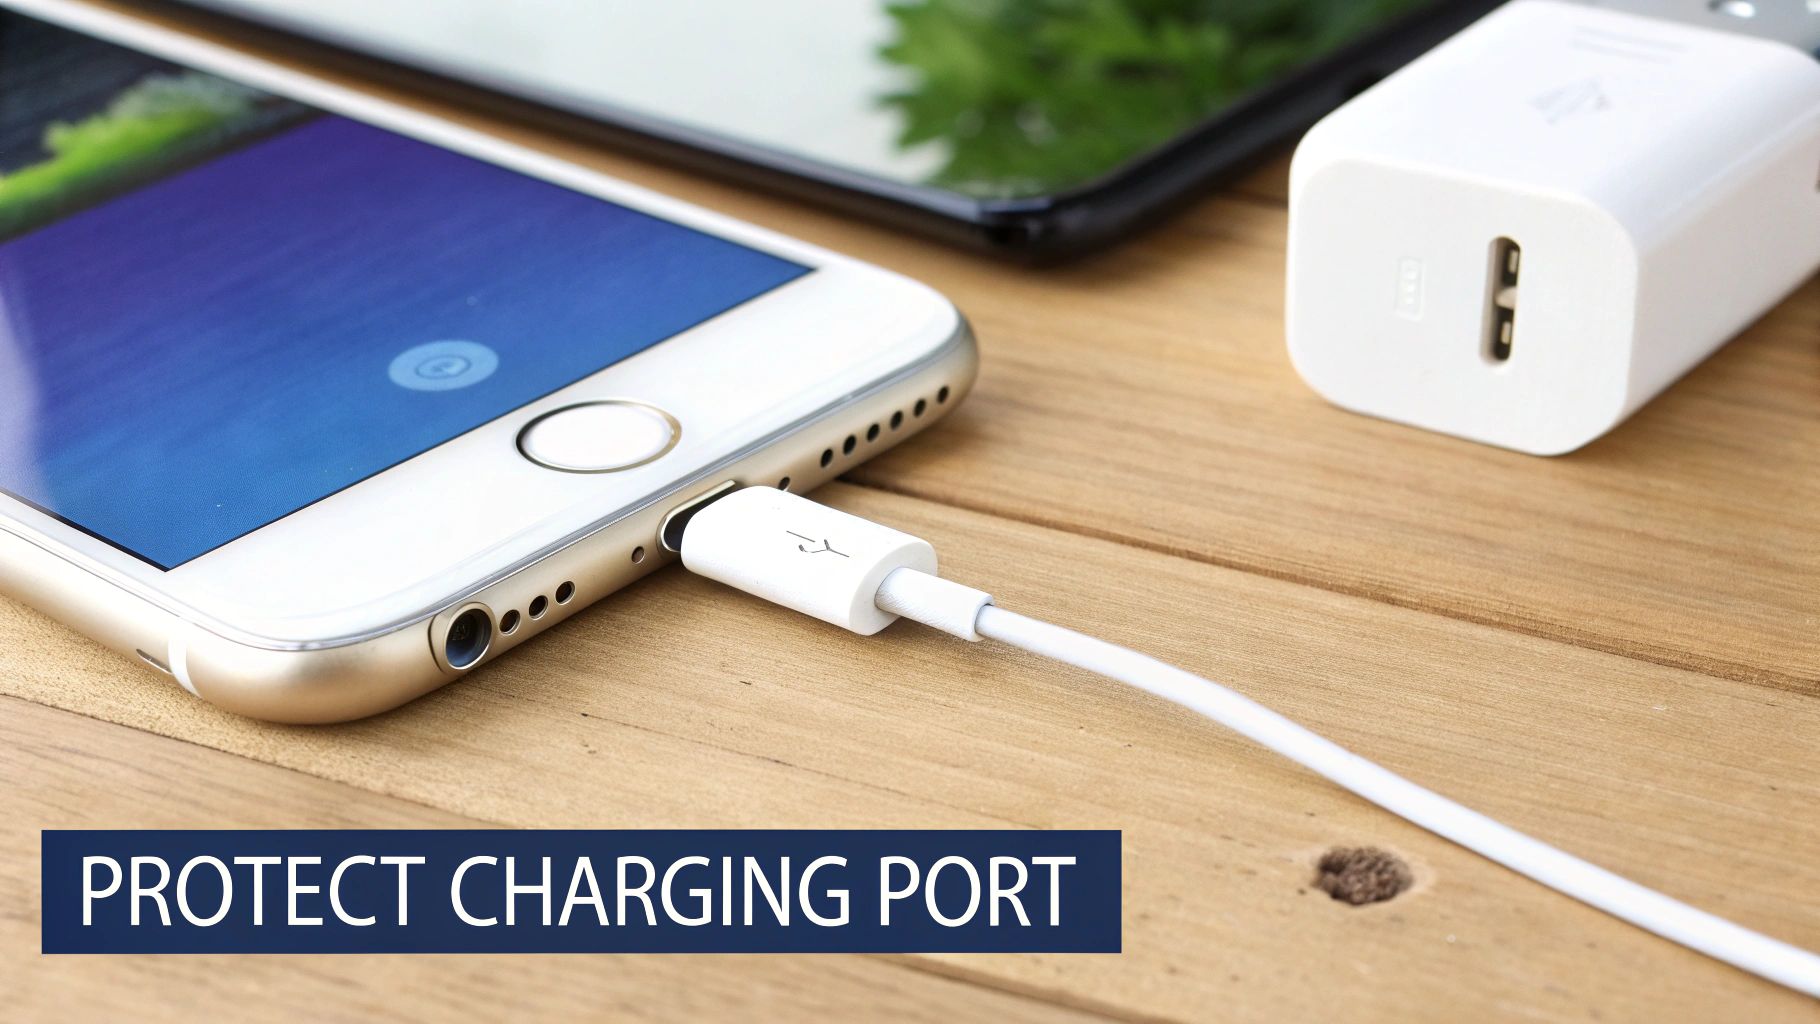
Ditch the Rough Cable Habits
Every single time you plug in your iPhone, you're putting mechanical stress on the charging port. It's designed for it, of course, but rough handling will eventually wreck the delicate internal pins. The trick is to just be a bit more mindful.
When you plug it in, guide the connector straight into the port. Don't jam it in at an angle. To unplug, grab the hard plastic part of the connector—not the cable itself—and pull it straight out. Yanking the cable on an angle is probably the biggest cause of physical port damage we see.
We see this all the time: people letting their phone dangle by the charging cable. This puts a huge amount of strain on both the cable's connector and the port, which almost always leads to a wobbly, unreliable connection over time. Always rest your phone on a solid surface while it charges.
Keep It Clean, Keep It Protected
As you've probably figured out by now, pocket lint is the number one enemy of a happy charging port. Getting into the habit of a quick, gentle clean can stop that gunk from building up and causing problems in the first place.
Maybe once a month, just power down your iPhone and use a wooden toothpick or a soft, dry brush to carefully fish out any fluff you can see. It's a two-minute job that makes a world of difference.
If you work in a dusty place—think construction sites or workshops—a cheap accessory can be a lifesaver.
- Port Plugs: These are tiny silicone plugs that fit right into the port, creating a physical seal against dust, dirt, and even moisture when you're not charging. They're incredibly cheap and incredibly effective.
- Smart Case Choices: When you're buying a new case, keep an eye out for designs that have a built-in flap or cover for the charging port. It gives you the same protection without needing a separate plug.
Use Quality Gear and Keep It Dry
Those cheap, uncertified cables you see at the petrol station can do more harm than good. MFi (Made for iPhone) certified accessories are built to meet Apple's own performance and safety standards. This means they provide a stable current and won't fry your port's sensitive electronics. It really is worth spending a few extra dollars on good cables from brands you trust.
Just as important is keeping your phone away from moisture. Newer iPhones have decent water resistance, but the charging port is still a weak spot.
Don't charge your phone in steamy environments, like in the bathroom while you're having a shower. And if your phone ever does get wet, never, ever plug it in until you are 100% certain the port is bone dry. Moisture trapped inside will cause corrosion, and that's a one-way ticket to a dead port. If you're looking for recommendations on quality USB-C gear that's built to last, you can see what the experts suggest from brands like Anker and Logitech.
By working these simple habits into your routine, you'll dramatically lower the chances of running into charging problems again. But if you do get into a jam, remember that expert help is always just around the corner. Book your repair with Screen Fixed Brisbane today for a fast, reliable fix.
Disclaimer: iPhone and Lightning are trademarks of Apple Inc., registered in the U.S. and other countries. Screen Fixed is an independent repair service and is not affiliated with Apple Inc.
Your iPhone Charging Port Questions Answered
Even after trying all the cleaning and troubleshooting steps, it's completely normal to have a few questions rattling around. To help you feel confident about what to do next, we’ve tackled some of the most common queries we hear from customers about their iPhone charger ports.
Can I Use a Paperclip to Clean My iPhone Port?
Please, don't. This is one of the most common and dangerous DIY mistakes you can make. Poking around inside your charging port with a metal object like a paperclip, a safety pin, or even a SIM ejector tool is asking for trouble.
Metal is conductive. One wrong move and you could easily cause a short circuit, which can permanently damage the delicate charging pins inside. In a worst-case scenario, you could even fry a critical component on the logic board, turning a simple fix into a major repair.
Always stick to non-conductive tools. A wooden or plastic toothpick, a small, dry brush (like an unused toothbrush), or short, controlled bursts of compressed air are your best and safest bets.
Is My Battery Failing or Is It the Charging Port?
This is a classic case of mistaken identity. It's incredibly easy to confuse a faulty battery with a dodgy charging port because the symptoms can look very similar at first glance. But there are a few key differences that usually give the game away.
A charging port issue is almost always a connection problem. The cable might feel wobbly or loose, you might have to jiggle it just right to get it to charge, or your phone might not even recognise that a charger is plugged in.
A dying battery, on the other hand, usually still connects and shows that it's charging—it just does it very poorly. The tell-tale signs are:
- Charging takes forever, way longer than it used to.
- The battery percentage plummets shortly after you unplug it.
- Your iPhone shuts down out of nowhere, especially when the battery level is low (like 20-30%).
Since a dirty or damaged port is a much easier and more common issue, it always makes sense to rule that out first before jumping to conclusions about the battery.
Why Does My iPhone Say “This Accessory Is Not Supported”?
Ah, the dreaded "Accessory Not Supported" error. While it’s frustrating, it's actually a really useful clue. While this message can pop up if you’re using a cheap, non-certified charging cable, it’s often triggered by simple dirt and debris inside the charging port.
Your iPhone has a set of data pins inside the port that need to "talk" to the cable to verify it's a safe, certified accessory. If pocket lint, dust, or other gunk is blocking those specific pins, your phone can't complete that digital handshake. As a safety measure, it throws up the error and refuses to charge.
So, before you bin your cable, give the port a thorough but gentle clean. Then, try again with an official Apple cable or a well-known MFi-certified one to see if the error is gone.
Is It Cheaper to Fix the Port or Buy a New iPhone?
Fixing the charging port is almost always the smarter, more economical choice. There's really no contest. A professional clean or even a full port replacement at a trusted shop like Screen Fixed Brisbane will only set you back a tiny fraction of what a brand-new iPhone costs.
Choosing to repair isn't just a win for your wallet; it's a massive win for the environment, too. Every single device that gets repaired instead of replaced helps cut down on e-waste, which is one of the fastest-growing waste problems on the planet. Fixing your iPhone's charger port is a smart, sustainable decision all around.
If you’ve tried all the DIY tricks and your iPhone still refuses to charge, don't keep poking around and risk making things worse. The expert technicians at Screen Fixed have the right tools and years of experience to diagnose and fix the problem safely and efficiently.
Book your professional iPhone repair with Screen Fixed Brisbane today.