
Meta Title: How to Repair Phone Screen: A Complete DIY Guide
Meta Description: Learn how to repair your phone screen with our step-by-step DIY guide. We cover the tools, parts, and process for a successful screen replacement.
We’ve all felt it. That heart-stopping moment your phone escapes your grip and smacks the pavement. If you're now staring at a spiderweb of cracks, your mind is probably racing, weighing up the cost and hassle of getting it fixed. A DIY phone screen repair can look like the perfect budget-friendly fix, but it's crucial to understand the real risks before you start prying your device open. This guide will walk you through the problem, explain the solution, and help you decide if a DIY repair is right for you.
Should You DIY Your Phone Screen Repair?
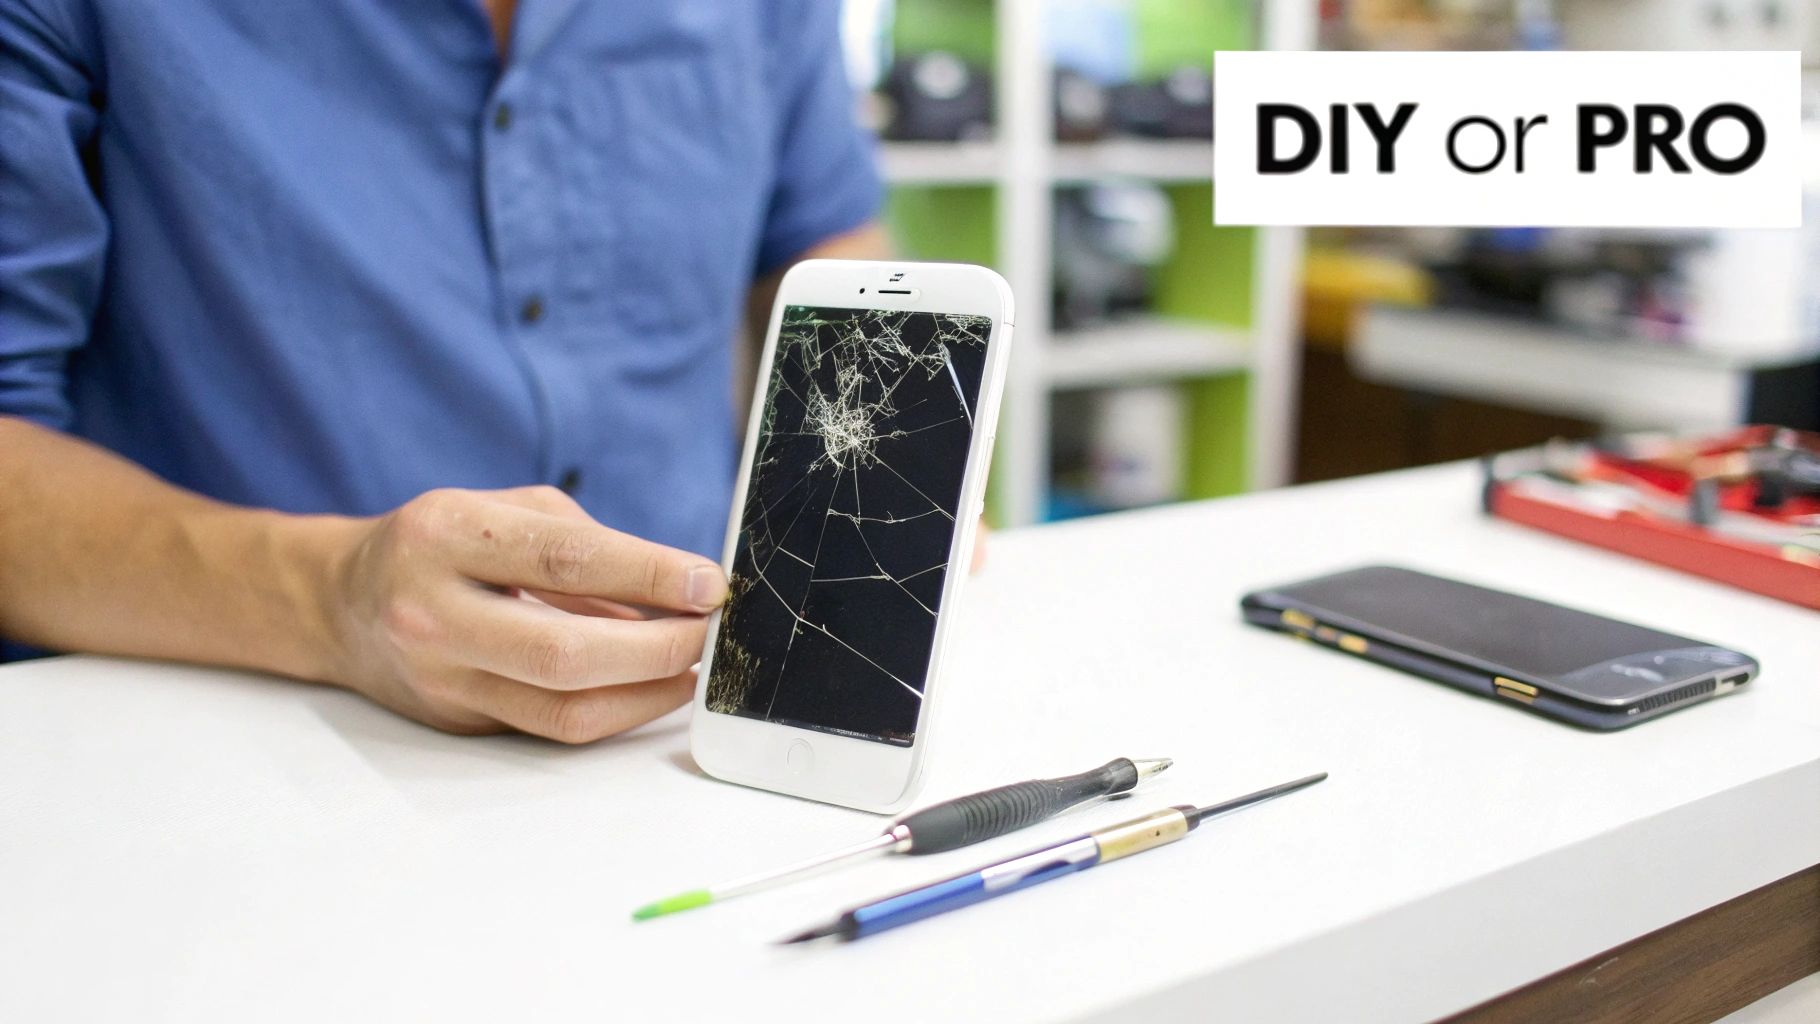
Alt text: A person holding a damaged smartphone next to a set of phone repair tools.
Caption: iPhone 14 Pro screen replacement in Brisbane.
Fixing your own phone is a tempting thought. You save a good chunk of money and get a solid sense of accomplishment. For plenty of people, it’s a totally viable option, but your success really hinges on your technical confidence, the specific phone you're working with, and whether you're prepared for things to go wrong. It’s a job that demands patience, a steady hand, and the right gear.
Don't underestimate the complexity of modern smartphones. What seems like a simple screen swap can quickly turn into a delicate operation involving microscopic screws, paper-thin ribbon cables, and sensitive components that are shockingly easy to damage. This is why knowing how to repair phone screen damage yourself is about more than just watching a quick video tutorial.
The Realities Of A DIY Approach
Going the DIY route is a completely different ball game depending on your device. Swapping out the screen on an older iPhone with a basic LCD panel is miles away from replacing a curved OLED display on a new flagship Samsung. The newer, fancier models often require specialised adhesives and recalibration tools that you definitely won't find in a standard repair kit.
It's also worth thinking about whether you can realistically repair a second-hand iPhone yourself, as older models can throw you curveballs like brittle plastic clips or adhesive that’s turned to concrete over the years.
The potential for disaster is very real. One misplaced screw can puncture the battery (a serious fire hazard), and a tiny tear in a flex cable could permanently disable features like Face ID. This is where your initial savings can vanish in an instant, leaving you with a much more expensive professional repair bill or, even worse, a dead phone.
DIY Repair vs Professional Service: A Quick Comparison
When you're trying to decide, it helps to see the trade-offs side-by-side. Here’s a quick breakdown of what to expect from each path.
| Factor | DIY Repair | Professional Repair (e.g., Screen Fixed) |
|---|---|---|
| Upfront Cost | Lower. You only pay for parts and tools. | Higher. You pay for parts, labour, and expertise. |
| Risk | High. You are 100% responsible for any further damage. | None. The shop assumes all risk during the repair. |
| Time | Can take several hours, especially for your first time. | Fast. Often completed in under an hour. |
| Parts Quality | Varies wildly. Sourcing reliable parts can be tricky. | Guaranteed. Pros use high-quality, tested parts. |
| Warranty | None. If the part fails, you're on your own. | Yes. Reputable shops offer a warranty on parts and labour. |
| Tools | You'll need to buy a specific tool kit. | No need to buy any tools. |
Ultimately, the right choice comes down to balancing cost against security. While a DIY repair might save you money upfront, a professional service buys you peace of mind, a warranty, and the assurance of a job done right.
A cracked screen isn't just a personal headache; it's a massive issue across Australia. In fact, screen damage is the single most common type of smartphone mishap, showing just how often these accidents happen to all of us.
The numbers are pretty staggering. A recent survey revealed that one in ten Aussies have broken a device beyond repair in the last five years alone. That adds up to over 2.5 million smartphones destroyed—or about 1,370 devices meeting their end every single day.
So, what's the final verdict? It all boils down to your personal comfort level. Are you confident you can tackle a delicate technical task, or do you prefer the guaranteed outcome of a professional service? If you're still on the fence, check out our guide on how to find affordable phone screen repair services near you for more help making the call.
Diagnosing the Damage and Sourcing Quality Parts

Alt text: A close-up of a finger touching a smartphone with a severely cracked screen.
Before you even think about ordering parts or reaching for a screwdriver, you need to play detective. A spiderweb of cracked glass is obvious, but the real issues often hide underneath. Knowing precisely what's broken is the difference between a successful fix and a wasted afternoon.
Take a minute to properly inspect your phone. Power it on and look for any gremlins beyond the physical cracks. Getting the diagnosis right is the foundation for a successful screen repair.
Is It Just the Glass or the Whole Display?
This is where most DIY-ers get stuck: figuring out if it's just the top layer of glass that's broken or the entire screen assembly. Modern phone screens are a fused stack of different layers, and separating them is a job for specialised factory equipment, not a home toolkit.
Here’s a quick checklist to figure out what you're dealing with:
- Coloured Lines: Are there vertical or horizontal lines of bright colour streaking across the screen? That's a classic sign of a damaged OLED or LCD panel.
- Black Splotches: Inky black spots that look like a leak are a dead giveaway that the display itself is broken.
- Unresponsive Touch: If some parts of the screen don't respond to your finger anymore, the digitiser (the touch-sensitive layer) is faulty.
- Flickering or Dead Pixels: A screen that flickers, shows weird, distorted colours, or has tiny black dots points to damage in the display panel.
If you’re seeing any of these symptoms, you absolutely need to replace the entire screen assembly. This is a single unit that includes the glass, digitiser, and the display panel, all bonded together from the factory. Trying a "glass-only" repair at home on these devices is pretty much impossible and will almost certainly lead to more damage.
Sourcing a Quality Replacement Screen
Once you know what you need, the next hurdle is finding a reliable part. The market is flooded with replacement screens of wildly different quality, and picking the wrong one can mean poor performance and another repair bill in just a few months.
You’ll generally come across three main types of replacement screens, and it can be a bit of a minefield if you're new to this. For a more detailed look, check out our guide on the different types of replacement phone screens you can get.
Knowing what's out there helps you make a smart choice based on your budget and what you expect from your phone.
Remember this: The quality of your replacement screen directly impacts your phone’s performance. A cheap, low-quality screen can give you dull colours, poor touch response, and even drain your battery faster, completely changing how you use your phone every day.
Here’s a quick breakdown of what you’ll find online:
| Screen Type | Description | Key Takeaway |
|---|---|---|
| OEM / Service Pack | These are original parts made by or for the phone's manufacturer (e.g., Apple, Samsung). | The best quality, colour accuracy, and performance you can get, but they come at the highest price. |
| Premium Aftermarket | Made by third-party companies aiming to match original specs. The quality can be excellent. | A fantastic balance between cost and quality. Always look for reputable suppliers who test their stock. |
| Refurbished Original | An original screen where only the cracked glass has been professionally replaced, but the display underneath is genuine. | You can get OEM display quality for less money, but the quality of the refurbishment can be a bit hit-or-miss. |
| Budget Aftermarket | The cheapest option out there, often using lower-quality LCD panels even on phones that originally had OLEDs. | Prone to issues like bad brightness, incorrect colours, and high failure rates. We'd suggest you avoid these. |
When you're shopping around, always check seller reviews and look for a warranty. A good supplier will stand by their products. Be very cautious of anyone advertising "Original" parts at ridiculously low prices—they're almost always low-grade fakes. Investing a little more in a quality part from a trusted Australian supplier makes all the difference in getting your phone to look and feel new again.
Getting Your Toolkit Ready for a Successful Repair
Trying to fix a phone screen with the wrong tools is a recipe for disaster. Seriously. It’s like trying to perform surgery with a butter knife. Reaching for household items or that generic screwdriver set you have lying around is the fastest way to strip a tiny screw, fry a delicate component, or even crack your brand-new replacement screen before you've even installed it.
A successful repair always starts with a proper toolkit, one that’s actually designed for the intricate world of electronics. The right gear doesn’t just make the job easier; it actively prevents you from causing more damage. Trust us, investing in a few key items is non-negotiable if you want to learn how to do this properly.
The Absolute Essentials
Before you even think about starting, there are some core tools you absolutely must have on hand. These aren't just suggestions—they are the bare minimum for opening and working on a modern smartphone without breaking something else in the process.
Here’s a breakdown of the must-haves:
- Precision Screwdriver Kit: This is your most important purchase. Modern phones are held together with a variety of tiny, specialised screws. If you're working on an iPhone, a Pentalobe P2 driver is essential just to get the thing open. Your kit should also have Phillips #000, tri-point Y000, and flathead bits to handle all the different internal components you'll encounter.
- Plastic Spudgers and Opening Picks: Metal tools will gouge your phone’s frame and can easily wreck the fragile connectors on the logic board. Flexible plastic spudgers and thin, guitar-pick-style tools are your best friends here. They’re perfect for gently prying open the chassis and disconnecting ribbon cables without causing a short circuit.
- Suction Cup: Getting that initial separation between the screen and the frame is often the trickiest part of the whole job. A small, strong suction cup gives you the leverage you need to lift the display just enough to slide a plastic opening pick in, which is crucial on devices sealed with strong adhesive.
These three items are the foundation of any serious DIY repair kit. Without them, you're pretty much flying blind and risking very costly mistakes.
A common mistake we see all the time is people underestimating how stubborn modern adhesives are. Without a gentle heat source, you’ll probably use too much force. That’s the number one cause of cracked replacement screens and torn flex cables during an installation.
Tools for Tackling That Stubborn Adhesive
Manufacturers use incredibly strong adhesives to seal up phones, which helps with water resistance and structural integrity. Breaking this seal safely requires a specific approach, and brute force is definitely not the answer.
You’ll need a tool to soften the glue. A dedicated heat gun on a low setting is what the pros use. It allows you to apply controlled, even heat around the edges of the device, making the adhesive pliable and much easier to separate. Just be careful—too much heat can damage the battery or other sensitive parts.
For a more budget-friendly and safer alternative, a simple hairdryer on its highest setting can often get the job done. It provides less intense heat, which reduces the risk of accidentally overheating anything inside. Another great option is a heated gel pack (like an iOpener), which you can microwave and lay on the phone to provide gentle, consistent warmth.
To Kit or Not to Kit?
So, should you buy a complete repair kit or hunt down tools individually? For your first repair, a pre-assembled kit is almost always the smarter choice. It's more cost-effective and guarantees you have all the necessary driver bits and prying tools in one place. Reputable suppliers like Fixo offer comprehensive DIY kits that bundle quality parts with all the essential tools you’ll need.
However, if you find yourself enjoying this and plan on doing more repairs, you might want to invest in individual, higher-quality tools over time. A premium screwdriver set or a professional-grade heat gun can be a worthwhile upgrade down the line. But for a one-off screen replacement, a good-quality, all-in-one kit gives you the best value and sets you up for success. Whether you're tackling an iPhone repair in Brisbane or fixing a Samsung on the Gold Coast, having the right toolkit is your first step toward a perfect fix.
The Phone Screen Replacement Process
With your tools laid out, it's time to get into the repair itself. This is where patience and a steady hand are non-negotiable. Trying to rush these steps is the fastest way to cause more damage, so find a well-lit space, take a deep breath, and keep your components organised.
The exact procedure can change dramatically from one model to another. An iPhone 13, for example, opens from the front, meaning the entire display assembly lifts away from the main body. Many Samsung devices, like the Galaxy S22, are the complete opposite—you have to come in from the back, removing the rear glass panel before you can even see the screen connectors. This is why you must always follow a guide specific to your exact model.
Safely Opening Your Device
The first step is always, always the same: power down your phone completely. Don’t just let it go to sleep. A live current running through the motherboard while you're poking around inside is a recipe for disaster.
Once it's off, you can start dealing with the adhesive. Gently apply heat around the edges of the screen (for front-opening phones) or the back panel (for back-opening ones). A heat gun on its lowest setting or even a hairdryer will do the trick. The idea is just to soften the glue, not to cook the phone's insides. Keep the heat moving for a minute or two until the edge is warm to the touch.
Now, grab your suction cup. Press it firmly onto the glass near a heated edge and give it a gentle, steady pull to create a tiny gap. That's your entry point. Slide a thin plastic opening pick into this gap and carefully work it around the perimeter of the device, reheating the edges as you go to slice through the stubborn adhesive seal.
The moment you create that first gap is the most critical. Be patient and resist the urge to use force. A torn cable or a cracked frame can turn a simple screen swap into a much bigger problem.
Navigating the Internals with Care
Once the adhesive is cut, don't just yank the screen off. It's still connected to the motherboard by several incredibly fragile ribbon cables. Open the device slowly, like you're opening a book, and take a moment to identify where these cables are. On some iPhones, they’ll be on the right side, while many Androids have them near the top.
This infographic shows the basic flow of tools you'll be using to get inside.
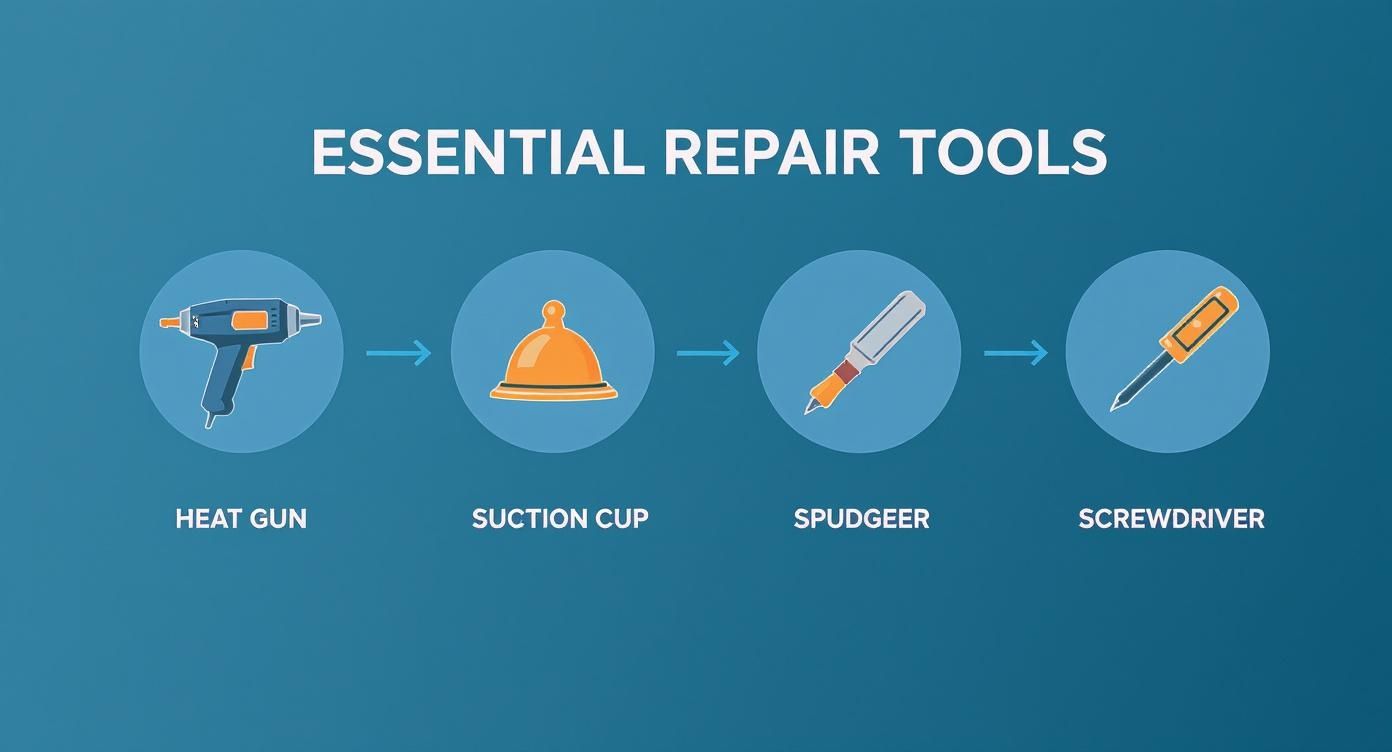
Alt text: A diagram of essential repair tools: heat gun, suction cup, spudger, and screwdriver.
This sequence—heat, lift, pry, and unscrew—is the fundamental method for getting into almost any modern smartphone without breaking it.
Before you touch anything else, your next step is to disconnect the battery. This kills any lingering power and prevents accidental shorts. You'll usually find the battery connector hidden under a small metal bracket held in by a couple of screws. Remove them, then use a plastic spudger to gently pop the connector straight up off the board.
Only with the battery safely disconnected should you move on to disconnecting the display cables and removing the old screen for good.
The Importance of Screw Management
This might sound trivial, but it's not. Keeping track of your screws is about more than just staying organised—it’s about protecting your phone from catastrophic damage. Smartphones use screws of varying lengths, and putting a long screw where a short one should be can literally puncture the layers of the motherboard, killing it instantly. It's a heartbreakingly common and expensive DIY mistake.
A magnetic mat or even a simple ice cube tray is perfect for this. Map out exactly where each screw came from so you can be certain it goes back into its original spot. This simple habit is one of the biggest things that separates a successful repair from a failed one.
It’s no surprise that the smartphone repair market in Australia has ballooned, with screen damage leading the charge. In fact, screen repairs and replacements make up about 40% of all smartphone repair jobs, the largest single category in the industry. You're definitely not alone in facing this problem, which is why services like iPhone Repairs Brisbane are so busy. You can learn more about the cost of phone repairs in Australia to see how a DIY job stacks up.
Special Considerations for iPhone Users
If you're working on an iPhone with Face ID (that's the iPhone X and newer), listen up. There is a critical component you cannot afford to mess up. The original earpiece speaker and sensor assembly at the top of your old screen is cryptographically paired to your phone's logic board.
You must carefully transfer this entire assembly from your old, broken screen to the new one. This involves removing a few tiny screws and gently prying the component away. If you damage this assembly or just use the one that might come with your new screen, Face ID will be permanently disabled. There is no software fix for this.
Putting It All Back Together: Sealing and Final Testing
You’ve got the phone open and the old screen off—that was half the battle. But don't get complacent, because putting it all back together properly is just as critical. This is where a lot of DIY repairs go wrong; rushing the reassembly can easily compromise the entire job and even damage the phone long-term.
The first thing on your list is reconnecting all the components you unplugged earlier. Each flex cable has a tiny, press-fit connector that should give a satisfying click when it seats correctly on the motherboard. Whatever you do, never force these connectors. If it doesn’t feel right, gently lift it and try again. A misaligned connector can bend the pins, and that often means a permanent failure for that part.
Securing Components and Applying New Adhesive
With all the cables back in place, it’s time to reinstall any brackets or shields you removed. This is where that screw management system you set up earlier really pays off. Carefully return every single screw to its original location to avoid accidentally piercing the battery or cracking the motherboard.
Once everything inside is secure, turn your attention to the frame's adhesive. The old, stretched-out adhesive gasket is useless now and needs to be completely removed. Use a plastic spudger and a bit of isopropyl alcohol to meticulously scrape away any gunk left on the phone's frame. You need a perfectly clean surface for the new seal to bond correctly.
Using a fresh, pre-cut adhesive gasket is non-negotiable if you want to restore any level of the phone's original water and dust resistance. This isn't just about waterproofing, either. A proper seal keeps annoying dust specks out of your camera lenses and prevents the screen from lifting up at the edges over time. For some more detailed techniques, you can check out our guide on using double-sided tape adhesive for phone repairs.
A strong, well-applied seal does more than just hold your phone together. It provides structural rigidity and is the first line of defence against environmental contaminants that can kill your device. Skipping this step is a shortcut you'll definitely regret.
It’s no surprise that more and more Australians are opting for professional repairs to ensure these critical steps are handled correctly. The global smartphone repair market is valued at around USD 20.98 billion, and Australia makes up a significant chunk of that thanks to high smartphone ownership. This trend is also fuelled by a growing environmental conscience, as people choose to extend their device's life instead of replacing it.
The All-Important Final Test
Okay, your phone is sealed up and powered on, but you're not done yet. A thorough final test is essential to make sure every single function works as it should. Don't just check if the screen lights up; run through a complete checklist to catch any issues before you start relying on the device again.
Post-Repair Testing Checklist
- Touch Sensitivity: Open a notes app and tap every letter on the keyboard. Then, press and hold an app icon and drag it all over the screen. You're looking for any dead spots or areas where it lags or jumps unexpectedly.
- Brightness and Colour: Slide the brightness control from the absolute minimum to the maximum. Pull up a few colourful photos to check for any discolouration, weird tints, or dead pixels.
- Proximity Sensor: This one's easy. Make a phone call and hold the device up to your ear. The screen should immediately turn off. If it stays on, the sensor might be blocked or misaligned.
- Cameras: Test both the front and rear cameras. Snap a few photos and record a quick video, then check the results for any dust specks, blurriness, or focusing problems.
- Face ID / Fingerprint Sensor: If your phone has biometric security, make sure it unlocks correctly and reliably.
If it passes this final check, congratulations—your DIY screen repair was a success! If you've run into an issue, don't panic. Sometimes a simple reboot or re-seating a cable that didn't quite click in is all it takes. But if the problem persists, it might be time to call in the experts.
Common Questions About Phone Screen Repair
Even with the best guide in hand, it’s completely normal for a few questions to pop up, especially if this is your first time cracking open a phone. Things don't always go exactly to plan.
To help you through those moments, we've gathered the most common questions we hear from the DIY community. Think of this as your quick-fire troubleshooting guide to prevent a small hiccup from turning into a full-blown repair nightmare.
What if My New Screen Isn't Working at All?
First off, don't panic! More often than not, a "dead" screen is just the result of a connection that isn't fully seated. It’s a super common mistake.
Power the phone down completely. Disconnect the battery (this is a crucial safety step), and then carefully unplug and reconnect the display flex cables. You're listening and feeling for a satisfying little click that tells you the connector is securely locked in. A partially seated cable won't work.
If it’s still no-go, you might have a faulty part. This is exactly why buying from a reputable supplier who offers a solid warranty is so important. A good seller will walk you through troubleshooting or simply send a replacement if the screen is defective.
Why Is My Touch Screen Acting Strange?
"Ghost touch"—where the screen seems to have a mind of its own—or patches of unresponsiveness almost always point back to the connectors. A slightly misaligned flex cable can cause all sorts of bizarre behaviour from the digitiser.
Your first move should always be to re-seat those cables. If that doesn't fix it, the issue might be pressure. A screw that's been overtightened or a small metal bracket pinching a cable can wreak havoc on the digitiser's function. Go back and double-check that everything is sitting flush and secured, but not cranked down with excessive force.
Pro Tip: Always perform a "dry test" before you apply any new adhesive. Connect the new screen and battery, power the phone on, and check everything—touch response, display quality, camera, etc. This simple check saves you the massive headache of having to pry open a freshly sealed device.
Will I Lose My Phone's Water Resistance?
The short answer is yes, you'll compromise it. The moment you break that original factory seal, the phone's water resistance is gone.
While using a new, high-quality adhesive gasket helps restore a good level of protection against dust and minor splashes, you should never treat your repaired phone as waterproof again. Avoid taking it anywhere near water. That new seal is a decent safeguard, but it's no match for the precise, machine-applied seal from the factory. A professional service from Screen Fixed Brisbane uses specialised presses and premium adhesives to get as close as possible to that original finish.
Knowing how to repair phone screen issues yourself is incredibly empowering, but sometimes a problem is bigger than a simple fix. If you've run through these steps and are still stuck, don't risk causing more damage. If your DIY attempt hasn't gone to plan or you'd rather leave it to the professionals, we're here to help.
Book your repair with Screen Fixed Brisbane today.
Disclaimer: All third-party trademarks (including logos and icons) referenced by Screen Fixed remain the property of their respective owners. Unless specifically identified as such, Screen Fixed’s use of third-party trademarks does not indicate any relationship, sponsorship, or endorsement between Screen Fixed and the owners of these trademarks.