
meta_title: Replacing MacBook Pro Screen | Expert Guide AU
meta_description: Cracked your MacBook Pro screen? Our guide covers DIY vs professional repair options, costs in Australia, and troubleshooting tips for a successful replacement.
That horrible crunching sound, followed by the sight of a shattered MacBook Pro screen, is enough to make anyone’s stomach drop. The first thought is almost always about the cost and hassle of getting it fixed. The good news? You’ve got a few solid options, and figuring out which one is right for you is the first step to getting your Mac back in action.
Your MacBook Pro Screen Is Broken. Now What?
Seeing that spiderweb of cracks across your beautiful Retina display immediately brings a flood of questions. How much is this going to set me back? How long will I be without my laptop? Is it even worth fixing, or should I just bite the bullet and buy a new one?
It's a frustrating spot to be in, for sure. But navigating your next steps doesn't have to be a headache. Your decision really comes down to three main pathways, each one suited to different priorities.
Alt text: A silver MacBook Pro with a severely cracked screen on a wooden desk, with overlay text asking 'Repair or Replace'.
Caption: Cracked MacBook Pro screen in Brisbane, awaiting repair decision.
Comparing Your Main Repair Options
The path you take will depend on your budget, how quickly you need your machine back, and how comfortable you are with getting your hands dirty. Let's break down the choices in a way that's easy to understand.
- Going direct to Apple: This is the official route. You’re guaranteed a genuine part, and the work is done by Apple-certified technicians. However, this premium service comes with a premium price tag and can sometimes mean longer turnaround times, especially if your device needs to be sent away.
- Expert third-party repair: This is where services like Screen Fixed Brisbane come in, offering a great balance of quality and value. We use high-quality parts and have experienced technicians who specialise in these repairs, often for less money and with a much faster turnaround than the manufacturer.
- The DIY approach: For the tech-savvy and brave, replacing the screen yourself is definitely an option. While it's the cheapest route for parts, it carries the highest risk. One small slip-up can lead to more complex and expensive damage.
A huge factor here is the age and model of your MacBook Pro. Dropping a few hundred dollars on a screen for a two-year-old machine makes perfect sense. For an eight-year-old model, though? You might want to weigh that repair cost against the price of a newer, refurbished laptop.
To make things clearer, here's a quick look at how these options stack up.
H3: MacBook Pro Screen Repair Options At a Glance
| Repair Option | Typical Cost (AU) | Turnaround Time | Part Quality | Best For |
|---|---|---|---|---|
| Apple Official Repair | $700 - $1200+ | 3-7 business days | Genuine Apple parts | Warranty preservation and peace of mind, if budget isn't a concern. |
| Third-Party Expert | $600 - $900 | Same-day to 2 days | High-quality OEM or refurbished | A balance of speed, cost, and quality for most users. |
| DIY Repair | $250 - $500 (parts only) | A few hours to a weekend | Varies (user-sourced) | Tech-savvy users on a tight budget who are willing to take on the risk. |
As you can see, there's a trade-off between cost, convenience, and risk with each choice.
H3: Understanding the True Cost of Repair
Cost is almost always the biggest factor. A DIY kit might look temptingly cheap, but the potential for error is very real. On the flip side, the official Apple route gives you certainty but at a price that can be hard to swallow.
In Australia, you can expect an official Apple Store screen replacement to cost between AUD $700 and AUD $1200, depending on your MacBook Pro model. A 'Tier 4' accidental damage service for just the screen is around AUD $1000, and with labour, the final bill often pushes past this, particularly for the newer Retina and M-series models.
H3: What If a Repair Isn’t the Best Option?
Sometimes, the numbers just don't add up. If the repair quote is a huge chunk of what a new or refurbished machine would cost, it might be time to think about an upgrade, especially if your MacBook is getting on in years.
Should you decide to replace it, handling the old device responsibly is crucial. Before you toss it, make sure you understand how to dispose of old laptops safely and securely to protect your personal data and minimise e-waste. It's a simple step that ensures your information stays safe and the device gets recycled properly.
Figuring Out the Real Problem Before You Get Started
When your MacBook Pro screen flickers and dies, your first thought is probably a dead display. It’s an easy conclusion to jump to, but hold off on buying that replacement screen just yet. It's time to play detective.
A black or glitchy screen isn't always a sign of a failed display. In fact, the problem could be something far simpler and cheaper to fix, like a worn-out display cable or even a logic board issue that just looks like a screen problem. Taking a few minutes to troubleshoot properly can be the difference between a $150 cable swap and a $900+ full display assembly replacement.
Let’s go through a couple of quick, practical tests you can do right now to get to the bottom of it.
H3: The External Monitor Test
This is the single most important diagnostic you can do, and it’s dead simple. Grab an HDMI or USB-C cable and connect your MacBook Pro to any external monitor or TV you have lying around. This one step will tell you almost everything you need to know.
Here’s what you’re looking for:
- Perfect picture on the external screen? If your TV or monitor looks great while the MacBook’s screen is still black or messed up, you’ve pretty much confirmed the fault is with the display assembly itself or its connecting cables.
- Same weird graphics on both screens? If the external monitor shows the exact same distorted lines, glitches, or complete blackout as your MacBook's screen, the problem isn’t the display. This almost always points to a failing Graphics Processing Unit (GPU), which is part of the logic board. A new screen won't fix that.
This test instantly narrows down your focus, saving you a world of headache.
Key Takeaway: If the external monitor works perfectly, you've got the green light to keep investigating the screen. If it doesn't, stop. Replacing the display will be a complete waste of money because the issue is much deeper, likely the logic board.
H3: Decoding the Visual Glitches
How your screen is failing can give you some serious clues. Different visual problems often point to very specific hardware failures, so pay close attention to the details.
A classic example is an issue known as "Flexgate," which was a real headache on models from around 2016-2018. The problem stems from a display flex cable that just wasn't long enough, causing it to wear out and break from the simple stress of opening and closing the lid over time.
Symptoms of a failing flex cable usually look like this:
- A "stage light" effect, with uneven bright spots along the bottom of the screen.
- The backlight turns on for a second or two, then cuts out.
- The display works fine, but only when the lid is open at a very specific angle (like 45-degrees).
On the other hand, if you're seeing persistent vertical or horizontal lines, weird colours, or a totally dead panel with no backlight at all, the LCD panel itself is the more likely culprit.
H3: The Flashlight Test for a Dead Backlight
What if your MacBook is completely black, but you can hear the startup chime and see the keyboard light up? This often means the display is actually working, but the backlight that illuminates it has failed.
This is where the good ol' flashlight test comes in. Take your MacBook into a dark room and shine a bright light (your phone's torch is perfect for this) at an angle onto the screen. Look closely. If you can faintly make out your desktop icons or the login window, you've confirmed it's a backlight failure.
The LCD panel is getting an image, but there's no light behind it. The fault lies somewhere in the backlight circuit, the LED strip, or its power cable. While it’s still a significant repair, it confirms the problem is contained within the display assembly. This is a must-do check before you start a DIY project for replacing macbook pro screen, as it confirms the screen is definitely where you need to focus your efforts.
Your DIY Toolkit and Parts Sourcing Guide
Deciding to tackle a MacBook Pro screen replacement yourself is a bold move, and your success really hinges on your preparation. Before you even think about touching a single screw, you need to get the right tools lined up and find a quality replacement part. Honestly, getting this part right is non-negotiable—it's what separates a smooth repair from a very expensive headache.
Think of it like setting up for a big project at work. You can apply the principles of kitting by getting every tool and part you need laid out and ready to go. This simple manufacturing strategy prevents that mid-repair panic when you realise you're missing something crucial.
H3: The Essential Tools for the Job
Let's be clear: MacBooks are not designed for easy entry. They use proprietary screws and incredibly delicate connectors that demand specific tools. That generic screwdriver set from the garage? It’s not going to cut it and will likely cause more harm than good.
Your must-have toolkit includes:
- Pentalobe P5 Screwdriver: Absolutely essential for removing the bottom case screws on most MacBook Pro models. Using anything else is a surefire way to strip these tiny, frustrating screws.
- Torx T3, T5, and T8 Screwdrivers: You'll run into various Torx screws holding down internal components like fans, logic board covers, and the all-important hinge mechanisms.
- Plastic Spudgers and Opening Picks: These are your best friends for safely prying open the case and disconnecting fragile ribbon cables. Whatever you do, never use metal tools for these tasks—you risk scratching or shorting the logic board.
- Suction Cup: A small, strong suction cup gives you the leverage you need to lift the display assembly away from the body, which is especially helpful on newer models that are sealed tight.
- iOpener or Heat Gun: A little bit of gentle heat goes a long way. Applying it to the adhesive holding down things like the display cable cover makes removal much safer and easier.
Having the right screwdrivers is a particularly big deal. If you're curious about why Apple uses these specific screws, have a look at our guide on Pentalobe screwdrivers for iPhone and MacBook repairs.
H3: Sourcing Your Replacement Screen
This is the moment where many DIY repairs go sideways. The quality of your replacement screen dictates the final result, but the market is flooded with parts of wildly different quality. Knowing what you're buying is the key to not being disappointed.
You’ll generally find three tiers of replacement parts:
- OEM (Original Equipment Manufacturer): These are the real deal, made by the same manufacturers Apple uses. They give you identical performance, colour accuracy, and brightness. The catch? They can be tough to find and are usually the priciest option.
- High-Quality Aftermarket: These are brand-new parts from third-party companies aiming to match the original specs. A reputable supplier can offer a screen that's nearly indistinguishable from the original, making this the sweet spot for most DIY repairs.
- Refurbished/Pulled: These are original screens salvaged from other MacBooks. The quality here is a bit of a lottery. You might get a perfect screen, or you could end up with one that has minor flaws, dead pixels, or a dim backlight.
A Word of Caution: Be extremely wary of sellers on platforms like eBay or AliExpress advertising "Genuine" or "Original" screens at rock-bottom prices. More often than not, you're looking at a low-grade aftermarket part that will suffer from poor colours, backlight bleed, or just fail on you prematurely.
H3: Don't Forget Safety Precautions
Finally, you have to protect your MacBook from… yourself. Your body can build up a static charge powerful enough to instantly fry the delicate microchips on the logic board. This is called electrostatic discharge (ESD), and it's the silent killer of electronics.
The solution is simple. Always work on a non-conductive surface and use an anti-static wrist strap. This cheap and cheerful tool clips onto a metal part of the MacBook's chassis and safely grounds you, getting rid of any static buildup. It's a tiny investment that insures you against a massive mistake.
This decision tree can help you visualise the diagnostic steps before committing to buying parts.
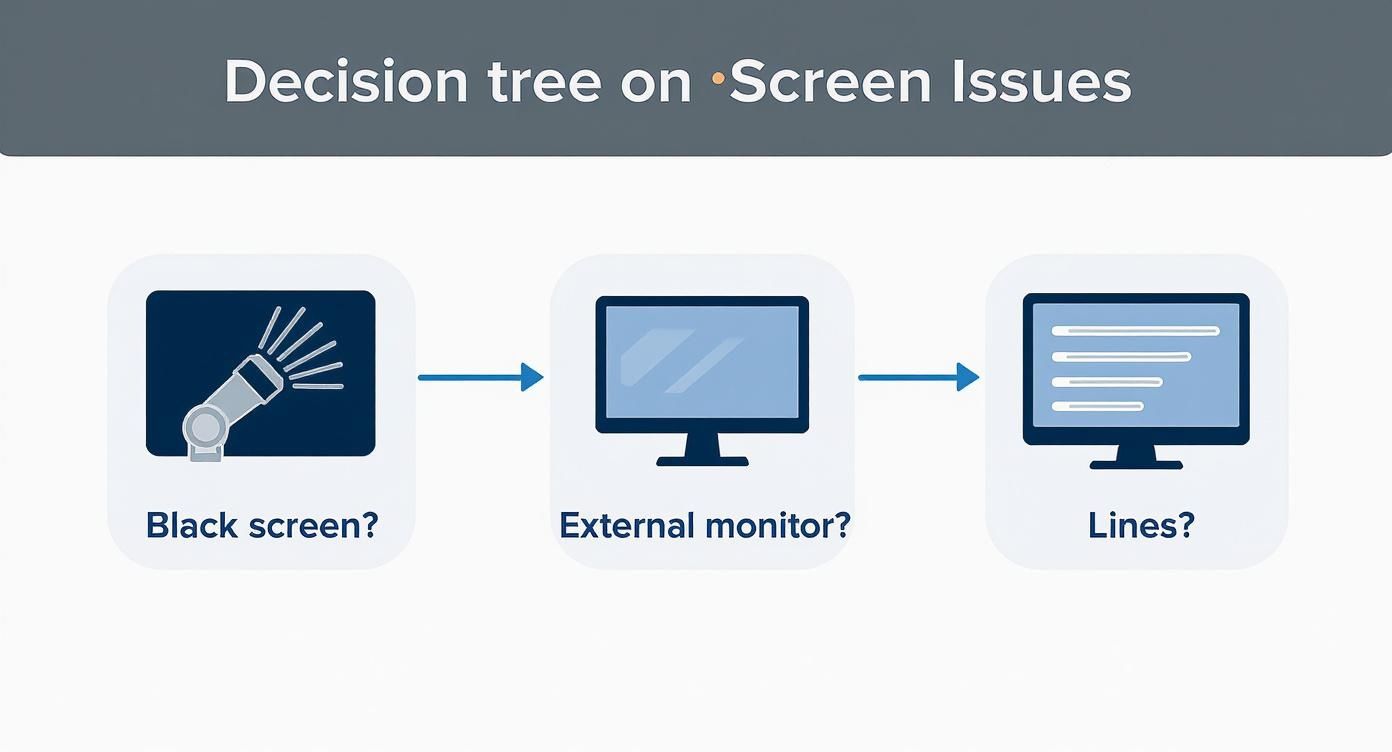
Alt text: A decision tree flowchart illustrating troubleshooting steps for MacBook screen issues, from checking for a black screen to testing with an external monitor.
By following a logical process, you can confirm the screen is the true culprit before investing time and money into the tools and parts for the replacement.
A Model-Specific Walkthrough of the Replacement Process
Right, you’ve figured out the problem, got your tools lined up, and have a quality replacement screen ready to go. Now for the main event—the actual screen swap. How this goes down really depends on which MacBook Pro you're working with, so let’s break it down by generation and look at the unique quirks each one throws at you.
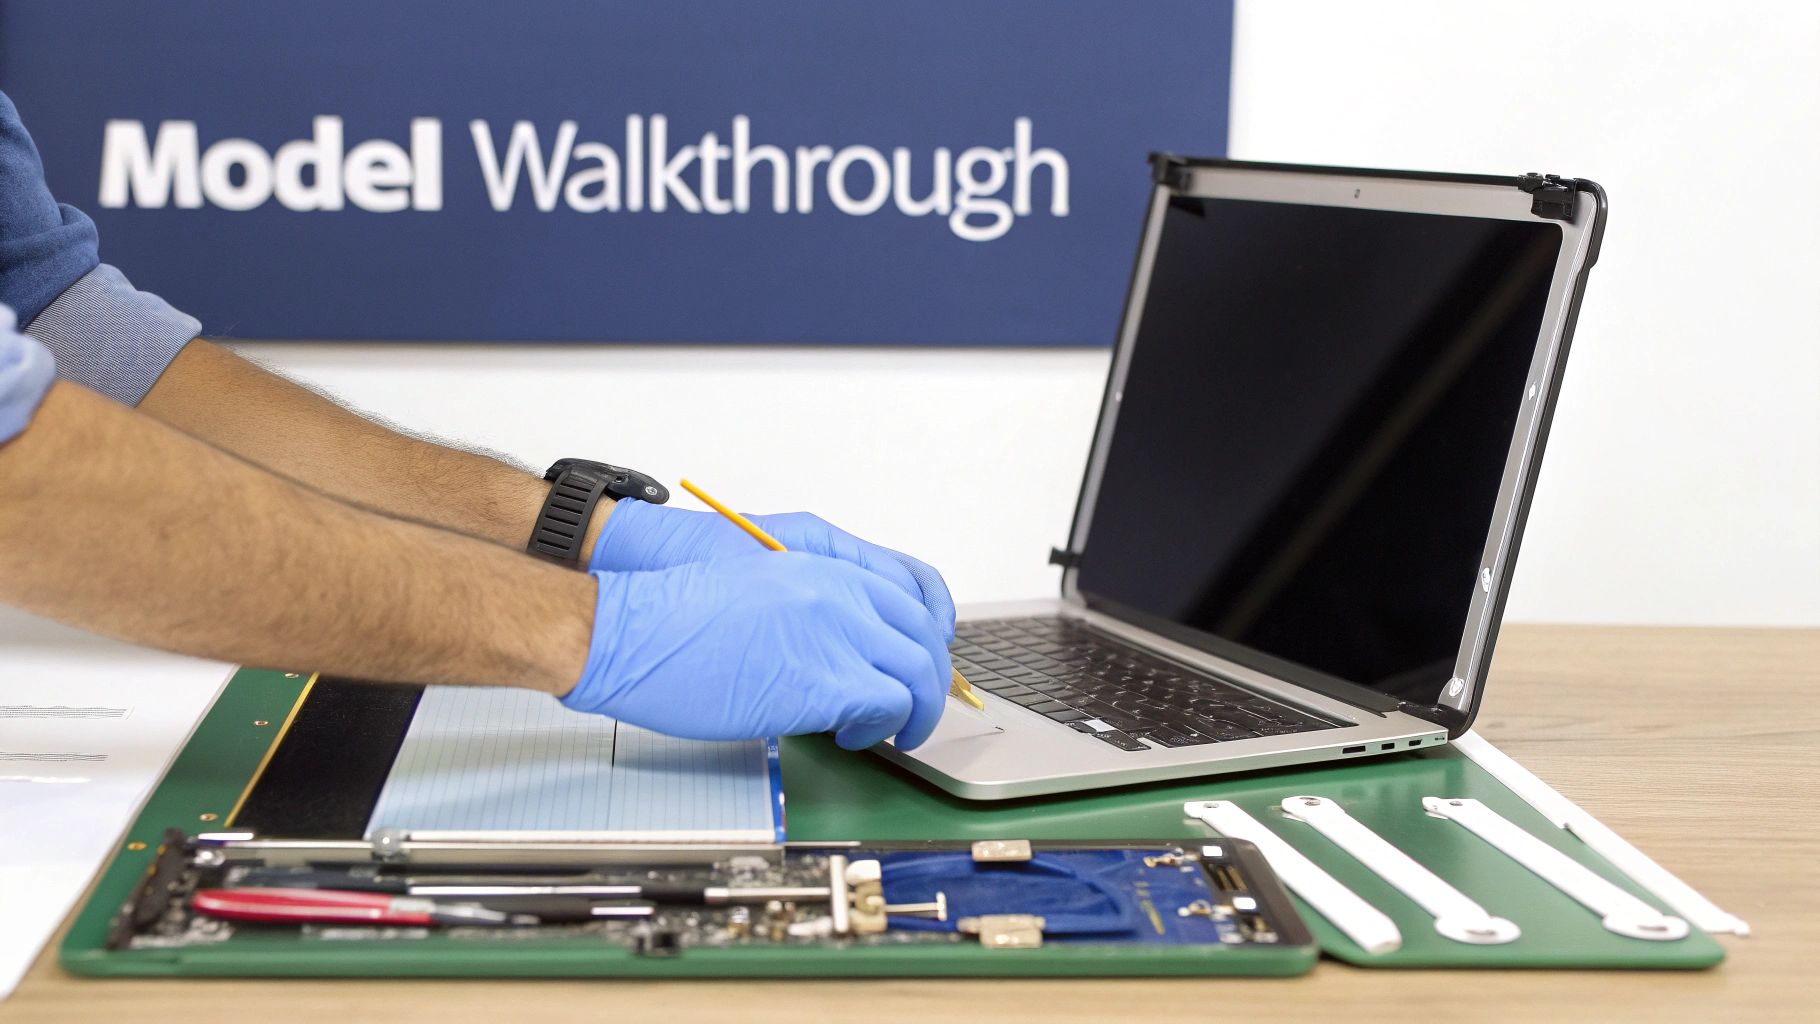
Alt text: A technician in blue gloves using precision tools to perform a MacBook Pro screen replacement on a green anti-static mat.
Caption: A MacBook Pro 14-inch screen replacement in Brisbane.
This is not a simple plug-and-play job. It requires a lot of patience, a steady hand, and an almost obsessive attention to detail. If you rush it, you’re looking at stripped screws, torn ribbon cables, or even a fried logic board. That’s how a manageable repair turns into a complete disaster.
H3: Phase One: Initial Teardown and Disconnection
No matter what model you have, the first steps are always the same. Start by shutting down the MacBook Pro completely and unplugging it from the wall. The very next thing you must do is disconnect the battery. Skipping this is just asking for trouble; it leaves the logic board live and one slip of a tool could cause a short circuit.
Once you've used your Pentalobe P5 screwdriver to get the bottom case off, you'll see the battery connector. Use a plastic spudger to gently unclip it from the logic board. Now that the power is safely cut, you can move on.
This first phase is all about methodically removing the bits and pieces that are in the way of the display assembly connections. Typically, this means:
- Unscrewing and carefully setting aside the fan assembly.
- Popping off the tiny antenna cables for Wi-Fi and Bluetooth.
- Disconnecting the main display video cable (often called the LVDS or eDP connector).
- Gently unplugging the iSight camera cable.
Pro Tip: Grab a magnetic screw mat or even just a piece of paper to map out where every single screw came from. MacBook screws are infamous for being different lengths, and putting a long screw into a short hole can punch right through and destroy the logic board.
H3: Navigating Non-Retina and Early Retina Models (Pre-2016)
If you're working on an older "Unibody" model (from around 2009-2012) or one of the first-gen Retina MacBook Pros (2012-2015), the job is a bit more straightforward, but it still demands care. The main hurdle here is the hinge mechanism.
The display assembly is held onto the body with six Torx T8 screws, three on each hinge. Apple often uses thread-locking compound on these, making them incredibly tight. You absolutely need a high-quality screwdriver that fits perfectly to avoid stripping the heads.
With the hinge screws out, you can gently lift the display to a 90-degree angle and slide it away from the body. As you do this, pay extremely close attention to the Wi-Fi antenna and camera cables that are snaked through the hinge clutch cover. Snagging and tearing one of these is a common, and very annoying, mistake.
H3: The Touch Bar and Modern Retina Models (2016 and Newer)
This is where the repair difficulty really ramps up. Newer MacBook Pros have a much more integrated and delicate design, turning the screen replacement into a high-stakes operation. The display cables, especially, are notoriously fragile.
One of the biggest headaches is the pair of thin flex cables connecting the display to the logic board. On certain models, these are ridiculously short and will tear if you breathe on them wrong. They're usually secured by a small metal bracket and a few tiny screws.
Reassembly is also trickier. The Wi-Fi antenna bar, which sits right at the top of the logic board, must be aligned perfectly for the new display to close properly. If it’s even slightly off, it can create pressure points that will crack your brand-new screen the first time you close the lid. The adhesive is also much stronger on these models, so if you're attempting the much harder repair of replacing just the panel instead of the whole assembly, you’ll need the right gear. To learn more about this, check out our guide on the importance of double tape adhesive in electronics repair.
H3: Reassembly and Final Checks
Once you've successfully attached the new display assembly, you're mostly just doing the teardown in reverse. But there are a few things to obsess over during reassembly to make sure everything works perfectly.
- Cable Routing is Crucial: Make sure every cable—display, camera, antennas—is perfectly seated in its little channel. A pinched cable will eventually fail or stop the case from closing flush.
- Connector Seating: When you reconnect cables to the logic board, you should hear and feel a faint "click." If a connector is only partially seated, you’ll end up with a dead display or a non-working camera.
- Torque with Care: Don’t go crazy tightening the screws, especially the ones holding the logic board and display hinges. Gentle but firm is what you're aiming for.
Before you seal up the bottom case, reconnect the battery as the absolute last step. This is your final safeguard against accidental shorts. Power the machine on and do a full systems check before putting the last screws in. Test the display at different brightness levels, make sure the camera works, and check that your Wi-Fi and Bluetooth signals are strong.
Why a Professional Repair Is Often the Smarter Choice
The pull of a DIY repair is strong, I get it. Saving a bit of cash and the satisfaction of fixing something yourself is a great feeling. But when it comes to replacing a MacBook Pro screen, this isn't just a simple parts swap. It's more like delicate surgery, where one tiny slip can turn a fixable laptop into a very expensive paperweight.
Modern MacBooks are marvels of engineering, but that tight, intricate design leaves absolutely zero room for error. A misplaced screw, a slightly torn ribbon cable, or an unseen zap of static discharge (ESD) can cause irreversible damage to the logic board. What started as a screen problem can quickly spiral into a total system failure, costing you far more to sort out than the original issue.
Even if you navigate the teardown perfectly, the quality of aftermarket parts can be a real gamble. A cheap screen might look okay when you first turn it on, but give it a few days or weeks, and the flaws often start to show—poor colour accuracy, distracting backlight bleed, or dead pixels popping up out of nowhere.
H3: The Hidden Costs of a DIY Mistake
When you go the DIY route, you're taking on all the risk. There’s no warranty on your own labour, and if you accidentally damage another component while you're in there, that cost is entirely on you.
We've seen some common DIY disasters roll through our workshop:
- Bricked Logic Boards: A tiny, invisible surge of static electricity is all it takes to fry the sensitive chips on the logic board, rendering the entire MacBook useless.
- Damaged Connectors: Those tiny ZIF (Zero Insertion Force) connectors are incredibly fragile. If you tear one off the board, you’re looking at a complex microsoldering repair, assuming it’s even possible to fix.
- Creating New Problems: Incorrectly routing an antenna cable can kill your Wi-Fi signal. A pinched camera cable means no more video calls. These small mistakes create big headaches.
Choosing a professional service isn't just about paying someone to swap a part. It's an investment in certainty, quality, and the peace of mind that your valuable device is in safe hands.
Here’s a more direct comparison of the risks involved.
H3: DIY vs Professional Repair Risk Comparison
This table gives you an honest look at what you're up against when deciding between doing it yourself and letting a pro handle it.
| Factor | DIY Repair Risk | Professional Repair (Screen Fixed) | Outcome |
|---|---|---|---|
| Component Damage | High. Risk of frying logic board, tearing cables, or damaging other parts. | Very Low. Technicians are trained and experienced with these specific repairs. | With DIY, a simple screen fix can become a full logic board replacement. A pro minimises this risk. |
| Part Quality | Variable. Aftermarket screens often have colour, brightness, or durability issues. | Guaranteed. We use premium, high-quality parts that meet or exceed original specs. | A professional repair ensures your display looks and functions as it should. |
| Warranty | None. If your repair fails or causes another issue, you bear the full cost. | Comprehensive. Our repairs are backed by a service warranty on parts and labour. | A warranty provides a safety net, protecting your investment if something goes wrong. |
| Tools & Expertise | Limited. Requires purchasing specific tools and learning on a very expensive device. | Specialised. Access to professional-grade tools and years of hands-on experience. | Experts have the right gear and know-how to avoid common pitfalls, ensuring a successful repair. |
| Data Privacy | Secure. Your data stays with you. | Secure. We follow strict protocols to protect your personal information. | You can trust a reputable repairer, but DIY is the only way to have 100% control. |
Ultimately, while the potential for saving money with a DIY repair is there, the financial and functional risks are significant.
H3: The Professional Advantage at Screen Fixed Brisbane
This is where trusting an expert team like Screen Fixed Brisbane really pays off. A professional repair completely sidesteps the risks of a DIY job, giving you a guaranteed result backed by years of experience and a solid warranty.
When you bring your MacBook to us, you’re getting more than just a quick fix. You get a complete service designed to restore your machine to perfect working order.
This includes:
- Access to High-Quality Parts: We source premium replacement screens that match the original specifications for brightness, colour, and long-term durability.
- Specialised Tools: Our technicians use professional-grade tools designed specifically for Apple repairs, making sure every screw and connector is handled with precision.
- Experienced Technicians: Our team has done this exact repair hundreds of times. They know the common failure points and how to navigate the tricky parts of each MacBook Pro model.
- Service Warranty: Every single repair we do is backed by our warranty. If anything goes wrong with the part or our workmanship, you're completely covered.
We also understand that your data is important. If you're concerned about what happens to your files during a fix, you can learn more about our commitment to phone repair data security and privacy in our detailed guide.
Third-party repair services in Australia offer fantastic value. For MacBook Pro screen replacements on Retina and M-series models, you can expect to pay somewhere between AUD 600 to AUD 900. This is a far more cost-effective option than going directly to Apple, and it completely eliminates the gamble of a DIY attempt.
In the end, a professional repair is about getting a perfect result without the stress, saving you time and potentially a lot of money.
Common Questions About MacBook Pro Screen Replacements
Deciding to fix your MacBook Pro screen is a big step, and you’ve probably got a few questions still bouncing around in your head. That's completely normal. When it comes to something as important as your display, you want to have all the facts straight. We get these kinds of queries all the time, so let's clear up some of the most common ones.
Getting these answers will help you make a solid decision about replacing your MacBook Pro screen, so there are no nasty surprises down the track.
H3: Can I Just Replace the Glass on a Retina Screen?
This is a classic question, and it’s an understandable one, especially if you’re used to older laptops where this was possible. For any MacBook Pro with a Retina display (which is pretty much every model since 2012), the short answer is, unfortunately, no.
Apple designs these screens by fusing the glass, the LCD panel itself, and the aluminium lid into one single, laminated unit. It's what makes the display so thin and the colours so vibrant, but it also means the components are inseparable. So, if the glass cracks, the whole top assembly has to be replaced.
H3: Will a DIY Screen Replacement Void My Apple Warranty?
Yes, it absolutely will. As soon as you open up your device and perform an unauthorised repair, any remaining Apple warranty or AppleCare+ coverage you have is gone.
If your MacBook Pro is still covered, your best bet is always to go through Apple or an Apple Authorised Service Provider. This keeps your warranty intact, which is a massive plus for such a high-value piece of tech.
H3: Is It Worth Fixing an Older MacBook Pro?
This really comes down to a simple cost-benefit analysis. The answer depends on how well your Mac is running otherwise and what you’re quoted for the repair versus the cost of a new or refurbished machine.
Think about it: if your older MacBook Pro still handles your day-to-day tasks without a hitch—the battery life is decent, the keyboard works, and it’s generally reliable—then a screen replacement is almost always the smarter financial move. It can breathe years of extra life into a perfectly good machine for a fraction of what a new one would cost. A $600 repair on a laptop that serves you well is a much better deal than dropping $2,500+ on a brand-new model.
H3: How Long Does a Professional Repair Take?
Speed is one of the biggest perks of going with a professional repair service. While sending your device to Apple can sometimes mean waiting for days, a dedicated repair shop like Screen Fixed can turn it around much, much faster.
Here at Screen Fixed Brisbane, we can often get a MacBook Pro screen replacement done on the same day, as long as we have the specific part for your model in stock. It’s always a good idea to call us first to check on part availability and get a precise time estimate. This quick turnaround means you get your essential gear back in your hands with minimal downtime.
Disclaimer: Apple, MacBook, MacBook Pro, and Retina are trademarks of Apple Inc., registered in the U.S. and other countries. Screen Fixed is an independent service provider and is not affiliated with Apple Inc.
Ready to get your MacBook Pro looking and working like new again, but without the hassle and risks of a DIY job? The expert technicians at Screen Fixed Brisbane have the right tools, premium parts, and the hands-on experience to get it done properly.