
That sickening crunch of a MacBook Pro screen is a sound no one wants to hear, but it's an all-too-common reality for many Aussies. When you're staring at a spiderweb of cracked glass, the big question is simple: can you actually replace a MacBook Pro screen yourself, or is it a job best left to the professionals? The short answer is, it really depends on your technical skills, budget, and how much risk you're willing to take on.
This guide will walk you through the problem, explain your options, and provide a step-by-step process for a DIY screen replacement, helping you make an informed choice.
Deciding Your MacBook Screen Repair Path
A cracked screen feels like a total disaster, but it doesn't have to be the end of your beloved MacBook. It often happens in the most frustratingly simple ways—the laptop sliding off the arm of the couch, a pen left on the keyboard when shutting the lid, or just the pressure from being crammed into an overstuffed backpack.
However it happened, you've got a decision to make. Broadly speaking, you have three paths you can go down.
 Caption: A common sight: a MacBook Pro with a cracked screen, ready for repair.
Comparing Your Options
Each approach comes with its own set of trade-offs involving cost, time, and complexity. Getting your head around these differences is the first step to figuring out what’s right for you.
-
Official Apple Repair: This is easily the most expensive route, but it guarantees genuine parts and expert service. The catch? The cost can sometimes get uncomfortably close to the price of a second-hand machine, making it a tough pill to swallow if you're out of warranty.
-
Professional Independent Repair: Services like our team here at Screen Fixed Brisbane offer a fantastic middle ground. You get professional expertise, often at a much lower cost than Apple, and usually with a quicker turnaround. It’s a solid, reliable choice if you need your MacBook fixed properly without the premium price tag.
-
DIY Screen Replacement: This is the most affordable option by a long shot, but it's also the riskiest. Sourcing your own parts and tools can save you hundreds, but one wrong move could easily lead to more significant (and expensive) damage. This guide is here to help you navigate that very path.
The Scope of the Problem in Australia
Here in Australia, a smashed MacBook Pro screen is an incredibly common problem. In fact, it often ranks as the number one repair issue for laptops, a trend that closely mirrors how often we see smartphone screens coming in for repair. This is largely thanks to the delicate Retina displays used in models from 2012 onwards, which are notoriously easy to crack from everyday drops or pressure.
Repair data actually shows that screen damage can account for over 40% of all MacBook repairs processed by independent shops. You can explore more about these Australian repair trends and their causes.
Key Takeaway: Your decision to DIY or hire a professional to replace your MacBook Pro screen boils down to a balance between cost savings and risk. A DIY repair is absolutely achievable, but it demands precision, patience, and the right set of tools.
This guide will walk you through everything you need to know to make an informed choice. And, if you decide to go for it, we'll be here to help you tackle the repair yourself, covering everything from identifying your model to sourcing the right screen and the step-by-step process.
Finding the Right Parts for Your MacBook Pro
Before you even think about reaching for a screwdriver, your first job—and the most critical one—is to get your hands on the right replacement screen. We can't stress this enough. Getting this wrong isn't just a small hiccup; it's a guaranteed dead end for your repair.
An incompatible display will, at best, simply not work. At worst? You could fry your MacBook Pro's logic board. That makes correctly identifying your model the single most important task of this entire process.
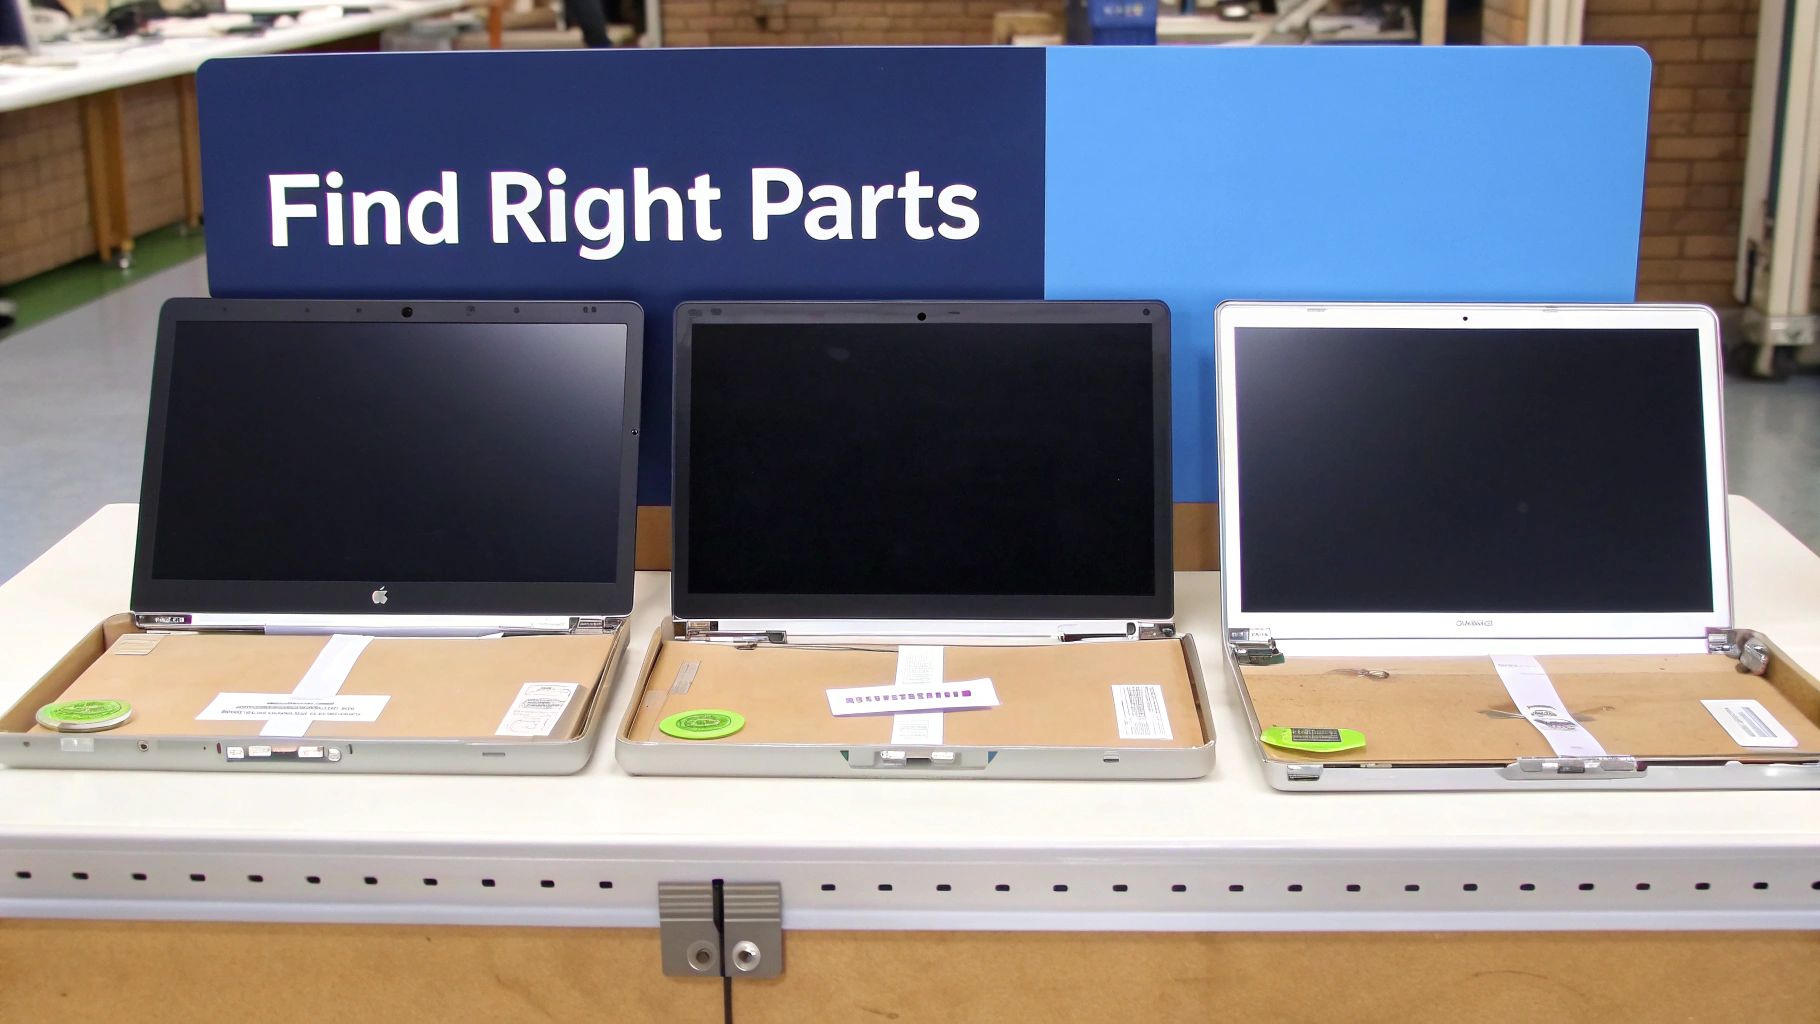 Caption: Sourcing the correct replacement screen is the crucial first step for any MacBook Pro repair.
Thankfully, Apple makes this part relatively painless. The key you need is printed right on the bottom case of your laptop.
How to Identify Your Exact MacBook Pro Model
Flip your MacBook Pro over and have a look at the fine print etched into the aluminium. You’re looking for a model number starting with an 'A' followed by four digits, like A1708, A2159, or A2338. This little number is the holy grail for sourcing parts, telling suppliers everything they need to know—from the screen's size and resolution to its specific connector type.
If the bottom case is scratched or unreadable, you can also use the serial number. If your screen is still working a bit, click the Apple logo in the top-left corner and go to "About This Mac" to find it. Pop that serial number into Apple's official support site, and it'll confirm your exact model.
Pro Tip: Always, always double-check the model number. A MacBook Pro from early 2015 might look identical to a late 2015 model, but they can use slightly different display connectors. It’s a tiny detail that can mean the difference between a successful repair and a very costly mistake.
To make things easier, we've put together a quick reference guide.
MacBook Pro Model Identification Guide
Use this table to quickly find your MacBook Pro's model identifier. This number is essential for ordering the correct replacement screen for your repair.
| Model Year Range | Common Model Identifiers | Key Screen Characteristics |
|---|---|---|
| 2016-2017 (Non-Touch Bar) | A1708 | 13-inch Retina, standard function keys |
| 2016-2020 (Touch Bar) | A1706, A1989, A2159, A2251, A2289, A2338 (M1) | 13-inch Retina with Touch Bar |
| 2016-2019 | A1707, A1990 | 15-inch Retina with Touch Bar |
| 2019-2023 | A2141, A2485, A2780 | 16-inch Retina, Liquid Retina XDR |
| 2020-2022 (Apple Silicon) | A2337 (Air), A2338 (Pro) | 13-inch M1/M2 models, distinct display cables |
This table covers many common models, but always confirm the 'A' number on your own device before ordering anything.
Choosing Your Replacement Screen Type
Once you've got your model number, you'll find there are a few different types of screens available from Australian suppliers. Each offers a different balance of quality, longevity, and cost, so it’s important to know what you’re buying. For a much deeper dive, check out our comprehensive guide on the different types of replacement screens for a MacBook Pro.
Generally, your choices boil down to these:
- Original (OEM/Service-Pack): These are brand-new, factory-fresh screens—the very same parts Apple would use for an official repair. They guarantee perfect colour accuracy, brightness, and full True Tone functionality. They're the most expensive option, but you get what you pay for: the best quality and flawless compatibility.
- High-Quality Refurbished: A great middle-ground option. A refurbished screen usually takes an original Apple LCD panel from a unit with cracked glass and fits it with a new glass front. You get the same visual performance as an original screen but at a much friendlier price. It's also a more eco-friendly choice without compromising on quality.
A word of caution: be wary of suspiciously cheap screens from overseas marketplaces. They are almost always low-quality aftermarket parts plagued with poor colour reproduction, backlight bleeding, and a shockingly high failure rate. Stick to reputable Australian suppliers who stand by their products and can match a reliable part to your A-series model number.
When you decide to replace your MacBook Pro screen, the quality of the component you choose will directly define the result. Investing in a quality part from a trusted local source is the smartest move you can make. After all, you’re not just fixing a screen; you’re restoring a vital tool for your daily work. Getting this first step right sets the stage for a smooth, successful repair.
Your Essential Toolkit and Workspace Setup
Trying to replace a MacBook Pro screen without the right gear is like attempting surgery with a butter knife—it’s messy, almost certainly won't work, and you’re guaranteed to cause more harm than good. Your standard household screwdriver set just won't cut it here.
Apple uses proprietary screws for a reason: to keep casual tinkerers out. So, investing in a few specialised tools isn't just a friendly suggestion; it’s an absolute must-have to even get started.
Your workspace is just as important as the tools you use. A poorly lit, cluttered, or static-prone area is a recipe for disaster. You really don't want to lose a microscopic screw in the carpet or, far worse, fry the logic board with a tiny spark of static electricity. Taking a few minutes to prep your environment is what separates a successful repair from a very expensive mistake.
Assembling Your Precision Toolkit
To get this job done right, you need a specific set of tools. Each one has a precise job, from safely popping open the case to handling delicate connectors without snapping them.
Here's what your essential toolkit should include:
- P5 Pentalobe Screwdriver: This is non-negotiable. It's the only tool that will open the bottom case of modern MacBook Pros.
- T3 and T5 Torx Screwdrivers: You'll run into these holding down various internal bits, like the logic board, fans, and hinge covers.
- Nylon Spudger: This is your best friend for safely disconnecting fragile ribbon cables. Whatever you do, don't use a metal tool for this, as you'll risk scratching the logic board.
- Fine-Tipped Tweezers: Absolutely essential for handling the tiny screws you'll be removing and putting back.
- Suction Cup: A small, strong suction cup gives you the leverage needed to gently lift the screen assembly away from the body.
- Plastic Opening Picks: These thin plastic triangles are perfect for slicing through the adhesive holding parts together without scratching anything.
Pro Tip: Don't cheap out on your tools. Poorly made screwdrivers can easily strip the tiny, soft metal screws Apple uses, turning a straightforward job into an absolute nightmare. A good quality kit is a smart investment.
Creating a Safe and Organised Workspace
Got your tools? Great. Now it's time to set up your workspace. A clean, organised area helps prevent mishaps and keeps you focused. The last thing you need is a missing hinge screw because it rolled off the table and into oblivion.
Here’s how to set up an effective repair space:
- Let There Be Light: Good, bright lighting is crucial. A desk lamp or even a headlamp will help you see all the tiny components clearly, saving you from eye strain and silly mistakes.
- Go Static-Free: Work on a wooden or laminate desk if you can. Stay away from carpets and synthetic fabrics that build up static. An anti-static wrist strap is a cheap and incredibly effective way to protect your MacBook’s sensitive electronics from an accidental zap. You can learn more about preventing this from resources like the Electrostatic Discharge Association.
- Stay Organised: Use a magnetic project mat or even just a simple ice cube tray to keep track of all the screws. These mats have small grids where you can place screws in the exact order you remove them, making sure every single one goes back where it belongs. This is a total game-changer for complex repairs.
If you want to get a better handle on the specialised screws you'll be dealing with, you might find our guide on the different types of Pentalobe screwdrivers used in Apple repairs helpful. Knowing this stuff before you even touch a screw will set you up for success.
A Visual Guide to the Screen Replacement Process
Alright, let's get our hands dirty. This walkthrough will take you through the entire screen replacement, from the first screw you remove to the final power-on. We’ll break down each critical stage, pointing out the common traps and sharing a few pro tips to keep your repair on track.
Before you even think about touching a screwdriver, though, getting your setup right is half the battle. A good repair is built on a solid foundation of preparation.
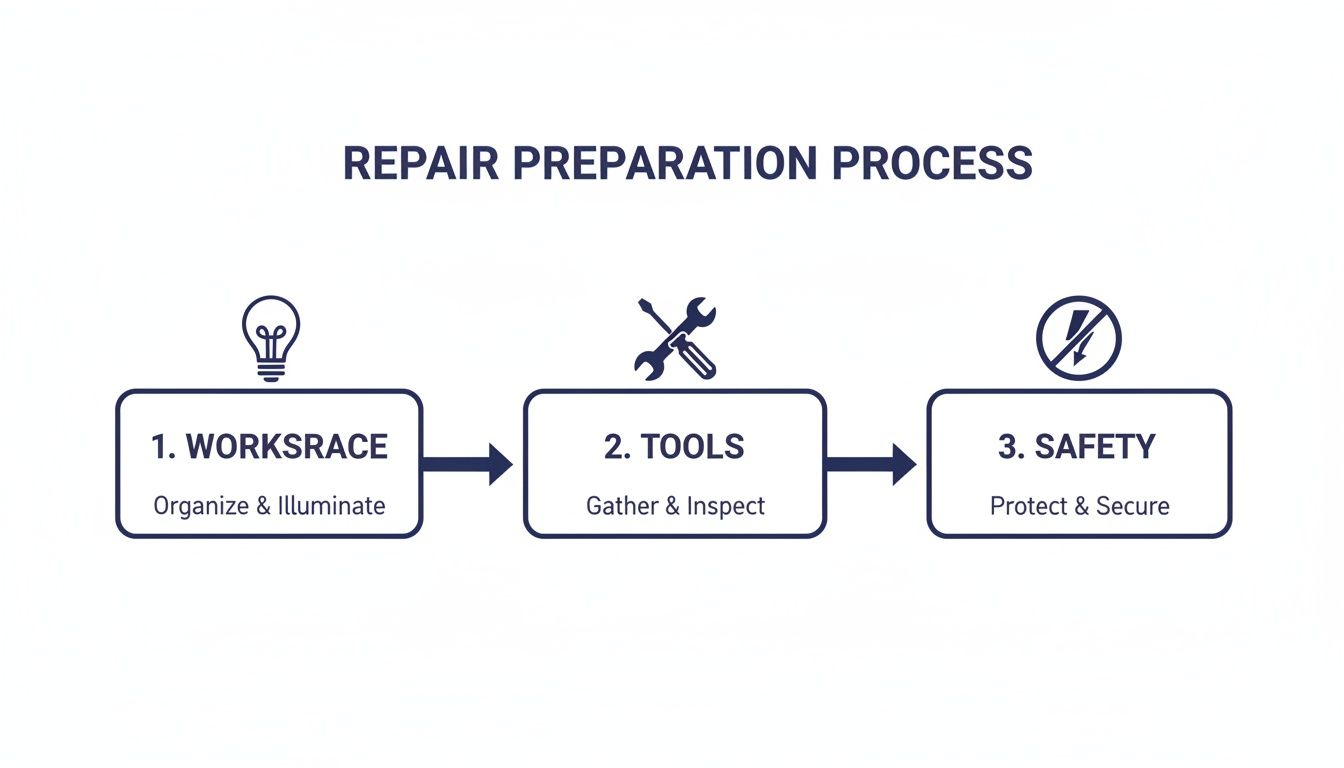 Caption: Successful repairs depend on three key pillars: a safe workspace, the right tools, and proper safety procedures.
This little chart nails the three pillars: a clean, well-lit workspace, the right tools for the job, and—most importantly—proper safety precautions. Don't even think about skipping the battery disconnect. It's non-negotiable.
First Up: Killing the Power
We can't stress this enough: the very first thing you do in any electronic repair is disconnect the power. Trying to work on a MacBook with the battery connected is a recipe for disaster. One slip can cause a short circuit that instantly fries the logic board, turning a simple screen repair into a very expensive paperweight.
Start by flipping your MacBook Pro upside down on an anti-static mat. Grab your P5 Pentalobe screwdriver and get to work on the bottom case screws. Keep them organised on your magnetic mat—some MacBook models use different length screws, and you don't want to mix them up.
With the screws out, use a suction cup near the centre of the back edge (close to the hinge) to create a small gap. Slide a plastic pick in there and gently work your way around the sides to pop the clips. Once they're all free, you can lift the bottom case straight off.
You’re in. The first thing to tackle is the battery. Find its connector on the logic board; it's usually a wide, flat plug held down by a small bracket and a couple of Torx screws. Remove that bracket, and then use a nylon spudger to carefully pry the battery connector straight up and off the board. You should feel a little pop.
Crucial Safety Step: Now that the battery is physically disconnected, press and hold the power button for about 10 seconds. This drains any leftover charge from the capacitors, making the device completely safe. We’ve seen people skip this and regret it. Don't be one of them.
Releasing the Display Assembly
With the MacBook safely powered down, we can now turn our attention to the busted screen. This part requires a steady hand. You'll be dealing with several tiny, fragile cables that handle everything from the display and camera to the antennas.
First, track down the display cable connectors, usually tucked under a small metal shield near the hinges. A few Torx screws hold this shield in place, so get those out of the way.
Underneath, you'll see a few press-fit connectors. Use the flat end of your spudger to lift each one straight up. Whatever you do, don't pry at an angle—you can easily damage the sockets on the logic board itself. You'll also see some tiny coaxial cables for Wi-Fi and Bluetooth; these just snap on and off, but be gentle.
Next are the hinge screws. Each hinge is secured to the chassis with several T5 or T8 Torx screws. We find it’s much easier to access them if you open the laptop to about a 90-degree angle. Use one hand to support the weight of the screen while you remove the screws with the other.
Once that last screw is out, you can gently lift the entire display assembly away from the top case. Set it aside somewhere safe and focus back on the main body of the laptop.
Installation and Reassembly
Putting the new screen on is pretty much the reverse of what you just did, but there are a few fiddly bits that require extra patience. Rushing here is how mistakes happen.
Start by lining up the new display's hinges with the screw holes on the top case. Pop the hinge screws back in, but don't tighten them down completely just yet. Leaving them a little loose gives you some play for perfect alignment.
Now for the most delicate step: reconnecting all those tiny cables. We always start with the thin coaxial antenna cables. Use tweezers to get them into position over their sockets, then press down gently with your spudger until you feel a faint click. They are incredibly fragile, so never, ever force them.
Next up are the main display cables. Line them up perfectly over their sockets and press down firmly with your fingertip until you feel a solid click. Once every cable is seated, screw the metal shield back on to protect them.
Hold off on putting the bottom case back on. It’s time for a quick test.
The Moment of Truth: First Power-On
You’re on the home stretch, but don't seal it up just yet. Go ahead and reconnect the battery connector, ensuring it clicks securely into place. You can just rest the bottom case on for now.
Flip the MacBook over, open the lid, and hit the power button. It's normal for your heart to be pounding a bit, but if you followed the steps, you should be greeted by the glorious sight of the Apple logo on your new screen.
Now's the time for a quick function check before you call it a day.
- Backlight Check: Look closely. Is the screen evenly lit? Any flickering or dark patches?
- Webcam Test: Open up Photo Booth or FaceTime. You should see your smiling face.
- Connectivity Check: Make sure you can connect to your Wi-Fi network and pair a Bluetooth device.
If everything checks out, power the MacBook down one last time. Disconnect the battery again just to be safe, then properly screw the bottom case back on with all its P5 screws. Finally, reconnect the battery for good and seal it up. You've just successfully replaced your MacBook Pro screen.
Final Checks and Troubleshooting Common Issues
You’ve done it. The new display is in, the last cable is connected, and your MacBook Pro is looking almost whole again.
But hold on. Before you grab that screwdriver and seal up the bottom case, this is the most critical moment: the full systems check. Trust us, powering on for a quick test before buttoning everything up can save you the massive headache of having to tear it all down again to fix something small.
This final phase is all about making sure your hard work paid off and knowing how to diagnose the little gremlins that can pop up. A methodical approach here is your best friend.
Performing Your Post-Repair Systems Check
With the battery reconnected but the bottom case still off, it's time to get down to business. Power on your MacBook and run through this checklist to make sure every single function is firing on all cylinders.
-
Display and Backlight Integrity: Open up a plain white background, like a blank document or an empty browser page. Scan for any dark spots, weird discolouration, or backlight bleed around the edges. You'll also want to look for the infamous "stage light" effect at the bottom—those faint vertical beams of light that often point to a damaged flex cable.
-
Webcam and Microphone Functionality: Pop open FaceTime or Photo Booth. Does the camera kick in? Does the little green indicator light come on? Don't forget to test the mic by recording a quick voice memo; you want to hear clear, crisp audio.
-
Ambient Light Sensor and True Tone: This little sensor is what handles automatic screen brightness. The easiest way to test it is to cover the sensor (it's usually right next to the webcam) with your hand. The screen should dim noticeably. If your MacBook supports True Tone, jump into System Settings > Displays and make sure the option is actually there and you can toggle it on and off.
-
Wi-Fi and Bluetooth Connectivity: Those tiny antenna connectors you wrestled with are vital. Make sure you can connect to your Wi-Fi network and that the signal strength is solid. Next, try pairing a Bluetooth device like headphones or a mouse to confirm that's working correctly too.
What to Do When Things Go Wrong
Even the most careful DIYer can run into a snag. Don't panic. Most post-repair problems come down to simple, fixable mistakes, not a dud part. The key is to stay calm and diagnose the issue logically.
A blank screen after a replacement is terrifying, but it's rarely a sign of total failure. In over 90% of cases, the root cause is a display cable that isn't fully seated. A connector might look clipped in, but even a fraction of a millimetre's gap can break the connection.
If you hit a wall, the first step is always the same: power down, disconnect the battery, and then start troubleshooting.
Common Problems and How to Fix Them
Here’s a rundown of the issues we see most often and how to tackle them.
-
The Screen Is Completely Black: This is the big one, but usually the easiest fix. Your first move is to double-check that every single display connector is pushed firmly and squarely into its socket on the logic board. We mean it—unplug them and reseat them just to be absolutely certain. If that doesn’t do the trick, you may need to grab a multimeter and check for continuity in the display cables themselves. Our guide on how to check continuity with a multimeter can walk you through that diagnostic step.
-
Flickering or Vertical Lines on the Display: This almost always points to either a loose connection or a pinched ribbon cable. Trace the full length of the display cables, looking carefully for any sharp creases or damage that might have happened during the installation.
-
Webcam or Wi-Fi Not Working: Nine times out of ten, this is because one of the smaller coaxial or flat flex cables isn't connected properly. They are notoriously fiddly. Go back and make sure each one has clicked securely into place. Be patient here; it can take a few tries to get it right.
Deciding to replace a MacBook Pro screen yourself is a big undertaking, but it’s often the smartest financial move. Here in Australia, a quality DIY repair can be 50-60% cheaper than buying a new model. For a popular A1708 model, for example, you might spend around $700-$800 on parts, which is a fraction of the $2,000+ you’d spend on a new machine. And since accidents tend to happen, learning to repair makes it a practical, long-term solution.
Got Questions About Your MacBook Pro Screen Replacement? We’ve Got Answers
Even with a step-by-step guide in front of you, it's totally normal to have some last-minute questions. Tackling a MacBook Pro screen replacement is a big deal, so a little hesitation is expected.
To put your mind at ease, we've pulled together some of the most common questions our technicians in Brisbane get from DIYers. Consider this the final chat you’d have with an expert before diving in.
How Long Does a DIY Screen Replacement Actually Take?
This is a classic "how long is a piece of string?" question, but we can give you a pretty realistic timeframe. If this is your first time, and you’re being careful and methodical, you’ll want to block out a good three to four hours. Seriously.
That includes getting your workspace ready, obsessively organising screws, and checking every connection twice. An experienced tech might knock it over in 90 minutes, but that’s pure muscle memory from doing it day in and day out. Don’t rush this – speed is not your friend here.
Expert Tip: Don't even think about starting this on a busy weeknight. Set aside a weekend morning when you’re fresh and won’t be disturbed. Patience and a clear head are more important than any tool in your kit.
Can I Just Replace the Glass Instead of the Whole Screen?
It’s a great question because, on the surface, it seems like a much cheaper and simpler fix. The short answer is: technically, yes, but it’s an incredibly fiddly process that’s best left to pros with some very specialised gear.
The glass on a Retina display is actually fused directly to the LCD panel underneath. Trying to separate them without wrecking the delicate LCD involves a heated wire machine and a completely dust-free room. For a DIY job, replacing the entire top-lid assembly is really the only practical and reliable way to go.
That said, if you’re looking at professional repair options, a glass-only repair can be a huge money-saver. Here in Australia, this service can slash the cost by 40-60% compared to a full assembly replacement, typically landing somewhere between $250-$440 AUD if the LCD itself is still in perfect shape. It's a solid option if you're on a budget and only the top glass is cracked. You can get a better idea of the numbers by checking out these Mac screen repair costs in Australia.
Will I Lose My True Tone Function?
Losing True Tone—that slick feature that adjusts your screen's colour to match the light around you—is a massive worry for a lot of people. The good news? If you use a high-quality replacement screen (either an original OEM part or a top-tier refurbished one), you should keep full True Tone functionality.
The feature is hardwired into the display assembly itself. Those cheap, low-quality aftermarket screens you see online often cut corners and lack the necessary hardware, which is why True Tone vanishes after they’re installed. It’s a perfect example of why it pays to invest in a quality part from a supplier you trust. You’re not just buying a screen; you’re buying all the integrated features that make it work like it’s supposed to.
What's the Single Biggest Mistake People Make?
Hands down, the most common and expensive mistake is not disconnecting the battery before starting the repair. It feels like such a small step to skip, but it’s a massive gamble.
All it takes is one tiny slip with a metal tool to cause a short circuit on the logic board, instantly frying a component. This can kill your backlight or, even worse, leave you with a MacBook that won't turn on at all. Your simple screen repair just turned into a far more complex (and costly) logic board repair.
Another classic blunder is mixing up the screws. MacBooks use screws of slightly different lengths, and forcing a long screw into a short hole can literally puncture the logic board from underneath. A magnetic mat for organising screws isn’t a suggestion; it’s a necessity.
Feeling a bit out of your depth or decided this DIY project isn't for you? That’s perfectly fine. For a guaranteed, professional result without any of the risk, just book your repair with Screen Fixed Brisbane. Our expert technicians will get your MacBook Pro screen replaced quickly and affordably.
Get Your Free Repair Quote with Fixo Today
Disclaimer: Screen Fixed is an independent repair service and is not affiliated with Apple Inc. All brand names, trademarks, and logos are the property of their respective owners. Any use of third-party brand names is for identification purposes only and does not imply endorsement.