
Meta Title: How to Fix iPhone Screen: Australian DIY Guide | Screen Fixed
Meta Description: Cracked your iPhone screen? Learn how to fix your iPhone screen with our complete DIY guide. Get expert tips for a successful repair in Australia.
That sickening crunch of your iPhone hitting the pavement is a sound no one wants to hear. Staring down at a spiderweb of cracks, your first thought might be the cost and hassle of a repair. But what if you could fix it yourself? Before you even think about ordering parts, the first, most critical step in any iPhone screen repair is diagnosis. What looks like a catastrophic screen failure might just be a software glitch that a simple reset can fix. On the other hand, it could be clear-as-day physical damage.
This guide will walk you through everything you need to know, from figuring out the real problem to successfully reassembling your device. Let's get that screen looking new again.
Is Your iPhone Screen Damaged or Just Glitching?
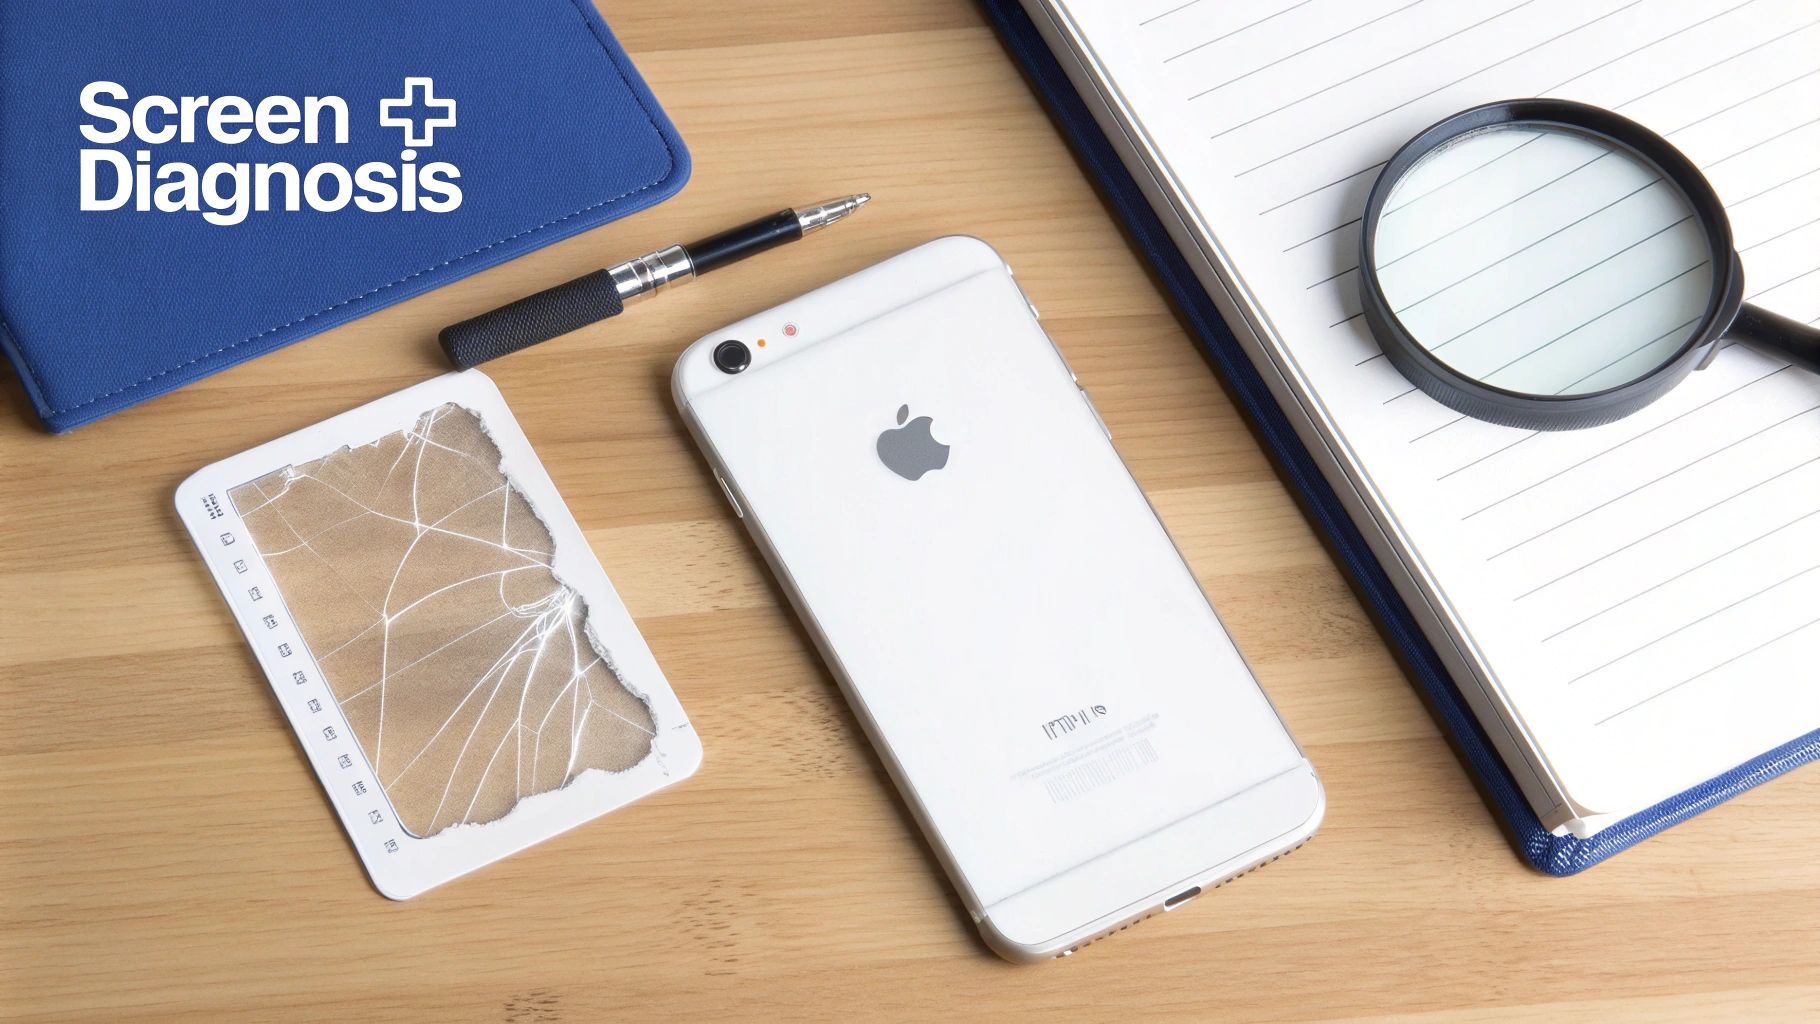
Alt text: Essential tools for an iPhone screen repair laid out on a wooden desk next to a cracked iPhone.
Caption: iPhone 14 Pro screen replacement in Brisbane.
Alright, it's time to play detective. A shattered screen is obviously physical damage, but other symptoms can be more mysterious. Flickering lines, weird discoloured blotches, a totally black screen, or a touch surface that's ignoring you don't automatically mean the display is toast.
These issues can actually stem from a software crash, a connector that's worked its way loose inside, or even a problem with the logic board. You don't want to waste time and money on a new screen only to find out it didn't solve the real problem. This is why a proper assessment is the most important part of this whole repair journey.
Differentiating Physical Damage from Software Faults
First things first, let's rule out the easy stuff. A software glitch can be a master of disguise, perfectly mimicking a hardware failure. If your screen is black or frozen but the glass itself looks fine, your first move should always be a forced restart. You'd be amazed how many times this simple trick resolves software-related freezes without needing a single tool.
If a restart doesn't help, you might need to try something more advanced. If software isn't the culprit, it's time to look for the classic signs of physical damage:
- Spiderweb Cracks: This is the most common sight after a drop, a clear sign the top layer of glass has fractured.
- Black Blobs or "Ink" Spots: These are clusters of dead pixels. It’s a dead giveaway that the delicate OLED or LCD panel beneath the glass has been damaged.
- Green or Coloured Lines: Vertical lines running down the screen often point to a damaged display driver or, more commonly, a torn flex cable that connects the screen to the logic board.
- Unresponsive Areas: If you can tap and swipe on some parts of the screen but other areas are dead, the digitiser (the touch-sensitive layer) has likely been compromised.
Cleaning the Screen for a Clearer Diagnosis
Believe it or not, sometimes the problem is just dirt. Grime, finger oil, or even a dodgy screen protector can cause touch responsiveness issues that look exactly like a hardware fault.
Before you condemn the digitiser, give the screen a proper clean. Using a specialised iPhone cleaner removes any residue that might be interfering with touch input and gives you a much clearer picture of the screen's true condition.
This has become especially important here in Australia, where iPhone screen repairs are on the rise. People are holding onto their phones for longer, and that means more owners are choosing to fix their devices instead of buying new ones. For the 58.83% of Australian mobile users who own an iPhone, getting the diagnosis right is more important than ever.
Key Takeaway: Don't jump to conclusions. A frozen or black screen doesn't always mean a broken screen. Always try a forced restart and give the display a thorough clean before you decide a physical replacement is the only way forward. This simple checklist could save you a lot of time, money, and hassle.
Assembling Your Toolkit and Choosing the Right Screen
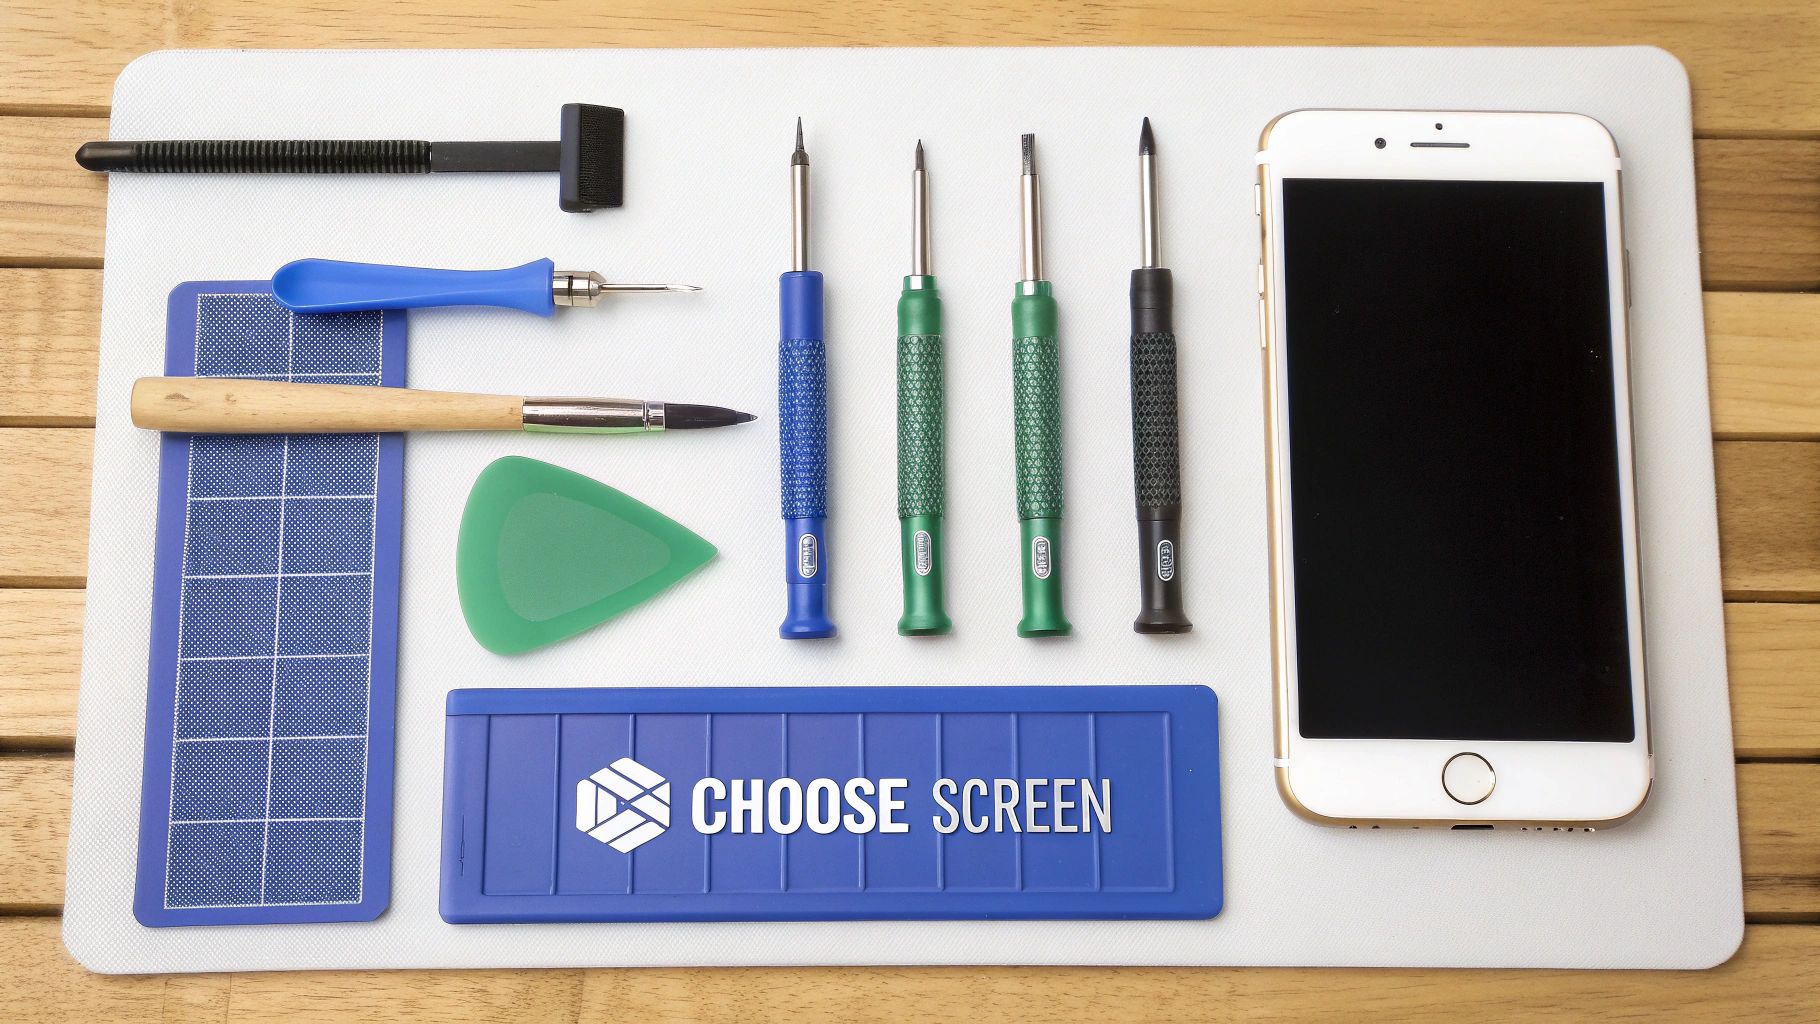
Alt text: Flat lay of smartphone repair tools, including screwdrivers and prying tools, for an iPhone screen fix.
Jumping into a DIY iPhone screen repair without the proper gear is like trying to bake a cake with just a fork and a prayer—it’s probably not going to end well. A successful fix really comes down to two things: having the correct tools and a high-quality replacement screen. Getting this prep work right is just as important as the repair itself.
Taking the time to gather everything first means you won't have to stop halfway through, which is when tiny screws get lost and delicate parts get damaged. Think of it as your pre-flight checklist; making sure everything is ready to go ensures a much smoother ride.
Your Essential Repair Toolkit
Trust us, trying to fix an iPhone with the random tools from your kitchen drawer is a recipe for disaster. iPhones are notorious for their proprietary screws and fragile connectors that require very specific equipment. Using the wrong screwdriver can easily strip the screw heads, turning a straightforward repair into a massive headache.
Here’s a rundown of the absolute must-haves for your kit:
- Pentalobe Screwdriver: This is non-negotiable. It’s for those two tiny screws flanking the charging port. Nothing else will do the job.
- Tri-Point Y000 Screwdriver: You’ll need this for many of the internal screws on the iPhone 7 and any newer models.
- Spudger and Prying Tools: These plastic tools are your best friends for safely disconnecting ribbon cables and separating the screen without scratching or cracking anything important.
- Suction Cup: After you’ve heated the adhesive, this little guy helps you gently lift the screen assembly away from the iPhone’s frame.
- Heat Gun or Hairdryer: You'll need a source of gentle, even heat to soften the waterproof adhesive that seals the screen to the body.
Honestly, don’t even think about starting without these. We've seen countless repairs go sideways simply because someone tried to improvise with the wrong gear.
Choosing the Right Replacement Screen
Once you’ve got your tools sorted, the next big decision is which replacement screen to buy. The market is absolutely flooded with options, and they are definitely not all created equal. The quality of the display you pick will have a direct impact on everything from colour accuracy to touch responsiveness.
This is more important than ever, as Australians are holding onto their phones for longer. By late 2025, it's estimated that 75% of Australian iPhone owners will have delayed upgrading for over three years, which has created a huge demand for quality screen replacements. While newer models are getting more modular, their proprietary screws still make DIY repairs a challenge unless you have pro-grade tools.
A Note from Experience: Choosing a cheap, poor-quality screen can lead to a world of pain—bad brightness, weird colours, dead spots, and unreliable touch input. It's often the difference between a repair that feels brand new and one that just feels... off.
You generally have three main types of screens to consider.
iPhone Screen Type Comparison
To make an informed decision, it helps to understand the key differences between the screen types available on the market.
| Screen Type | Description | Best For | Price Point |
|---|---|---|---|
| Aftermarket | Made by third-party manufacturers. Quality can be a real lottery, ranging from excellent to very poor. | Those on a tight budget who are willing to accept potential trade-offs in display quality and longevity. | $ |
| Refurbished Original | An original Apple LCD/OLED panel with new outer glass fitted. It offers genuine display quality at a lower cost. | Users who want that authentic Apple display performance without paying the premium for a brand-new part. | $$ |
| Service Pack | Brand-new, genuine parts sourced directly from Apple's supply chain. This is the highest quality available, period. | Anyone wanting a no-compromise repair that restores their iPhone to its original factory condition. | $$$ |
For most DIY repairs, a refurbished original screen hits that sweet spot between quality and value. You get the vibrant colours and snappy responsiveness of an authentic Apple display because the most important part—the underlying panel—is genuine. You can dive deeper into this by exploring the differences between LCD and OLED replacement screens in our guide.
Ultimately, investing in a quality screen and the right tools from the start is the best way to make sure your DIY repair is a success.
Step-by-Step Guide to Replacing Your iPhone Screen
Alright, let's get down to business. This is where we'll walk through the entire screen replacement, breaking it down into clear stages. With your tools and new screen ready to go, it's time to dive in.
Just remember, this is a delicate operation. Take your time, keep everything organised, and follow the steps closely. Rushing is the number one reason people make avoidable mistakes like stripping a tiny screw or, even worse, tearing a fragile cable.
First Things First: Power Down and Open Up
Before you even think about touching a screw, the absolute first step is to completely power down your iPhone. This isn't just a friendly suggestion—it’s a critical safety measure. Skip this, and you risk a short circuit that could easily fry your logic board. Hold down the side button and one of the volume buttons, then slide to power off. Simple.
Once the phone is completely off, your entry point is the pair of tiny Pentalobe screws flanking the charging port. Grab your Pentalobe screwdriver and carefully remove them. These things are incredibly easy to lose, so we recommend placing them on a magnetic screw mat or at least in a small, secure container.
Next up, you need to soften the waterproof adhesive sealing the screen to the frame. Gently heat the edges of the display using a heat gun on its lowest setting or even just a hairdryer. The key is to keep the heat source moving, distributing the warmth evenly rather than blasting one spot.
Pro Tip: The goal here is to warm the adhesive, not to cook your phone. The screen should feel warm to the touch, but not so hot that you can't comfortably hold it. This makes the adhesive pliable and a whole lot easier to separate.
With the adhesive softened, stick a suction cup onto the lower part of the screen, just above where you plug in your charger. Pull up on the suction cup gently to create a tiny gap between the screen assembly and the phone's frame. This is your chance to slide in a thin plastic prying tool or a spudger.
Getting Inside and Cutting the Power
With your prying tool in that gap, carefully work it around the entire perimeter of the phone. This will release the clips holding the screen in place. Pay close attention to the flex cables connecting the screen to the logic board—on most modern iPhones, they're on the right side. The safest way to open it is like a book, from the left side, to avoid putting any strain on those vital connections.
Before you touch anything else, the battery must be disconnected. We can't stress this enough; it's the most important step to prevent any electrical damage while you're working.
The battery connector is usually tucked away under a small metal bracket held down by a few Tri-point screws. Remove those screws, lift the bracket off, and then use the flat end of a spudger to gently pop the battery connector off the logic board. You should feel a soft click as it lifts up.
Now that the power is officially cut, you can safely move on to disconnecting the old screen.
Swapping the Screen and Transferring Key Parts
The screen assembly is attached to the logic board with two or three very delicate flex cables, which are also protected by a metal bracket. Unscrew and remove that bracket, then use your spudger to disconnect each screen cable one by one.
You can now completely separate the old, damaged screen from the iPhone's body. Set the main body of the phone aside somewhere safe and dust-free.
This next part is absolutely crucial if you want to keep all your phone's features working properly. You'll need to transfer the earpiece speaker and front sensor assembly from your old screen over to the new one. This little module is responsible for a lot:
- The earpiece speaker you hear calls through.
- The front-facing microphone.
- The ambient light sensor for auto-brightness.
- The proximity sensor that turns the screen off when you hold it to your ear.
- And importantly, the components for Face ID on newer models.
This whole assembly is held in with a few small screws and some light adhesive. Carefully remove the screws and gently pry the assembly away from the old screen. Be extremely careful with the thin flex cables attached to these parts. A tiny tear here could permanently kill your Face ID. If you're working on a similar model, our detailed guide on an iPhone XR screen replacement has some great model-specific pointers.
A Quick Word on Model Differences
Not all iPhones are created equal, and how you open them can vary quite a bit.
- Models with a Home Button (iPhone 8 and older): These phones have a notoriously fragile cable connecting the Home Button at the bottom. When you lift the screen, be careful not to pull it up too far or too fast. It's incredibly easy to snap this cable, and if you do, your Touch ID is gone for good.
- Models without a Home Button (iPhone X and newer): These tend to open from the left side, almost like a book. The flex cables are all grouped together on one side, which makes things a little simpler, but they're still just as fragile.
Knowing the specific layout of your model before you start is essential. Over the years of performing iPhone screen repairs in our Brisbane workshops, we’ve seen that overlooking these small differences is one of the most common causes of DIY repair failures. Always double-check a guide specific to your device; that little bit of extra prep can turn a frustrating job into a successful fix.
Reassembling Your iPhone and Final Testing
You've got the new screen ready to go, and it feels like the finish line is in sight. But hold on—the job isn't done until you've put everything back together with care and tested it thoroughly. This is the stage that separates a decent DIY fix from a great one that's built to last. It’s all about reversing what you just did with the exact same precision.
First up, you'll need to reconnect those delicate flex cables from the new display to the logic board. These connectors are designed to click satisfyingly into place. You should feel a gentle but definite snap. Whatever you do, never force them. If you misalign a connector, you risk bending the tiny pins inside, which can cause a world of pain—from an unresponsive screen to no display at all.
This infographic gives you a quick visual reminder of the core physical steps you've just been through.
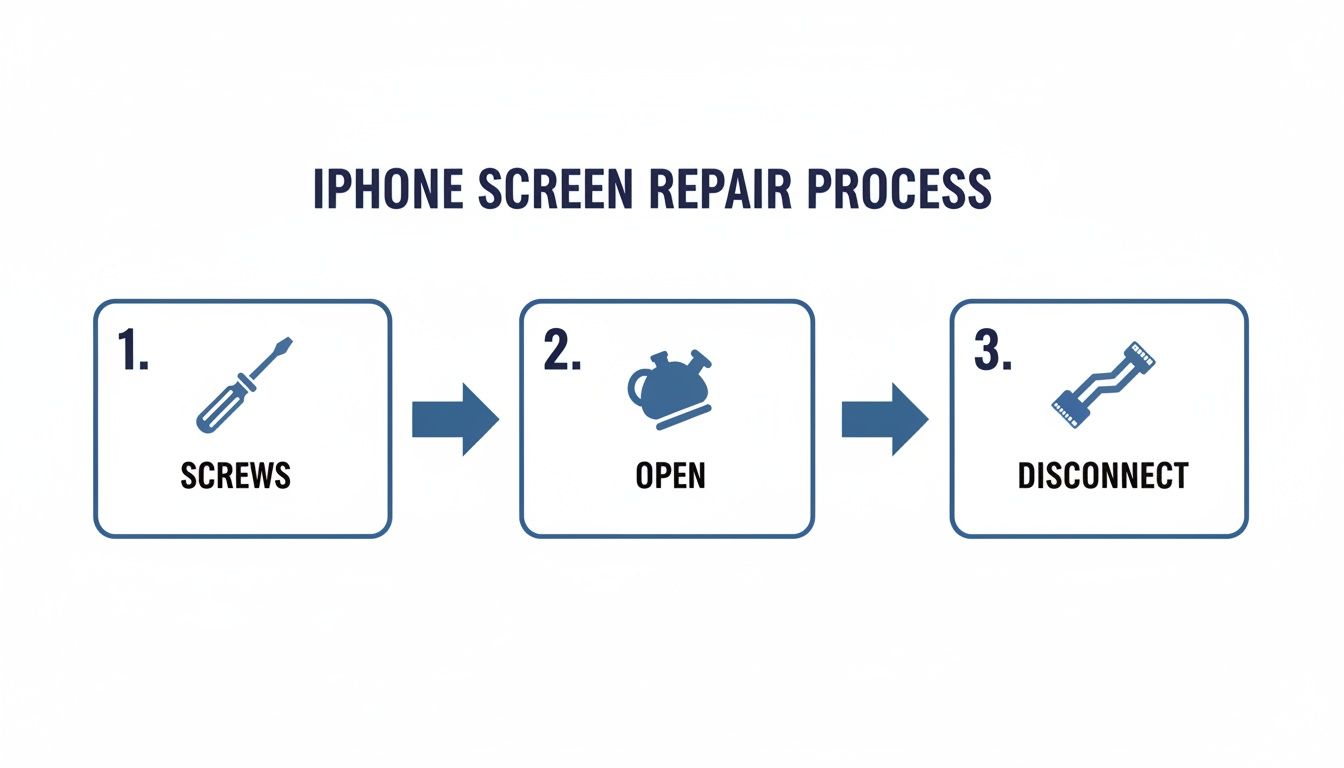
Alt text: Infographic showing the three main steps to open an iPhone for screen repair.
It’s a simple flow—screws out, device open, cables disconnected—but getting this right is the foundation of the whole repair, setting you up for a smooth reassembly.
Restoring Water Resistance
One of the most commonly skipped steps in a DIY screen repair is replacing the waterproof adhesive seal. This is the thin, sticky gasket running around the edge of the iPhone's frame, and it's your first line of defence against dust and moisture. The original seal gets destroyed the second you pry the screen open, so fitting a new one is a non-negotiable.
Before you even think about applying the new adhesive, get both the screen frame and the phone’s chassis perfectly clean. A little isopropyl alcohol on a microfibre cloth is your best friend here. Wipe away every last bit of old gunk to ensure the new seal bonds properly. This is key to restoring as much of the original water resistance as possible.
The Comprehensive Post-Repair Checklist
With the new screen connected and the fresh adhesive in place, it’s time to close it up. Gently close your iPhone like you’re closing a book, making sure the top edge aligns perfectly before snapping the sides into place. If you feel any resistance, stop immediately. Open it back up and check that no cables are being pinched. Finally, pop those two Pentalobe screws back in at the bottom.
Now, before you pat yourself on the back, it's time for the most critical part: a full system test. Power on your iPhone and go through this checklist to make sure every single thing is working exactly as it should. We run through a similar process for all our professional iPhone repairs in Brisbane to guarantee every device leaves in perfect working order.
- Touch Sensitivity: Pop open the Notes app and draw lines across every inch of the screen. You're looking for any dead spots or gaps where the line breaks, which points to a digitiser issue.
- Pixel Check: Search online for a pure black image and a pure white one. View them full-screen and scan for any "stuck" pixels (bright dots on the black screen) or dead pixels (black dots on the white screen).
- Brightness and Colour: Drag the brightness slider all the way up and down in the Control Centre. The response should be smooth, with no flickering. Also, check that the colours look right—not washed out or weirdly saturated.
- 3D Touch or Haptic Touch: Depending on your model, press and hold an app icon. The shortcut menu should pop up just like it used to, confirming the feature is working.
- Biometric Security: Test Face ID or Touch ID a few times to make sure it unlocks your phone without a hitch. If you transferred the original sensor assembly over correctly, this should work flawlessly.
A heads-up on a common side effect of screen replacement: losing True Tone. This feature, which adjusts the screen's colour temperature to your environment, is digitally 'paired' to the original screen's serial number. Without specialised gear to copy that data to the new display, True Tone will be disabled. It doesn't break the phone, but it's a known trade-off in most third-party repairs.
Working through this checklist gives you peace of mind that your repair was a success. It confirms that the new screen is perfect and, just as importantly, that all the sensitive components around it are still functioning correctly. Taking these extra few minutes to be thorough can save you the massive headache of having to open the phone all over again.
Troubleshooting Common Repair Problems
So you've put your iPhone back together, but something’s not quite right. Don't panic. Even the most seasoned technicians run into hiccups every now and then. The key is to troubleshoot logically, starting with the simplest explanations before jumping to the worst-case scenario. Most of the time, post-repair problems come down to a few common, easily fixable issues.
This guide is built from the real-world problems we see and solve every day at our Screen Fixed Brisbane workshop. We'll walk you through the most frequent issues, from a screen that refuses to turn on to a misbehaving camera, helping you figure out what’s wrong without having to tear everything down and start over.
The Screen Is Completely Black or Unresponsive
This is probably the most heart-stopping issue, but it's rarely a sign that your new screen is dead on arrival. Before you do anything else, re-check your work, focusing on the connections you just made.
- Check Your Connections: Power the phone down completely, open it back up, and carefully disconnect and reconnect the screen and battery cables. A connector that looks perfectly seated can be off by a fraction of a millimetre—that’s all it takes to break the connection.
- Battery First: Did you disconnect the battery before starting the repair? If not, a little static discharge could be the culprit. A quick fix is to disconnect the battery now, wait about 30 seconds, then reconnect everything. This simple "reboot" often does the trick.
- Test the Old Screen: If the new screen still won't light up, try reconnecting your old, broken screen (assuming it was still partly working). If the old one powers on, you've likely got a defective new part. If neither screen works, the issue might be deeper, possibly with the logic board itself.
Lines, Colours, or Backlight Issues
Seeing vertical lines, weird colours, or a dim backlight after a repair can be incredibly frustrating. But again, this almost always points back to the flex cables. These ribbon cables are packed with tiny pathways for data and power, and even the slightest misalignment can create visual chaos.
A Technician's Insight: Think of the screen's flex cables like a garden hose. If there's a tiny kink or the connection isn't perfectly sealed, the water (or in this case, the visual data) won't flow through correctly. Systematically reseating each connector is almost always the solution.
This is one of the most common hurdles when you're learning how to fix an iPhone screen. A patient and methodical approach to checking these connections will solve the problem 90% of the time.
Face ID or Front Camera Not Working
If you're greeted with a "Face ID is not available" error or the front camera just shows a black screen, the issue is almost certainly with that delicate sensor assembly you transferred from the old screen. That little module is incredibly fragile.
Carefully inspect the thin ribbon cables for any tiny tears or creases that might have happened during the transfer. Even damage you can barely see can sever a connection and kill the feature for good. Also, make sure it's seated perfectly in the new screen, with no pinched cables.
Unfortunately, if this component is damaged, there's no easy fix. The sensor is cryptographically paired to your device's logic board, so replacing it means losing Face ID functionality forever.
The rising complexity of these parts is a big reason repair costs are climbing. Australian repair shops have seen major cost increases for flagship models, driven by these intricate screen technologies. With phone lifespans now averaging 3.36 years, screen fixes have become the most common solution, making up a massive 68% of extended warranty claims in Australia, where Apple holds a dominant market share.
Your iPhone Screen Repair Questions Answered
Even with the best guide in front of you, a few questions can pop up. That’s perfectly normal, especially when you’re doing something as precise as an iPhone repair. We get it. Drawing from thousands of chats with DIYers and pro techs across Australia, we’ve put together the answers to the questions we hear the most.
Think of this as your final confidence boost before you button everything up.
Can I Really Make My iPhone Waterproof Again?
This is a big one. The second you open up an iPhone, that factory water resistance is gone. While you can't perfectly replicate the original seal at home, installing a fresh, high-quality waterproof adhesive gasket is the absolute next best thing.
When you apply it correctly to a clean frame, the new seal does a great job of restoring protection against splashes and dust. Just be sensible – it's probably best to treat your repaired iPhone with a little more care around water than you did when it was fresh out of the box.
Why Did My Face ID Stop Working After the Repair?
Getting that dreaded "Face ID is Not Available" error is a gut-punch. Almost every single time, it traces back to the front sensor assembly – that little module you carefully moved over from the old screen. This delicate piece holds the dot projector and infrared camera, which are cryptographically paired to your iPhone’s logic board at the factory.
- Accidental Damage: Even a tiny, invisible tear in the flex cable during the transfer can permanently kill Face ID.
- Incorrect Seating: Sometimes, the module just isn't sitting perfectly aligned in its new spot.
Here’s the tough part: if that original component is damaged, there's no fixing it. You can't just swap in a new one; Face ID will be gone for good. This is exactly why being incredibly careful during that step is non-negotiable.
Will Using a Non-Apple Screen Void My Warranty?
Short answer: yes. If your iPhone is still covered by Apple's warranty or AppleCare+, doing any repair yourself, screen replacement included, will void that coverage. The same usually goes for any third-party insurance you might have, so always check their policy first.
But let's be realistic. Most phones that need a new screen are already well outside their warranty period. At that stage, a DIY repair is a smart, cost-effective way to get more life out of a device you already own.
Expert Insight: The "Right to Repair" movement is pushing hard for consumers to have the freedom to fix their own electronics without being penalised. While the rules are slowly shifting, for now, the safest bet is to assume any DIY work will void an active warranty. Consumer advocates like iFixit have some great discussions on this if you're keen to learn more.
Is It Worth Fixing an Older iPhone Model?
Absolutely. With new iPhones costing a small fortune, fixing an older model like an iPhone 11 or 12 makes complete financial sense. If a cracked screen is the only thing wrong with it, a replacement gives the phone a new lease on life for a tiny fraction of the cost of upgrading.
The average Aussie now keeps their phone for over three years, so a quality screen repair is a fantastic investment. To get it right, using reliable parts for iPhone Repairs in Brisbane or anywhere else in the country is the key to making sure your trusty older device keeps performing like it should.
If you've followed this guide but DIY isn't for you, don't worry. For a professional, guaranteed fix, our expert technicians are here to help. Book your repair with Screen Fixed Brisbane today.
Disclaimer: Apple, iPhone, Face ID, and Touch ID are trademarks of Apple Inc., registered in the U.S. and other countries. Screen Fixed is an independent service provider and is not affiliated with Apple Inc.