
If your iPad is struggling with short battery life or random shutdowns, replacing the battery is often the smartest and most budget-friendly way to get it back in fighting shape. Is your iPad feeling sluggish, taking forever to charge, or dying unexpectedly? These are classic signs of a worn-out battery. Before you jump into a repair, it's worth taking a moment to decide if a new battery is the right call for your device's age and your wallet.
Is Replacing Your iPad Battery Worth It?
An ageing iPad doesn't automatically mean it's destined for the recycling bin. More often than not, the real culprit is just a worn-out battery. A simple replacement can breathe new life into it, saving you hundreds compared to buying a brand-new model. The first step is learning to spot the tell-tale signs of battery decay.
Perhaps your iPad feels sluggish, takes an eternity to charge, or just dies on you when it insists it still has 20% left. These aren't just minor quirks; they're clear signals that the lithium-polymer battery inside is on its last legs. Before you start browsing for the latest iPad, let's break down whether a straightforward battery swap is the better move.
Key Signs Your iPad Battery Needs Replacing
It's easy to chalk up performance issues to a software glitch or assume the whole device is obsolete. But battery degradation is predictable, and if you're noticing a few of these symptoms at once, the battery is almost certainly to blame.
Here are the most common red flags to watch for:
- Drastically Reduced Battery Life: This is the most obvious one. If you used to get a solid 10 hours of video playback and now you're lucky to get through a movie, it's a dead giveaway. You shouldn't have to live tethered to a charger.
- Unexpected Shutdowns: Does your iPad suddenly power down even when the battery icon shows 30% or 40%? This happens when an old battery can’t supply a stable voltage anymore, causing the device to shut itself down to prevent damage.
- Sluggish Performance: A tired battery struggles to deliver the peak power needed for intensive apps. To stop it from shutting down, Apple’s software might slow down the processor. The result? Apps take longer to open, and the whole interface feels frustratingly laggy.
- Failure to Charge or Slow Charging: If your iPad is taking much longer to charge than it used to, or it never quite makes it to 100%, its ability to hold a charge has seriously declined.

Analysing iPad battery health to determine if a replacement is needed.
Understanding Battery Lifespan in Australia
An iPad battery's life isn't really measured in years but in charge cycles. One full cycle is counted every time you use up 100% of the battery’s capacity. This could be all in one go or spread over a few days.
Here in Australia, you can generally expect your iPad battery to retain about 80% of its original capacity after 1,000 full charge cycles. However, Apple designs them to hit significant degradation after around 400-500 cycles, which is when you'll really start to feel the decline.
It's also worth remembering that Australia's warmer climate plays a big part. Heat is the number one enemy of batteries, and high temperatures can speed up the chemical ageing process. If you're a heavy user, you might notice performance drops sooner than you'd expect.
Cost-Benefit Analysis: DIY vs Professional Repair vs New Device
Figuring out the best path forward really comes down to a simple cost-benefit analysis. A DIY kit can be an incredibly affordable option if you're confident handling delicate electronics. On the other hand, a professional repair service offers a warranty and peace of mind, although it comes at a higher price.
Before you make a call on an iPad battery replacement, it's helpful to see how it compares to other common issues, like a fast phone battery replacement, which can give you a better feel for professional repair costs.
To make it easier, here's a quick decision matrix to help you weigh your options.
Decision Matrix: iPad Battery Replacement vs New Device
| Consideration | DIY Battery Replacement | Professional Repair | Buying a New iPad |
|---|---|---|---|
| Cost | Lowest ($50-$100) | Moderate ($150-$250) | Highest ($500+) |
| Time | High (2-4 hours, plus learning) | Low (1-2 hours) | Low (Time to purchase) |
| Risk | High (Damage to screen, logic board) | Low (Covered by warranty) | None (Brand new device) |
| Warranty | None (Parts only, if any) | Yes (Typically 6-12 months) | Yes (12+ months from Apple) |
| Best For | Tech-savvy users on a tight budget | Peace of mind and guaranteed results | Needing new features or an outdated iPad |
Ultimately, comparing the repair cost to the price of a shiny new iPad usually makes the choice pretty clear. If your device is still in great condition otherwise, replacing the battery is an excellent move for both your wallet and the environment.
Assembling Your Toolkit for a Successful Repair
Trying to replace an iPad battery with whatever you have lying around the house is a recipe for disaster. Think of it like trying to perform surgery with a butter knife – you’re going to do a lot more harm than good. I've seen it countless times: a simple battery swap turns into a costly screen replacement because someone thought a hairdryer and a flathead screwdriver were good enough. They aren't.
iPads are precision-engineered machines, sealed shut with incredibly strong adhesive and filled with paper-thin ribbon cables. One wrong move with a makeshift tool can crack the screen, scratch the frame, or, even worse, sever a critical connection on the logic board. Investing in the right toolkit isn't just a recommendation; it's the absolute first step to a successful repair.
The Essential Tools You Cannot Skip
While different iPad models have their own little quirks, there's a core set of tools that you'll need for pretty much any battery replacement. These are designed specifically to deal with the fragile components inside a modern tablet.
- Heat Gun or Heating Pad: Your first major hurdle is loosening the adhesive that seals the screen to the frame. A proper heating pad or a heat gun on a low, controlled setting is the only safe way to do this without frying the delicate LCD panel.
- iFlex or Thin Prying Tool: Once the glue is soft, you need something incredibly thin and flexible, like an iFlex tool, to slice through it. This allows you to separate the screen from the body without putting stress on the glass.
- Suction Cup: This gives you a safe handle to gently and evenly lift the screen assembly once the adhesive has been cut. Pulling with your fingers is a sure-fire way to cause a crack.
- Plastic Prying Tools (Spudgers) and Picks: These are non-negotiable for disconnecting those tiny ribbon cables. Using anything metal here is asking for a short circuit that could kill your iPad for good.
- Precision Screwdriver Set: iPads are held together internally with tiny Phillips and, in some models, tri-point screws. A quality set with magnetic tips is essential to avoid stripping them.
- Isopropyl Alcohol and Adhesive Remover: This is the secret to safely removing the old battery. It’s held in place with strong adhesive strips, and trying to pry it out by force is dangerous. The alcohol dissolves the glue, allowing the battery to be lifted out with minimal effort.
- Replacement Adhesive Strips: Once the new battery is in, you need to properly seal the iPad back up. Pre-cut adhesive strips designed for your specific model are a must for restoring that factory seal and keeping dust out.
The Smart Choice: An All-In-One DIY Kit
Honestly, hunting down all these tools one by one can be a real pain and can get surprisingly expensive. A much smarter and more practical approach is to grab an all-in-one DIY repair kit. Reputable suppliers bundle a high-quality replacement battery with every single tool you need for the job.
Opting for a complete kit not only saves you money but also ensures that the tools you're using are specifically suited for iPad repairs. It removes the guesswork and drastically reduces the risk of using a substandard tool that could damage your device.
These kits take the stress out of the preparation. Everything you need, from the spudgers right down to the exact adhesive strips for a clean reassembly, is all in one box.
OEM vs Aftermarket Batteries: What You Need to Know
The final piece of your toolkit is, of course, the battery itself. This is not the place to cut corners. The market is flooded with dirt-cheap aftermarket batteries that promise the world but often fail spectacularly. These can lead to serious safety risks like overheating or swelling, and their lifespan is often a joke compared to a quality part.
When choosing your replacement battery, always put quality first. An Original Equipment Manufacturer (OEM) part or a premium aftermarket battery from a trusted Australian supplier has been through proper testing to meet safety and performance standards. It might cost a few dollars more upfront, but the reliability and peace of mind are absolutely worth it. To get a better handle on spotting quality parts, check out our guide to buying iPad replacement parts. Knowing what to look for is key to making sure your repair actually lasts.
The Complete iPad Battery Replacement Process
Alright, let's get our hands dirty. Tackling an iPad battery replacement is a delicate job, but it’s absolutely doable with a bit of patience and the right approach. The secret is to go slow, keep everything organised, and have a healthy respect for the fragile tech inside. I'll walk you through the entire process, cutting out the confusing jargon so you can feel confident doing it yourself.
At its core, the job involves separating the screen from the body, swapping out the old battery, and putting it all back together. While the basic steps are pretty consistent across the board, there are small but crucial differences between an iPad Air, an iPad Pro, and a standard iPad that you absolutely need to know. We’ll flag these variations as we move along.
Preparing for a Safe Disassembly
Before you even think about picking up a tool, the first thing you need to do is set up a safe, clean workspace. Lay down a soft, lint-free mat to keep that screen from getting scratched up. Most importantly, power down your iPad completely—and I mean completely off, not just sleeping.
Safety is a huge deal here, especially when you're working with lithium-ion batteries. A punctured or bent battery is a serious fire risk. Never, ever use metal tools to pry directly on the battery itself, and always handle it gently.
Opening the iPad Carefully
This is it—the most critical and nerve-wracking part of the whole repair. Almost every iPad is sealed shut with a seriously strong adhesive that bonds the screen assembly to the frame. Your job is to soften that glue just enough to safely get the two halves apart without cracking the glass or wrecking the delicate display panel underneath.
Start by applying gentle, even heat around the edges of the iPad. A proper heat pad is your safest bet, but a heat gun on its lowest setting will work if you keep it moving constantly. You want the frame to be warm to the touch, not scorching hot. After heating one side for a few minutes, use a suction cup to create a tiny gap between the screen and the frame.
Once you’ve got a small opening, slip a thin prying tool, like an iFlex, into that gap. From there, you can gently work your way around the edges, slicing through the softened adhesive.
Pro Tip: Be extremely careful on the side where the camera and display cables live (this is usually near the top or side, depending on your model). If you push your tool in too far here, you can easily slice through these vital connections. That turns a simple battery swap into a much more complicated and expensive headache.
Disconnecting the Screen and Battery
With the adhesive cut, you can now open the iPad like a book. But hold on—don't lift the screen all the way off! It's still tethered to the logic board by several thin, fragile ribbon cables. How the screen opens depends on the model; some open from the side, while others hinge from the top.
Look for the metal shield covering the display and battery connectors. You'll need to remove a few tiny screws to get this shield off. You have to keep track of every single screw, as they're often different sizes. A magnetic mat is a lifesaver for this.
Once the shield is out of the way, use a plastic prying tool (a spudger) to gently pop off the connectors. Always start with the battery connector first. This is a non-negotiable safety step that de-energises the device, preventing any accidental short circuits. After the battery is disconnected, you can safely unclip the display and digitiser cables and set the screen assembly aside.
This visual gives you a simple overview of the main phases of the repair.
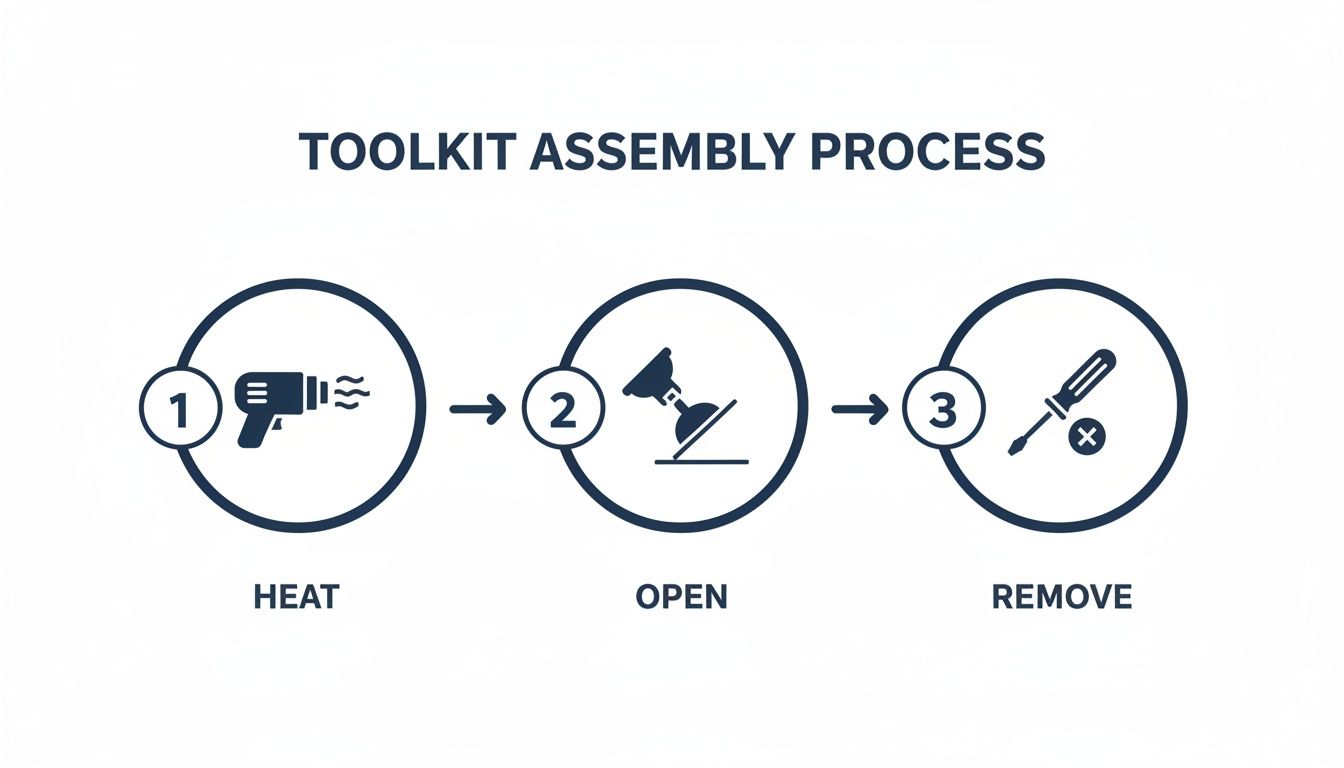
Key steps for an iPad Pro battery replacement in Brisbane.
It breaks down the core actions into heating, opening, and removing—the fundamental stages for getting to the battery.
Removing the Old Battery
Now for the main event: getting that old battery out. It’s held in place by incredibly strong adhesive strips. Trying to just yank it out is the most common—and most dangerous—mistake you can make. Prying against the battery can puncture it, which can lead to a thermal event (that's a fire, folks).
The right way to do this is to use isopropyl alcohol to dissolve the adhesive.
- If you see pull tabs on the adhesive strips (common on newer models), you can try gently lifting their edges. Pull them slowly and steadily to release the battery.
- No pull tabs? No problem. Carefully drip a small amount of 99% isopropyl alcohol along the edges of the battery.
- Give the alcohol a few minutes to seep underneath and do its magic on the glue.
- Take a plastic card (an old gift card is perfect) and gently slide it under the battery, slowly working it loose. Add more alcohol if you feel resistance. The goal is for the battery to come free without any bending or force.
Installing the New Battery and Reassembly
With the old battery gone, the hardest part is officially behind you. Before you put the new one in, take a moment to clean out any leftover gunk from the iPad's frame using a plastic spudger and a bit more alcohol. You need a clean surface for a secure fit.
Place the new battery into the frame, making sure the connector lines up perfectly with the socket on the logic board. Most replacement kits include new adhesive strips; apply these to the battery before you set it in place. Understanding what makes a quality adhesive is important, and you can learn more about why a good double-sided tape adhesive is crucial for a strong, lasting bond.
Once the battery is seated, just reverse your steps to put everything back together:
- Reconnect Cables: Carefully reattach the display and digitiser cables first. You should feel a faint click when they're seated properly.
- Connect the New Battery: The very last thing you should connect is the battery. This ensures no power is flowing while you're reconnecting those delicate screen components.
- Test Before You Seal: This is a big one. Before sealing the iPad, power it on. Check that the screen works, the touch response is good, and the new battery is showing up. This quick check can save you the major pain of having to re-open the device if a cable isn't quite right.
- Seal It Up: Apply new, pre-cut adhesive strips to the frame to get a clean, factory-like seal. Carefully close the iPad, make sure everything is aligned, and apply gentle pressure or clamps around the edges for a few hours to help the adhesive cure.
Final Checks and Calibrating Your New Battery
Alright, getting the new battery seated and the screen sealed is a huge relief, but the job isn't quite over yet. These next few steps are absolutely critical for making sure your hard work translates into reliable, long-term performance.
Skipping these final checks is like building a new engine and never tuning it—it might run, but it won’t run well. This last phase is all about verifying that every single component is working as it should and, most importantly, teaching your iPad’s software to communicate correctly with its new power source. This is the secret to getting accurate battery percentage readings and the best possible lifespan from your replacement.
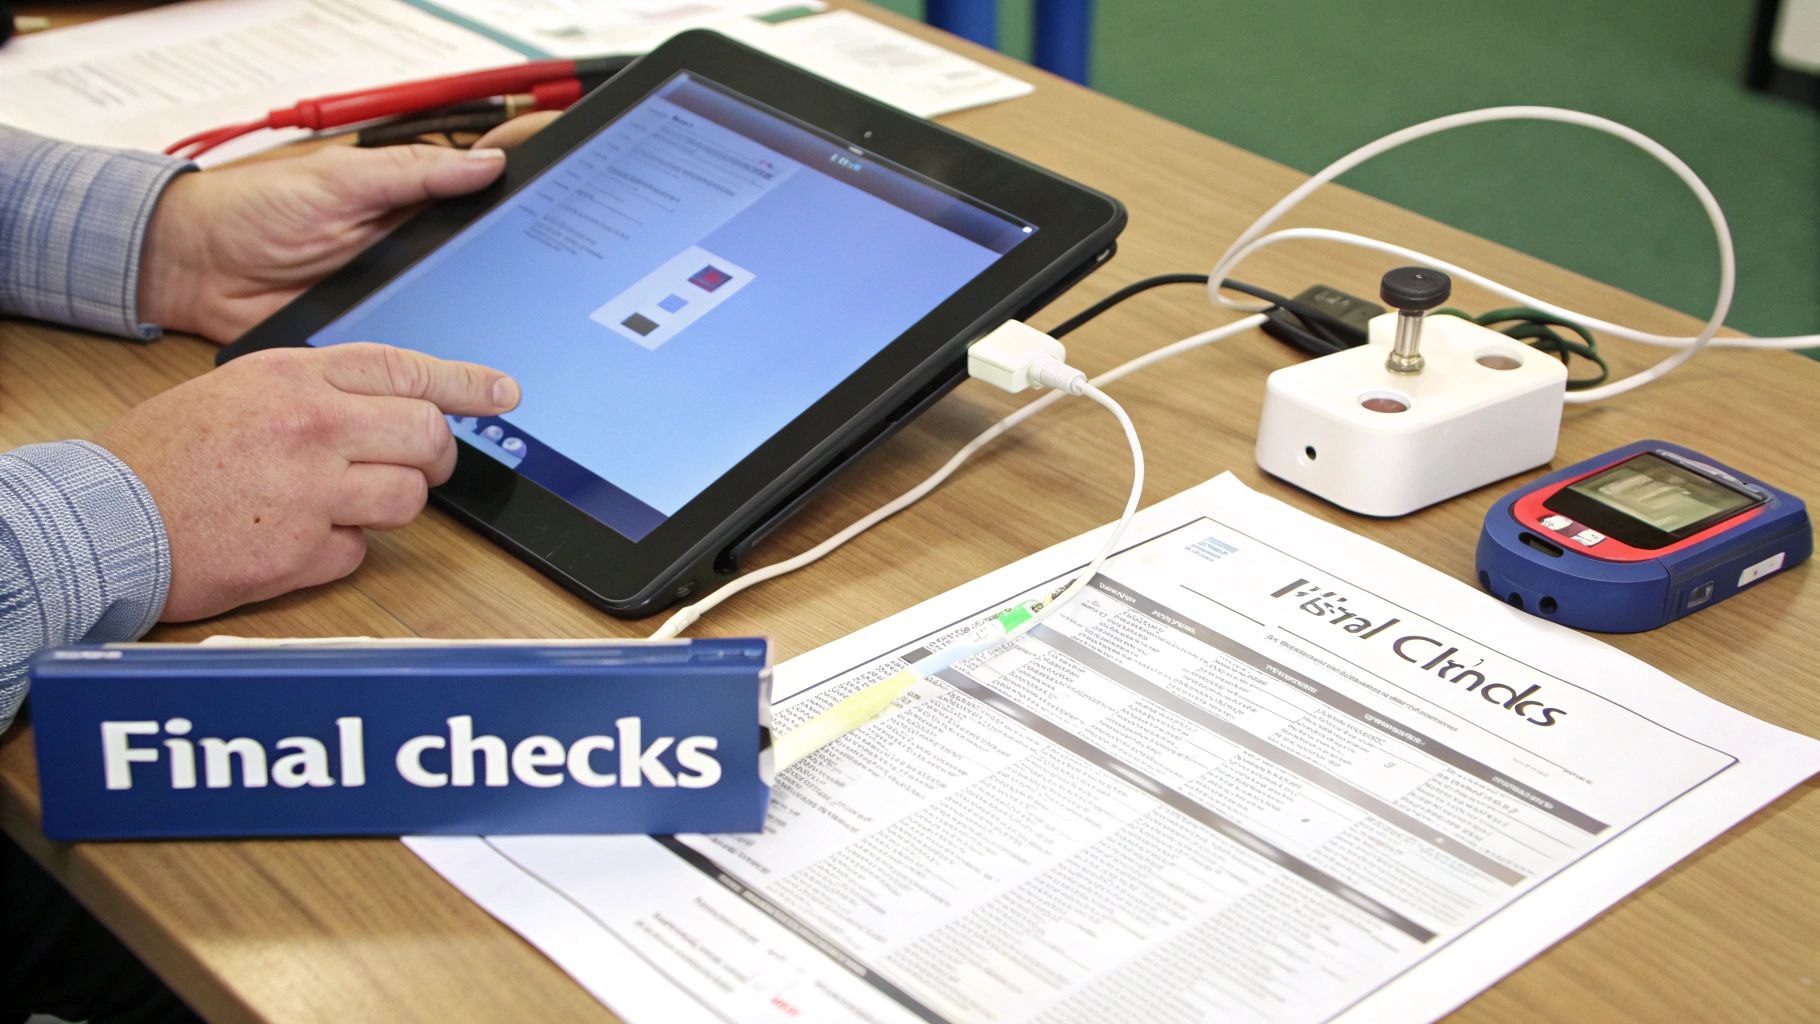
Running final diagnostic checks after replacing an iPad battery.
A Quick Post-Repair Checklist
Before diving into the battery calibration, you need to run a full diagnostic check. Trust me, it's much easier to fix a loose cable now than after you’ve already sealed everything up and started using the iPad again.
Run through this simple checklist to test the core functions:
- Display and Touch: Open an app with a white background and look for any discoloured spots or dead pixels. Next, drag an app icon all over the screen to make sure every zone is responsive to your touch.
- Buttons and Switches: Give the volume up/down buttons, the power button, and the mute switch (if your model has one) a good test. Make sure they all click and function correctly.
- Cameras: Open the Camera app and switch between the front and rear cameras. Snap a photo and take a short video with each to confirm they're working properly.
- Connectivity: Connect to your Wi-Fi network and browse a few websites. If you have a cellular model, check that it’s picking up a mobile signal.
- Charging Port: Plug in your charging cable. You should see the iPad recognise it and the charging icon appear immediately. A successful test here confirms a key part of the replacing iPad battery process went smoothly.
The Importance of Battery Calibration
With all the hardware checks out of the way, it’s time for the most crucial post-replacement step: battery calibration. A brand-new battery has a full, fresh capacity that your iPad's software doesn't recognise just yet. Calibration is the process of teaching the software the battery's true upper and lower limits.
Without proper calibration, you’ll likely see some strange behaviour. Think of the battery percentage jumping from 40% to 10% in an instant, or the device shutting down unexpectedly even when it says there's power left. This process syncs the hardware with the software for accurate readings you can trust.
The process itself is quite simple, but it does require a bit of patience. While the specifics can vary slightly, the fundamental method is pretty much the same for most devices. To get the most out of your new battery, you can learn more about the specifics of how to calibrate an iPhone battery, as the principles are nearly identical for an iPad.
Here's the breakdown of the full charge and discharge cycle:
- Full Discharge: First, use your iPad until it powers down on its own from a completely dead battery. Don't just let it sit there—actively use it by watching videos or playing a game to drain it faster.
- Rest Period: Once it’s off, let the iPad sit for at least 3-4 hours. This allows the battery chemistry to settle.
- Uninterrupted Charge: Now, plug it in and charge it all the way to 100%. Crucially, once it hits 100%, leave it on the charger for another 2-3 hours to ensure it’s fully saturated. It's always best to use the official Apple charger and cable for this.
- Final Restart: Once it's completely charged, perform a soft reset (by holding the power and home/volume button) while it's still plugged into the charger.
After you've done this, your iPad's software will have an accurate map of the new battery's capacity, giving you reliable performance for years to come.
Working Through Common DIY Repair Hiccups
Even with the best preparation, a DIY iPad battery replacement can hit a snag. It’s a stressful moment when something doesn't go to plan, but don't panic. Most issues that pop up are pretty common and, thankfully, have straightforward solutions. This section is your guide for navigating those little hurdles, drawing from real-world repair experience to get you back on track.
The trick is to be methodical. Instead of jumping to the worst-case scenario, start with the simplest explanation and work your way up. More often than not, the fix is much easier than you think.
The Dreaded Black Screen After Reassembly
You've got it all back together, you press the power button, and… nothing. A black screen is probably the most common and heart-sinking issue for any DIYer. Before you convince yourself you've fried the logic board, run through these checks. The cause is usually just a simple connection problem.
- Check the Battery Connection: This is the first and most likely culprit. A poorly seated battery connector won't deliver any power. Disconnect it, give it about 30 seconds, and then carefully reconnect it. You should feel a distinct, satisfying click when it's properly in place.
- Reseat the Display Cables: The display and digitiser cables are incredibly sensitive. They might look connected but could be off by a fraction of a millimetre. Gently disconnect both, inspect the pins for any damage, and reconnect them firmly.
- Give It a Hard Reset: Sometimes, the iPad's software just needs a jolt to recognise the new hardware. A hard reset (holding the power and home/volume buttons) can often force it to boot up and see the new battery.
The "it looks connected" trap is a classic. A connector can feel seated but still lack the perfect alignment for a solid connection. I've seen countless "dead" screens spring back to life just by reconnecting the cables with firm, even pressure.
Dealing With Damaged Screws or Cables
During disassembly, a couple of things can go wrong that require a steady hand and some patience. Stripping a tiny screw or nicking a delicate cable feels like a disaster, but these situations are often salvageable.
What to Do with a Stripped Screw
Those tiny internal screws are notoriously easy to strip. If you find one that won't budge, stop immediately before you make it worse. The best trick in the book is to place a small rubber band over the head of the screw, then press your screwdriver firmly into it. The rubber often provides just enough extra grip to get it moving.
Handling a Torn Ribbon Cable
This one is a bit more serious. If you've torn a display or digitiser cable, a repair isn't really possible; the entire screen assembly will need to be replaced. However, if you've nicked a less critical cable, like one for a button or speaker, you might be able to source a replacement part. The key is to correctly identify the damaged component before you order anything. This is one of those moments where getting some professional advice, perhaps from the experts at Screen Fixed Brisbane, can save you from a costly misdiagnosis.
When the New Battery Refuses to Charge
So you've installed the new battery and the iPad powers on, but when you plug it in, nothing happens. It's another frustrating but fixable issue. Before assuming the new battery is a dud, explore these other possibilities.
First, check the charging port for debris. A bit of pocket lint or dust can easily get lodged in there during the repair and prevent the cable from making a solid connection. Use a soft brush or a wooden toothpick to gently clean it out.
Next, try a different charging cable and power adapter. It's surprisingly common for a faulty cable to be the real problem, and it's an easy thing to overlook when your focus is on the internal hardware. Finally, if you’re certain the port and cables are fine, revisit that battery connector one last time. A slightly misaligned connection can provide enough juice for the device to turn on, but not enough to carry a proper charging current.
Knowing When to Trust a Professional Repair Service
Getting your hands dirty with a DIY repair can be incredibly satisfying, but the real mark of a smart repairer is knowing when to put the tools down. You have to be honest with yourself about your limits. Sometimes, the best and most sensible choice is to hand the job over to a professional who does these repairs day in, day out.
Recognising that moment can save you from turning a simple battery swap into an expensive, irreversible mess. It’s not about admitting defeat; it’s about making the right call for your device and your own peace of mind. There are a few situations that should be immediate red flags, telling you it’s time to call in an expert.
Red Flags That Scream “Stop”
During your repair, you might hit a snag that seriously raises the risk of permanent damage. If you see any of these signs, it's a clear signal to pause and think about getting professional help.
- A Swollen Battery: This is the big one. A puffy, swollen battery is a major fire hazard. It's under immense pressure and can be easily punctured, which could lead to a dangerous thermal reaction. Professionals are kitted out with the right safety gear and know the proper protocols for handling and disposing of these batteries.
- Accidental Damage to Other Components: Did a tiny component just ping off the logic board while you were working? Or maybe you accidentally tore a cable that wasn't the battery. Stop immediately. Trying to fix something like that without microsoldering skills is only going to dig a deeper hole.
- Feeling Overwhelmed: There's absolutely no shame in feeling out of your depth. If the repair is more complex than you bargained for and you're starting to get frustrated, that’s exactly when mistakes happen. A professional service is a stress-free way out.
Comparing DIY vs Professional Costs in Australia
When you're weighing up your options, you need to look past the initial price of a DIY kit. Think about the total potential cost, which has to include the risk of something going wrong. A botched repair can easily end up costing you more to fix than a professional service would have charged in the first place.
In Australia, the cost for replacing an iPad battery can be all over the place. Official Apple repairs can be expensive, and for older models, often involves replacing the whole device. This is a key reason why many people with out-of-warranty iPads turn to independent repair shops. Third-party repairers are usually 20-30% cheaper than Apple's direct pricing, making them a much more practical choice. You can get a better financial picture by learning more about the details of iPad battery replacement costs.
A DIY kit might only set you back $50, but cracking the screen during the repair could cost an extra $200 or more to fix. When you weigh that risk against a professional job that comes with a warranty, the value proposition becomes crystal clear.
The Value of Professional Expertise
Choosing a service like Screen Fixed Brisbane isn't just about paying someone to do the labour. You're really investing in a whole package of benefits that a DIY project just can't match. Technicians have done hundreds of these exact repairs, using professional-grade tools that minimise risk and guarantee a perfect result.
That expertise is backed by a solid warranty. If anything goes wrong with the new battery or the repair itself during the warranty period, you're completely covered. Honestly, that peace of mind is probably the most valuable part of the deal. You walk away with a perfectly working iPad, guaranteed results, and zero stress. It takes all the uncertainty of a DIY job and turns it into a reliable, predictable solution.
When you need a guaranteed, professional result for your iPad battery replacement, trust the experts. Screen Fixed offers expert repairs with quality parts and a reliable warranty.
Book your repair with Screen Fixed Brisbane today
Disclaimer: All third-party brand names, such as Apple and iPad, are trademarks of their respective owners. Screen Fixed is an independent repair service and is not affiliated with these brands.