
It usually starts small. Your MacBook Air, which once felt like it could last forever, suddenly can't get through a single meeting without being plugged in. If your laptop is starting to feel more like a desktop, it’s a clear sign you might need to replace the battery in your MacBook Air. This guide will walk you through diagnosing the problem, understanding your options, and deciding whether a DIY fix or a professional service is right for you.
Is It Time for a New MacBook Air Battery?
We’ve all felt that sinking feeling when a MacBook Air suddenly dies at 40% charge. It’s a classic symptom of a worn-out battery. Over time, the lithium-ion batteries inside all laptops naturally degrade, meaning they hold less of a charge and deliver power less consistently. This isn't just an annoyance; it can genuinely slow your Mac down as it struggles to draw enough power for demanding tasks.
Catching the warning signs early can save you from a world of frustration and unexpected shutdowns. The good news is your MacBook is pretty good at telling you something’s wrong—you just have to know where to look.

alt="A user checks the battery health status on their MacBook Air, which shows a 'Service Recommended' warning."
caption="Checking the battery health status in macOS on a MacBook Air."
Key Symptoms of a Failing Battery
So, is your MacBook's battery on its last legs? Keep an eye out for these common red flags. While a single symptom might just be a fluke, seeing a few of them together is a strong indicator that a replacement is on the horizon.
- "Service Recommended" Warning: This is macOS giving you a direct heads-up. You can see it by holding the Option key and clicking the battery icon in your menu bar. It means the battery still works, but its ability to hold a decent charge is seriously diminished.
- Draining Way Too Fast: If a full charge barely gets you through an hour or two of light work, especially compared to the solid performance you used to get, the battery's capacity has faded significantly.
- Unexpected Shutdowns: Your machine powering off out of nowhere, particularly when the battery meter still shows a reasonable percentage (like anything above 20%), is a huge sign of a failing battery.
- Physical Swelling: This is the most serious symptom. A swollen battery can make your trackpad difficult to click or even cause a visible bulge in the bottom case. If you see this, stop using the laptop immediately and get it looked at by a professional.
A healthy MacBook battery is designed to keep up to 80% of its original capacity after 1,000 full charge cycles. Once it drops below that threshold, you'll really start to notice the decline in its day-to-day performance. For a deeper look, check out our guide on when you might need a new battery for your MacBook Air.
Your Two Main Options
Once you've confirmed the battery is the problem, you have two main options. You can either roll up your sleeves and tackle the replacement yourself, or you can hand it over to the experts. The DIY route can be rewarding and save you some money, but only if you're comfortable working with delicate electronics.
On the other hand, a professional service offers a completely stress-free solution, backed by the right tools and years of experience. The replacement itself is usually pretty quick, often taking just 1–3 hours if the parts are on hand. Deciding which way to go really comes down to your technical confidence, how much time you have, and your comfort level with the risks involved.
Finding the Right Battery and Tools for the Job
Diving into a repair with the wrong parts is a fast track to frustration. Before you even think about popping the back off your laptop, you need to get your hands on the correct replacement battery and the specific tools for the job. Think of this as your pre-flight check for a successful MacBook Air battery replacement—it's what will save you from making costly mistakes down the line.
The first big decision is the battery itself. You'll find a few options online, mainly split between Original Equipment Manufacturer (OEM) parts and third-party replacements. While OEM parts are the same as what Apple uses, a high-quality third-party battery from a trusted supplier can be a fantastic, more affordable alternative.
When you're hunting for a replacement battery for your MacBook Air, the most important thing is to match the part number exactly to your computer's model. Don't just go by the year it was made.
Choosing Between OEM and Third-Party Batteries
A good third-party battery should meet or even exceed the original's specs, like its voltage, capacity (the figure in milliampere-hours or mAh), and physical size. A big giveaway of quality is a warranty. If a supplier offers a warranty, it shows they have confidence in their product's performance and longevity. A battery without one is a massive red flag.
Be wary of suspiciously cheap batteries you see on huge online marketplaces. They're often built with lower-grade cells, which can lead to poor performance, a very short lifespan, or even become a safety hazard. It’s much safer to stick with specialised electronics parts suppliers who have a reputation to protect.
Essential Tools for the Job
Apple has a long history of using proprietary screws to keep people out of their devices, and the MacBook Air is no different. You can't just pull a standard Phillips head screwdriver from your tool kit and hope for the best. If you try, you'll almost certainly strip the screws, turning what should be a simple job into a massive headache.
To get the case open and the old battery out safely, you'll need a couple of specific precision screwdrivers:
- Pentalobe P5 Screwdriver: This is for the screws on the bottom case of your MacBook Air. Its unique five-point star shape will stop a standard toolkit in its tracks.
- Torx T5 Screwdriver: Once you're inside, you'll typically need this to remove the smaller screws that hold the battery to the top case.
Getting a proper toolkit isn't optional; it's essential. These tools are designed for a perfect fit, which prevents you from damaging the delicate screw heads and ensures you can put your Mac back together securely. If you want to get a better handle on these unique tools, you can learn more about Pentalobe screwdrivers for Apple repairs in our detailed guide.
Pro Tip: As you take the screws out, place them on a magnetic mat or in a little container with labels. The screws inside a MacBook Air can be different lengths, and mixing them up can cause serious damage to the logic board when you're putting it all back together.
To make things a bit easier, we've put together a quick reference table for the most common MacBook Air models. This should help you nail down your Mac's model number and see exactly which battery and tools you need before you start. The best first step is always to find your model number (it's on the bottom case, usually starting with an 'A') and check it against this list.
MacBook Air Model and Required Battery Tool Guide
Use this quick reference to find the correct battery and screwdrivers for the most common MacBook Air models.
| MacBook Air Model Number | Production Years | Replacement Battery Model | Required Screwdrivers |
|---|---|---|---|
| A1369 / A1466 | 2010–2017 | A1405 / A1496 | Pentalobe P5, Torx T5 |
| A1932 | 2018–2019 | A1965 | Pentalobe P5, Torx T5 |
| A2179 | 2020 (Intel) | A2171 | Pentalobe P5, Torx T5 |
| A2337 (M1) | 2020 | A2389 | Pentalobe P5, Torx T5 |
Having this info ready to go makes the buying process so much smoother. It guarantees you're ordering the exact parts for your specific machine, setting you up for a successful repair right from the start.
Your Guide to Replacing the MacBook Air Battery
Alright, with the right parts and tools laid out, it’s time to get hands-on. This is where we move from planning to doing, walking through the entire process of swapping out the battery in your MacBook Air. We'll break it down into clear, manageable stages, focusing on safety and precision every step of the way. Think of this guide as your straightforward companion, cutting through confusing jargon to help you get the job done with confidence.
The journey ahead involves setting up a safe workspace, taking off the bottom case, disconnecting the old battery, and tackling whatever is holding it in—whether that's simple screws or the notoriously stubborn adhesive strips found in newer models.
Remember, identifying your model, sourcing the correct battery, and gathering your tools is the foundation for a successful repair. This infographic below sums up that crucial first phase.

alt="A three-step workflow diagram: 1. Identify Model, 2. Get Battery, 3. Get Tools, for a MacBook Air battery replacement."
caption="The three key preparation steps for a successful MacBook Air battery replacement."
As you can see, a good replacement starts long before you even touch a screwdriver. It all begins with careful prep work that links your specific laptop to the exact parts you need. Now, let’s dive into the practical steps.
Setting Up a Safe and Organised Workspace
First things first: create a clean, well-lit, and static-free area to work in. A wooden or plastic table is perfect, as metal surfaces can conduct electricity and create risks. If you have an anti-static mat, lay it down. If not, just be mindful of static by grounding yourself every so often—a simple touch on a large metal object will do the trick.
Make sure your MacBook Air is completely shut down, not just asleep. Once it’s off, unplug the charger and anything else connected to it. This isn't just a friendly suggestion; it's a vital safety step to prevent any short circuits.
Get your tools organised and within easy reach. A magnetic screw mat or even a few small, labelled containers are absolute lifesavers for keeping track of those tiny Pentalobe and Torx screws. Mixing them up is a classic mistake that can lead to disaster during reassembly—a long screw in a short hole can easily puncture components on the logic board.
Removing the Bottom Case
With your workspace prepped, flip your MacBook Air over onto a soft cloth to avoid scratching the lid. Grab your Pentalobe P5 screwdriver and start carefully removing the screws from the bottom case.
Pay close attention here. On most MacBook Air models, the two screws nearest the hinge are longer than the others. Make a special note of where they came from. Keeping them separate will save you a major headache later on.
Once all the screws are out, the bottom case won’t just drop off. It's held in place with small clips. You'll need to gently pry it open, starting from the hinge side, using a plastic spudger or even your fingernails. Just work your way around the edges until you feel the case pop free, then lift it off and set it aside.
Disconnecting the Old Battery
You're in. The battery is the big, black, multi-celled unit taking up most of the space. Before you do anything else, your number one priority is to disconnect it from the logic board.
Look for the small, wide battery connector. Using the flat end of a plastic spudger or your fingernail, carefully pry the connector straight up and away from its socket. Never, ever use a metal tool for this step. You could easily short a connection and cause permanent, expensive damage.
Crucial Safety Warning: Lithium-ion batteries are no joke. If you puncture one, it can swell, release toxic fumes, and even catch fire. Work slowly, use gentle pressure, and never use sharp or metal tools to pry at the battery cells themselves. Your safety is paramount.
With that connector detached, the logic board is no longer powered, making it safe to continue. This one simple action is the most important thing you'll do during this entire repair.
Removing the Old Battery Cells
How you get the battery out depends entirely on which MacBook Air model you have. This is where the process can really differ.
- Older Models (e.g., A1466): If you have a model from around 2017 or earlier, you're in luck. The battery is usually just held in by a few Torx T5 screws. Simply undo them—keeping track of where each one goes—and the old battery will lift right out. Easy.
- Newer Models (e.g., A1932, A2337): Newer MacBook Airs use very strong adhesive pull-tabs to secure the battery, which makes removal much more of a challenge. You'll spot several white or black tabs tucked under the edges of the battery cells. The trick is to pull these tabs slowly and at a very low, flat angle to stretch them out from underneath.
If the adhesive tabs break—and they often do—you'll need to carefully work a plastic card (like an old gift card) under the battery cells to slice through the remaining adhesive. A few drops of isopropyl alcohol (90% or higher) around the edges can help dissolve the glue. Just be patient and use minimal force to avoid bending or, worse, puncturing the cells. Once the old unit is out, you're ready to install its replacement.
Reassembly and New Battery Calibration
You've successfully installed the new battery, which is a massive achievement. But the job isn't quite over yet. The final steps—reassembly, the first power-on, and battery calibration—are just as critical to ensure your MacBook Air runs perfectly for years to come. Rushing this last part can lead to some really frustrating issues down the track, so let’s walk through it carefully.
With the new battery sitting snugly in place and its connector securely plugged into the logic board, the first task is to get that bottom case back on. This needs a bit of care to avoid damaging the internal clips or getting it misaligned.
Securing the Bottom Case
Start by positioning the bottom case over the chassis, making sure you align it first along the hinge edge. Gently press down around the perimeter of the case until you hear a series of satisfying clicks. Those are the internal clips re-engaging, which is essential for a snug, secure fit.
Once it's clipped in, it’s time to replace the screws. Remember how you carefully separated those longer Pentalobe screws that came from near the hinge? Now is when that diligence pays off.
- Start with the long ones: Re-insert the two longer screws into their original holes by the display hinge first.
- Secure the rest: Proceed to tighten the rest of the shorter Pentalobe screws around the edge of the case.
- Don't overdo it: Tighten them until they are just snug. Applying too much force can strip the threads in the aluminium chassis, which is a headache you definitely want to avoid.
With the case back on, your MacBook Air is physically whole again. The next step is to power it on for the first time with its new heart.
The Critical First Power On and Calibration
This is the moment of truth. Plug in your MagSafe or USB-C charger and power on your MacBook Air. It should boot up normally. Don't be alarmed if the battery percentage seems a bit wild at first; this is completely normal and exactly what the calibration process is designed to fix.
Calibration is essentially teaching macOS the true capacity of your new battery. It resets the power management system's memory, ensuring the percentage you see on screen accurately reflects the power you have left. Skipping this can lead to your Mac shutting down unexpectedly, even when it says you have 20% or 30% charge remaining.
This simple charge-and-discharge cycle is the single most important step for maximising the lifespan and accuracy of your new battery. It establishes a baseline for the power management controller, preventing future headaches and ensuring optimal performance.
To properly calibrate your new battery, follow this specific cycle:
- Charge to 100%: Keep your MacBook plugged in and let it charge completely to 100%. Once it hits 100%, leave it on the charger for another two hours. This makes sure it's fully saturated.
- Discharge completely: Now, unplug the charger and use your MacBook normally until it shuts down on its own. It's fine to keep working, but maybe hold off on any super-intensive tasks like video editing during this first discharge.
- Let it rest: After it shuts down, leave it off and unplugged for at least five hours. This allows the battery to settle at its lowest state.
- Full recharge: Finally, plug the charger back in and charge it uninterrupted all the way back to 100%.
Once this cycle is complete, your new battery is fully calibrated and ready for normal use. From this point on, you can charge it whenever you like. You've successfully completed the mission to replace the battery in your MacBook Air, bringing new life to your trusted machine.
DIY Repair vs a Professional Service
So, you've figured out the problem, you've got the parts lined up, and you've watched a few tutorials. Now for the big question: should you actually do this yourself? Tackling a DIY MacBook Air battery replacement can feel incredibly satisfying and definitely save you a few dollars. But let's be honest, it's a path littered with potential landmines that can turn a simple fix into an expensive headache.
This isn't just about money. It's about weighing up your own confidence, time, and tolerance for things going sideways against the security that comes with getting a pro to handle it. Let's get real about what can go wrong and what a professional service brings to the table.
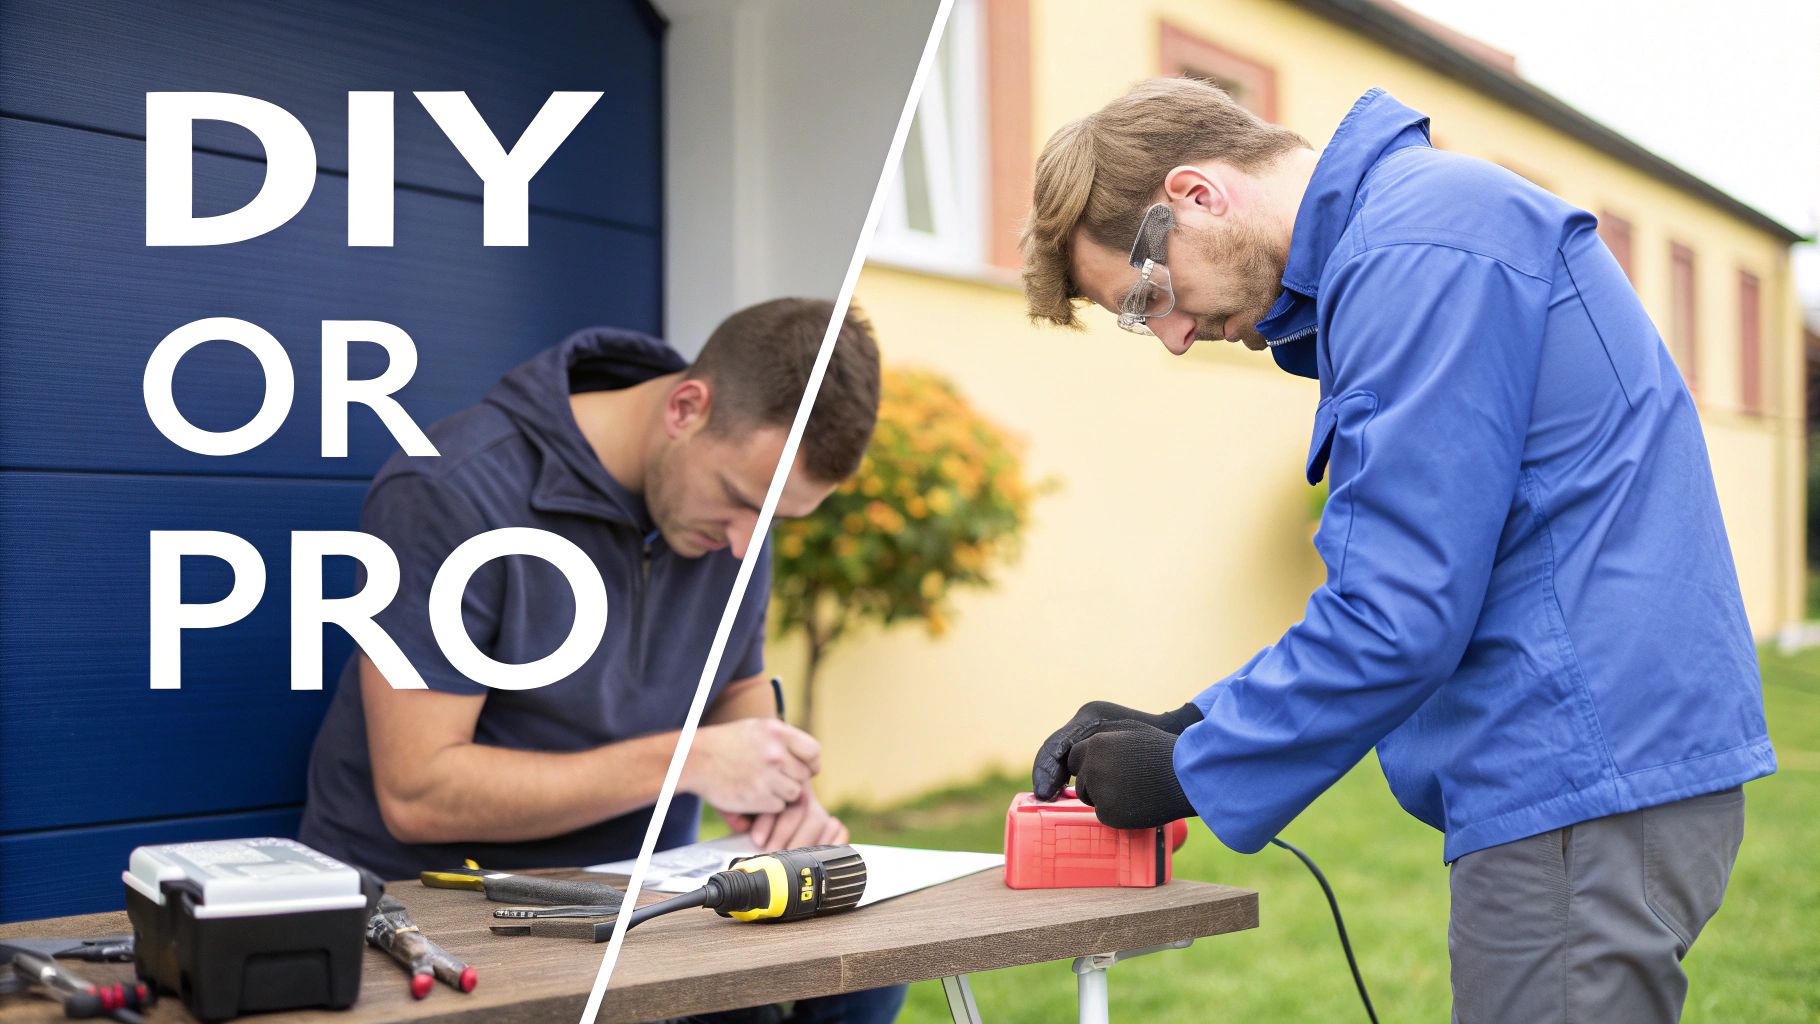
alt="A split image showing a person struggling with a DIY repair versus a confident professional technician."
caption="Deciding between a DIY repair and a professional service comes down to risk, time, and expertise."
The Real Risks of a DIY Replacement
The internet is full of DIY success stories, but it’s just as important to understand where things can go pear-shaped. One tiny slip-up can have some pretty serious consequences. For instance, using the wrong screwdriver or just a bit too much force can easily strip a Pentalobe screw head, leaving you stuck before you even get the back cover off.
Once you're inside, the stakes get higher. The battery connector is notoriously fragile; a slight misalignment or a bit of extra pressure can wreck the socket on the logic board—a component that will cost you hundreds of dollars to get fixed. And then there's the battery itself. Puncturing a lithium-ion cell isn't just a minor mistake; it's a genuine fire hazard.
A huge advantage of professional repair is simply risk management. A technician has probably done this exact repair hundreds of times, turning potential disasters into routine procedure. For them, a stubborn adhesive strip isn't a crisis—it's just another Tuesday.
Even if you navigate all those hazards perfectly, you still have to trust the part you bought. The online market is flooded with cheap, low-grade batteries that promise the world but deliver nothing but disappointment, often failing within a few months. A reputable repair shop like Screen Fixed Brisbane already has trusted supply chains for premium parts, ensuring your new battery is reliable and built to last.
The Clear Advantages of a Professional Service
Opting for a professional repair service basically transforms the entire experience from a stressful gamble into a simple, straightforward transaction. The biggest benefit is expertise. Technicians have the specialised tools, proper anti-static workstations, and the muscle memory that only comes from daily practice. They know exactly how much force to use on a glued-in battery and how to handle those delicate ribbon cables without causing damage.
Time is another massive factor. A DIY job could easily eat up your entire afternoon (or longer, if you hit a snag). A professional can often have the job done in about an hour. You drop off your MacBook Air and pick it up a short while later, working perfectly.
Most importantly, professional repairs come with a warranty. If the new battery is faulty or something goes wrong with the installation, you're covered. That warranty is your safety net, giving you complete peace of mind that a DIY repair just can't offer. For most people who rely on their MacBook every day, that level of assurance is priceless.
To make the choice a bit easier, let's break down the key differences side-by-side.
DIY vs Professional Battery Replacement at a Glance
This table gives you a clear, at-a-glance comparison to help you decide between tackling the job yourself and handing it over to a professional repair service.
| Factor | DIY Replacement | Professional Service (e.g., Screen Fixed) |
|---|---|---|
| Cost | Lower upfront cost for parts and tools ($80–$150). However, the potential cost of accidental damage can be extremely high. | Higher initial cost ($150–$250+) but it's a fixed price. This includes premium parts, expert labour, and a warranty. |
| Time | Can take several hours, especially for a first-timer. This doesn't include time spent researching and ordering parts. | Typically completed in 1–3 hours. This allows for a quick, convenient turnaround so you're not without your device for long. |
| Risk Level | High. There's a real risk of stripping screws, damaging the logic board, or puncturing the battery. Any of these would void your warranty. | Extremely low. The repair is handled by experienced technicians, and the service is backed by a comprehensive warranty for peace of mind. |
| Part Quality | Variable. Success depends entirely on sourcing a reliable battery from a reputable supplier, which can be a lottery for consumers. | Consistently high. Professionals use trusted suppliers for quality-tested parts that meet OEM specs for performance and safety. |
| Tools | Requires buying specific tools like Pentalobe and Torx screwdrivers, a spudger, and possibly isopropyl alcohol. | No tool purchase is necessary. The service includes the use of professional-grade, specialised equipment for the job. |
Ultimately, the choice is yours. If you're a seasoned tinkerer who loves a challenge and understands the risks, a DIY replacement can be a satisfying project. But for the vast majority of people who depend on their MacBook Air and just want a guaranteed, stress-free solution, a professional service like the MacBook repairs offered by Screen Fixed Brisbane is the smarter, safer, and often more logical choice.
Common Questions About MacBook Air Battery Replacement
To wrap things up, let's go through some of the most common questions we get from people thinking about a MacBook Air battery replacement. Getting some clear, straightforward answers can help you figure out if this is a project you want to tackle yourself or hand over to a pro.
How Much Does It Cost to Replace a MacBook Air Battery in Australia?
The cost can swing quite a bit depending on which path you take. If you go directly through Apple, you can expect to pay anywhere from $209 to $339, which varies based on your specific MacBook Air model.
Independent repair shops, on the other hand, are often a more budget-friendly choice. A professional service at a trusted local store usually lands in the $150 to $250 range. That price typically includes both the new battery and the expert labour to get it installed properly.
A DIY kit might look like the cheapest route upfront, costing around $80-$120 for the parts. Just remember it comes with the risk of causing more expensive damage if something goes sideways during the repair.
Will Replacing the Battery Myself Void My Apple Warranty?
In a word, yes. If your MacBook Air is still covered under its original warranty or an AppleCare+ plan, doing a self-repair will almost certainly void your coverage for any issues related to the battery or any other parts you might accidentally damage along the way.
However, if your device is already well out of its warranty period, this isn't a concern anymore. That makes a DIY or third-party repair a much more practical and cost-effective option.
For out-of-warranty devices, the freedom to choose your repair method opens up more affordable solutions. You're no longer tied to official service centres, giving you much greater flexibility.
What Is a Battery Cycle Count and When Should I Worry?
Think of a cycle count as a measure of your battery's life experience. One complete charge and discharge equals one cycle. Modern MacBook batteries are engineered to hold up to 80% of their original capacity after hitting 1,000 cycles.
You should start thinking about a replacement when your cycle count is getting close to that number and you’re noticing a real-world drop in how long it lasts day-to-day. The "Service Recommended" warning popping up in macOS is another dead giveaway that it's time for a change.
How Do I Safely Dispose of My Old MacBook Battery?
Whatever you do, never throw old lithium-ion batteries in your regular household rubbish. They are a serious fire hazard and contain materials that are incredibly harmful to the environment.
In Australia, you must take them to a designated e-waste recycling point. A great resource is the Australian Battery Recycling Initiative (ABRI), which can help you find a local drop-off point. Many local councils and big electronics retailers also offer these services completely free of charge.
If you've decided that a professional touch is the right move, our team is here to help. Book your MacBook Air battery replacement with Screen Fixed Brisbane today for a fast, reliable, and warranty-backed service.
Disclaimer: Apple, MacBook, MacBook Air, and macOS are trademarks of Apple Inc., registered in the U.S. and other countries. Screen Fixed is an independent repair service and is not affiliated with or endorsed by Apple Inc.