
Is your iPhone 14 Pro struggling to make it through the day? If it dies before lunchtime, feels sluggish, or just shuts down out of nowhere, it might be time for a new battery. This kind of performance drop is a normal part of a battery's life, and a professional iPhone 14 pro battery replacement can get your device back to the power and speed it had on day one.
When Your iPhone 14 Pro Battery Just Can't Keep Up
It’s a familiar, sinking feeling: you’re not even through your morning coffee, and your iPhone 14 Pro is already hitting that dreaded 20% warning. While checking the battery health percentage in your settings is a good start, the real-world signs of a dying battery are often far more obvious and annoying.
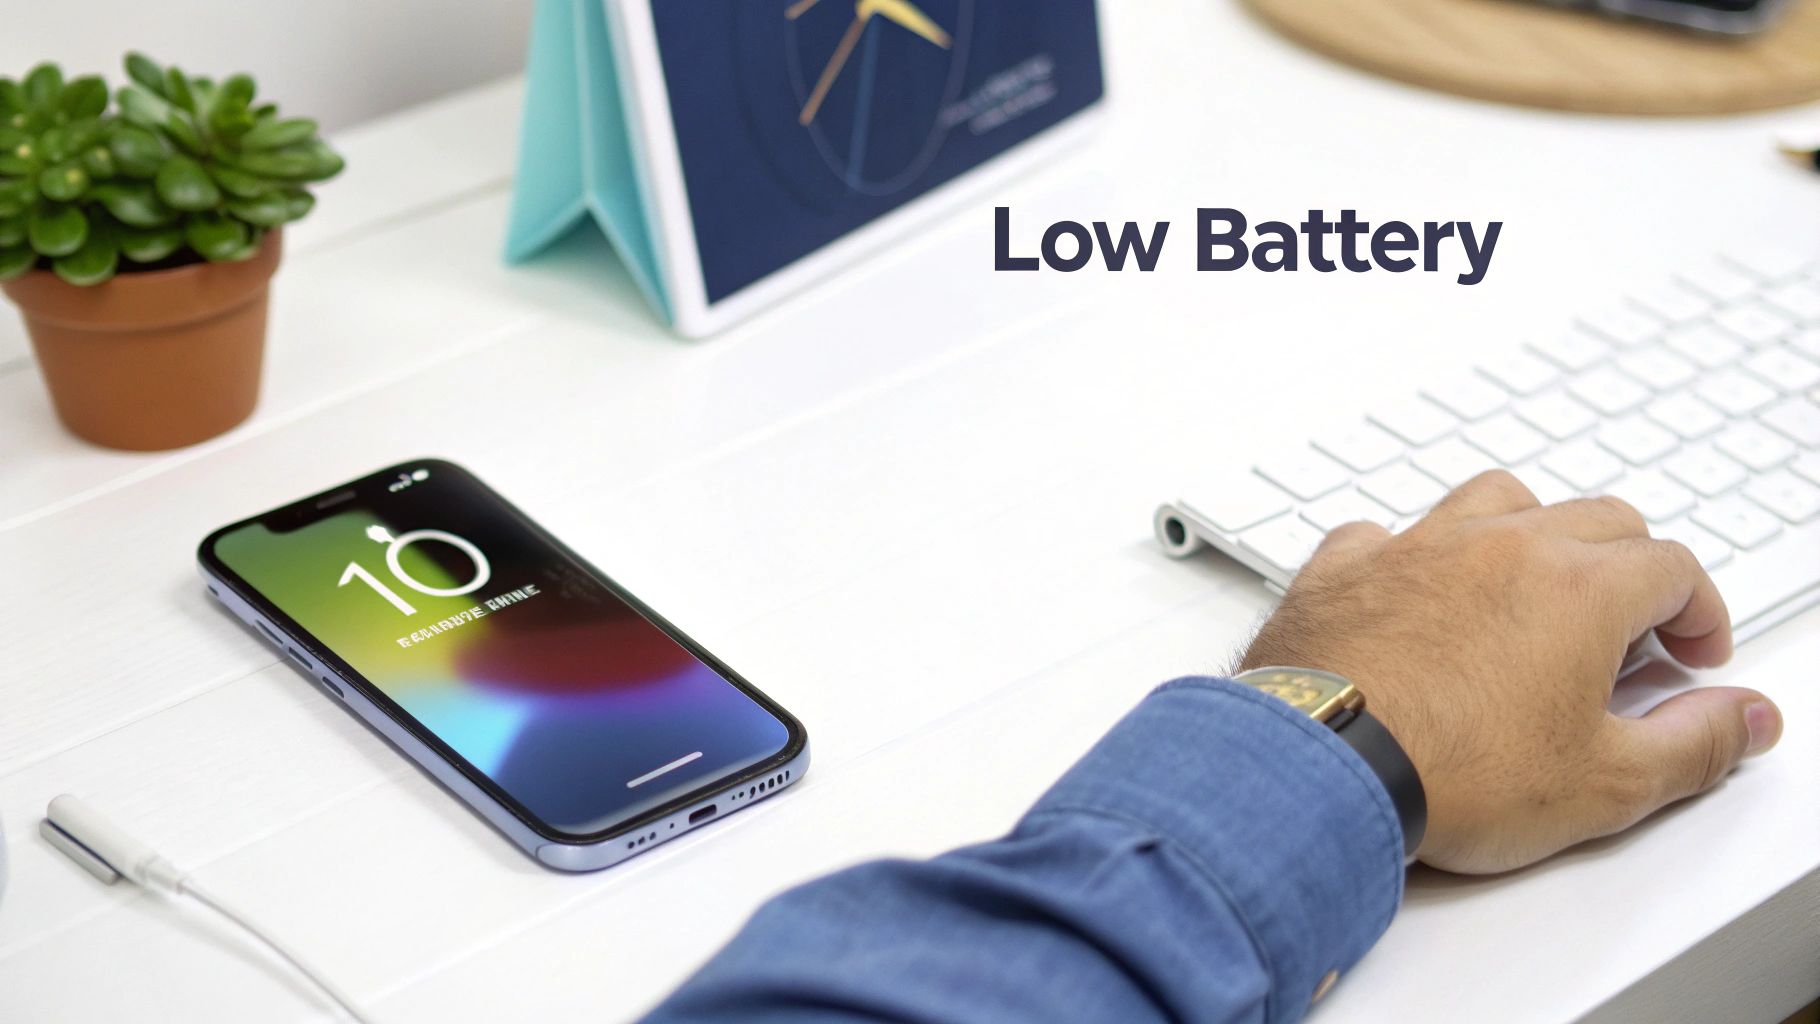
Caption: An iPhone 14 Pro displaying a low battery warning, a common sign it's time for a battery replacement.
This isn't just about needing to charge it more often. A degraded battery can make your whole phone feel slow, even when you're doing simple things like scrolling through social media. You might also have to deal with unexpected shutdowns, especially in the cold, where the phone just gives up despite showing it still has juice. These are all signs that directly impact how reliable your device is.
The Science Behind Battery Decline
Lithium-ion batteries, like the one in your iPhone 14 Pro, naturally wear down over time with every charge and discharge. It's an unavoidable process called chemical ageing that's built into the battery's technology. As the battery gets older, its capacity to hold a full charge drops, leading to the performance problems you're experiencing.
This isn't just a feeling; it's a measurable reality. For example, some Australian iPhone 14 Pro users have seen their battery health drop from 93% to 92% in less than a year. A typical lithium-ion battery is designed to keep about 80% of its capacity after 500 charge cycles, so seeing a noticeable decline after one or two years of regular use is totally expected. You can read more about user experiences with battery degradation on Apple’s community forums to see you're not alone.
Key Takeaway: Your iPhone's battery health declining is normal. Telltale signs like poor battery life, sluggish performance, and random shutdowns are clear signals that it's time to think about a replacement.
Beyond the Battery Health Percentage
The Battery Health screen in your iPhone’s settings is a useful metric, but it doesn't always paint the full picture. Your real-world experience is the truest test. If your phone just can't keep up with your daily needs anymore, it’s time for a change. Catching these signs early means you can sort it out before it becomes a major headache.
You might notice other subtle clues that your battery is on its way out:
- Struggling with intensive apps: Your phone might get unusually hot or slow down when you're using GPS navigation or playing games.
- Inconsistent charging: The battery percentage might jump or drop erratically instead of charging and discharging smoothly.
- Diminished peak performance: iOS might be quietly throttling your phone's processor to prevent those unexpected shutdowns, which makes everything feel slower.
Recognising these signs is the first step toward getting your iPhone back to its best. The good news is that a professional battery replacement is a straightforward and effective solution. It’s a practical fix that breathes new life into your device, making it feel brand new without the cost of a full upgrade.
Getting Ready for a Smooth Battery Swap
Whether you’re planning a DIY battery replacement for your iPhone 14 Pro or taking it to a professional, a little prep work goes a long way. Taking a few minutes to get your device ready can prevent a straightforward repair from turning into a massive headache. Think of it as setting the stage for a successful operation—the better you prepare, the smoother everything will go.
Honestly, skipping these steps is one of the most common mistakes we see people make. It can lead to lost data, weird software glitches, or unnecessary delays in getting your phone back up and running. A little bit of prep ensures the focus stays exactly where it should be: on the battery swap itself.
Your Pre-Repair Checklist: The Non-Negotiables
Before anyone cracks open your phone, you need to protect what’s inside. This isn't just a list of suggestions; these are the essential steps to guarantee a seamless and risk-free replacement.
- Do a Full Backup: This is your absolute number one priority. Can you imagine losing years of photos, contacts, or messages? You can back up your iPhone to iCloud right from the device, or plug it into a Mac or PC to create a backup there. A full backup is your ultimate safety net, making sure you can restore everything just the way it was.
- Update to the Latest iOS: Software compatibility is a big deal. Running the latest version of iOS ensures your phone's software is optimised to recognise and work with new hardware, like a fresh battery. It's a simple step that can prevent software conflicts or your phone showing incorrect battery health readings after the job is done.
- Turn Off 'Find My': For any repair service to happen, this feature has to be disabled. 'Find My' is a security lock tied to your Apple ID, which stops anyone else from accessing or servicing the device. Just go to Settings > [Your Name] > Find My, and toggle it off. You'll need your Apple ID password to do this.
Following these three steps will put you in the best possible position for a successful repair, whether you're visiting a workshop or tackling it yourself.
Why Each Step Is So Important
Each of these preparation steps has a specific, crucial job. The backup protects your digital life, the iOS update keeps the software happy, and disabling 'Find My' gives the green light for the repair to start. Even authorised repair centres in Australia treat these as standard procedure.
For example, getting this service done through official channels will set you back around A$169 out-of-warranty, and they won't even start without these preparations being complete. This whole process is designed to make the replacement efficient and completely remove the risk of losing your data.
Spending 20 minutes getting your device ready can save you hours of potential frustration. It’s a tiny time investment that ensures your iPhone 14 Pro battery replacement is smooth, predictable, and successful.
Once you've ticked off these preparations, you're ready to move on. If you're going the DIY route, the next phase is gathering the right tools. You'll need specialised gear like pentalobe screwdrivers, which are made specifically for Apple devices. If you want to know why using the correct screwdriver is so critical, check out our guide on pentalobe screwdrivers for iPhone repairs. Having the right kit is the first real step in any hands-on repair.
Thinking About a DIY Battery Swap? Here’s the Reality.
For those with a steady hand and a bit of technical confidence, tackling an iPhone 14 Pro battery replacement yourself can seem like a great way to save a few quid. The internet is flooded with guides and sped-up videos that make it look like child's play. What those slick tutorials often gloss over, though, is the sheer precision required and the very real risk of turning a simple job into an expensive nightmare.
This isn’t like changing the batteries in your TV remote. We’re talking about a complex, compact machine sealed with powerful adhesives and packed with delicate, paper-thin cables. The goal here isn't to scare you off, but to give you a clear-eyed, honest look at what you’re getting into. A successful DIY repair is incredibly satisfying, but a failed one can be costly and deeply frustrating.
Gearing Up: Why Your Kitchen Drawer Toolkit Won’t Cut It
First things first: you can't do this job with a standard household toolkit. Trying this repair without the proper gear is the fastest way to turn a simple battery swap into a much more expensive screen or logic board disaster. You need specialised, professional-grade tools designed specifically for the tight tolerances inside an iPhone.
Before you even think about cracking open your device, you need the right kit on hand. Below is a list of the absolute essentials.
Essential Tools for a DIY iPhone 14 Pro Battery Replacement
This isn't just a list of nice-to-haves; each tool serves a critical purpose. Attempting the repair without the right equipment is asking for trouble.
| Tool | Purpose | Common Pitfall if Skipped |
|---|---|---|
| Pentalobe P2 Screwdriver | Specifically for the two tiny screws on either side of the charging port. No other screwdriver fits correctly. | Using the wrong driver will instantly strip these delicate screw heads, making it impossible to open the phone without drilling. |
| Tri-Point Y000 Screwdriver | Apple uses these unique three-pronged screws internally to secure brackets over vital connectors. | Attempting to use a small Phillips driver will strip the screws and potentially damage the tiny connectors they're meant to protect. |
| Heating Pad or Heat Gun | The iPhone 14 Pro is sealed with a strong, waterproof adhesive that must be softened with gentle, consistent heat to open the screen. | Using a hairdryer can create hotspots that damage the screen or internal components. Too little heat and you'll crack the screen prying. |
| Suction Cup & Pry Tools | A strong suction cup lifts the screen just enough to insert thin plastic picks, which are then used to slice through the adhesive. | Metal pry tools can easily scratch the frame or, worse, crack the screen glass. A weak suction cup won't create the necessary gap. |
| Replacement Adhesive Strips | The old battery is held in place with stretchy adhesive pull-tabs. New ones are needed to secure the new battery properly. | The new battery will rattle around inside the phone, which can lead to connector damage or other issues over time. |
| Waterproofing Adhesive Seal | This pre-cut gasket goes around the frame before closing the phone, helping to restore some level of water resistance. | Your phone will be left completely vulnerable to dust and moisture, permanently compromising a key feature of the device. |
Skipping even one of these, like the proper adhesive seal, means permanently compromising your phone's defence against the elements. It’s a shortcut that’s just not worth taking.
The diagram below gives you a high-level look at the prep work involved. These are the crucial first steps you need to take before you even pick up a screwdriver.
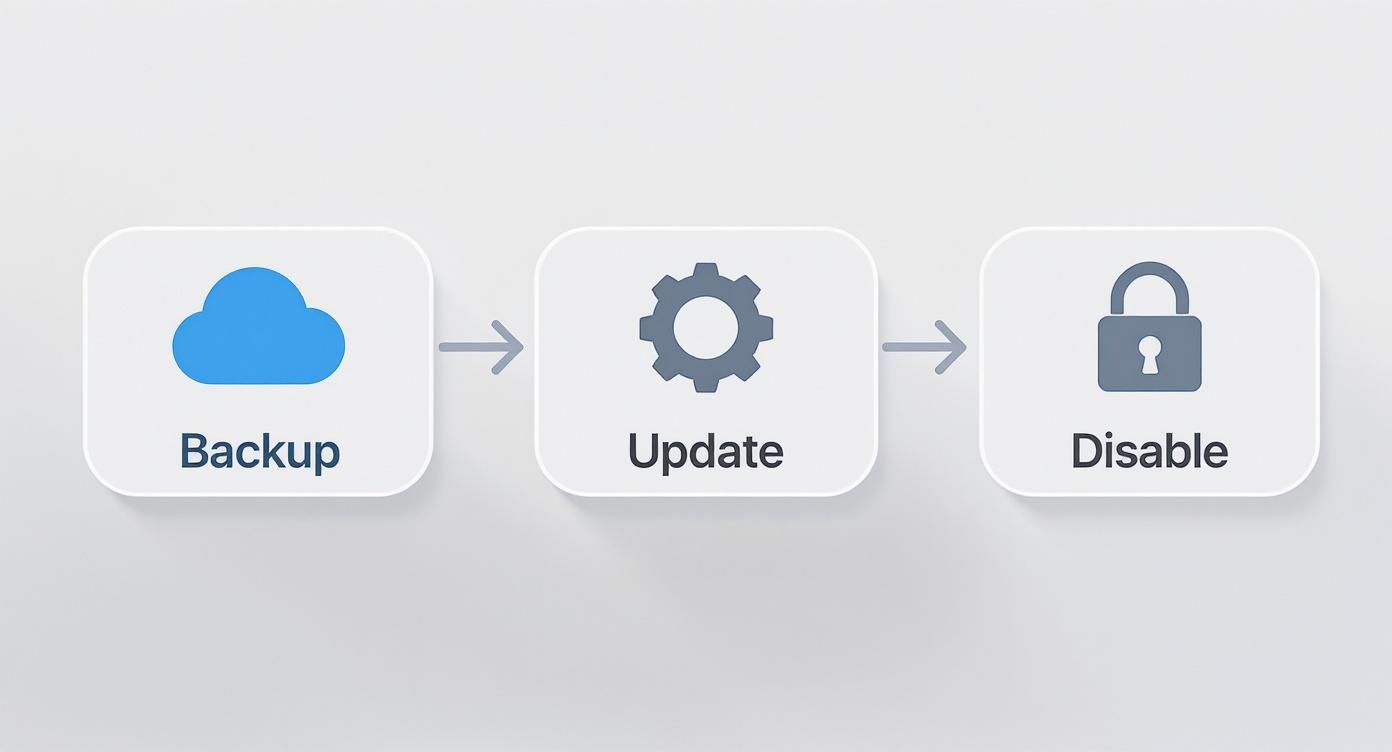
Caption: A workflow diagram illustrating the key preparation steps for an iPhone 14 Pro battery replacement.
As you can see, safeguarding your data and device settings is the foundational step before any physical repair begins. Don't skip it.
The Most Common DIY Disasters I’ve Seen
Even with all the right tools, the process is fraught with potential pitfalls. The inside of an iPhone 14 Pro is a marvel of engineering, but it leaves absolutely zero room for error. One slip of a tool or a moment of impatience can lead to a very bad day.
The single most common DIY failure is a damaged display. Tearing one of the screen’s fragile ribbon cables means you’ll need a whole new screen—a part that costs far more than the battery you were trying to replace.
When you lift the screen, you have to open it carefully, like a book, without putting any stress on the delicate cables connecting it to the logic board. I've seen countless people yank it open and instantly snap a connector.
Another huge risk involves the battery itself. Lithium-ion batteries can be genuinely dangerous if punctured. A slip with a metal pry tool can cause the battery to short-circuit, swell up like a pillow, and even catch fire. This is exactly why it’s vital to use plastic tools around the battery and to handle it with extreme care.
Finally, there’s reassembly. Getting everything back in its place, including all the tiny screws and brackets, is a real challenge. Forgetting a screw or misplacing a bracket can cause internal components to shift or even short out. Even if the phone turns on, you might find that Face ID, the cameras, or other functions no longer work correctly. It's why so many people in Brisbane and across Australia ultimately choose a professional for their iPhone 14 Pro battery replacement, ensuring the job is done right. A pro service like Screen Fixed Brisbane simply eliminates these risks and gives you peace of mind.
Why a Professional Repair is the Smarter Choice
After weighing up the risks of a DIY repair, the idea of handing your expensive iPhone 14 Pro over to a professional starts to look much more appealing. While a DIY attempt might seem like it saves money upfront, a professional iPhone 14 Pro battery replacement offers something far more valuable: guaranteed results and complete peace of mind.
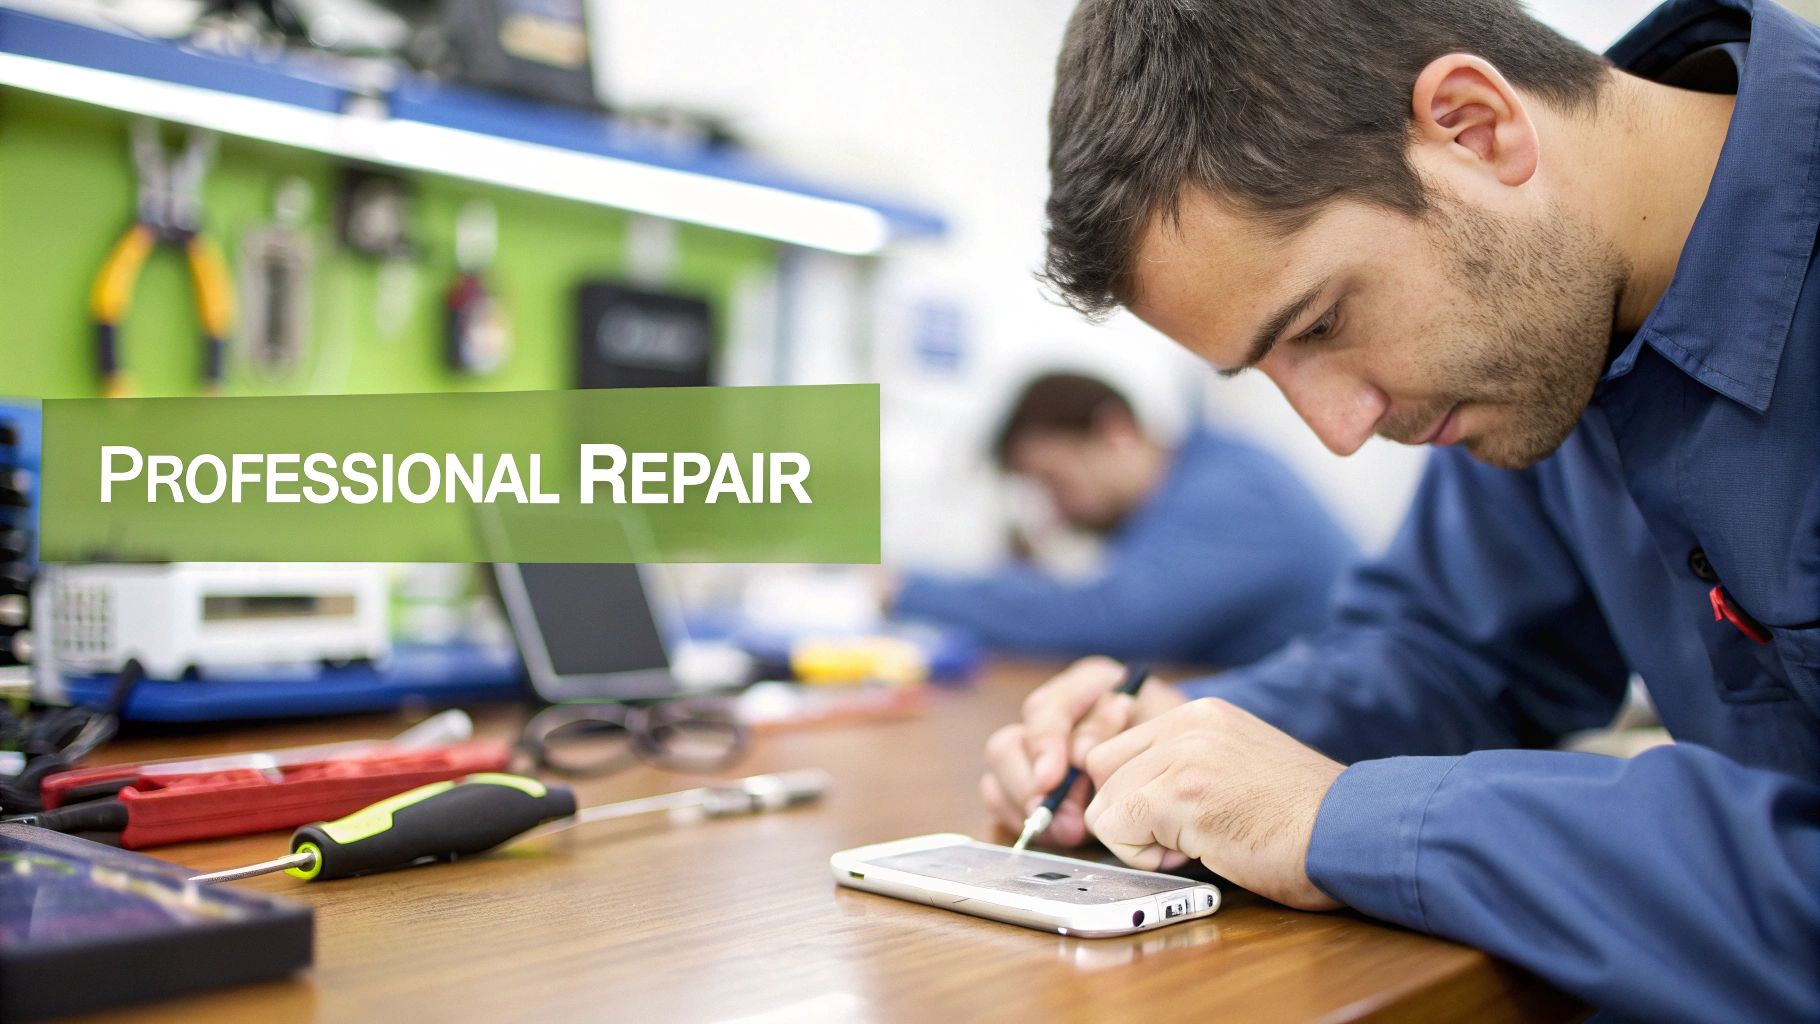
Caption: iPhone 14 Pro battery replacement performed by a professional technician in Brisbane.
The real value of a pro service goes way beyond just the new battery itself. It’s an all-in-one solution that covers expert installation by a trained technician, the use of high-quality parts, post-repair diagnostics to make sure everything works perfectly, and—most importantly—a service warranty to protect your investment. When you choose a trusted independent workshop like Screen Fixed Brisbane, you’re paying for expertise and assurance, not just a part.
The True Cost of Repair Parts and Labour
It's easy to get tunnel vision and focus only on the upfront price tag when comparing repair options. But looking at the financial landscape for an iPhone 14 Pro battery replacement in Australia reveals a clear trade-off between cost and risk.
Third-party repair services offer a much more wallet-friendly option, with prices often landing between A$50 to A$75. This is just a fraction of the A$169 you'd typically pay for an out-of-warranty replacement directly from Apple. This price gap makes independent shops really attractive, but it’s vital to understand what you’re getting for your money. If you want to dive deeper into the numbers, you can learn more about Australian iPhone 14 repair pricing.
Chasing the absolute lowest price can sometimes mean getting a lower-quality battery that won't have the same lifespan or performance as a premium part. Plus, there's always the risk of voiding any remaining manufacturer's warranty. This is where a reputable independent repairer hits the sweet spot—offering competitive pricing without skimping on the quality of the parts or the skill of the technician.
Preserving Your Device’s Integrity
One of the biggest perks of going pro is protecting your phone's complex internal systems. An experienced technician knows the delicate dance needed to safely open the device, disconnect the old battery, and install the new one without damaging the intricate web of ribbon cables and sensors.
Here’s what you get with a professional installation:
- Expert Handling: Technicians are trained to sidestep common DIY mistakes, like tearing a screen cable or accidentally puncturing the old battery.
- Water Resistance Restoration: After the repair, pros re-apply a fresh, industry-grade adhesive seal around the frame. This is crucial for restoring your iPhone's protection against dust and moisture—a step that’s almost always missed in a home repair.
- Tool Precision: Professional workshops have calibrated heating stations and precision tools, ensuring the screen is removed safely without causing micro-fractures or damaging the delicate OLED panel.
At our workshop for iPhone Repairs Brisbane, our technicians treat every device with the precision it deserves. We make sure every single component, from the Face ID sensors to the Taptic Engine, is reconnected and functions exactly as it should before it leaves our bench.
Understanding the Important Battery Message
Since iOS 15, Apple has rolled out a feature that might show an "Important Battery Message" in your settings if a non-Apple-paired battery is installed. You might see a "Unable to determine battery health" notification, which is really just an alert to let you know a component has been changed.
It’s crucial to understand this does not mean the new battery is faulty or low-quality. A premium third-party battery will perform just as well as an original, giving you excellent capacity and longevity. The message is simply a software lock from Apple.
Any good repairer will explain this to you beforehand and will use high-quality parts that ensure your phone functions perfectly, even if the "Battery Health" feature in settings is no longer available. Our premium batteries at Screen Fixed are hand-picked to deliver top-tier performance, restoring your phone's power without compromise.
Calibrating and Testing Your New Battery
Once your iPhone 14 Pro is sealed back up, it's tempting to call it a day. But hold on—there's one last, critical phase that separates a good repair from a great one: calibration and testing.
This isn't just a box-ticking exercise. It's about ensuring your phone's software accurately understands its new power source and that every other component is working perfectly after being disconnected and reconnected. Skipping this is a classic rookie mistake that leads to frustrating problems, like an incorrect battery percentage or sudden shutdowns. A little extra time here guarantees you get the best performance from day one.
The Importance of Battery Calibration
A new battery is a clean slate, but your iPhone's software is still clinging to the performance patterns of the old, degraded one. Calibration is simply the process of teaching iOS the true capacity of its new power source, syncing the physical hardware with the software that manages it.
The idea is simple: run the battery through one complete power cycle. This helps the phone's power management system establish a new baseline for what 0% and 100% really mean. Without this, you might see the battery percentage drop erratically or stay stuck at the same number for hours.
To properly calibrate your new battery, just follow this cycle:
- Drain it completely. Use your phone normally until it shuts itself down at 0%. Resist the urge to plug it in when you see the low battery warning.
- Charge it uninterrupted. Once it's off, plug it into a reliable charger and let it charge all the way to 100% without unplugging it. For best results, leave it on the charger for another hour or so after it hits 100% to make sure it's fully saturated.
- Do a soft reset. After it's fully charged, a quick restart helps lock in the new calibration.
This single cycle gives you a reliable, accurate gauge of your battery life. For a more detailed walkthrough, you can check out our guide on how to calibrate an iPhone battery.
Your Final Post-Repair Checklist
With the battery calibrated, it’s time for a final function check. An iPhone 14 Pro battery replacement requires you to disconnect several key components, so it's vital to confirm everything was reconnected properly. This quick diagnostic gives you confidence that the repair was a complete success.
Go through your phone and test these critical functions:
- Screen Responsiveness: Check for touch sensitivity across the whole screen. A good trick is to open an app and drag an icon around every corner to check for dead spots.
- Face ID: Lock and unlock your phone multiple times. If Face ID is acting up, the delicate sensor array near the earpiece might have been slightly misaligned during reassembly.
- Cameras: Test both the front and rear cameras. Snap a few photos and take a short video to ensure everything looks sharp.
- Charging Port: Plug in a Lightning cable to confirm it's charging correctly. Give the cable a slight wiggle to check for a loose connection.
- Speakers and Microphone: Make a quick phone call or record a voice memo. Test both the earpiece speaker and the main speaker at the bottom.
Running through these simple tests takes less than five minutes and provides total peace of mind. It confirms that not only is your battery life restored, but your entire device is functioning exactly as it should. This is a standard final step for any professional service—including every single repair we do at Screen Fixed.
Your Go-To for iPhone Repairs in Brisbane
We've walked through the warning signs of a dying battery, the critical prep steps, and the genuine risks of a DIY attempt. If you've decided that wrestling with tiny screws and delicate cables isn't for you, then finding a professional repairer is the next logical step. It's the surest way to get your iPhone 14 Pro back to peak performance without any headaches.
Choosing Screen Fixed means you’re opting for a proper, lasting solution. We pair top-shelf parts with the know-how of experienced technicians, all right here at our Brisbane locations. This isn't just about swapping out a battery; it's about handling your device with the care needed to protect all its intricate parts.
Why Choose Screen Fixed?
We take all the guesswork and risk out of the equation. Forget worrying about stripped screws or accidentally tearing a crucial flex cable—our team has done this countless times and knows exactly what to do.
- Premium Parts: We only use high-capacity batteries designed to restore your iPhone's original stamina.
- Expert Technicians: Our crew has the skills to perform the replacement safely, making sure everything, including the water resistance seals, is handled correctly.
- Solid Warranty: We back our work with a comprehensive warranty, giving you complete peace of mind.
By choosing a trusted service for your iPhone repairs in Brisbane, you're making an investment in your device's longevity. We make sure every repair meets our tough standards, so you get your phone back performing like it just came out of the box.
Ready to get your iPhone running at full speed again? Don't let a tired battery hold you back. For a closer look at what our service entails, you can learn about our iPhone battery replacement service in Brisbane.
Book your repair with Screen Fixed Brisbane today.
Disclaimer: Apple, iPhone, and Face ID are trademarks of Apple Inc. Screen Fixed is an independent repair service and is not affiliated with Apple Inc.
Your Top Questions Answered
When you're thinking about replacing your iPhone 14 Pro's battery, a few questions are bound to pop up. It's totally normal. Here are the most common things people ask us, with honest answers straight from our technicians.
How Long Will I Be Without My Phone?
We get it—being without your phone feels like being disconnected from the world. No one wants that.
That’s why we’ve gotten our process down to a fine art. For a standard iPhone 14 Pro battery replacement, our techs can have it done and dusted in under an hour. Seriously. You can drop it off, grab a coffee, and come back to a phone that’s ready to go. Our goal is always to get you back on your way with minimal fuss.
What Happens to the Water Resistance?
This is a fantastic question and a really important one. Your iPhone 14 Pro comes from the factory with a super-strong adhesive seal that keeps water and dust out. The moment we open the screen to get to the battery, that original seal is compromised.
But don't worry, we're all over it. As part of every single battery replacement, we meticulously remove all the old, broken adhesive. Then, we apply a fresh, professional-grade waterproof seal before we even think about closing up your device. While no third-party repair can officially give you back the factory IP rating, this is the right way to do it, ensuring your iPhone stays protected against everyday splashes and dust.
Will I See an Error Message After the Repair?
It's possible you'll see an "Important Battery Message" in your settings after the new battery is installed. This is something Apple's software does to flag that a new component has been fitted that isn't paired by them.
It's crucial to know that this message does not mean you have a bad battery. It simply means the new battery's serial number doesn't match the original one tied to your phone's main board. We only use premium replacement batteries that are built to meet or even beat the original specs, so you’ll get fantastic battery life. The only real difference is the "Battery Health" percentage won't show in your settings—but the performance will be top-notch. It’s a standard part of getting a quality third-party repair done right.