
Meta Title: MacBook Air Battery Replacement Guide | Screen Fixed
Meta Description: Is your MacBook Air battery dying? Learn how to check its health, find the right replacement kit, and decide between DIY or a professional service in Australia.
We’ve all felt that familiar dread when a MacBook Air suddenly shuts down in the middle of something important. It’s a common frustration, and more often than not, it means a MacBook Air battery replacement is on the cards. If your trusty laptop isn't holding a charge like it used to, or it's become frustratingly slow, a worn-out battery is the most likely culprit.
Generally, it's time for a new battery when your current one can no longer hold at least 80% of its original capacity. For most MacBook Air models, this tends to happen after about 1000 charge cycles. Catching the warning signs early means you can sort it out before your Mac's performance takes a serious hit, restoring it to its former glory.
How To Tell When Your MacBook Air Needs a New Battery
It's not just about the inconvenience of a short battery life. A dying battery can seriously throttle your Mac's performance, making even simple, everyday tasks feel sluggish. Many people put up with a slow computer, blaming its age without realising the battery is the real problem.
Thankfully, your MacBook Air gives you some pretty clear signals when it's time for a change. You don't need to be a tech whiz to figure it out.
The most direct way to check is right within macOS. The built-in diagnostic tools take all the guesswork out of it, giving you a clear status report in seconds.

Alt text: A silver MacBook Air showing a battery health warning on the screen.
Check Your Battery’s Status Menu
The easiest place to look is right in your menu bar. Just click the battery icon at the top-right of your screen. If you see a "Service Recommended" or "Replace Now" warning, that's your Mac telling you straight up that the battery has degraded. This is the clearest sign you'll get that its performance and charge capacity are compromised.
A "Normal" status means the battery is working as expected, but that doesn't always tell the whole story. For a more detailed look, you’ll want to check the cycle count.
Understanding Battery Cycle Count
So, what exactly is a charge cycle? It's one full discharge and recharge of your battery, but it doesn't have to happen all at once. For instance, if you use 50% of your battery's charge today, recharge it fully, and then use another 50% tomorrow, that counts as a single charge cycle.
Here in Australia, MacBook Air batteries are designed to last for up to 1000 charge cycles before they're considered "consumed." Once you hit that number, the battery is expected to retain around 80% of its original capacity, but you'll almost certainly notice a drop in performance. You can read more about these guidelines on Apple's official battery support page.
Here’s how to find your cycle count:
- Hold down the Option key on your keyboard and click the Apple menu () in the top-left corner.
- Select System Information.
- In the window that appears, find the Power section under the "Hardware" heading.
- You'll see "Cycle Count" listed under the "Health Information" section.
If your cycle count is getting close to 1000—or you're well past it—a replacement is definitely in your near future.
Key Takeaway: A high cycle count combined with a "Service Recommended" warning is the ultimate confirmation. It means your battery's chemical age is getting up there, and it can no longer supply the steady power your MacBook Air needs to run at its best.
Physical and Performance Warning Signs
Sometimes, the signs your battery is on its way out are less direct but just as important. A failing battery can cause a lot more trouble than just a short runtime. Pay attention to these symptoms, as they often point to a battery that needs replacing.
MacBook Air Battery Health Indicators
This quick table breaks down the common signs of a failing battery and what you should do about them.
| Symptom | What It Means | Recommended Action |
|---|---|---|
| Unexpected Shutdowns | The battery can no longer provide stable power under load, causing the Mac to shut off to protect its components. | Check cycle count and system status. Prepare for a battery replacement. |
| Performance Throttling | Your Mac intentionally slows down the CPU because the battery can't deliver enough power for peak performance. | A battery replacement will almost always restore the original speed. |
| Rapid Draining | The battery has lost significant capacity and can no longer hold a charge for a reasonable amount of time. | This is a classic sign of chemical ageing. Time for a new battery. |
| Failure to Charge | The battery might not charge to 100%, or it might not charge at all, indicating a severe internal fault. | First, test with another charger. If that doesn't work, a new battery is likely needed. |
| "Service Recommended" Alert | macOS has detected that the battery's health has degraded significantly. | This is a direct warning. Plan to replace the battery soon to avoid further issues. |
Seeing any of these signs, especially when combined with a high cycle count, gives you a clear picture of your battery's health.
For instance, if your Mac suddenly turns off even when the battery meter shows plenty of charge left, it's a huge red flag. This often happens when you're doing something intensive, like editing a video or juggling dozens of browser tabs. In some of the worst cases, the MacBook Air won't even turn on, which points to a bigger problem. If you're facing that issue, you can find more help in our detailed guide on what to do when your MacBook Air is not turning on.
By keeping an eye on these symptoms and your Mac's own health reports, you'll know exactly when it's time to move forward with a MacBook Air battery replacement.
Selecting the Right Battery Replacement Kit
Picking the right battery for your MacBook Air is easily the most critical part of this whole job. Get it wrong, and you're looking at compatibility nightmares, poor performance, or even a damaged laptop. Nailing this first step is what turns a potentially tricky task into a satisfyingly simple fix.
The absolute first thing you need is your MacBook Air’s model number. We can't stress this enough—it's not optional. Different models, even those that look identical and were released in the same year, can use batteries with completely different shapes and connectors.
Why Your Model Number Is Non-Negotiable
Think of the model number as your MacBook's unique ID. It tells you exactly which parts will fit and which won't. For instance, a battery made for an A1466 (one of the very popular 13-inch models from 2013-2017) is physically incompatible with an A2337, the M1 Air. It’s like trying to jam the wrong key into a lock; it just won’t work, and you could easily break the delicate connectors on the logic board.
You’ll find this number printed in tiny text on the bottom case of your MacBook. It always starts with an 'A' followed by four digits (like A1466). Once you've got that, you can shop with confidence, knowing you’re getting a battery that's guaranteed to fit.
Expert Tip: Just snap a quick, clear photo of the model number with your phone. It's a simple move that eliminates any guesswork later when you're browsing for a replacement kit online.
OEM-Grade Parts vs Cheap Alternatives
As soon as you start searching for MacBook Air battery replacement options, you’ll be hit with a massive range of options at all sorts of prices. It’s tempting to grab the cheapest one you find, but trust us, that’s usually a false economy. Low-quality batteries are notorious for causing headaches down the line.
They're often built with cheap, inferior lithium-ion cells that lose their charge capacity in no time. You could find yourself right back where you started with a dead battery in just a few months. Even worse, many of these cheap batteries lack the proper internal circuitry for power management. This can lead to overheating or sudden shutdowns, which poses a real risk to your MacBook’s logic board.
On the flip side, a high-quality, OEM-grade battery is manufactured to the exact same specifications as the one your MacBook came with. They use premium cells and electronics, giving you the performance and lifespan you'd expect.
The All-in-One DIY Kit Advantage
So, you've got your model number and you're set on a quality battery. The next challenge? The tools. Apple deliberately uses proprietary screws to keep people out, which means your standard screwdriver set from the garage is useless here.
This is where an all-in-one DIY kit is an absolute lifesaver. Instead of trying to hunt down all the specific tools you need, these kits bundle everything together for you. A typical kit includes:
- A High-Quality Replacement Battery: Perfectly matched to your specific MacBook Air model.
- P5 Pentalobe Screwdriver: This is non-negotiable for removing the screws on the bottom case.
- T5 Torx Screwdriver: You'll need this for the screws holding the battery itself in place.
- Plastic Spudger or Pry Tool: A crucial non-conductive tool for safely popping off the battery connector without causing a short.
Having the right screwdrivers is absolutely vital. That P5 Pentalobe, with its unique five-pointed star shape, is made specifically for Apple products. If you try to force a different type of screwdriver, you will strip the heads, making them impossible to remove. A simple repair suddenly becomes a massive problem. To get a better handle on these unique tools, have a look at our guide on Pentalobe screwdrivers for iPhone and MacBook repairs.
Choosing a complete kit takes all the guesswork and frustration out of the equation. You get everything you need, all in one box, setting you up for a smooth, successful installation that’ll bring your MacBook Air back to life.
Right, let's get our hands dirty. This is where we move from theory to the practical side of replacing your MacBook Air's battery. Following a methodical process is the secret to a safe, successful installation. We’ll walk you through everything, from setting up your space to seating the new battery, so you can get the job done right.
Before a single screw comes out, safety has to be your number one priority. We're talking about safety for both you and the delicate electronics packed inside your Mac. Static electricity is the invisible enemy here; a tiny zap that you can't even feel is more than enough to fry the logic board for good.
This simple workflow lays out the first few checks to make sure you've got the right gear for a smooth repair.
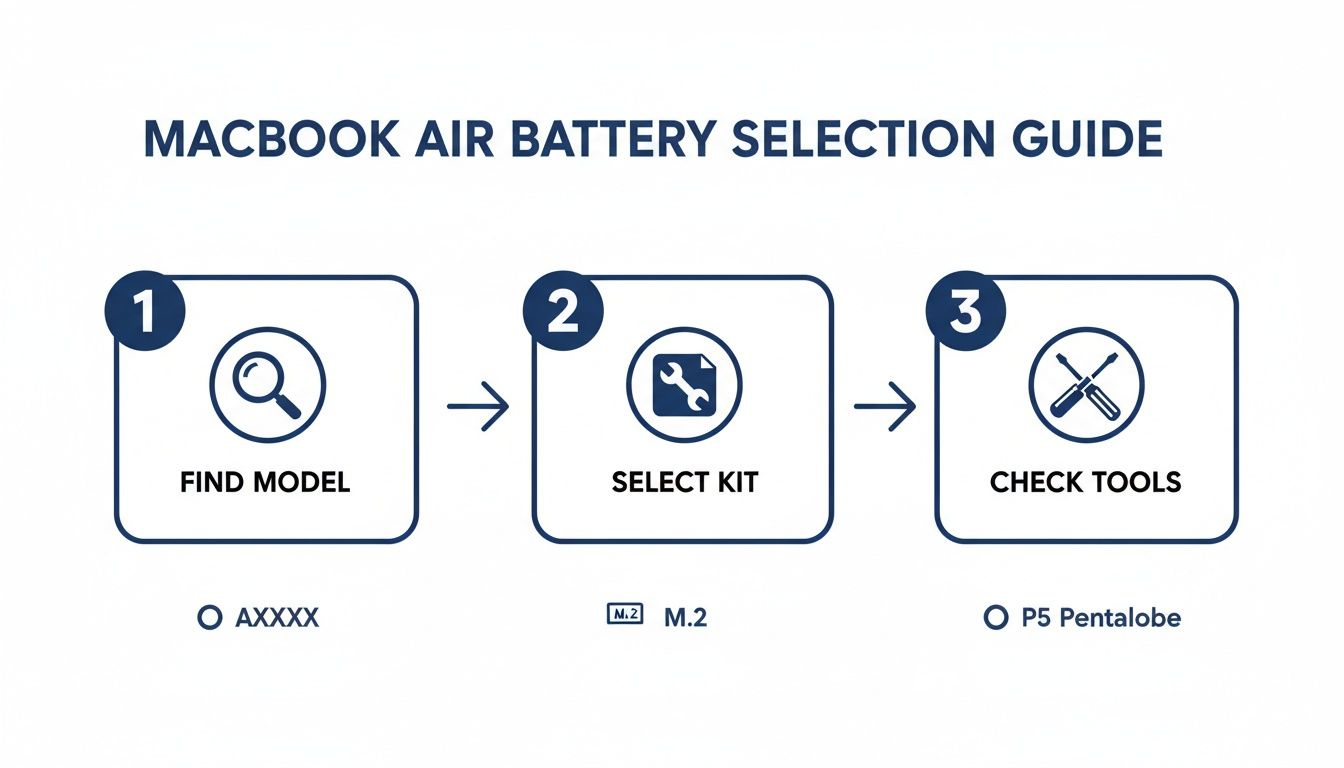
Alt text: Workflow diagram for selecting a MacBook Air battery replacement kit.
This just reinforces those critical first steps: nail down your model, grab the correct kit, and double-check you have all the tools before you dive in.
Preparing a Safe Workspace
You don't need a professional cleanroom, but your workspace absolutely needs to be clean, organised, and static-free. Find yourself a flat, stable surface like a wooden or plastic desk. A big no-no is working on carpet or blankets—they're notorious for building up static. Good lighting is another must-have, as you'll be dealing with tiny screws and connectors.
To really tackle the risk of electrostatic discharge (ESD), an anti-static wrist strap is your best bet. If you don't have one, you can ground yourself by periodically touching a large, unpainted metal object (like a radiator or the metal leg of a desk) before you start and as you work.
It’s also crucial to completely power down your MacBook Air. Don't just put it to sleep. Shut it down, then disconnect the MagSafe charger and anything else plugged into it. This ensures there's no live current running through the system, making it much safer to poke around inside.
Removing the Back Case
With your workspace sorted, it's time to open this thing up. The bottom case is held in by a handful of small Pentalobe screws. These aren't your typical hardware store screws; you absolutely must use the correct P5 Pentalobe screwdriver to avoid stripping the heads.
Here’s the game plan:
- Lay your MacBook Air upside down on a soft, non-abrasive cloth to avoid any scratches.
- Carefully remove all the screws from the bottom case. Pay attention here—the two screws near the hinge are usually longer than the others. Keep them separate so you know exactly where they go during reassembly. A magnetic mat or even just a sheet of paper where you can map out the screw layout is a fantastic way to stay organised.
- Once all the screws are out, gently lift the bottom case off, starting from the edge opposite the hinge. It should pop off easily without needing much force.
With the case removed, you'll get your first look at the internals. The big, black battery will be the most obvious component, taking up most of the space.
Pro Tip: Don't rush taking the screws out. Stripping a Pentalobe screw is a really common DIY mistake, and it can turn a simple job into a massive headache. Use firm, even pressure and turn the screwdriver slowly and deliberately.
Disconnecting the Old Battery
This is probably the most delicate part of the entire process. The battery connector is a tiny, fragile component on the logic board. If you damage it, you’re looking at a much more complex and expensive repair, so take your sweet time here.
Before you touch anything else, you must disconnect the battery. This immediately de-energises the system and prevents any accidental shorts.
Grab a plastic spudger or the flat end of a plastic pry tool. Never, ever use a metal tool for this step. It could easily short a circuit on the logic board. Slide the flat edge of your plastic tool under the battery connector's edge and gently pry it straight up, away from the logic board. It should pop off with very little effort.
Dealing with the Adhesive
Apple uses a combination of Torx screws and some seriously strong adhesive strips to hold the battery in place. First up, use your T5 Torx screwdriver to remove the screws securing the battery. Make sure you keep these screws separate from the P5 case screws.
Now for the sticky part. On some older models, the battery might just lift out after the screws are gone, but on most, it's glued down tight. The goal is to soften that adhesive without using brute force, which could puncture the old battery. A punctured lithium-ion battery is a serious fire hazard.
A tried-and-true technique is to apply a small amount of isopropyl alcohol (90% or higher) around the edges of the battery cells with a dropper or syringe. Give it a minute or two to seep underneath and start dissolving the glue.
After letting the alcohol do its thing, gently slide a plastic card (an old credit card works perfectly) under the battery cells to slowly break the adhesive bond. Work your way around, applying steady, gentle pressure. Avoid yanking or bending the battery. Patience is key. Once the adhesive gives way, you can lift the old battery out of the chassis.
Finally, while it’s not strictly necessary for a battery swap, if you're ever curious about checking electrical pathways for more advanced diagnostics, understanding the basics can be a useful skill. We have a great resource on how to test continuity with a multimeter if you want to expand your repair knowledge.
With the old battery out, you're halfway there. Now it's time to clean up, install the new battery, and carefully put your rejuvenated MacBook Air back together.
Calibrating Your New Battery for Peak Performance
Right, you’ve done the hard part. The new battery is in, and your MacBook Air is all buttoned up. It's tempting to fire it up and call it a day, but there's one last step that a lot of people miss: calibrating the battery.
Think of it as a "handshake" between your new battery and your Mac's software. This process teaches the power management system how to talk to the new hardware, ensuring you get accurate percentage readings and the longest possible life out of your repair. Without it, your Mac might shut down unexpectedly at 10% or never quite charge to its true 100% capacity.
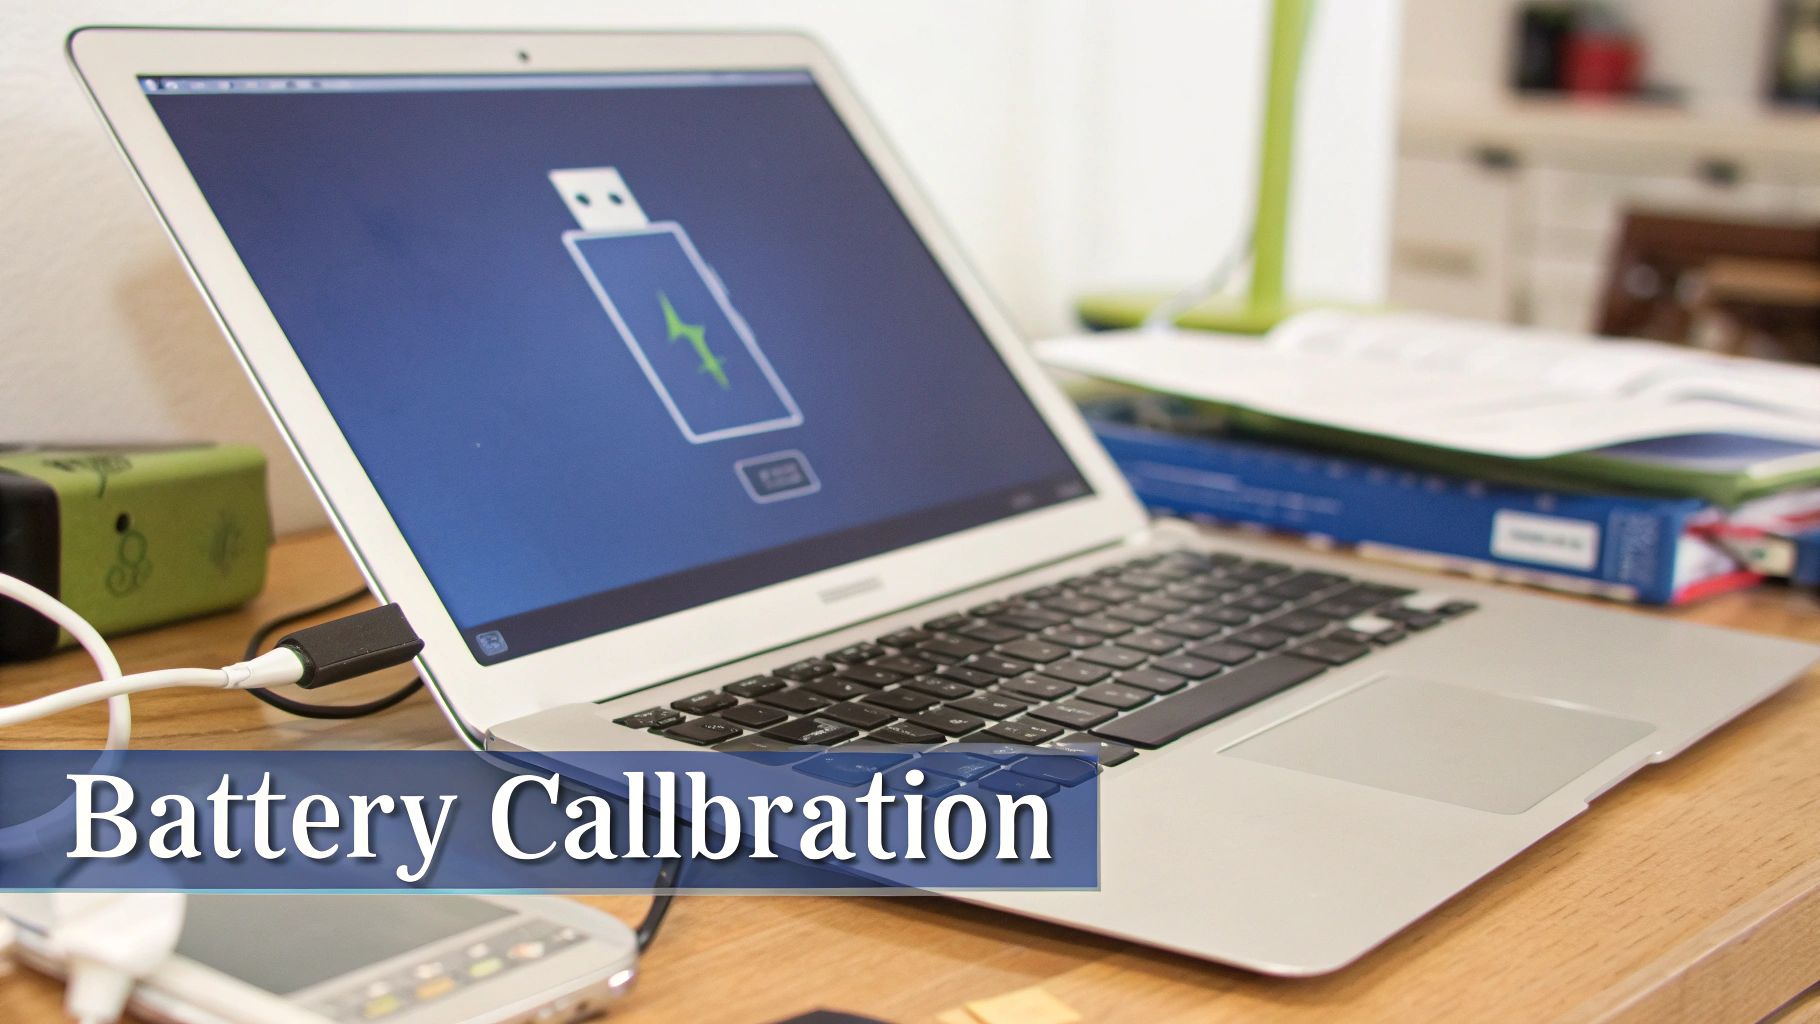
Alt text: MacBook Air charging on a desk after a battery replacement.
The Essential Charge-Discharge Cycle
Calibration boils down to a single, full charge-discharge-recharge cycle. It’s a simple process that just requires a bit of patience, but it's crucial for getting the battery's internal microcontroller and macOS on the same page.
Here’s exactly what you need to do:
- Charge It Up: Plug in the charger and let the new battery charge all the way to 100%. Once it hits the top, don't unplug it just yet—leave it on the charger for at least another two hours. This gives the cells time to properly top up and stabilise.
- Run It Down: Now, unplug the charger and use your MacBook Air as you normally would. The goal is to let it run until it completely runs out of juice and shuts itself down.
- Let It Rest: After it dies, leave it unplugged for at least five hours. Leaving it overnight is even better. This lets any lingering charge dissipate and establishes a true "empty" baseline for the system.
- Full Recharge: Finally, plug it back in and let it charge all the way back to 100% without any interruptions.
That's it. Your new battery is now calibrated, and the percentage you see on the screen will be a reliable reflection of its actual charge.
When to Perform a System Management Controller (SMC) Reset
Sometimes, even after a perfect installation and calibration, your Mac might behave a little erratically. Maybe the fans are spinning like crazy for no reason, the keyboard backlight isn't working, or the battery indicator is still acting up. These are classic signs that the System Management Controller (SMC) is confused.
The SMC is a chip that handles a lot of the Mac's core physical functions, including power. A battery swap can sometimes throw it for a loop, but a quick reset will force it to recognise the new hardware.
Expert Insight: We like to think of an SMC reset as a hard reboot for your Mac's hardware. It won’t touch your files or data, but it wipes the slate clean for low-level settings, often fixing strange power-related bugs in an instant.
For most MacBook Air models made before the T2 security chip (that’s generally pre-2018 models), the process is straightforward:
- First, shut down your MacBook Air completely.
- On the built-in keyboard, press and hold Shift + Control + Option on the left side, and press the Power button at the same time.
- Keep all four keys held down for 10 seconds, then release them all at once.
- Press the Power button again to turn your Mac on.
This simple procedure forces the SMC to re-initialise and properly communicate with all its components, including your brand-new battery. Taking these final steps ensures your DIY job gives you professional results.
DIY Repair Versus a Professional Service
So, you’ve figured out your MacBook Air needs a new battery. Now for the big question: do you roll up your sleeves and do it yourself, or leave it to the professionals? There’s no single right answer here—it really just boils down to your own comfort level with tech, your budget, and how much time you’ve got to spare.
Let's break down both options so you can make a call you feel good about.
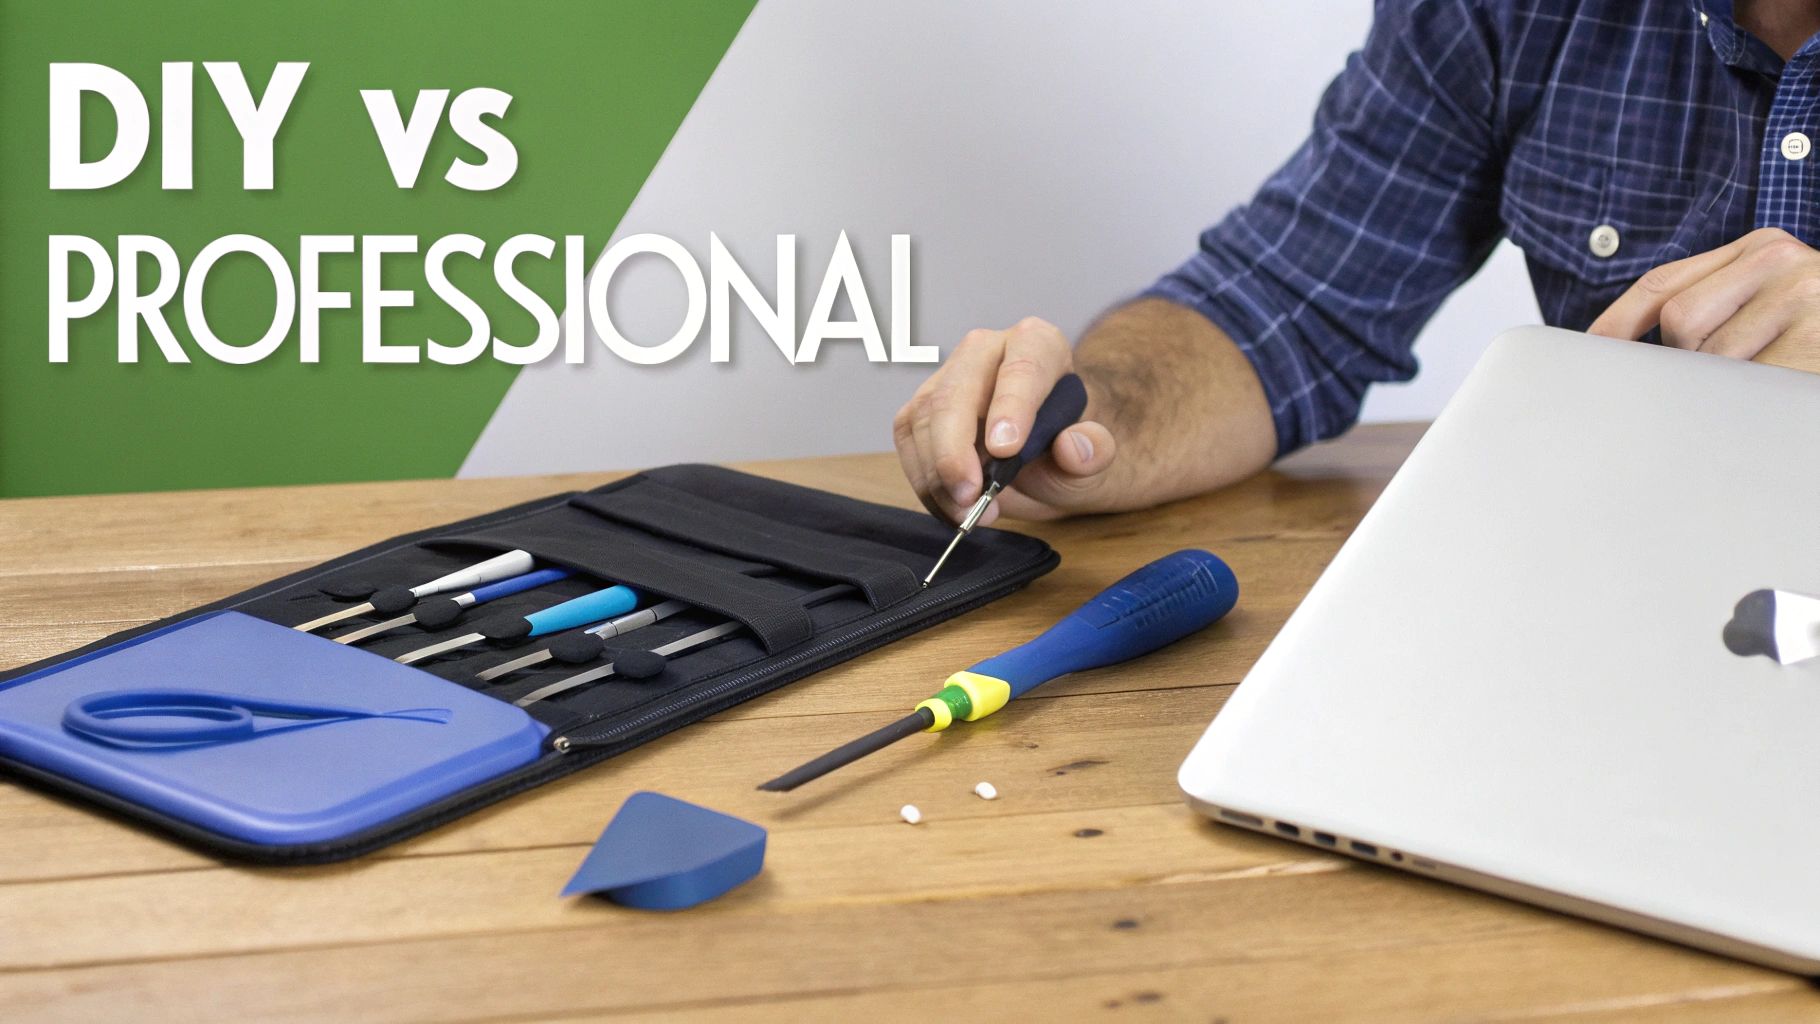
Alt text: A technician performs a MacBook Air battery replacement in Brisbane.
The Appeal of a DIY Repair
There's a certain satisfaction that comes from fixing your own gear. Bragging rights aside, the biggest win with a DIY MacBook Air battery replacement is the cost. You're only paying for the parts, not the labour, which can make a serious dent in the final bill.
To give you an idea, a professional battery replacement in Australia can set you back anywhere from $109 to $299, depending on your MacBook model. Going the DIY route with a quality kit usually lands you at the lower end of that range. That's a clear financial win. You can browse options from top Aussie suppliers like MacFixit to see just how much you can save on parts.
But the DIY path isn’t a walk in the park. It demands patience, a steady hand, and meticulous attention to detail. The risks are real, even if they're manageable. One slip with a screwdriver could mean a scratched logic board, and mishandling the old battery could lead to a dangerous puncture.
The Value of Professional Service
Choosing a professional repair service like Screen Fixed Brisbane is really about buying peace of mind. You aren't just paying for a new battery; you're paying for experience, efficiency, and a guarantee that the job is done right. Our technicians do these replacements day in and day out, so they know exactly what to look out for and can get it done quickly and safely.
The main perks of going pro are pretty clear:
- Expertise and Experience: Technicians have the correct tools and know-how to handle delicate components without causing collateral damage.
- Speed and Convenience: A professional can often have the job done in a fraction of the time it would take a first-timer.
- Warranty on Parts and Labour: If anything goes wrong with the new battery or the installation, you’re covered. That's a safety net you just don't get when you do it yourself.
Of course, this all comes at a higher price because you're paying for that expertise. The decision really comes down to what you value more—the cost savings of DIY or the security and speed of a pro service.
Key Consideration: Ask yourself one simple question: "What's my time worth, and what's the potential cost of a mistake?" If a botched DIY job means you're up for a new laptop, that professional service fee suddenly starts to look a lot more appealing.
DIY vs Professional Repair: A Quick Comparison
To help you see the trade-offs at a glance, we’ve put together a simple comparison. Here’s how tackling the job yourself stacks up against bringing it to a team like ours.
| Factor | DIY Replacement | Professional Service (e.g., Screen Fixed Brisbane) |
|---|---|---|
| Total Cost | Lower (parts only) | Higher (parts + labour) |
| Time Investment | A few hours, including research and the actual repair | Minimal; often a same-day service |
| Risk of Damage | Moderate; depends heavily on your skill and care | Very low; handled by experienced technicians |
| Required Tools | Need to source a specific kit | All specialised tools are provided by the service |
| Warranty | Warranty on the part itself, but not your workmanship | Comprehensive warranty covering both the part and the labour |
| Satisfaction | High sense of accomplishment when it goes right | High sense of convenience and security |
Ultimately, both paths lead to the same great outcome: a MacBook Air with a fresh lease on life. Whether you choose the hands-on satisfaction of a DIY project or the guaranteed result from a trusted service, you’re making a smart, sustainable choice to keep your device running for years to come.
MacBook Air Battery FAQs
Swapping out a MacBook Air battery is a pretty involved job, so it's only natural to have a few questions rattling around. To put your mind at ease and make sure you're feeling confident, here are the answers to the most common queries we see.
We'll tackle the big ones: warranties, how long your new battery should really last, and the right way to get rid of the old one.
Will a DIY Battery Replacement Void My Warranty?
This is a big one, and the answer isn't a simple yes or no. If your MacBook Air is still covered by its original one-year warranty or an active AppleCare+ plan, doing the repair yourself with a third-party part will almost certainly void the warranty for any problems related to that battery.
That said, Australian Consumer Law offers protections that might still cover other unrelated parts of your Mac.
But let's be realistic—if you're at the point where you need a new battery, your MacBook Air is probably well out of its warranty period anyway. For most people doing this repair, there's really nothing to lose.
How Long Should the New Battery Last?
A top-quality replacement battery should give you performance on par with the original one that came with your Mac. In real-world terms, you should expect to see around 800 to 1,000 charge cycles before its health dips below the 80% mark.
For most of us, that translates to a solid three to five years of use. Your mileage will vary, of course. If you're a power user constantly hammering your Mac with demanding apps, you'll burn through those cycles faster than someone who just sticks to emails and web browsing. Following the calibration steps we talked about earlier is your best bet for getting the most out of it.
The Bottom Line: The quality of the replacement battery is the single most important factor here. Investing in a premium, OEM-grade battery is the only way to guarantee you'll get years of dependable service from your repair.
What Guarantees Come With a Professional Replacement?
When you pay a professional to do the job, you're getting more than just a new part. Apple's official battery service in Australia, for instance, guarantees their work for 90 days or the remainder of your existing warranty, whichever is longer. This gives you a safety net and confirms the parts are properly tested. It's a service that works alongside the strong consumer law protections we all have in Australia.
Here at Screen Fixed Brisbane, we take it a step further. We stand behind our work with a comprehensive warranty that covers both the new battery and our labour.
How Do I Dispose of the Old Battery?
Whatever you do, don't just toss the old lithium-ion battery in your household bin. It's illegal in many parts of Australia, but more importantly, it's a massive environmental and fire risk. Old or damaged lithium batteries can short-circuit, overheat, and catch fire.
The only safe way to get rid of it is through a designated e-waste recycling program. Your local council will have collection points, and big retailers like Officeworks usually have battery recycling bins in-store. This ensures the hazardous materials are dealt with safely and valuable components can be recovered.
Ready to bring your MacBook Air back to life? Whether you need a professional installation or advice on your next steps, Screen Fixed has the expertise you need.
Book your MacBook repair with Screen Fixed Brisbane today.
Disclaimer: MacBook, MacBook Air, and AppleCare+ are trademarks of Apple Inc. Screen Fixed is an independent service provider and is not affiliated with Apple Inc.