
Meta Title: How to Repair iPhone Screen | Australian DIY Guide | Screen Fixed
Meta Description: A cracked iPhone screen? Learn how to repair an iPhone screen with our complete DIY guide. Get tips on tools, parts, and common issues in Australia.
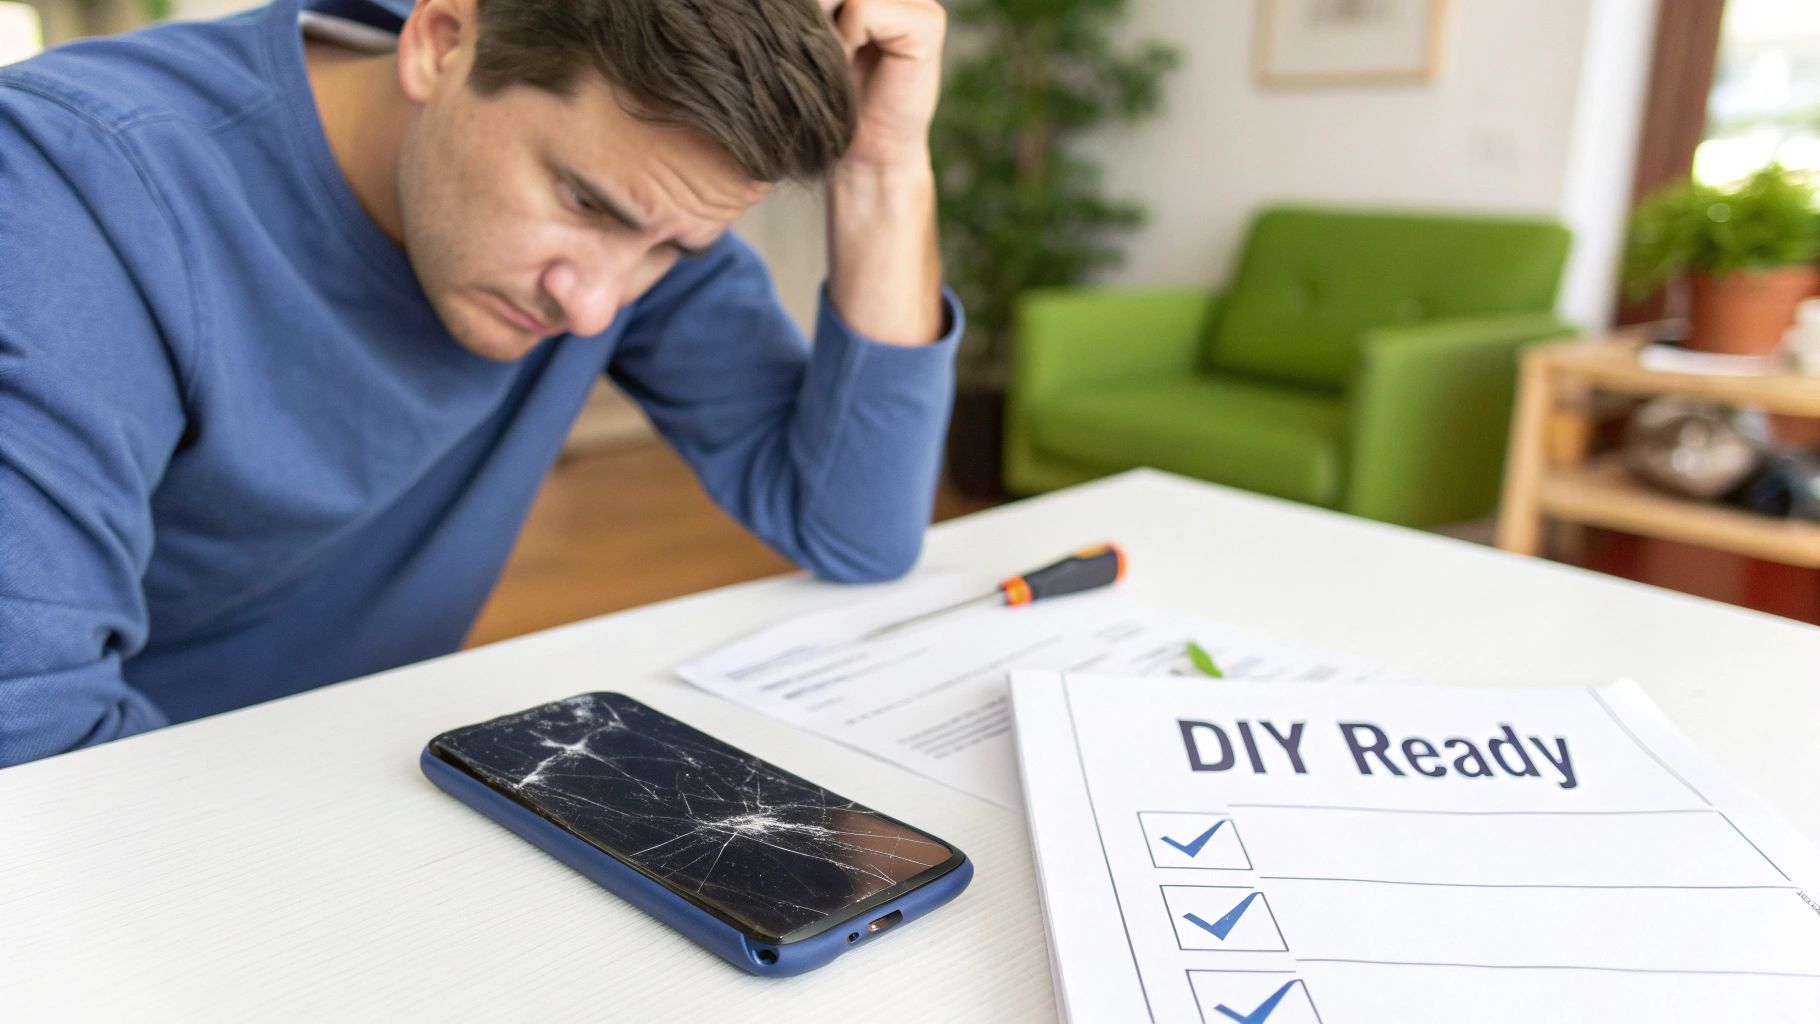
A cracked iPhone screen is a frustrating problem. That spiderweb of glass can make your expensive device almost unusable. While a DIY screen repair can save you money, it's a detailed process that requires the right tools, quality parts, and a steady hand. This guide will walk you through how to repair an iPhone screen, helping you decide if it’s a job you can tackle yourself or if it’s better left to the professionals at Screen Fixed Brisbane.
Assessing Your DIY Repair Readiness
Taking on an iPhone screen replacement at home goes beyond just swapping a broken display. It’s about honestly matching your technical skills to the complexities of the job.
Key factors include:
- Device Complexity: Newer iPhones have delicate Face ID and ProMotion technologies integrated into the screen, making the repair much more sensitive.
- Part Quality: The Australian market is flooded with parts. Aftermarket screens can vary wildly in touch accuracy, colour, and long-term durability.
- Workspace Setup: A clean, well-lit, and organised workspace is non-negotiable to avoid losing tiny screws or causing accidental damage.
Risk Factors To Consider
A small hairline crack might seem minor, but applying pressure to remove the screen can cause it to shatter further. If you fumble the transfer of the front sensor assembly, you’ll permanently lose Face ID.
On the other hand, older models like the iPhone 8 or SE have simpler internal layouts, making them more forgiving for first-timers. Modern OLED screens, however, are expensive and demand precise handling to avoid damage.
“DIY repairs can save you money on labour, but one small slip-up with a tiny cable can easily double your final repair bill.”
– Screen Fixed Brisbane technician tip
Comparing Repair Costs In Australia
Looking at professional repair quotes highlights the balance between risk and reward. While doing it yourself saves on labour, a mistake can be costly.
| Device Type | Average Professional Replacement Cost |
|---|---|
| iPhone Screen | $150 – $400 |
| Android Screen | $90 – $250 |
For a deeper look into how these costs break down, iFixit offers comprehensive data: Explore the True Cost of Repair.
Checklist To Assess Readiness:
- Do you have experience using precision tools like a pentalobe screwdriver and a spudger?
- Are you comfortable handling fragile, paper-thin flex cables?
- Do you accept that you will void your Apple warranty and lose the factory water resistance?
A wrong move on a newer iPhone model can easily cost more to fix than a professional screen repair booked with iPhone Repairs Brisbane.
Caption: An iPhone 14 Pro screen replacement in Brisbane being performed by a technician.
Getting the Right Tools and Parts in Australia
Let’s be clear: the success of your DIY iPhone screen repair depends almost entirely on the quality of your tools and replacement parts. Using a cheap, poor-quality screen or trying to make do with makeshift tools is asking for trouble. It’s how a simple fix turns into a much bigger, more expensive problem.
Before you start unscrewing anything, let’s go over what you need and where to get it in Australia. Getting this step right is half the battle.
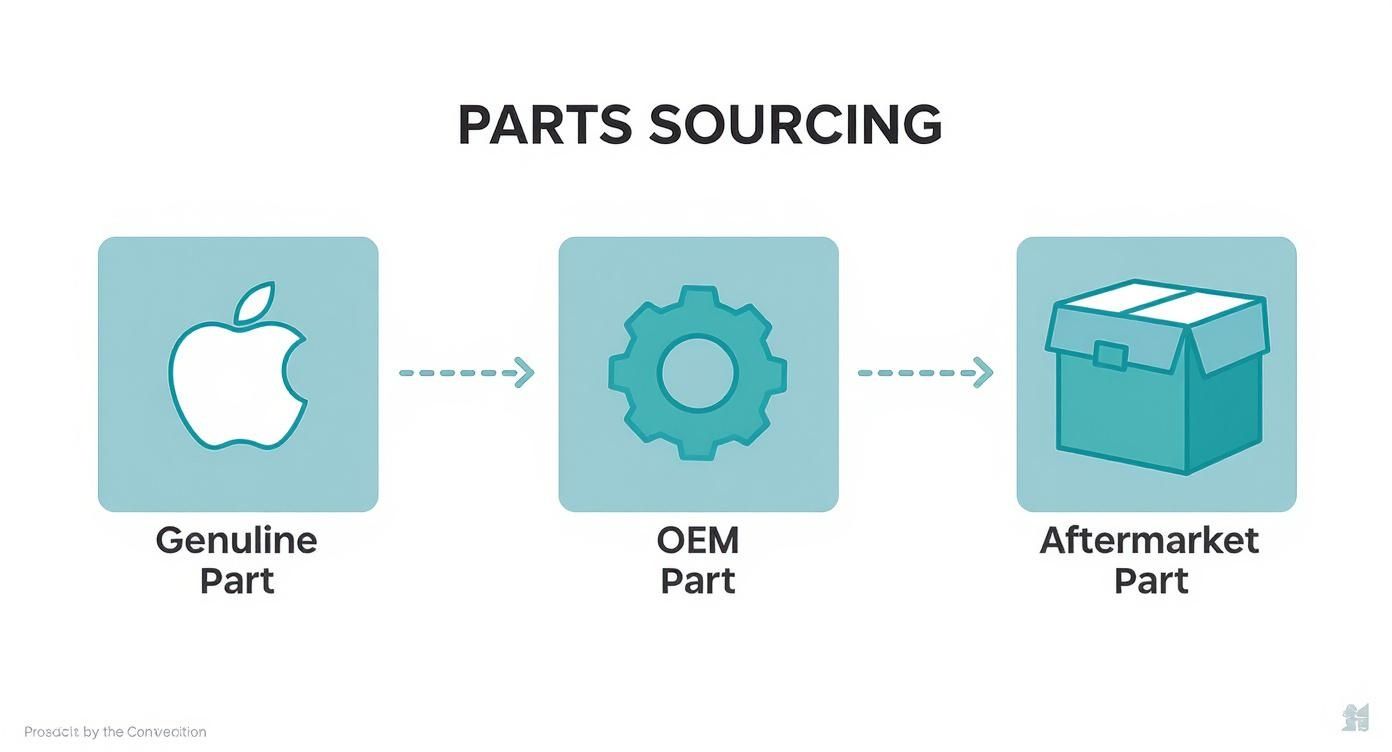
Not All Screens Are Created Equal
When you start shopping for a replacement screen, you'll find a confusing range of options. Understanding the difference is vital for getting a result you’ll be happy with. The quality of the screen directly impacts everything from colour vibrancy and touch response to its overall lifespan.
iPhone Screen Part Quality Comparison
| Part Type | Key Features | Average Cost (AU) | Best For |
|---|---|---|---|
| Genuine Apple | Sourced directly from Apple. Perfect colour, performance, and fit. | $$$$ | Those who want the absolute best and can access official channels. |
| OEM / Service Pack | Made by the same manufacturers as Apple's parts. Identical quality. | $$$ | The best balance of perfect quality and accessibility for DIY repairs. |
| Refurbished Original | A genuine screen with new glass fitted to the original LCD/OLED. | $$ | Maintaining original display quality on a tighter budget. |
| High-Quality Aftermarket | Third-party copies from reputable manufacturers. Good performance. | $ | Budget-conscious repairs where minor differences are acceptable. |
For a deeper dive into the pros and cons, check out our guide on replacement phone screens.
The Tools You Absolutely Need
We can't stress this enough: using the wrong tools will damage your iPhone. A kitchen knife is not a pry tool, and a regular jeweller’s screwdriver will strip the tiny, specialised screws inside your device.
Here are the non-negotiables:
- Pentalobe Screwdriver: iPhones use unique five-point screws to secure the enclosure. You need the correct driver.
- Spudger and Pry Tools: These are made of soft plastic or nylon, designed to safely disconnect tiny, fragile ribbon cables without scratching or cracking components.
- Suction Cup: This provides the gentle, even leverage needed to lift the screen from the frame without putting stress on the glass.
- Precision Tweezers: You'll be dealing with microscopic screws and connectors. Good tweezers are essential for handling them accurately.
A pro tip? Get a magnetic screw mat. It’s a lifesaver. One of the most common and disastrous mistakes DIYers make is mixing up screws. A screw that's just 1 mm too long put in the wrong hole can puncture the logic board, killing your phone for good.
How Much Do iPhone Parts Cost in Australia?
The cost of a replacement screen in Australia depends on your iPhone model and the part quality you choose. Unsurprisingly, newer models with OLED displays have much more expensive parts.
A screen for an older iPhone 8 might cost around $80 for an aftermarket part, while a premium screen for an iPhone 14 Pro Max can be over $500. This massive price range shows how important it is to source parts that fit your needs and your budget. Investing in quality parts and proper tools isn’t an expense—it's insurance against costly mistakes.
Your Guide To The iPhone Screen Replacement Process
With your tools and parts ready, it's time to tackle the repair itself. This stage rewards patience and a careful, methodical approach. Follow these steps to turn a risky job into a successful DIY project.
Before you begin, it’s worth reviewing how to safely handle electronic devices to avoid static discharge. Ready? Let’s set up your workspace.
Preparing Your Workspace And Opening The Device
Choose a bright, flat surface where small components won’t get lost. Lay out your tools in the order you’ll use them. A magnetic screw mat is highly recommended for keeping track of every tiny screw.
Start by removing the two pentalobe screws on either side of the charging port. Next, gently warm the edges of the screen with a heat gun or hairdryer on a low setting. This softens the water-resistant adhesive, making it easier to open. The phone should feel warm, not hot.
Use a suction cup near the bottom edge to create a small gap. Insert a plastic pry tool and carefully slide it around the frame to release the clips holding the screen in place.
Crucial Tip: Never force the screen. If it resists, apply a little more heat. iPhone models older than the 12 series open like a book from left to right. The iPhone 12 and newer models open from right to left. Opening it the wrong way will tear the fragile display cables.
Disconnecting Power And Removing The Old Display
Once the screen is unclipped, stop. The first priority is to disconnect the power. Locate and remove the small metal bracket covering the battery connector. Then, use a nylon spudger—never a metal tool—to gently lift the battery connector from the logic board. This simple action prevents short circuits that could destroy your phone's internal components.
With the battery safely disconnected, you can remove the brackets covering the display and sensor cables. Keep each screw organised and carefully unclip the flex cables. Only then can you fully remove the old screen from the phone's frame.
Alt text: An infographic showing the steps to repair an iPhone screen, including tools needed and key disconnections.
Transferring Critical Components To The New Screen
This is the most delicate step. You need to move the front sensor assembly—which includes the earpiece speaker, microphone, and Face ID components—from your old screen to the new one. These parts are paired to your specific iPhone. Gently heat the adhesive holding the assembly and carefully pry it free. The ribbon cables here are incredibly thin; a small tear will permanently disable Face ID.
Once the sensor assembly is secured on the new screen, it's time for a dry test before sealing the device. This quick check confirms your work so far:
- Reconnect the new screen’s flex cables to the logic board.
- Temporarily reconnect the battery.
- Power on the iPhone to check the display, touch response, and sensors.
If the screen lights up and responds to touch, you're ready for reassembly.
Reassembly And Final Sealing
After a successful dry test, power down the phone and disconnect the battery again. Carefully scrape away all the old adhesive from the frame to ensure the new seal sits perfectly flat. Applying a new water-resistant adhesive gasket is essential for protecting against dust and moisture. You can read our guide on double tape adhesive for tips.
Align the top edge of the screen first, then press firmly around the perimeter until you hear each clip snap into place. Reinstall the metal brackets, reconnect the battery last, and finally, screw in the two pentalobe screws by the charging port. Power up the phone, run a full function test, and congratulations—you've just completed one of the most common yet tricky electronics repairs.
Working Through Common Repair Headaches
Even with a steady hand, a DIY iPhone screen repair can hit a snag. You get it all back together, press the power button, and... nothing. Or the screen lights up with strange lines, or it ignores your taps and swipes.
Before you panic, take a breath. Most post-repair glitches are not a disaster. They usually come down to a few common, fixable issues, like a cable that isn't seated properly or a stray piece of debris. This is your troubleshooting guide to diagnosing and fixing these problems.
The Screen is Totally Blank
This is the most common issue DIYers face, but it's often the easiest to fix.
The first place to check is the connections. The tiny flex cables that connect the screen to the logic board are extremely sensitive. If one is even slightly misaligned, the display won't get the power or data it needs. Power the phone down, disconnect the battery, and carefully reseat each display connector. You should feel a faint but satisfying click as it snaps into place.
Another possibility is a dead battery. If it was low before you started, it might have completely drained. Plug your iPhone into a reliable charger and give it at least 15 minutes before trying to power it on again.
Unresponsive Touch or "Ghost Touches"
What if the screen turns on, but you can't tap or swipe? Or worse, it starts acting on its own, opening apps and typing—a classic case of "ghost touch." This points to an issue with the digitiser, the touch-sensitive layer of the screen.
Again, start by checking the connections. The digitiser has its own flex cable, so reseating it is your first step. While you're in there, inspect the connector itself for any bent pins or debris. A single speck of dust can cause problems.
Pro Tip: Double-check that no part of a flex cable is being pinched or sharply creased under a bracket or the screen's frame. A bad fold can damage the delicate wires inside, leading to a touch function that's either intermittent or completely dead.
If reconnecting everything doesn't solve it, you might have a faulty part. This is why sourcing high-quality screens from a trusted supplier is so important.
Vertical Lines or Discoloured Pixels
It’s disheartening to see strange lines, coloured bars, or dead pixels on your new screen. This kind of visual distortion is almost always caused by a poor connection or physical damage to one of the display flex cables.
Here's how to diagnose it:
- Power Down and Reconnect: You know the drill. Disconnect the battery and carefully reseat all screen-related flex cables.
- Inspect for Damage: With the cables disconnected, hold them under a bright light and look for any tiny tears, nicks, or harsh creases that might have occurred during installation.
- Check for Debris: Ensure there's no leftover sticky residue in the connectors on the logic board or on the cables.
Face ID or Front Camera Isn't Working
If Face ID, your selfie camera, or the proximity sensor stops working after the repair, the problem is almost certainly the front sensor assembly you transferred from the old screen. This component is incredibly fragile and is cryptographically paired to your iPhone's logic board.
Any damage to its delicate ribbon cable during the transfer will kill these functions. You'll need to open the device and carefully inspect this cable for any signs of tearing or stress. Unfortunately, if this cable is damaged, Face ID cannot be restored. It's a stark reminder to be extremely careful during that step.
Final Testing To Confirm A Successful Repair
You’ve clicked the last screw back in place and the Apple logo appears—great job! But you're not done yet. A thorough final check is crucial to ensure every function is working perfectly.
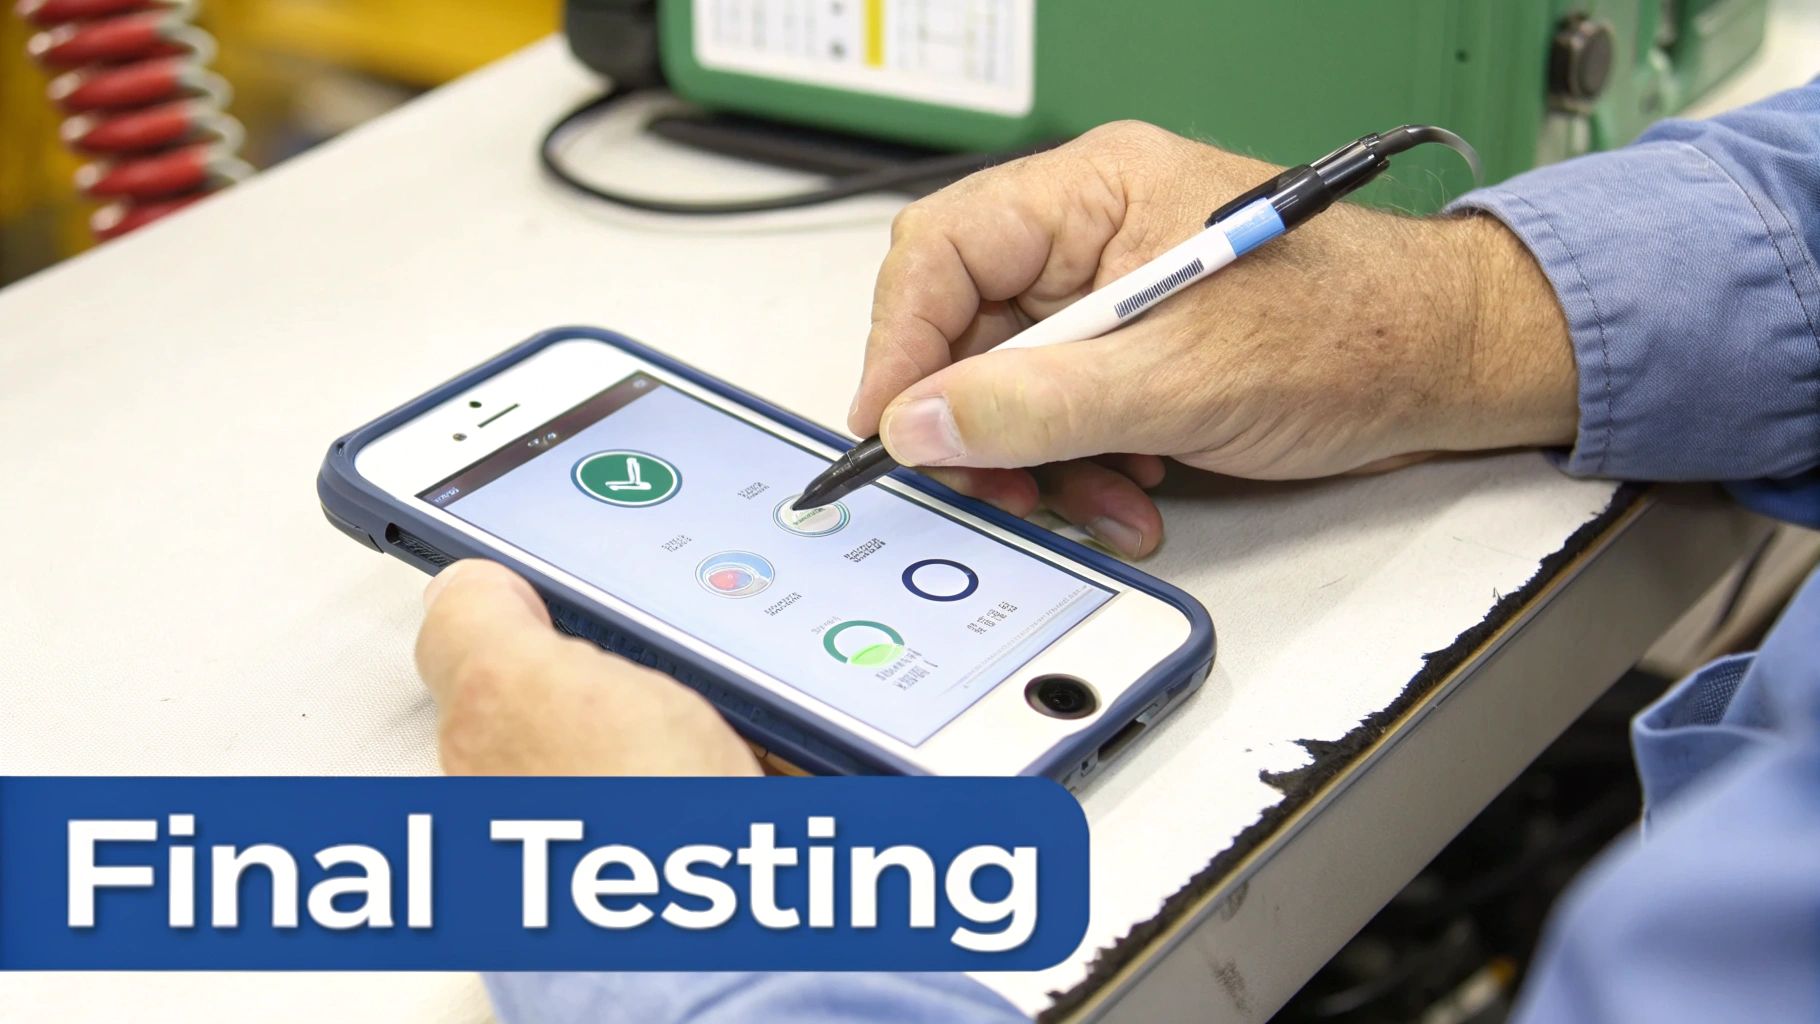
Alt text: An iPhone screen being tested for touch sensitivity after a repair, with a finger drawing lines across the display.
A Comprehensive Functionality Checklist
Before you pack away your tools, open a notes or drawing app and run through these tests:
- Multi-Touch Accuracy: Draw lines from corner to corner in a grid pattern. The lines should be smooth and unbroken. Any gaps or jumps suggest a connection issue with the digitiser.
- Haptic Touch (or 3D Touch): Long-press on app icons on the home screen. You should feel a crisp, consistent vibration. Weak feedback can indicate a poorly seated Taptic Engine connector.
- Display Quality: View a pure white image, then a solid black one. This will help you spot any dead pixels, bright spots, or discolouration.
- Brightness & True Tone: Drag the brightness slider up and down to ensure it adjusts smoothly. If your model has True Tone, toggle it on and off to confirm the screen’s colour temperature adjusts to the ambient light.
Verifying Key Sensor Functions
A beautiful new screen is only half the solution. The phone's sensors must also be working correctly.
A common DIY mistake is forgetting to test the proximity sensor. If it's not working, the screen won't turn off during calls, leading to accidental button presses with your cheek.
- Proximity Sensor: Make a phone call and hold the iPhone to your ear. The display should turn off immediately. If it stays on, the sensor may be misaligned.
- Face ID & Front Camera: Open the Camera app and switch to the front-facing camera. Take a photo, then test Face ID by locking and unlocking your phone several times.
If you encounter an issue you can't resolve, professional iPhone Repairs Brisbane services are ready to help.
Answering Your Top Questions About iPhone Screen Repair
It's normal to have a few questions after completing a repair. Here are straightforward answers to the most common things people ask.
Will I Lose My Data if I Repair My iPhone Screen Myself?
No, you shouldn't. Replacing the screen does not affect your personal data. All your photos, contacts, and apps are stored on the iPhone's logic board, which is separate from the display.
However, it is always best practice to back up your iPhone to iCloud or a computer before starting any repair. This acts as a safety net in the rare event that something goes wrong.
Can I Still Use Face ID and True Tone After a Screen Replacement?
Yes, but only if you are extremely careful. To keep Face ID and True Tone working, you must transfer the original front sensor assembly from your old, broken screen to the new one. This component is electronically paired to your specific phone. If the delicate ribbon cable is torn during the transfer, or if you use a sensor from another phone, Face ID and True Tone will be permanently disabled.
Is My iPhone Still Water Resistant After a Screen Repair?
It's safest to assume it is not. When you open an iPhone, you break the original factory-applied water-resistant seal. While your repair kit may include a new adhesive gasket, it is very difficult to replicate the factory seal perfectly at home. Even professional shops like Screen Fixed Brisbane cannot guarantee the original IP rating after a repair. It's best to keep your newly repaired phone away from liquids.
What Is the Biggest Mistake to Avoid During a DIY iPhone Screen Repair?
The single biggest and most costly mistake is forgetting to disconnect the battery as the very first step after opening the phone. Working on the device with the battery connected means the logic board is live. If a metal tool accidentally touches the wrong component, it can cause an electrical short. This can instantly damage the screen's backlight circuit or even destroy the logic board, turning a simple screen repair into a dead phone. Always disconnect the battery first.
Feeling confident, or thinking it might be better to leave it to an expert? Screen Fixed is here to provide professional, reliable iPhone repairs across Australia. Our experienced technicians have the right tools and expertise to get the job done perfectly.
Book your repair with Screen Fixed Brisbane today, and we'll get your iPhone looking and working like new again.
Disclaimer: Apple, iPhone, Face ID, and True Tone are trademarks of Apple Inc., registered in the U.S. and other countries. Screen Fixed is an independent service provider and is not affiliated with Apple Inc.