
Meta Title: How to Test a Capacitor in Australia | Step-by-Step Guide Meta Description: Learn how to test a capacitor safely with a multimeter. Our guide helps you diagnose faulty capacitors in devices like iPhones. For expert help, contact Screen Fixed Brisbane.
Is your device acting up or refusing to turn on? A single faulty capacitor could be the culprit, causing issues from a flickering monitor to a dead smartphone. Before you even think about testing one, you have to safely discharge it. Once that's done, you can grab a digital multimeter, switch it to the capacitance setting (μF), and measure its value. If the reading is close to the number printed on the capacitor's casing, you’re likely in the clear. A big difference—or a flat zero—tells you it's time for a replacement.
Why You Need to Test Capacitors Accurately
Before you even reach for your tools, it’s worth taking a moment to understand what’s at stake here. A single, tiny capacitor that’s gone bad is often the silent culprit behind some major electronic failures. We’re talking about everything from a smartphone that refuses to power on to a PC monitor that won't stop flickering. These little components are absolutely critical for managing power flow in modern circuits.
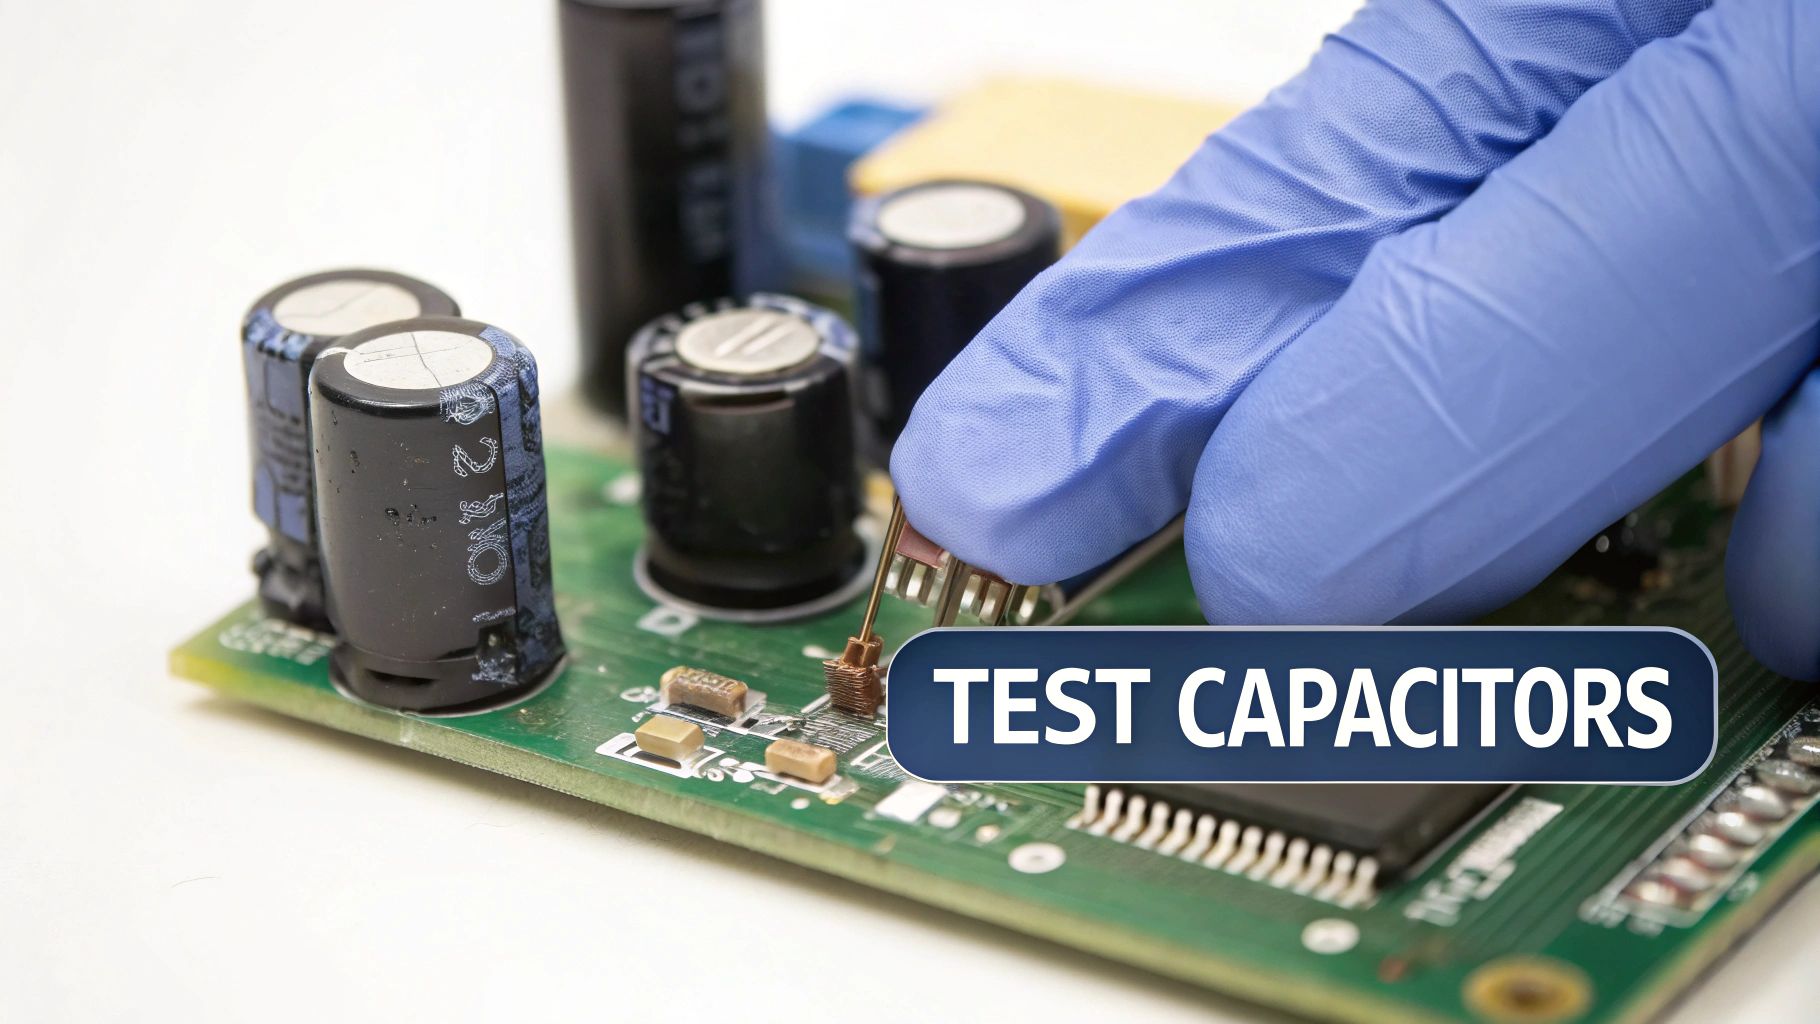 Alt text: A gloved hand using multimeter probes to test a capacitor on a green circuit board.
Caption: A technician performs a diagnostic test on an iPhone 13 logic board in Brisbane.
Alt text: A gloved hand using multimeter probes to test a capacitor on a green circuit board.
Caption: A technician performs a diagnostic test on an iPhone 13 logic board in Brisbane.
When a capacitor gives up the ghost, it can trigger a whole host of problems. That's why knowing how to test one isn't just a technical chore—it's an essential diagnostic skill for anyone serious about electronics repair.
Common Signs of a Bad Capacitor
Sometimes, a faulty capacitor makes itself obvious. If you spot one that’s bulging at the top, leaking an oily electrolyte fluid, or has a physically ruptured case, then you've found your problem. It's a goner and needs to be replaced, no questions asked. These are the classic, tell-tale signs that the capacitor has failed internally.
But here's the tricky part: many failed capacitors look perfectly fine from the outside. They might create an open circuit, which stops power from getting where it needs to go. Or, even worse, they can fail as a direct short to ground.
A shorted capacitor is a nightmare scenario. It can cause catastrophic damage to a circuit board by letting way too much current flow through other sensitive components, effectively frying them. This turns a simple component swap into a much more complex and expensive board-level repair.
Saving Time and Money
Whether you’re running a professional repair shop or just fixing your own gear, correctly identifying a bad capacitor is the difference between a quick, cheap fix and a costly board replacement. Instead of just guessing and swapping out entire modules, you can zero in on the exact point of failure.
This is especially true with complex devices like laptops and smartphones. A device that seems completely dead might not be a lost cause at all; it could just be a single failed capacitor on a power rail. Our guide on what to do when your MacBook Pro won't power on touches on similar diagnostic principles that often lead back to these tiny components.
Learning to test capacitors accurately is a key part of ensuring the entire system is reliable, slotting right into the broader process of learning how to test a circuit board for maximum reliability. By mastering this skill, you're setting yourself up for more precise, efficient, and cost-effective repairs—whether you're a pro on our iPhone Repairs Brisbane team or a dedicated DIYer at home.
The Critical First Step: Safely Discharging a Capacitor
Alright, let's talk about the single most important thing you must do before your multimeter probes even think about touching a capacitor: making it safe.
Never, ever assume a capacitor is dead. Even if a device has been unplugged for days, a capacitor can still be holding a nasty charge. Think of it as a tiny, primed battery just waiting to unload its stored energy. Its whole job is to hold onto a charge, and it can be surprisingly good at it long after the main power is off.
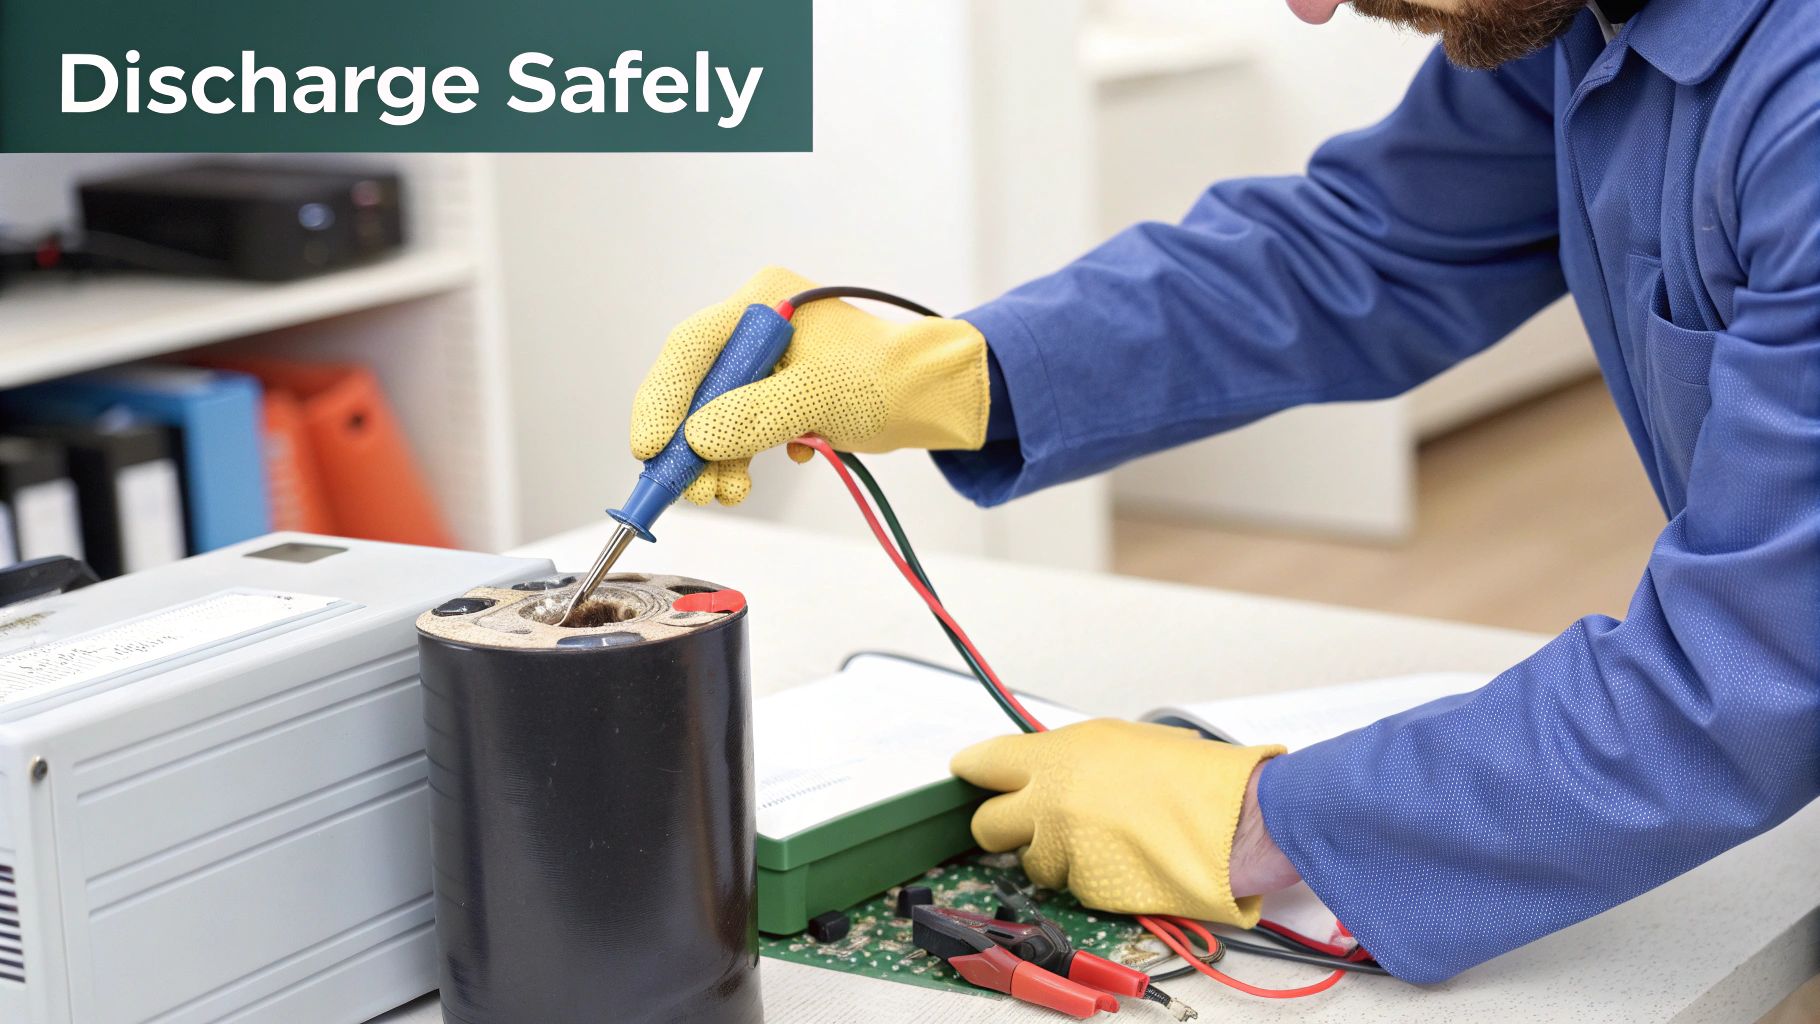 Alt text: Technician in gloves demonstrating the safe handling of an electrical capacitor on a workbench surrounded by tools.
Trying to test a charged capacitor is asking for trouble. In a best-case scenario, you might just fry your multimeter. In a worst-case scenario, you could get a violent spark that zaps you and destroys the very circuitry you're trying to repair. This is especially true for the bigger caps you find in power supplies—those things can pack a serious, dangerous punch.
How to Discharge a Capacitor the Right Way
The goal here is to give that stored energy a safe, controlled path to ground. I’ve seen people grab an insulated screwdriver to short the terminals, but that’s a terrible idea. The sudden, uncontrolled discharge creates a massive current spike. You can easily weld the screwdriver tip to the terminal, damage the capacitor's internal guts, and send a shockwave right through the circuit board.
Instead, we need to bleed that energy off gently. The professional approach uses a tool made for this exact purpose.
- Capacitor Discharge Pen: This is the best tool for the job, hands down. It has a built-in resistor that lets the charge drain away at a controlled rate. Most have a handy LED indicator that switches off once the capacitor is fully drained and safe to handle.
- High-Wattage Resistor: A great DIY alternative is a simple power resistor, something like a 1k-ohm, 5-watt resistor, with some alligator clip leads attached. Just clip it across the capacitor's terminals and give it a minute to do its thing.
Now, for the tiny surface-mount capacitors on a modern iPhone logic board, the stored charge is much smaller and usually dissipates pretty quickly on its own. Still, getting into the habit of checking the voltage across the terminals with your multimeter before testing is a professional best practice. It’s what separates the amateurs from the pros.
Always confirm the capacitor is fully discharged. Set your multimeter to DC voltage mode and measure across the terminals. If you see a reading of zero volts, you're good to go.
This simple check takes two seconds, removes all guesswork, and is the mark of a careful technician. Only once you've confirmed the component is completely inert can you safely move on to figuring out if it’s any good.
Using a Digital Multimeter for Capacitor Testing
Right, with your capacitor safely discharged, it’s time to grab your most important tool: the digital multimeter. This little box is the key to figuring out what’s really going on inside that tiny component. Learning how to test a capacitor isn’t just about getting a single number; it's about interpreting a few different readings to build a complete picture of its health.
 Alt text: A close-up of a blue digital multimeter set to measure capacitance, with red and black test leads attached.
This method has become the industry standard across Australian electronics repair shops, with adoption rates now hitting over 85% among professional service centres. And for good reason. A multimeter with a capacitance function can give you an answer in under 60 seconds, making it an incredibly efficient diagnostic tool when you're on the clock.
Checking with Capacitance Mode
The most direct way to get an answer is by using your multimeter's dedicated capacitance mode. Look for the microfarad symbol (µF) on the dial. This function is designed to do one thing: measure the component's actual ability to store a charge.
To get a reading, just set your multimeter to this mode and touch the probes to the capacitor's terminals. Don't forget, if you're testing a polarised capacitor, the red probe must touch the positive lead and the black probe goes to the negative. The meter will then do its thing and show you the capacitance value.
A healthy capacitor should give you a reading that's very close to the value printed on its side. Most caps have a tolerance rating (e.g., ±10% or ±20%), so as long as your reading falls within that range, you're good to go.
Using Resistance Mode for Quick Checks
But what if your multimeter is a bit older and doesn't have a capacitance setting? No worries. You can still do a basic but incredibly useful health check using the resistance or ohm (Ω) mode. It won’t give you a precise capacitance value, but it’s brilliant for spotting the two most common culprits: shorts and opens.
- For a Good Capacitor: When you first connect the probes, you should see the resistance value start low and then steadily climb. This is the multimeter's own battery charging the capacitor. After a moment, the reading should max out, often showing "OL" (Over Limit) or infinity, which means it has charged up fully.
- For a Shorted Capacitor: If the reading immediately drops to or near zero ohms and just stays there, you've got a shorted capacitor. It’s basically acting like a piece of wire, which is a major fault. It needs to be replaced, no questions asked.
- For an Open Capacitor: On the other hand, if the reading immediately goes to "OL" and never changes from the start, the capacitor is open. It’s not taking any charge at all, meaning its internal connection is completely broken.
This resistance test is a fantastic first-line diagnostic. It’s a quick-and-dirty way to confirm if a capacitor is fundamentally broken before you even think about doing a more precise capacitance measurement.
Interpreting the Results Like a Pro
Getting a number on the screen is just the first step; knowing what that number is telling you is the real skill. A reading that's just a little outside the tolerance might not cause a catastrophic failure, but it can absolutely lead to weird performance issues like circuit instability or annoying audio noise.
Take a power supply circuit in an iPhone, for instance. A capacitor that has lost 30% of its capacitance might cause the device to randomly restart when you're trying to run a game. You'd never spot that with a visual inspection, but your multimeter would sniff it out instantly.
This is why getting comfortable with your multimeter is so crucial. It’s these tests that help our technicians at Screen Fixed Brisbane quickly nail down a diagnosis and get those iPhone repairs done right the first time.
Multimeter Readings for Capacitor Health
| Test Mode | Purpose of Test | Reading for a Good Capacitor | Reading for a Bad Capacitor |
|---|---|---|---|
| Capacitance | Measures the actual ability to store a charge. | Within the printed tolerance (e.g., ±10%). | Significantly outside the tolerance range, or zero. |
| Resistance | Checks for basic charge/discharge functionality. | Starts low, then steadily climbs to "OL" or infinity. | Stays at or near zero (shorted) or instantly shows "OL" (open). |
| Diode Test | Quickly checks if the capacitor charges. | Beeps briefly, then the voltage reading climbs. | Continuous beep (shorted) or no beep/no change in reading (open). |
This table serves as a great go-to reference when you're at your workbench. Over time, you'll start to recognise these patterns instantly, which seriously speeds up your diagnostic process.
Going Deeper with ESR and LCR Meters
While your trusty multimeter is great for catching a dead short or a massive loss in capacitance, it doesn't always paint the full picture. For those really frustrating, intermittent faults or weird performance issues, you've got to dig a bit deeper. This is where professional tools like ESR and LCR meters become non-negotiable for any serious technician.
A capacitor might show its correct capacitance value on a multimeter but still completely fail when it's actually under load in a circuit. This is usually down to a sneaky little metric called Equivalent Series Resistance (ESR). The easiest way to think of ESR is as a tiny, hidden resistor living inside the capacitor that generates heat and wastes energy every time current flows through it.
Over its lifespan, the electrolyte inside a capacitor starts to dry out, which causes its ESR to creep up. A high ESR can stop a component from doing its job, especially in high-frequency circuits like the switch-mode power supplies you'll find in just about every modern device.
So, What's the Big Deal with Equivalent Series Resistance?
A brand-new, healthy capacitor will have an incredibly low ESR, typically well under an ohm. But as it ages and degrades, this internal resistance can skyrocket. Your standard multimeter just can't detect this subtle but absolutely critical change.
A capacitor with high ESR is like a clogged fuel filter in a car. The car might idle perfectly fine, but the second you put your foot down, it sputters and stalls. In the same way, a high-ESR capacitor fails the moment the circuit demands a quick burst of power, leading to instability or total failure.
This is an extremely common point of failure in power supplies for computers, monitors, and gaming consoles. If you're wrestling with a device that's unstable or randomly shutting down, high ESR is a prime suspect that a basic capacitance test would completely miss.
When to Break Out the ESR or LCR Meter
You'll want to reach for a dedicated ESR meter when a multimeter test tells you a capacitor is "good," but your gut is telling you it's still the source of the problem. These meters work by sending a small AC signal through the capacitor, allowing them to measure its internal resistance—a much more reliable indicator of its true health.
Many professional repair shops, including our own team that handles intricate iPhone repairs Brisbane wide, depend on these tools for accurate diagnostics. A huge advantage is that they allow for in-circuit testing, which saves a massive amount of time because you don't have to desolder every single component just to check it.
Beyond just ESR, some advanced diagnostic techniques in Australia have found success using the time constant method, which is governed by the formula TC = R × C. This involves measuring the time it takes for a capacitor to charge to about 63.2% of an applied voltage through a known resistor. Technical findings show this method can be incredibly accurate, especially for spotting subtle degradation that other tests might overlook. You can dive deeper into these advanced principles with resources from specialists like Keysight.
At the end of the day, investing in a good ESR meter is a game-changer. It takes you from simply checking components to performing true circuit analysis, letting you catch failing parts before they cause a catastrophic failure.
From Diagnosis to Replacement: A Practical Workflow
Pinpointing a faulty capacitor is a big win, but the job isn't truly done until you've got a new one successfully soldered in its place. This workflow is all about bridging that gap between diagnosis and a finished repair, making sure you make the right calls every step of the way.
Once your tests confirm a capacitor is out of spec, it's time to find its replacement.
This isn't as simple as grabbing one that just looks the same. Popping in the wrong component can cause it to fail immediately, or even worse, it could take out other perfectly good parts on the board.
Sourcing the Right Replacement
To get the right replacement, you need to match three critical specifications from the original capacitor. These values are absolutely non-negotiable for a safe, lasting repair.
- Capacitance (µF): This value, measured in microfarads, must be an exact match. It's the core of what the capacitor does—storing a specific amount of charge. Changing this value will throw off how the entire circuit is designed to behave.
- Voltage Rating (V): The voltage rating on your new capacitor needs to be equal to or higher than the original. Think of this as its safety limit; a cap with a lower voltage rating will likely pop or fail spectacularly under normal operating conditions.
- Physical Footprint: It sounds obvious, but the new part has to physically fit on the board. Pay close attention to its diameter, height, and the spacing of its leads to ensure it will install cleanly without interfering with anything around it.
This decision tree gives you a quick visual guide on which tool to grab first, steering you from a basic multimeter check to an ESR meter when you need to dig deeper.
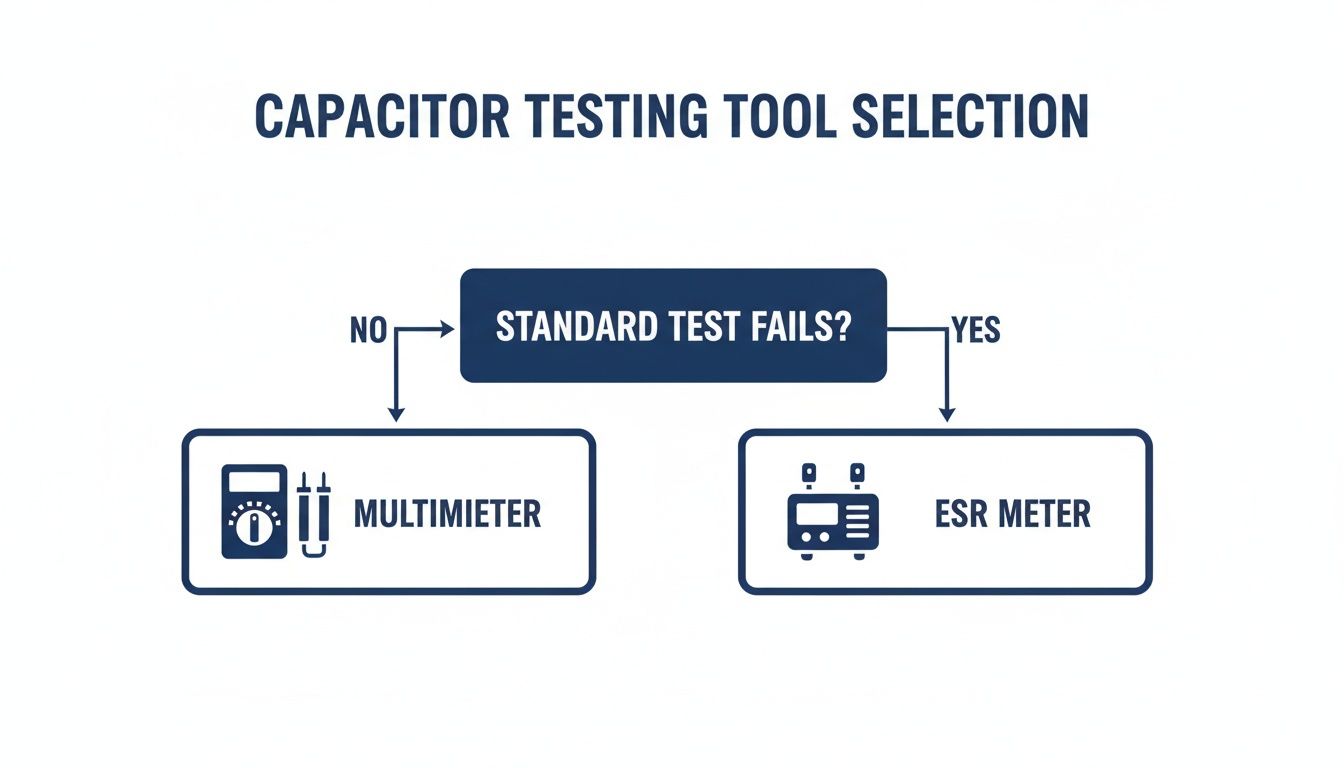 Alt text: A flowchart diagram for selecting the right capacitor testing tool, starting with a multimeter and escalating to an ESR meter for advanced diagnostics.
As the flowchart shows, your multimeter is your go-to for the first pass. But an ESR meter is the real MVP for catching those sneaky failures that basic tests just can't see.
After you've identified the dud, you'll need to source a replacement. A good place to start is browsing the various types of capacitors available to find one that ticks all the boxes. For technicians doing these kinds of intricate repairs day in and day out, having a supplier you can trust is absolutely essential.
A successful repair isn't just about finding the fault—it's about restoring the device to full functionality with reliable, correctly matched components. Taking the time to get the replacement part right is just as important as the diagnosis itself.
This whole process ties directly into other board-level diagnostics. If you're keen to build up your skills, you might find our guide on how to test continuity with a multimeter useful—it's another fundamental skill every repair technician needs.
Common Questions About Testing Capacitors
Even with the best multimeter and a clear plan, you're bound to run into a few tricky situations when you're deep in a repair. It happens to everyone, from seasoned technicians to curious DIY-ers. Let's tackle some of the most common questions that pop up, so you can get past the roadblocks and back to the fix.
Can I Test a Capacitor While It's Still on the Board?
This is probably the number one question we hear, and the straightforward answer is: it's a gamble. Testing a capacitor "in-circuit" is a shortcut that can easily mislead you. Your multimeter isn't just measuring the capacitor; it's also seeing every other component connected in parallel. Resistors, ICs, and other caps on the same line can skew the reading, making a good capacitor look bad or, even worse, a faulty one seem perfectly fine.
Now, if you're just hunting for a dead short, a quick resistance check in-circuit can sometimes give you a clue. If your meter beeps or reads close to zero ohms, you’ve likely found a shorted component. But for an accurate capacitance reading, there's no substitute for desoldering at least one leg of the capacitor. That’s the only way to be 100% certain you're testing that component and nothing else.
In-circuit testing might save you a minute, but it can cost you hours chasing a phantom problem. The professional standard is always to test out-of-circuit for results you can actually trust.
What Does the Voltage Rating on a Capacitor Mean?
That voltage rating you see printed on the side of a capacitor (like 16V or 25V) isn't what it runs at—it's the absolute maximum voltage it can handle before its internal insulating layer, the dielectric, gives up the ghost. Pushing it past that limit, even for a split second, can cause the capacitor to fail, sometimes with a pop and a puff of smoke.
When you're looking for a replacement, the rule is simple: the new capacitor's voltage rating must be equal to or higher than the original. It's completely safe to use a higher voltage rating (say, a 25V cap to replace a 16V one), and it can even make the circuit a bit more robust, as long as it physically fits on the board. But you should never, ever use a capacitor with a lower voltage rating than the original.
What If My Multimeter Doesn't Have a Capacitance Setting?
No dedicated capacitance (µF) function? Don't sweat it. You can still run a surprisingly effective health check using the good old resistance (ohm) mode. This classic test is perfect for spotting the two most common and destructive failure types: shorts and opens.
- Checking for a short: Set your meter to resistance. Touch the probes to the capacitor's legs. If the reading instantly plummets to near zero and stays there, you've got an internal short. Bin it.
- Checking for an open: If the reading immediately shows "OL" (Over Limit) or infinity and doesn't budge, the capacitor's internal connection is broken. It’s an open circuit and completely useless.
- A healthy capacitor: Should do something interesting. You'll see the resistance start low and then steadily climb higher and higher, eventually heading towards infinity. This happens because the small voltage from your multimeter's battery is actually charging the capacitor.
This simple resistance check is a powerful diagnostic tool. It’s a foundational skill for anyone wanting to learn how to test a capacitor properly and can quickly tell you if a component is dead on arrival, no fancy meter required.
At Screen Fixed Brisbane, our technicians put these precise diagnostic skills to use every single day to carry out reliable, board-level repairs. If you're wrestling with a tricky electronics problem, don't leave it to guesswork. Book your repair with Screen Fixed Brisbane today and let our experts handle it.
Disclaimer: iPhone and MacBook Pro are trademarks of Apple Inc. Screen Fixed is an independent repair service provider and is not affiliated with Apple Inc.