
Meta Title: Repair iPhone 7 Screen: A Complete DIY Guide Meta Description: Cracked your iPhone 7 screen? Our step-by-step guide shows you how to repair your iPhone 7 screen safely at home. Save money with our DIY fix.
So, you're staring at a cracked iPhone 7 screen and wondering what to do next. It often comes down to one big question: should you try fixing it yourself? For a phone like the iPhone 7, a DIY repair can be a fantastic, budget-friendly way to get it back in working order, especially when you compare it to professional repair fees or shelling out for a new phone.
With the right parts and a bit of guidance, you can absolutely replace that screen yourself. Plus, you get the satisfaction that comes with a job well done.
Should You Tackle a DIY iPhone 7 Screen Repair?
That spiderweb crack on your iPhone 7 might look like a death sentence for an older device, but it’s often a surprisingly straightforward fix. Here in Australia, repairing an iPhone 7 screen yourself is one of the smartest ways to keep a perfectly good phone going, saving it from becoming e-waste.
For most people, the biggest draw is the money you'll save. When you look at the numbers, a DIY kit can be the clear winner financially compared to professional repair shops or the massive cost of a new smartphone. This isn't just about saving a few bucks; it’s about making a smart economic choice and learning a valuable new skill in the process.
The Real Costs and Benefits
Before you jump in, it's good to know what you're getting into. A DIY repair means buying a kit, setting aside some time, and being patient enough to follow the instructions. The reward isn't just a working phone, but also a genuine sense of accomplishment.
The savings are hard to ignore. In Australia, screen cracks make up a huge percentage of all iPhone repairs, and older models like the iPhone 7 are a big part of that. We've seen local repair shops charge a significant amount for an iPhone 7 screen replacement. For a deeper dive into the numbers, check out this guide on iPhone screen repair costs.
A DIY repair kit from a reputable supplier gives you a high-quality replacement screen and all the tools you need. In many cases, the entire kit costs less than what a repair shop charges just for labour. It's an incredibly efficient way to manage your repair budget.
Is This the Right Project for You?
So, how do you know if you’ve got what it takes? You definitely don't need to be a tech whiz. The main things you need for a successful DIY repair are:
- Patience: Rushing is the fastest way to break something. Take your time.
- Attention to Detail: The iPhone 7 is full of tiny screws and delicate connectors. You need to be careful with them.
- A Clean Workspace: A well-lit, organised desk will be your best friend.
If you enjoy hands-on projects and can follow a video or guide, you're more than capable of doing this repair. It's always worth thinking about whether you truly can you repair a second hand iPhone yourself before you start, just to weigh up the pros and cons. This guide is here to walk you through every single step, turning what seems like a daunting task into a totally manageable and rewarding project.
Choosing the Right Screen and Assembling Your Toolkit
Jumping into a DIY iPhone 7 screen repair is a fantastic feeling, but your success really hangs on the quality of your parts and tools. Using the wrong screwdriver or a poor-quality screen can turn a simple job into a nightmare. Before you even think about touching a single screw, let’s get your gear sorted.
A good repair is all about preparation. It’s like trying to cook a masterpiece meal with a blunt knife and a wobbly chopping board – you might get there, but it won’t be pretty. The same goes for phone repair. Having the right tools laid out and ready makes everything smoother and dramatically cuts the risk of accidentally breaking something.
Understanding Your Replacement Screen Options
The single most critical part you'll buy is the new display itself. The market is absolutely flooded with options, and the quality difference can be huge, affecting everything from how the colours look to whether your touch inputs register properly. Making the right choice here is key to a repair that actually lasts.
It’s worth getting your head around the different screen options available for the iPhone 7. The one you pick will have the biggest impact on the final result, so it pays to choose wisely. Here’s a quick breakdown to help you decide.
iPhone 7 Replacement Screen Comparison
| Screen Type | Quality & Performance | Typical Price Range (AUD) | Best For |
|---|---|---|---|
| OEM (Original) | Made by the same suppliers as Apple. Identical to your original screen in every way—colour, brightness, and touch response. The absolute best quality. | $70 - $100+ | Perfectionists who want their phone to be exactly as it was when it came out of the box. |
| Service-Pack | High-quality, often using the original LCD and digitiser. Performance is almost indistinguishable from OEM. A solid, reliable choice. | $50 - $80 | Anyone looking for a great balance between top-tier performance and a more reasonable price. |
| Refurbished Original | A genuine Apple LCD and digitiser with new outer glass. Offers original display performance at a lower cost, as long as it’s from a trusted source. | $40 - $60 | Budget-conscious repairers who still want the colour and responsiveness of an original Apple display. |
Ultimately, a quality service-pack or a well-refurbished original screen from a trusted supplier offers the best blend of performance and value for most DIY repairs.
For anyone who wants to get a bit more technical, understanding the differences between LCD, OLED, and AMOLED replacement screens is a great way to learn why some displays look so much better than others.
The Essential Toolkit for an iPhone 7 Screen Repair
Having the correct tools is completely non-negotiable. The iPhone 7 uses very specific screws and fragile connectors that you'll just destroy with standard household tools. A proper kit makes sure you have exactly what's needed for every step.
Your toolkit absolutely must include these items:
- Pentalobe P2 Screwdriver: This is for those two tiny screws on the bottom of the iPhone, right beside the charging port. You physically cannot open the phone without this.
- Tri-Point Y000 Screwdriver: Apple started using this screw in the iPhone 7 to hold down internal parts like the display cable bracket.
- Phillips #000 Screwdriver: You'll need this for a bunch of internal screws holding down different components.
- Suction Cup: Crucial for gently lifting the screen away from the phone’s body after the screws are out.
- Plastic Prying Tools (Spudgers): These are your best friends for safely disconnecting tiny ribbon cables and prying things apart without scratching or shorting the logic board.
- Tweezers: You'll be glad you have these when you’re trying to handle those microscopic screws and components.
A classic rookie mistake is grabbing a generic "small screwdriver set." They almost never have the specific Pentalobe and Tri-Point bits you need, which is a one-way ticket to stripped screws—a massive headache that can bring your whole repair to a dead stop.
A Practical Walkthrough of the Disassembly Process
Alright, with your toolkit organised and a quality replacement screen ready to go, it’s time to get hands-on. This is where we'll carefully walk through taking your iPhone 7 apart. The keys here are precision, patience, and keeping everything organised so it all goes back together perfectly.
Think of this as careful surgery, not demolition. Every single screw has a specific home, and each cable is delicate. Follow these steps closely, and you’ll sidestep the common mistakes that can turn a simple repair iphone 7 screen job into a headache.
This diagram gives a great overview of the basic process: choose the right part, open the device, and carefully pry it open.
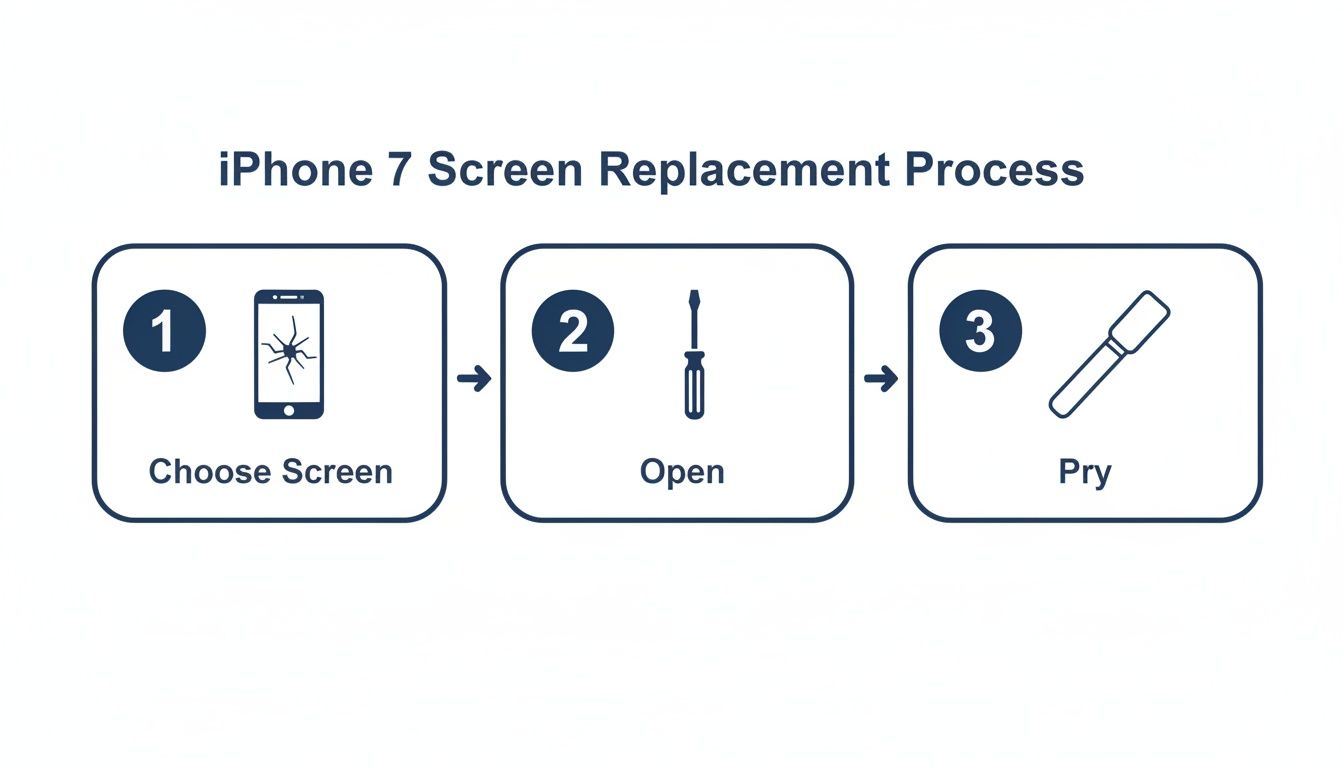 Alt: A diagram illustrating the three steps for an iPhone 7 screen replacement: choosing the screen, opening with a screwdriver, and prying.
Safely Opening the Enclosure
First things first: power down your iPhone 7 completely. Don't just let it go to sleep—hold the power button and slide to power off. This is non-negotiable, as it prevents accidental short circuits that could fry the logic board.
Next, find the two tiny pentalobe screws on either side of the charging port. Grab your P2 pentalobe screwdriver and carefully remove them. These are the only external screws holding the screen assembly to the frame, so put them somewhere safe. A magnetic mat is a lifesaver here.
With the screws out, you need to break the phone's waterproof seal. Stick a suction cup on the screen, just above the home button. While pulling up gently, slide a plastic prying tool (like a spudger) into the gap you create between the screen and the metal frame. Work your way around the edges slowly to release the internal clips.
Pro Tip: The iPhone 7 opens sideways like a book, from left to right. Don't try to lift the screen straight up! The display cables are on the right side and are extremely fragile. Pulling too hard or in the wrong direction will tear them.
Disconnecting the Battery Is Critical
Once the screen is propped open, you’ll see a small metal plate held down by four tri-point screws. This plate covers the battery and display connectors. It is absolutely essential to disconnect the battery before you do anything else.
Use your Y000 tri-point screwdriver to remove these four screws. Keep them organised, as they aren't the same length. Putting the wrong screw back in the wrong hole can puncture the logic board, instantly killing your phone.
After the plate is off, use the flat end of a plastic spudger to gently pop the battery connector off its socket. You'll feel a slight click. This simple step cuts all power, making the rest of the job safe.
Removing the Old Display Assembly
With the battery disconnected, you can now deal with the display connectors. They’re located right above the battery connector, under that same metal shield.
Use your spudger to carefully unclip the two display flex cables. They pop off just like the battery one did. Once they're free, the entire screen assembly will separate from the phone's body. Set the phone body aside somewhere safe and dust-free.
Transferring Components to the New Screen
Your new screen is basically a blank canvas. You'll need to move several key components from your old, broken display over to the new one. This is the most delicate part of the repair, so go slow and be patient.
The main parts you'll be transferring are:
- The Home Button/Touch ID Sensor: This is the most critical part. The Touch ID sensor is cryptographically paired to your phone's logic board. If you damage the original home button cable, Touch ID is gone for good. Carefully remove the screws holding its bracket, disconnect its tiny cable, and gently move it to the new screen.
- Front Camera and Sensor Assembly: This little module contains the selfie camera, the proximity sensor (which turns the screen off during calls), and the ambient light sensor. It's held in with a bracket and a bit of adhesive.
- Earpiece Speaker: This is the small speaker you listen through during phone calls. It sits neatly in a recess at the top of the display.
- LCD Shield Plate: This large metal plate on the back of the LCD protects it and helps with heat dissipation. It’s held in by several small Phillips screws around its perimeter.
As you take each part off, pay close attention to which screws came from where. A misplaced screw can easily damage the new screen from behind, causing bright spots or dead pixels on your brand-new display. Once everything is transferred over, your new screen is ready to be installed by reversing these steps.
Putting It All Back Together: Reassembly and Final Checks
You’ve successfully moved all the critical components over to the new screen, which means you’re on the home stretch. But don't get ahead of yourself. Putting your iPhone 7 back together isn't just about doing everything in reverse; you need to be just as careful now as you were taking it apart.
This is where a little patience prevents a lot of headaches. Rushing the reassembly is a classic mistake, often leading to frustrating problems like an unresponsive screen or, worse, a dead home button. Take your time, get every connection right, and test everything thoroughly. Your hard work is about to pay off.
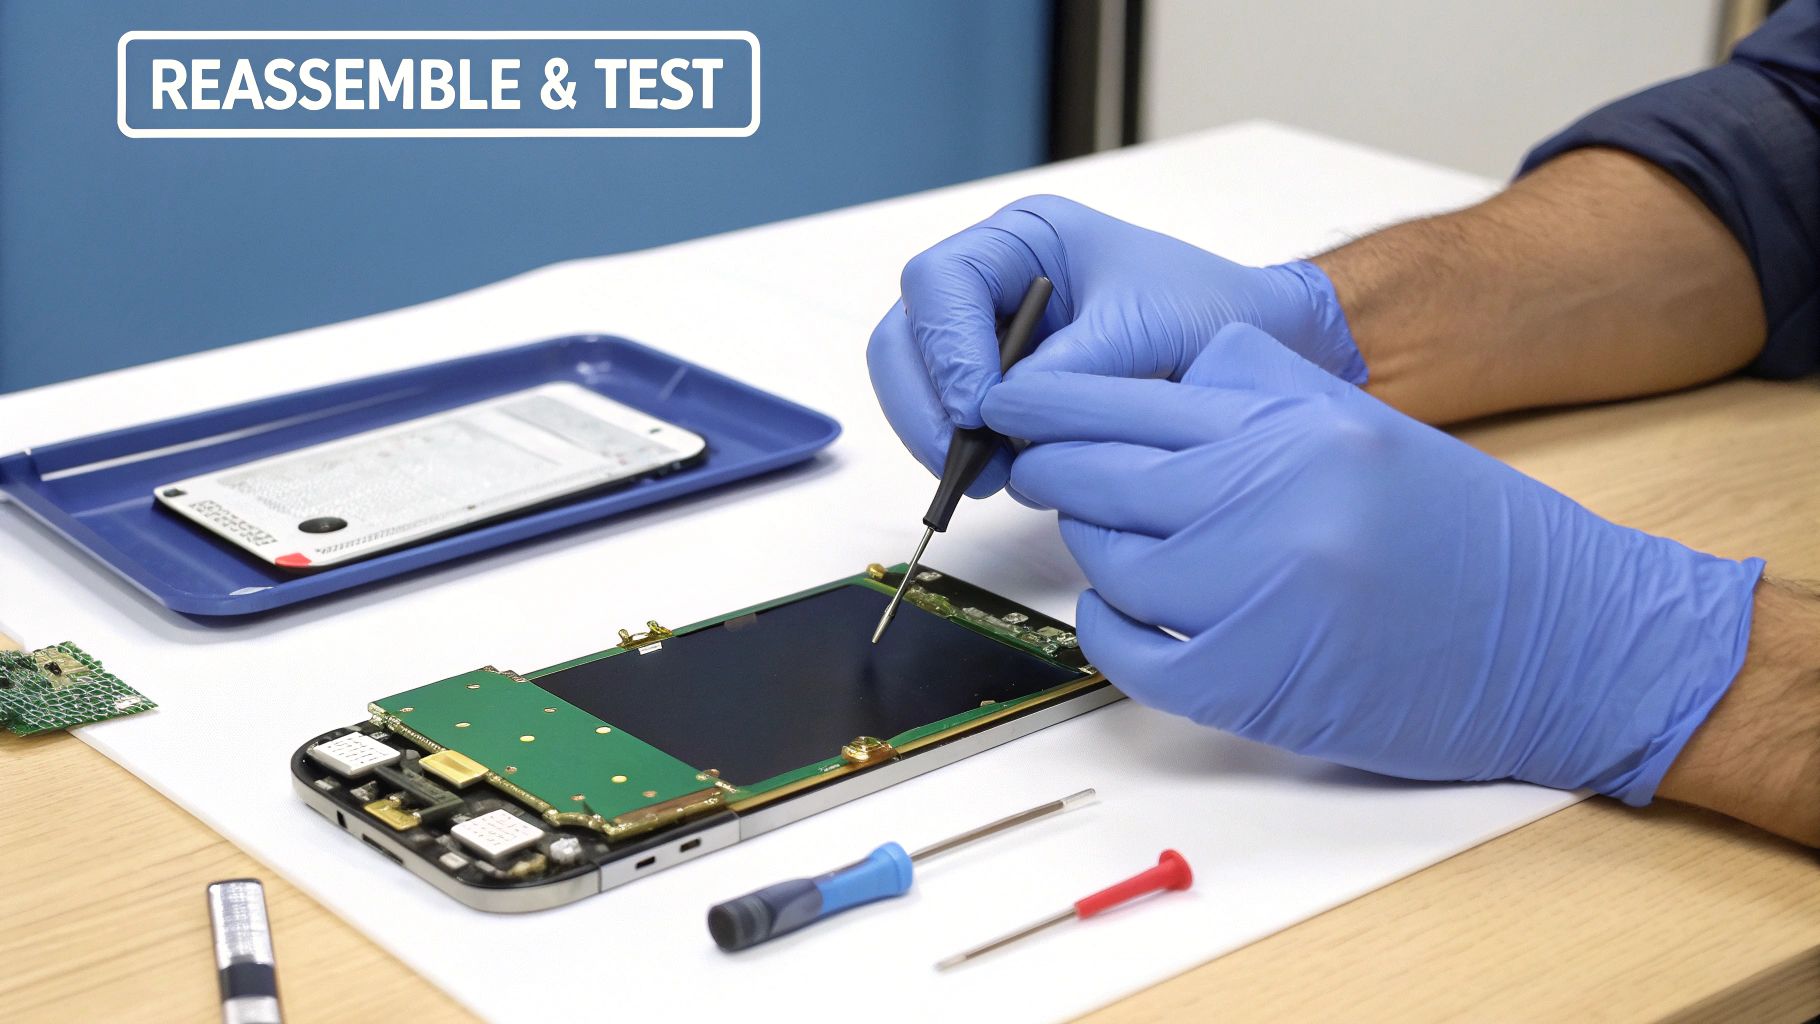 Alt: A technician in blue gloves reassembles an iPhone 7 on a workbench.
Reconnecting Flex Cables and the Battery
This is easily the most delicate part of the whole job. Those tiny flex cable connectors are incredibly fragile, so brute force is your enemy here. When a connector is perfectly aligned, it will click into place with just a little bit of gentle pressure from your fingertip or a spudger.
Begin with the two display cables, connecting them back to the logic board. You're listening and feeling for a faint but satisfying "click" for each one. Once they’re seated properly, you can move on to the battery connector. Crucially, always connect the battery last. This simple step prevents any chance of accidentally shorting out a component while you work.
With the battery reconnected, it's time to put the metal bracket back over the connectors. Carefully thread the four tri-point screws back into place, making absolutely sure each one goes into its original spot. They’re different lengths, and mixing them up can permanently damage the logic board underneath.
Applying the New Waterproof Adhesive
Before you snap that screen shut, you’ll want to install a new waterproof adhesive strip. It’s a thin, pre-cut sticker that runs along the phone's frame, helping to restore some of its original defence against the elements. While your iPhone won’t be fully waterproof again, this seal provides vital protection against dust and the occasional splash.
Here’s how to get it on there perfectly:
- Clean the Frame: Grab a microfibre cloth and a touch of isopropyl alcohol to wipe down the edges of the phone’s frame. You need to get rid of every last bit of the old adhesive gunk.
- Align the Strip: Carefully peel the first backing layer off the new adhesive. Line it up with the frame, starting in one corner and pressing it down firmly as you work your way around the entire perimeter.
- Remove the Top Film: Once the adhesive is securely attached to the frame, peel off the final protective film. This will leave a clean, tacky surface that's ready to bond with the new screen.
Performing Pre-Closure Function Tests
Stop what you're doing. This is the most important step before you seal the phone. Testing everything now ensures your repair iphone 7 screen job was a success. Finding a problem at this stage is a quick fix; finding it after the phone is sealed is a nightmare.
Power on the iPhone and let it boot up completely. Then, methodically go through this checklist:
- Touch Response: Open an app and drag an icon around every corner of the screen. If it drops unexpectedly, you’ve likely got a dead spot. Also, open a notes app and test every key on the keyboard.
- Display Quality: Pull up a pure white image and then a pure black one to check for any dead pixels, distracting bright spots, or patches of discolouration. Tilt the phone to view the screen from different angles.
- Brightness Control: Swipe up to get to the Control Centre and move the brightness slider all the way up and down. Make sure it responds smoothly.
- Home Button and Touch ID: Does the home button take you back to the home screen? Good. Now, head into Settings > Touch ID & Passcode and try adding a new fingerprint to make sure the sensor is working.
- Cameras: Fire up the Camera app. Switch between the front-facing and rear-facing cameras to confirm they are both clear, focused, and functioning correctly.
- Earpiece Speaker: The best way to test this is to make a quick phone call. You should be able to hear the other person without any issues.
Finding a loose front camera cable now might take five minutes to fix. Discovering it after you’ve sealed the phone means prying it open all over again, risking damage to your brand new screen and the adhesive you just applied. Seriously, test everything.
Sealing the iPhone and Final Steps
If everything passed your tests, congratulations! You're ready to close it up for good. Go ahead and power the phone down completely one last time.
Start by carefully aligning the top edge of the screen with the top of the frame, making sure the small clips slot into place first. From there, gently press down along the sides, working your way to the bottom. You should feel a series of soft clicks as the screen assembly snaps securely into the frame.
All that's left is to re-insert the two pentalobe screws at the bottom of the phone, on either side of the charging port. Don't go crazy tightening them—just snug them up until they stop. Once they're in, power your phone back on and enjoy your new, perfectly working screen. Job done.
How to Troubleshoot Common Repair Problems
Even when you follow every step to the letter, technology can still throw you a curveball. If you’ve finished your repair iphone 7 screen job and something’s not quite right, don’t panic. Most post-repair glitches are down to simple, fixable things like a loose cable or a slightly misaligned component.
Think of this troubleshooting guide as your safety net. We'll walk through the most common hiccups you might run into and show you how to diagnose and solve them, turning that moment of frustration into a final victory.
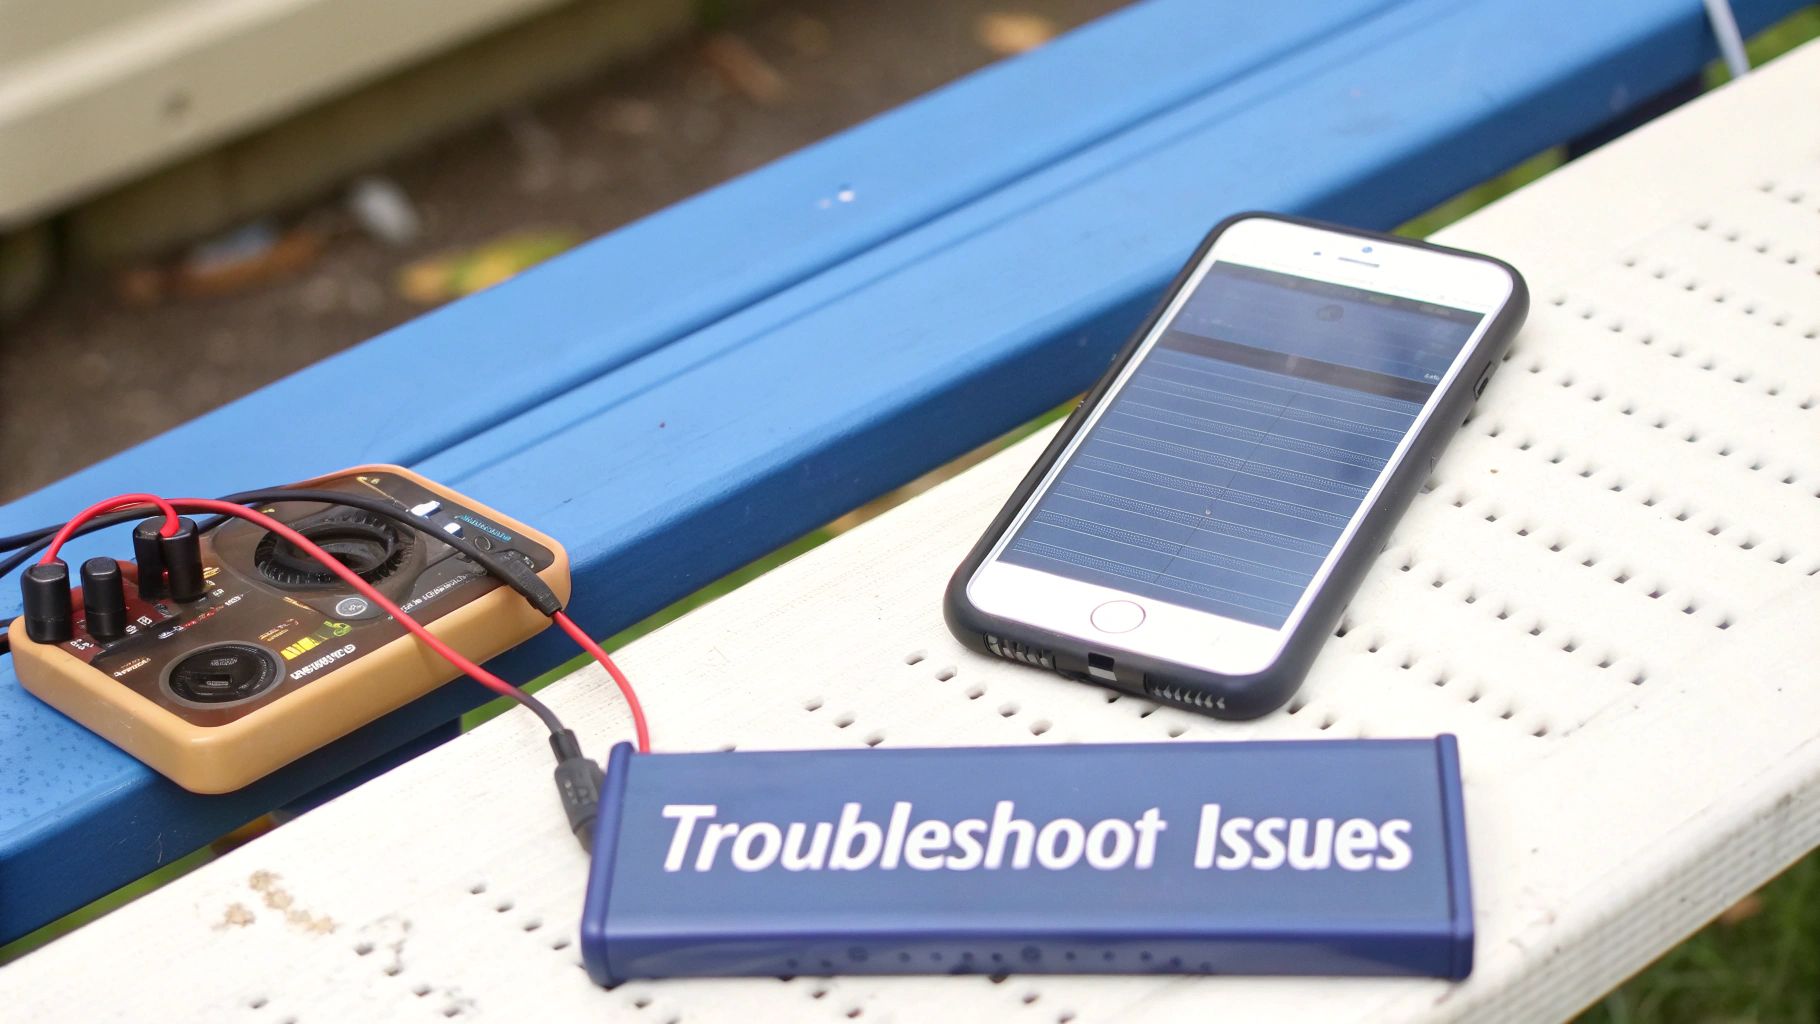 Alt: An iPhone connected to a diagnostic tool on a white table, symbolising troubleshooting.
The Screen Is Unresponsive or Has Lines
This is probably the most common issue. You've buttoned everything up, but the display is black, showing weird vertical lines, or just not responding to touch. This almost always points to a problem with the display flex cables.
First things first, power the phone off completely. You'll need to pop it open again, disconnect the battery (always!), and then carefully reseat the two display connectors. Make sure they line up perfectly with their sockets on the logic board before you hear that gentle click. A connector that’s even a fraction of a millimetre off can cause these exact symptoms.
A tiny speck of dust or debris in the connector socket is all it takes to ruin the connection. Give the sockets a gentle puff of compressed air before you reconnect the cables—it can make all the difference.
Touch ID or the Home Button Isn't Working
Is your home button feeling dead to the world, or is Touch ID failing? The culprit is almost certainly the delicate home button flex cable. That little ribbon is notoriously fragile and can be easily damaged when you transfer it from the old screen to the new one.
Open the phone back up and inspect that cable under good light. Look for any tiny tears or sharp creases, especially where it plugs into the logic board and the button itself. Double-check that its connector is securely clicked into place. If you see any visible damage, you’ve found your problem. Unfortunately, a torn home button cable means Touch ID is gone for good, as that sensor is cryptographically paired to the phone’s logic board from the factory.
The Front Camera or Earpiece Speaker Fails
Made a test call only to find you can't hear the other person, or your selfie camera is just a black screen? These components are all part of a single assembly, so if one isn't working, the others probably won't be either.
The issue is likely the flex cable for this assembly. Just like with the display connectors, the fix is to get back inside the phone, disconnect the battery, and carefully reseat the front camera assembly connector. Check that it's clean and clicks firmly into its socket.
Knowing When to Call a Professional for iPhone Repairs in Brisbane
There's a special kind of satisfaction that comes from successfully completing a DIY iPhone 7 screen repair. It's empowering. But a massive part of being a savvy DIYer is knowing your limits and recognising when it’s time to tap out and call in an expert.
Trust us, there’s zero shame in it. In fact, hitting pause before you turn a small hiccup into a major disaster is the smartest move you can make. Sometimes a repair just doesn't want to cooperate. Maybe a tiny screw has stripped, or a delicate connector refuses to click into place. These are the moments where pushing forward can quickly transform a manageable problem into a very expensive one.
Recognising the Red Flags
If you've hit a wall and are starting to feel frustrated, that’s your cue to stop. Trying to force a component that clearly won’t fit or applying just a little too much pressure is a fast track to a dead phone. If you’ve run through all the troubleshooting tips and are still stuck, it's a definite sign to get some help.
Here are a few specific situations where you should look for professional iPhone Repairs Brisbane:
- Accidental Damage: Sliced a flex cable (especially the critical home button one) or suspect you’ve damaged the logic board? A professional technician has the micro-soldering gear and experience to properly assess and, hopefully, fix the damage.
- Stripped Screws: A single stripped screw can bring your entire repair to a grinding halt. Technicians have specialised extraction tools that are worlds safer than reaching for a drill yourself.
- Multiple Unresolved Issues: You’ve replaced the screen, but now the camera or speaker is dead. This usually points to a deeper issue that an expert can diagnose far more efficiently.
Finding a Trusted Local Expert
When you do decide to hand it over, you want to find a reputable local service you can trust. Many of the best local businesses make themselves easy to find by optimizing their Google Business Profile, so a quick search is a great starting point. Always look for a repairer with a solid track record of positive reviews and transparent pricing.
At Screen Fixed, our expert technicians in Brisbane have seen it all. We can quickly diagnose the problem and get your iPhone 7 working perfectly again, often while you wait. We use only the highest quality parts and stand behind our work with a comprehensive warranty. For a deeper dive into professional services, check out our guide to iPhone screen repair in Brisbane.
If you've decided a professional touch is the right move, Screen Fixed offers expert, reliable repairs. Book your repair with Screen Fixed Brisbane today at https://www.fixo.com.au.
Disclaimer: iPhone and Apple are trademarks of Apple Inc., registered in the U.S. and other countries. Screen Fixed is an independent service provider and is not affiliated with Apple Inc.