
meta_title: "How to Fix an iPhone Charging Port: A Complete Guide | Screen Fixed"
meta_description: "Is your iPhone not charging? Learn how to fix your iPhone charging port with our easy DIY guide. From cleaning debris to full replacement, we've got you covered."
We've all felt that jolt of panic when you plug in your iPhone, and… nothing happens. A dead phone feels like being cut off from the world, but before you jump to the worst conclusion, take a breath. The reality is, the most common charging issues are often the easiest to fix. This guide will walk you through everything from simple cleaning to a full replacement, helping you figure out the best solution.
Diagnosing Your iPhone's Charging Problem
Figuring out why your iPhone won't charge is all about a process of elimination. More often than not, the solution is surprisingly simple and doesn't involve a complex repair. Before you start looking for professional iPhone repairs in Brisbane, running through these quick diagnostic steps can save you time, money, and a whole lot of frustration.
Diagnosing an iPhone 13 charging issue in Brisbane.
Start With The Essentials
Your first stop should always be the charging gear itself. The cable and the power adapter are, by far, the most frequent points of failure. Apple's Lightning cables, in particular, are notorious for fraying near the connector ends after months of being bent and pulled.
Grab a different cable and adapter that you know for sure are working. If your iPhone suddenly springs to life and starts charging, you’ve found your culprit. It’s also a good idea to try a different power point, just to rule out a faulty outlet.
Software Glitches And Resets
Sometimes, the problem isn't physical at all; it's a simple software bug. A quick restart can often clear up temporary glitches that stop your iPhone from recognising a charger.
A "force restart" is a powerful tool for resolving software-related charging issues. It clears the device's temporary memory without affecting your data and can often get a non-responsive phone to recognise power again.
If a standard restart doesn’t do the trick, a force restart is the next logical move. The exact method varies depending on your iPhone model, but it’s a more thorough reboot that can often solve the problem.
Physical Inspection Of The Port
Now it’s time to get a closer look at the charging port. After months of living in pockets and bags, the Lightning port can become a trap for an incredible amount of gunk and debris.
- Pocket Lint: This is the number one offender. Every time you plug in the cable, tiny fibres of fabric get packed down, creating a dense barrier.
- Dust and Dirt: General grime from the environment can build up and prevent a solid connection.
- Corrosion or Damage: Look for any green or white residue, which could be a sign of moisture damage. Also, check if the internal pins look bent or broken.
A quick visual check can tell you a lot. Grab a torch and peer inside. If you see a compacted layer of greyish fluff, that's almost certainly packed-in lint. Gently cleaning this out is often all it takes to fix an iPhone charging port.
iPhone Charging Problem Diagnostic Checklist
To help you narrow things down, we've put together this quick reference table. Just match your phone's symptoms to the likely cause and see what to try first.
| Symptom | Likely Cause | Recommended First Action |
|---|---|---|
| Nothing happens when plugged in | Faulty cable/adapter or blocked port | Try a different cable & adapter; inspect port for debris. |
| Charges intermittently or "wiggles" | Debris in port or a damaged cable/port | Clean the port carefully; test with another cable. |
| "Accessory not supported" error message | Dirty port, faulty cable, or software glitch | Clean the port; try a different (MFi-certified) cable. |
| Phone gets very hot while charging | Faulty adapter, bad cable, or battery issue | Immediately unplug; try a different adapter and cable. |
| Charges very slowly | Low-wattage adapter or background apps | Use a higher-wattage adapter; check battery usage stats. |
| Shows it's charging, but % doesn't rise | Software bug or failing battery | Perform a force restart; if it persists, check battery health. |
This checklist covers the most common scenarios we see every day. Working through it methodically will solve the problem for the vast majority of users without needing a trip to the repair shop.
Safely Cleaning Your iPhone Charging Port
Carefully cleaning the charging port of an iPhone 12 Pro.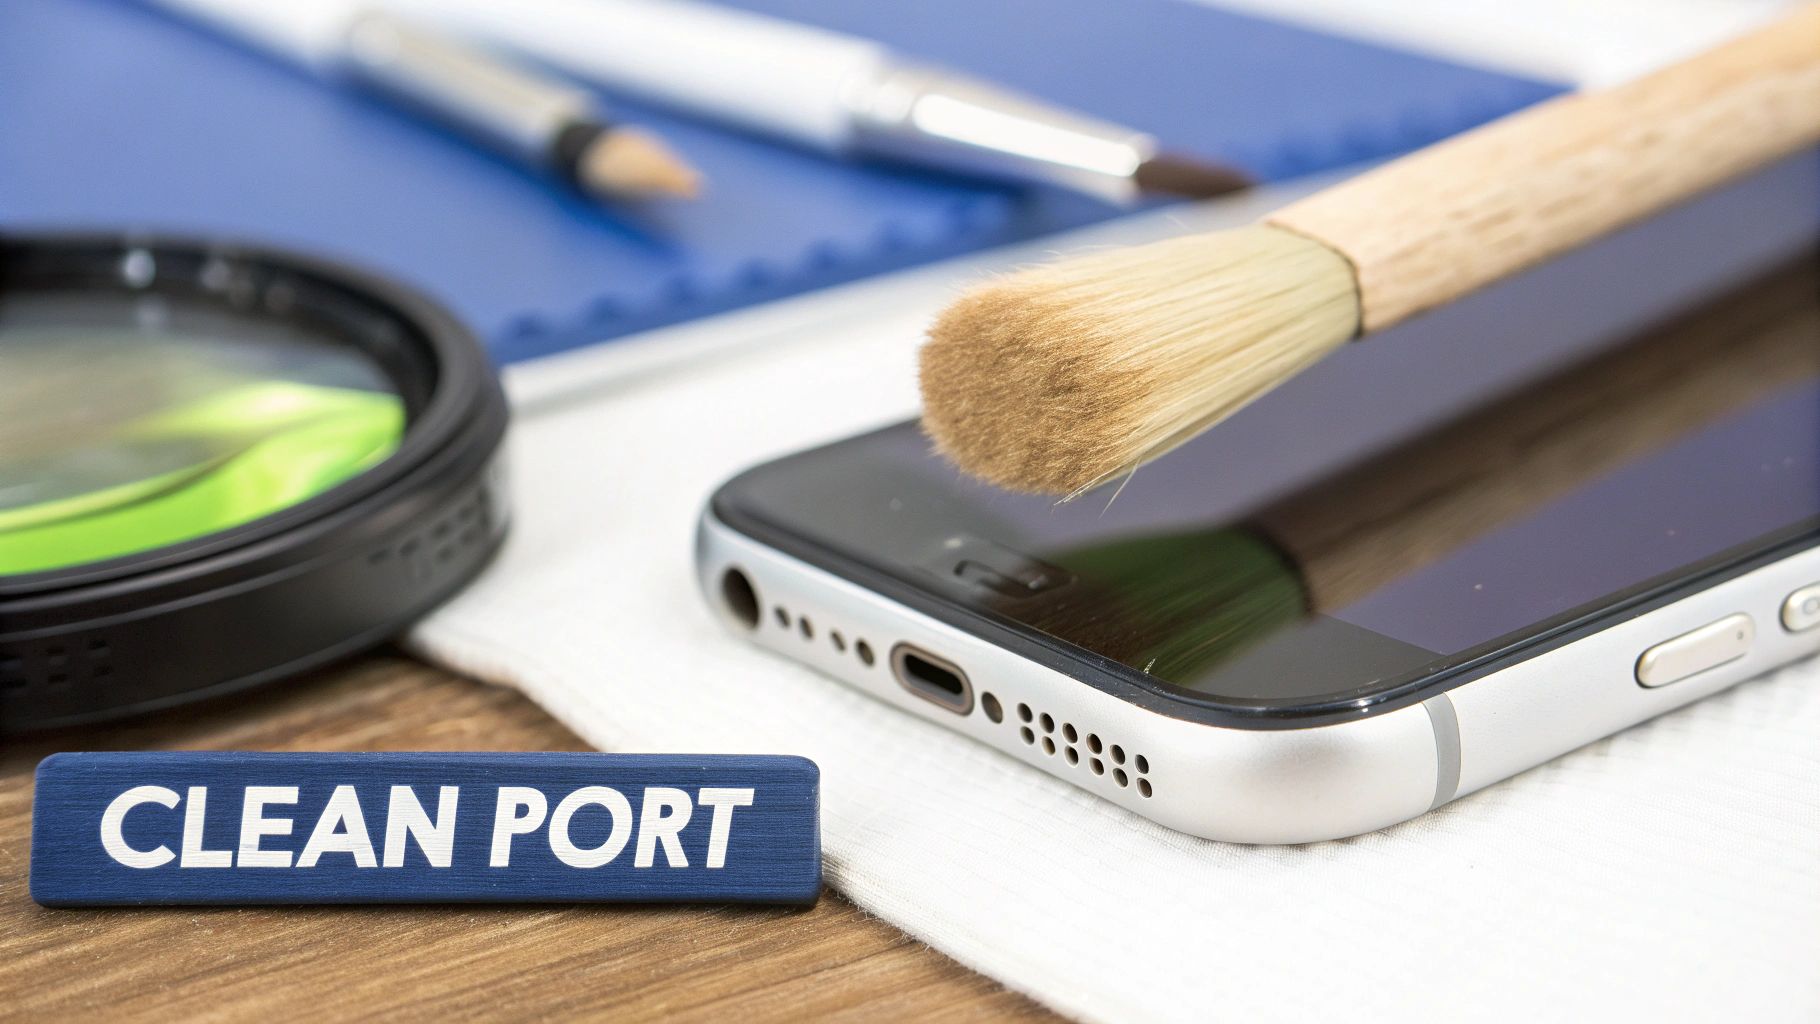
It's amazing how often a massive charging headache boils down to a tiny bit of pocket lint. Over months of use, your iPhone's charging port acts like a scoop, collecting dust, fabric, and whatever else is lurking in your pockets or bag. Every time you plug in the cable, you're compacting that gunk, eventually creating a solid barrier that stops the charger from making a clean connection.
This build-up is easily the number one reason we see for phones that "won't charge." So, before you start thinking about a costly repair, a gentle clean is always the best first move. With the right tools and a steady hand, you can clear out the blockage yourself and get your phone charging again, potentially saving a trip to the repair shop. Honestly, this simple bit of maintenance can often fix an iPhone charging port in less than five minutes.
What Not to Do First
Okay, before we grab our tools, it’s vital to cover what not to do. The charging port is home to delicate pins and electrical contacts that are ridiculously easy to damage. One wrong move with the wrong tool can turn a simple fix into an expensive problem.
Here’s what you absolutely must avoid:
- Never Use Metal Objects: Do not—we repeat, do not—stick paper clips, SIM ejector tools, or safety pins in there. Metal is conductive and can cause a short circuit, frying the internals. It’ll also scratch and snap those fragile contact pins in a heartbeat.
- Avoid Using Your Mouth: Blowing into the port seems like a harmless idea, but you’re introducing moisture and saliva. That moisture will lead to corrosion on the electronics over time, creating a much bigger headache than a bit of dust.
- Stay Away From Liquids: Never spray water, isopropyl alcohol, or any household cleaners into the port. Liquid damage is one of the worst things that can happen to a phone and is rarely a simple fix.
The Right Tools for the Job
Now that the warnings are out of the way, let's get to what actually works. The aim here is to dislodge and scoop out the debris without actually touching the sensitive electronic components. Your best bet is always to use non-conductive tools that are softer than the parts inside.
A can of compressed air is the perfect starting point. It uses focused air pressure to blow out loose debris without making any physical contact. If that doesn't solve it, the lint is probably too compacted and needs to be manually pulled out.
For this, a simple wooden toothpick is your best friend. It's non-conductive and soft enough that you're unlikely to cause scratches or damage as long as you're gentle. You can even carefully shave the tip down with a knife to make it a bit thinner and flatter for a better fit.
Pro Tip: Before you start poking around, always power down your iPhone completely. This eliminates any risk of a short circuit, even if you're using non-conductive tools. Safety first is the golden rule for any DIY repair.
Performing the Clean
Once you’ve got your toothpick, find a well-lit spot. Use another phone's torch or a bright lamp to peer inside the port and see exactly where the debris is packed in.
Gently insert the toothpick and use a careful scraping or hooking motion along the inside walls of the port. The idea is to hook the debris and pull it out, not to shove it further inside. You’ll probably be shocked at the dense little ball of lint that comes out.
After you've removed the main clump, a final blast of compressed air can clear out any remaining dust. In our experience, this simple procedure is often all it takes to resolve the most common charging problems.
Assembling Your DIY iPhone Repair Toolkit
So, you’ve given the charging port a good clean, but your iPhone is still playing dead. That usually means the problem isn’t just some pocket fluff, but a sign that the internal hardware has failed. Taking on a full charging port replacement is definitely an ambitious project, but it’s also incredibly rewarding and can save you a fair bit of cash.
But let's be clear: diving into your iPhone’s guts without the right gear is a recipe for disaster. Getting prepared isn't just a good idea; it's the most crucial step for any successful DIY repair. Before you even think about popping that screen off, let's get your toolkit sorted so you can fix your iPhone charging port safely and properly.
The Non-Negotiable Tools of the Trade
Trying to fix an iPhone with whatever you have lying around the house is like trying to perform surgery with a butter knife—it’s just going to make a bigger mess. Investing in a decent, purpose-built toolkit is non-negotiable. The good news is most of these tools are pretty cheap and will come in handy for any other electronic repairs down the line.
Here’s what you absolutely need:
- Pentalobe P2 Screwdriver: This is a must-have for almost any iPhone. Apple uses these unique five-point screws at the bottom of the phone specifically to keep people out. Without this specialised screwdriver, you won’t even get past the first step.
- Tri-Point Y000 Screwdriver: For any iPhone 7 or newer, you'll find these tiny three-point screws holding down critical components like the screen and battery connectors. Trust me, using the wrong driver here will strip them in a heartbeat.
- Phillips #000 Screwdriver: This is your standard-issue small Phillips head, used for various screws inside older iPhones and some components in the newer models.
- Spudger and Plastic Pry Tools: These non-conductive tools are your best friends for safely disconnecting those delicate ribbon cables and prying things apart without scratching the logic board or cracking the screen.
- Suction Cup: A small but vital tool. You'll use it to create a gap to lift the screen assembly off the phone's frame once the bottom screws are out.
- Tweezers: A good pair of fine-tipped, anti-static tweezers is invaluable for handling those microscopic screws and guiding tiny flex cables into place.
Safety First: Always, and we mean always, use an anti-static wrist strap when you're working on the inside of your iPhone. One tiny, invisible spark of static from your body is all it takes to fry the sensitive logic board, turning a simple fix into a very expensive paperweight.
Sourcing Quality Replacement Parts
With your tools ready, the next mission is finding a reliable replacement charging port. Here in Australia, you’ll mainly find two kinds of parts: Original Equipment Manufacturer (OEM) and aftermarket. Knowing the difference is crucial for a repair that actually lasts.
OEM parts are made by the same factories that supply Apple. They give you guaranteed performance and a perfect fit, but they can be tougher to find and will cost you more. On the other hand, aftermarket parts are made by third-party companies. They're cheaper and everywhere, but the quality can be all over the place. A dodgy part might fail after a few weeks or just not perform like the original.
For something as important as the charging port assembly—which often has microphones and antenna connections piggybacking on it—you really want to stick with high-quality parts. Look for reputable Aussie suppliers who are upfront about what they’re selling and offer warranties. A quick search for reviews from the repair community can save you a lot of future headaches.
Pre-Repair Organisation
Okay, you’ve got your tools and your new part. The last piece of the puzzle is organisation. You're about to deal with a dozen or more tiny screws, often of different lengths. Mixing them up is one of the most common and damaging mistakes a beginner can make.
A magnetic screw mat is a brilliant investment. These mats often have a diagram of the iPhone's layout printed on them, so you can place each screw exactly where it came from. This simple tool practically eliminates the risk of putting a long screw in a short hole during reassembly—a mistake that can easily puncture the battery or destroy the logic board. A bit of prep work like this transforms a potentially chaotic job into a calm, methodical process.
If you want to learn more about the specific screwdrivers needed for these jobs, you can read our detailed guide on pentalobe screwdrivers for iPhone repairs.
The Step-by-Step Replacement Process
So, a good cleaning didn't fix your charging problems. It looks like we need to get our hands a bit dirtier. A full charging port replacement might sound intimidating, but if you've got the patience for it, this is a repair you can absolutely pull off yourself and save your iPhone from becoming a paperweight. This is where all that preparation really starts to matter.
We'll walk you through the key stages of the replacement, from popping the phone open to sealing it back up. We’ll be using the same core techniques our own technicians rely on every day to manage those tiny screws, handle delicate ribbon cables, and get the job done right without causing any new problems.
The Initial Teardown and Disconnecting Power
First things first: turn the iPhone completely off. This isn't just a friendly suggestion; it's the most critical step to prevent a short circuit that could fry the logic board. Once it’s powered down, grab your pentalobe driver and remove the two screws at the bottom of the phone, right next to the charging port.
With those screws out, it's time to lift the screen. Use a suction cup to get a grip on the glass, placing it just above the home button area (or a similar spot on newer models). Pull up with steady, gentle pressure. You're just looking to create a tiny gap, enough to slide a plastic pry tool in. From there, you can carefully work your way around the edges, releasing the clips that hold the screen to the frame.
Crucial Tip: Don't just swing the screen open. On most iPhone models, the delicate display cables are attached along the right-hand side. You have to open it from left to right, like you're opening a book from the back cover. Getting this wrong will tear those vital flex cables instantly.
As soon as the screen is open, your next move is to disconnect the battery. This is non-negotiable. Find the small metal bracket that covers the battery connector, remove its screws (they're usually tiny tri-point or Phillips head), and then use a plastic spudger to gently lift the connector straight up and away from the logic board. Now, the device is safe to work on.
Removing the Old Charging Port Assembly
The charging port isn't a simple, standalone part. It’s actually part of a larger, complex flex cable that snakes through the bottom of the phone. This single assembly often includes the main microphone, connections for the Taptic Engine (the component that creates vibrations), and even parts of the cellular antenna. Because it’s so integrated, staying organised is absolutely key.
To get to the old port, you’ll need to methodically remove a few other components that are in the way. This usually means:
- Removing the loudspeaker module: This is typically held in by a few screws and sits right on top of the charging port's flex cable.
- Disconnecting the Taptic Engine: This little motor gives you haptic feedback. It needs to be disconnected and often removed to give you enough room to work.
- Detaching various connectors: Use your spudger to carefully pop off the small press-fit connectors linking the port assembly to the main logic board.
The old port itself is usually secured by several small screws and a bit of light adhesive. You'll need to patiently remove every screw—keeping them organised on your magnetic mat is a lifesaver here. Once everything is loose, you can gently peel the old flex cable assembly out of the phone's frame. Don't rush it; yanking on it can easily tear something else.
Installing the New Part and Reassembly
With the old part out, it’s time to fit the new one. Start by carefully placing the new charging port into its slot in the frame. Make sure you align the screw holes perfectly before you start putting anything back in.
From this point on, you're essentially just doing everything in reverse.
- Secure the new charging port assembly with its screws.
- Reinstall and reconnect the Taptic Engine.
- Put the loudspeaker module back in place.
- Reconnect all the flex cable connectors to the logic board.
The infographic below gives you a simple visual of the whole process: unscrewing, prying, and swapping the part.
The core steps of an iPhone component replacement.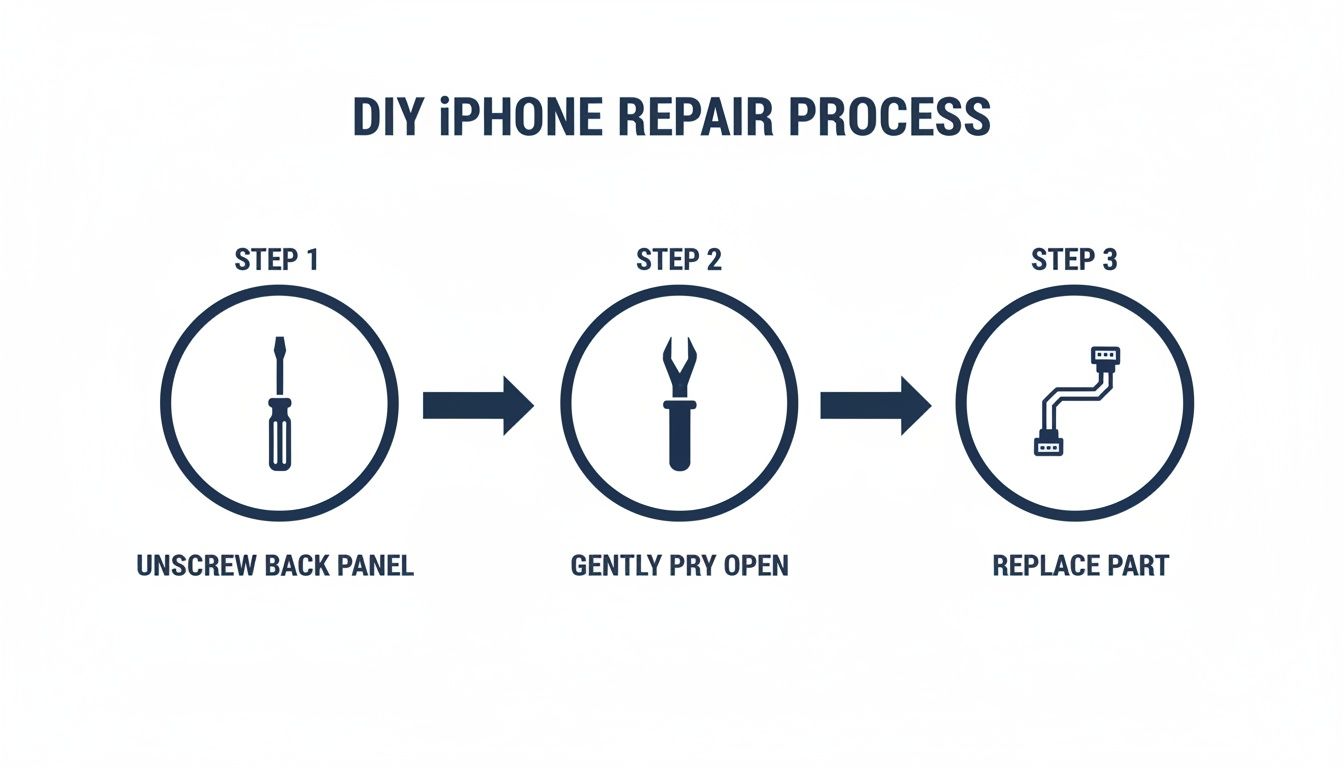
This just reinforces the methodical nature of the repair—you open it up, get to the problem component, replace it, and close it all back up.
Before you seal the phone up completely, reconnect the battery last. Then, reconnect the display cables. Don't snap the screen shut just yet. Power the phone on and test the new port with a charging cable to make sure it's actually working. It's also a good idea to test the microphone by recording a quick voice memo. If everything checks out, power it down one last time, carefully snap the screen back into place, and reinstall those two final pentalobe screws at the bottom.
If you're looking for an all-in-one solution, our iPhone XR DIY charger port repair kit comes with the part and all the tools you'll need.
Knowing When to Seek Professional iPhone Repairs Brisbane
Doing your own repairs can be incredibly satisfying, we get it. But knowing your limits is just as important as knowing how to use a pentalobe screwdriver. Sometimes, a charging issue isn't just a faulty part; it’s a symptom of a much deeper problem that needs specialised tools and a seasoned expert to diagnose.
The first step is to be honest with yourself about your skill level. If you felt hesitant or uncomfortable at any point reading through a guide, or if the idea of handling those tiny, delicate components fills you with dread, that’s your cue to pause. Pushing forward without confidence is often how a simple, affordable repair spirals into a costly nightmare.
Red Flags That Scream "Stop and Call a Pro"
Certain symptoms are giant, flashing neon signs telling you a DIY attempt is just too risky. If you run into any of these, it’s time to put the tools down and find professional iPhone repairs in Brisbane.
- Signs of Water or Liquid Damage: See any green or white crusty stuff inside the port or on the internal components? Stop immediately. Liquid damage can cause unpredictable short circuits and often messes with the logic board, which is a whole different ball game compared to a simple part swap.
- Multiple System Failures: Is it just the charging port acting up, or are the microphone, speakers, or even your mobile reception playing up too? These components are often bundled into the charging port assembly, so when several fail at once, it points to a more serious hardware fault that needs a professional eye.
- A Failed DIY Attempt: If you’ve already tried to fix an iPhone charging port and it either didn't work or, even worse, created a new problem, don't double down. You might have missed a tiny step or accidentally knocked something else loose. A technician can figure out what went wrong and get it sorted properly.
The Unseen Benefits of a Professional Service
Going to a professional repair service like Screen Fixed Brisbane isn't just about paying for convenience; it’s about protecting your phone and getting a fix that actually lasts. Technicians have access to diagnostic tools and knowledge that just aren’t available to the average person tinkering at their kitchen table.
Technicians use advanced diagnostic gear to pinpoint the exact cause of a charging fault. They can tell if it's the port, the battery, or a subtle fault on the logic board itself—a distinction that’s nearly impossible to make at home without the right equipment.
On top of that, professional services give you the peace of mind that comes with a workmanship warranty. If the repair fails within that warranty period, you’re covered. That’s a crucial safety net you just don't get when you go it alone.
Charging port issues are one of the most common iPhone repairs in Australia. Pro service centres are absolute pros at these jobs, often knocking them over in under 30 minutes. If your phone's charging problem is still there even after a professional has looked at it, or if the repair just isn't worth it, you may need to think about how to securely dispose of an old cell phone to protect your data and the environment.
At the end of the day, the goal is simple: get your device working reliably again. While DIY is empowering, a professional repair is the guaranteed route to a safe, effective, and lasting solution.
Got Questions About Your iPhone Charging Port? We've Got Answers
When your iPhone stops charging, a million questions can pop into your head. It's a common problem, and over the years, we've heard just about every query imaginable from folks trying to get their phones working again. To wrap things up, here are some quick, no-nonsense answers to the questions we get asked most often here in Brisbane and across Australia.
Can I Just Use a Wireless Charger Instead?
You absolutely can! If you've got a newer iPhone that supports Qi wireless charging, it's a brilliant way to get by in the short term. It's perfect for plopping on your nightstand or desk to keep the battery topped up without having to wrestle with a dodgy port.
But it's important to see it for what it is: a temporary fix. You'll quickly realise how much you rely on that Lightning port for other things. Think about connecting to CarPlay, transferring photos to your laptop, or doing a full restore through iTunes or Finder. Wireless charging is a great backup, but you’ll want that port fixed for full functionality.
What's the Average Cost for a Charging Port Repair in Australia?
This is the big one, and honestly, it varies. The final price really comes down to which iPhone model you have and what’s actually wrong with it. Sometimes, it's just a severe buildup of lint, and a professional clean can get you sorted for under $100.
A full-blown port replacement is a more delicate operation. For older models, you might be looking at around $99. For the latest iPhones with their intricate internal layouts, the cost can creep up past the $200 mark. As a rule of thumb, independent repair shops like Screen Fixed Brisbane are almost always more budget-friendly than going directly through Apple.
The best part? Getting a quote costs nothing. Any decent repair shop will diagnose the problem and give you a firm price upfront, letting you decide what to do next with no pressure.
Will a DIY Repair Void My Apple Warranty?
In a word: yes. The second you open up your iPhone yourself or have a non-authorised technician do it, your standard Apple warranty is gone. This is a massive factor to weigh up if your device is still fairly new.
If your iPhone is still under its original warranty or you have AppleCare+, your first stop should always be an Apple Store or an Apple Authorised Service Provider. They'll take a look, and if it turns out to be a manufacturing fault, you could get it fixed for free.
Why Does My iPhone Keep Saying "Accessory Not Supported"?
Ah, the dreaded pop-up. Seeing this message is incredibly common and it almost always boils down to one of three things. The first and most likely culprit is a dirty charging port that's blocking a proper connection.
Second, it could be a dodgy cable. Cheap, non-certified MFi (Made for iPhone) cables are notorious for causing this error. Finally, on rare occasions, it might just be a software glitch.
The smart move is to start simple. Give the port a thorough but gentle clean. If that doesn't solve it, try a genuine Apple cable (or a certified one) that you know works with another device. If the error still won't go away, that’s a pretty clear sign the port's hardware has failed and needs attention.
Disclaimer: Apple, iPhone, Lightning, and AppleCare+ are trademarks of Apple Inc., registered in the U.S. and other countries. Screen Fixed is an independent repair service and is not affiliated with Apple Inc.
Need a hand from the experts? Book your repair with Screen Fixed Brisbane today.