
meta_title: iPhone 13 Pro Max Screen Replacement Guide | Screen Fixed Brisbane meta_description: Cracked your iPhone 13 Pro Max screen? Our guide covers repair options, costs in Australia, and post-repair tips. Get a quote from Screen Fixed Brisbane.
When your iPhone 13 Pro Max screen takes a hit, it’s not just a simple matter of swapping the glass. The real decision is choosing between an official Apple service and a skilled independent repair expert. Going through Apple guarantees original parts, but you'll feel it in your wallet. On the other hand, a trusted local shop like Screen Fixed can deliver incredible savings without sacrificing the quality of that stunning ProMotion display.
Weighing Your iPhone 13 Pro Max Repair Options
That moment your iPhone 13 Pro Max screen shatters can be a bit overwhelming. The first question that pops into your head is usually, "Where do I even take this?" Do you book an appointment with Apple, or do you head to a local, independent repair shop? Both will get your phone working again, but the path you take—in terms of cost, time, and the quality of the parts—is worlds apart.
Figuring out these differences is crucial to making a call that works for your budget and your schedule.
iPhone 13 Pro Max screen replacement options in Brisbane.
The Official Apple Repair Route
Choosing an official Apple repair gives you peace of mind. You know you're getting a genuine, factory-spec screen, which is the biggest draw for a lot of people. It guarantees the display will look and feel exactly like it did the day you unboxed it. But, this premium service definitely comes with a premium price tag, especially if your phone is out of warranty.
Here's what you're looking at with an Apple repair:
- Guaranteed OEM Parts: No questions asked, you get a screen straight from Apple, ensuring perfect compatibility.
- Higher Cost: This is by far the most expensive option, often by a huge margin.
- Potential Wait Times: You'll likely need to book an appointment and could be without your phone for a while.
The Independent Repair Advantage
For most Aussies, independent repair shops offer a much more practical alternative. The most obvious benefit? The cost savings. A professional independent technician can handle an iPhone 13 Pro Max screen replacement for a fraction of what Apple charges, making high-quality repairs accessible for everyone.
This isn't just a small difference, either. Let's take a look at the real numbers.
iPhone 13 Pro Max Screen Repair Cost Comparison in Australia
Here’s a quick breakdown of what you can expect to pay for a screen repair in Australia. As you can see, going with an independent option can save you a significant amount without necessarily skimping on quality.
| Repair Provider | Estimated Cost (AUD) | Parts Quality | Typical Warranty |
|---|---|---|---|
| Apple (Out of Warranty) | $549+ | Genuine Apple Service Part | 90 days to 1 year |
| Independent Repair Shop | $250 - $450 | High-Quality Aftermarket or Refurbished Original | 3 months to Lifetime |
The data is clear: for most users whose iPhone 13 Pro Max is no longer covered by warranty, an independent repair strikes the perfect balance of quality, speed, and affordability. In fact, some industry reports show that over 80% of post-warranty customers now opt for independent providers for this very reason.
Choosing a reputable independent repairer doesn't mean you're sacrificing quality. Many, like Screen Fixed, source premium refurbished original screens that reuse the genuine Apple OLED panel, delivering the same vibrant colours and fluid ProMotion performance you expect.
Independent shops also bring flexibility to the table. You can often get much faster turnaround times—sometimes even same-day service—which is a massive win for anyone who can't be without their phone. Plus, you’re supporting a local Australian business. To get a better handle on the expenses, have a look at our detailed guide on iPhone screen repair costs.
Getting the Right Screen and Tools for the Job
Any good repair, especially one on a premium device like the iPhone 13 Pro Max, starts long before you pick up a screwdriver. It begins with getting the right parts and tools lined up. This is the step that separates a clean, factory-finish repair from one that ends in disaster—think poor colour, a dodgy touch response, or worse, a damaged phone.
First things first: you need to understand the different replacement screens on the market. It can feel like a minefield of confusing terms, but the performance gap between a cheap screen and a quality one is massive. Choosing the right one makes all the difference to the final result.
Choosing Your Replacement Screen
When you're replacing an iPhone 13 Pro Max screen, remember that not all parts are built the same. The display is how you interact with everything on the phone, so skimping on quality here is a bad idea. Let's break down what's out there for repair shops and ambitious DIYers.
- Refurbished Original Screens: Honestly, these are the gold standard for most third-party repairs. You get a genuine Apple OLED panel that’s had its cracked glass professionally replaced. Because the core display is original, you get the exact same colours, brightness, and that buttery-smooth 120Hz ProMotion experience the phone came with. No compromises.
- Service Pack Screens: A service pack screen is an OEM (Original Equipment Manufacturer) part, meaning it's made to the same specs Apple uses for its own repairs. They offer fantastic, reliable quality and are a go-to for professional techs who need consistent, top-tier results every single time.
- High-Quality Aftermarket Screens: These are brand-new screens made by third-party companies. While they aren't using original Apple components, the best ones get incredibly close in performance. They’re a great option if you're on a tighter budget, but it is absolutely critical you buy from a trusted supplier. A cheap, no-name screen will likely give you headaches like poor brightness, weird colour shifts, or frustrating touch issues.
For the iPhone 13 Pro Max, we almost always point people towards a refurbished original screen. You're keeping the authentic Apple OLED—the heart and soul of the display—which guarantees the ProMotion and colour depth stay exactly as they should.
Want to get really nerdy about screen types? We've got a much deeper dive in our article about understanding replacement phone screens. A little extra knowledge here goes a long way in making sure you (or your customer) are happy with the repair.
Assembling Your Essential Toolkit
Once the screen is sorted, it's time to get your tools ready. Using the wrong gear is probably the fastest way to turn a simple screen swap into a nightmare. We're talking stripped screws, torn ribbon cables, and even a bent frame. A proper toolkit is all about precision and safety.
If you’re a DIYer doing this as a one-off, you might be able to get creative with some items. But some tools are just non-negotiable if you want to do the job right. Investing in a decent kit not only makes the process smoother but also saves your expensive phone from clumsy mistakes.
Here's the must-have list for this particular job:
- Precision Screwdriver Kit: You absolutely need Pentalobe (P2), Tri-Point (Y000), and Phillips (PH000) bits. Using the wrong bit is the #1 reason screws get stripped, turning a 30-minute job into a multi-hour headache.
- Heat Source: A proper heat gun or a dedicated heat mat is best for softening the tough adhesive holding the screen down. You can use a hairdryer in a pinch, but you have far less control over the temperature, which adds risk.
- Opening Tools: You'll want a mix of thin plastic picks and a suction cup. A super-thin metal prying tool is a game-changer for getting that initial separation between the screen and frame without scratching or bending anything.
- Spudger and Tweezers: A nylon spudger (a type of pry tool) is crucial for safely popping off those delicate battery and display connectors without causing a short. And you'll need a good pair of precision tweezers for managing all the tiny screws and components you'll be handling.
- Waterproof Adhesive Seal: To finish the job properly and restore some of the phone's original dust and water resistance, you need a pre-cut adhesive gasket made specifically for the iPhone 13 Pro Max. Don't skip this.
Having these tools ready to go transforms the repair from a high-stakes gamble into a controlled, manageable process. For any repair business, a well-stocked and organised toolkit is the foundation of efficiency and quality work.
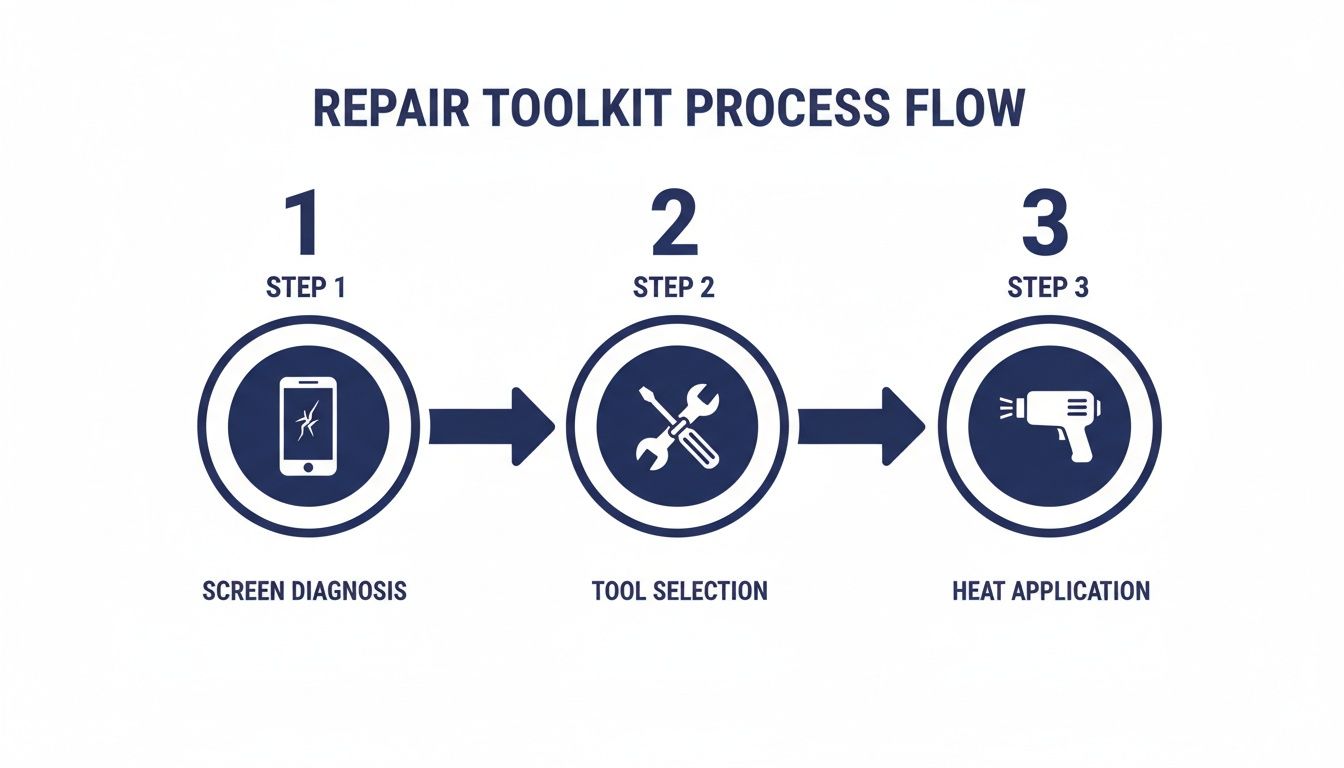
A Step-by-Step Walkthrough of the Replacement Process
With your new screen and tools laid out, it’s time to get into the nitty-gritty of the iPhone 13 Pro Max screen replacement. This repair really demands patience and a steady hand. The inside of this phone is a tightly packed puzzle of delicate components, so we'll walk you through each critical phase, sharing the kind of practical tips professionals rely on for a perfect job every time.
This isn’t just about taking out screws; it’s about understanding the sequence, respecting the hardware, and knowing where the traps are.
Cracking the Case: Safely Opening the Device
First things first, you've got to get inside. Apple uses a tough combination of two Pentalobe P2 screws and a seriously strong waterproof adhesive to seal the iPhone 13 Pro Max. Getting past this seal without wrecking the frame or the already-damaged screen is your first real test. Rushing this is a rookie mistake that easily leads to ugly cosmetic damage or, much worse, damaging components hiding just under the edge of the frame.
Before you even touch the phone, make sure you have a clean, well-lit workspace and a magnetic mat or screw organiser. This isn't just for keeping things tidy—mixing up the tiny, location-specific screws can cause catastrophic damage to the logic board. Some screws are only a fraction of a millimetre longer than others, and forcing one into the wrong post can permanently destroy internal board layers. It's a nightmare scenario known as "long screw damage," and it's completely avoidable.
This gives you a bird's-eye view of the initial stages, highlighting the core elements you're about to tackle.
 The methodical repair process ensures a successful iPhone 13 Pro Max screen replacement.
As you can see, a successful repair is all about a methodical approach: start with the right parts, then carefully apply heat to get inside without a fight.
Okay, let's begin. Power the iPhone completely off. Now, grab your Pentalobe driver and remove the two screws flanking the charging port.
Next up is that stubborn adhesive. Using a heat gun or a specialised heat mat, gently warm the edges of the screen for two to three minutes. You’re aiming to soften the glue, not cook the battery. A good rule of thumb is to get it warm to the touch, but not so hot you can't comfortably hold it.
Once it's heated, press a suction cup onto the bottom half of the screen and pull gently to create a tiny gap. Slide a thin opening pick into that gap. From there, you'll want to slowly and carefully work the pick along the edges of the phone, slicing through the softened adhesive.
Pro Tip: The iPhone 13 Pro Max is designed to open from the left side, swinging out like a book. The super-delicate display and sensor cables are all lined up along the right edge. Prying from that side is asking for trouble and dramatically increases the risk of tearing them.
Keep working your way around the frame, adding more picks as you go to stop the adhesive from sticking back down. Patience is key here; brute force is your worst enemy. Once you've cut through all the adhesive, don't just yank the screen off. Swing it open gently to the left.
Disconnecting Power and Display
Before you do anything else inside the phone, you have to disconnect the battery. This is the single most important safety step in any electronics repair. If you skip it, you risk a short circuit that can easily fry the logic board or other critical components.
You'll see a small metal shield covering the battery and display connectors. You’ll need to switch between your Phillips and Tri-Point screwdrivers to remove the screws holding this cover on. Keep these screws organised—they are not interchangeable!
With the shield off, grab a nylon spudger (never use a metal tool for this) and gently pop the battery connector straight up and off its socket on the logic board.
Now that the power is cut, you can safely disconnect the display. There are usually two connectors for the screen assembly. Use your spudger to carefully disconnect them the same way you did the battery. The screen is now free from the phone's body, but you're not done yet.
Transferring Critical Components
This is where the repair gets truly delicate. The earpiece speaker and front sensor assembly, which is attached to the back of your old screen, has to be moved over to the new one. This one little module contains the flood illuminator and dot projector—both absolutely essential for Face ID to work.
Here’s the catch: that assembly is cryptographically paired to your specific iPhone’s logic board at the factory. If you damage any part of it during the transfer, Face ID will be permanently disabled. There's no software fix for this.
Carefully remove the tiny screws holding the assembly in place. You'll probably need to apply a little bit of heat to the front of the screen to soften the adhesive holding the flex cables down. Using precision tweezers and a spudger, gently peel the assembly away from the old display. Take your time and be extremely careful not to tear the fragile ribbon cables or nick any of the sensors.
Once it's free, align it perfectly on the new replacement screen and secure it with the original screws. Now you can start putting everything back together by working backwards.
To avoid the dreaded "long screw damage," keeping track of every single screw is crucial. A map can be a real lifesaver, especially on your first few repairs. When you need that extra assurance, remember that a professional service like iPhone Repairs Brisbane handles these delicate transfers with precision every day.
Dealing With Common Post-Repair Problems
You’ve carefully replaced the screen, sealed everything up, and powered it on. In a perfect world, the job’s done. But we all know that sometimes, even after the most meticulous iPhone 13 Pro Max screen replacement, you run into frustrating glitches. Don't panic—most of these headaches are common and just need a logical approach to fix.
This section is your go-to guide for diagnosing and sorting out those post-repair issues. We'll walk through everything from a completely dead screen to weird display artefacts, starting with the simple stuff before digging into the trickier problems.
First Things First: Check Your Connections
Before you even think about blaming a faulty part, your very first move should be to double-check your work inside the phone. A massive percentage of post-repair problems boil down to something simple, like a flex cable that isn't seated quite right.
Power the phone down completely, open it back up, and carefully disconnect the battery again. Now, reseat the display connectors. You’re listening and feeling for a distinct, satisfying click that tells you it’s locked in properly. Give them a quick visual inspection too—look for any bent pins on the logic board socket or tiny tears in the flex cable itself. You'd be surprised how often this simple step fixes issues like an unresponsive touch screen or a display that won't light up at all.
Tackling Specific Display Glitches
If reseating the connectors didn’t do the trick, it’s time to play detective and diagnose the specific symptom. Different issues often point to different root causes, so figuring out exactly what’s wrong is the key to fixing it.
Here are a few common culprits and what to look for:
- No Touch Response: This almost always screams "connector issue." If reseating it didn't help, take a close look at the digitiser flex cable for any sharp creases or damage that might have happened during the installation.
- Lines or Artefacts on the Screen: Vertical or horizontal lines, or strange blocks of colour, usually indicate a faulty display panel or a damaged display flex. This is rarely a software bug and often points the finger straight at the new part.
- Backlight On, But No Image: A classic problem. This can happen if the display data connector isn't fully seated, even if the backlight connector is. The phone is on, but it simply can’t send the image data to the screen.
The Dreaded Green Screen of Death
One problem that’s become infamous with the iPhone 13 Pro Max is the 'Green Screen of Death'. This issue has been plaguing owners across Australia since early 2022, where the screen suddenly takes on a persistent, bright green tint. It's often triggered by an iOS update, which can expose underlying hardware vulnerabilities related to voltage drops.
Interestingly, some statistics suggest that a huge portion—up to 40%—of iPhone 13 Pro Max repairs in Australia are now related to this green screen problem. While Apple might quote you over $500 for a fix, independent repairers can often sort it out for a fraction of that. You can see how Aussie consumers are dealing with it by reading their discussions on community forums like OzBargain. If this pops up right after your repair, it could be a compatibility issue with the new screen or an underlying logic board problem.
Troubleshooting the Green Screen: Your first step is a hard reset (press and quickly release volume up, then volume down, then press and hold the side button). If that doesn't work and the original screen is still functional, test it again. If the old screen works fine, the new screen is likely faulty or incompatible. If the old screen also shows the green tint, the problem might be deeper, possibly with the phone's logic board.
Your Final Post-Repair Checklist
Once you've sorted out any immediate problems, it's absolutely vital to run a complete functional test before sealing the device for good. This final check ensures every part of the phone is working as it should and prevents an unhappy customer—or you—from discovering another issue down the line.
A thorough post-repair testing process should confirm all key functions are a-go.
- Display and Touch: Test all brightness levels, check for any dead pixels, and make sure touch response is quick and accurate across the entire screen.
- Face ID: Make sure Face ID unlocks the phone reliably. If it’s failing, you may have accidentally damaged the delicate front sensor assembly during the transfer.
- Cameras: Test both the front and rear cameras. Don't forget to check all the modes, like Portrait and video recording.
- Earpiece Speaker and Mic: The easiest way is to make a quick test call. Check the earpiece speaker, microphone, and the main loudspeaker.
- Proximity Sensor: While you're on that test call, the screen should turn off when you bring the phone up to your ear.
- True Tone: Swipe down to the Control Centre and check if the True Tone option is there and working. If it's missing, the screen data wasn't transferred correctly.
By methodically running through these troubleshooting steps and finishing with a rigorous check, you can wrap up your iPhone 13 Pro Max screen replacement with confidence, knowing you’ve delivered a high-quality, lasting repair.
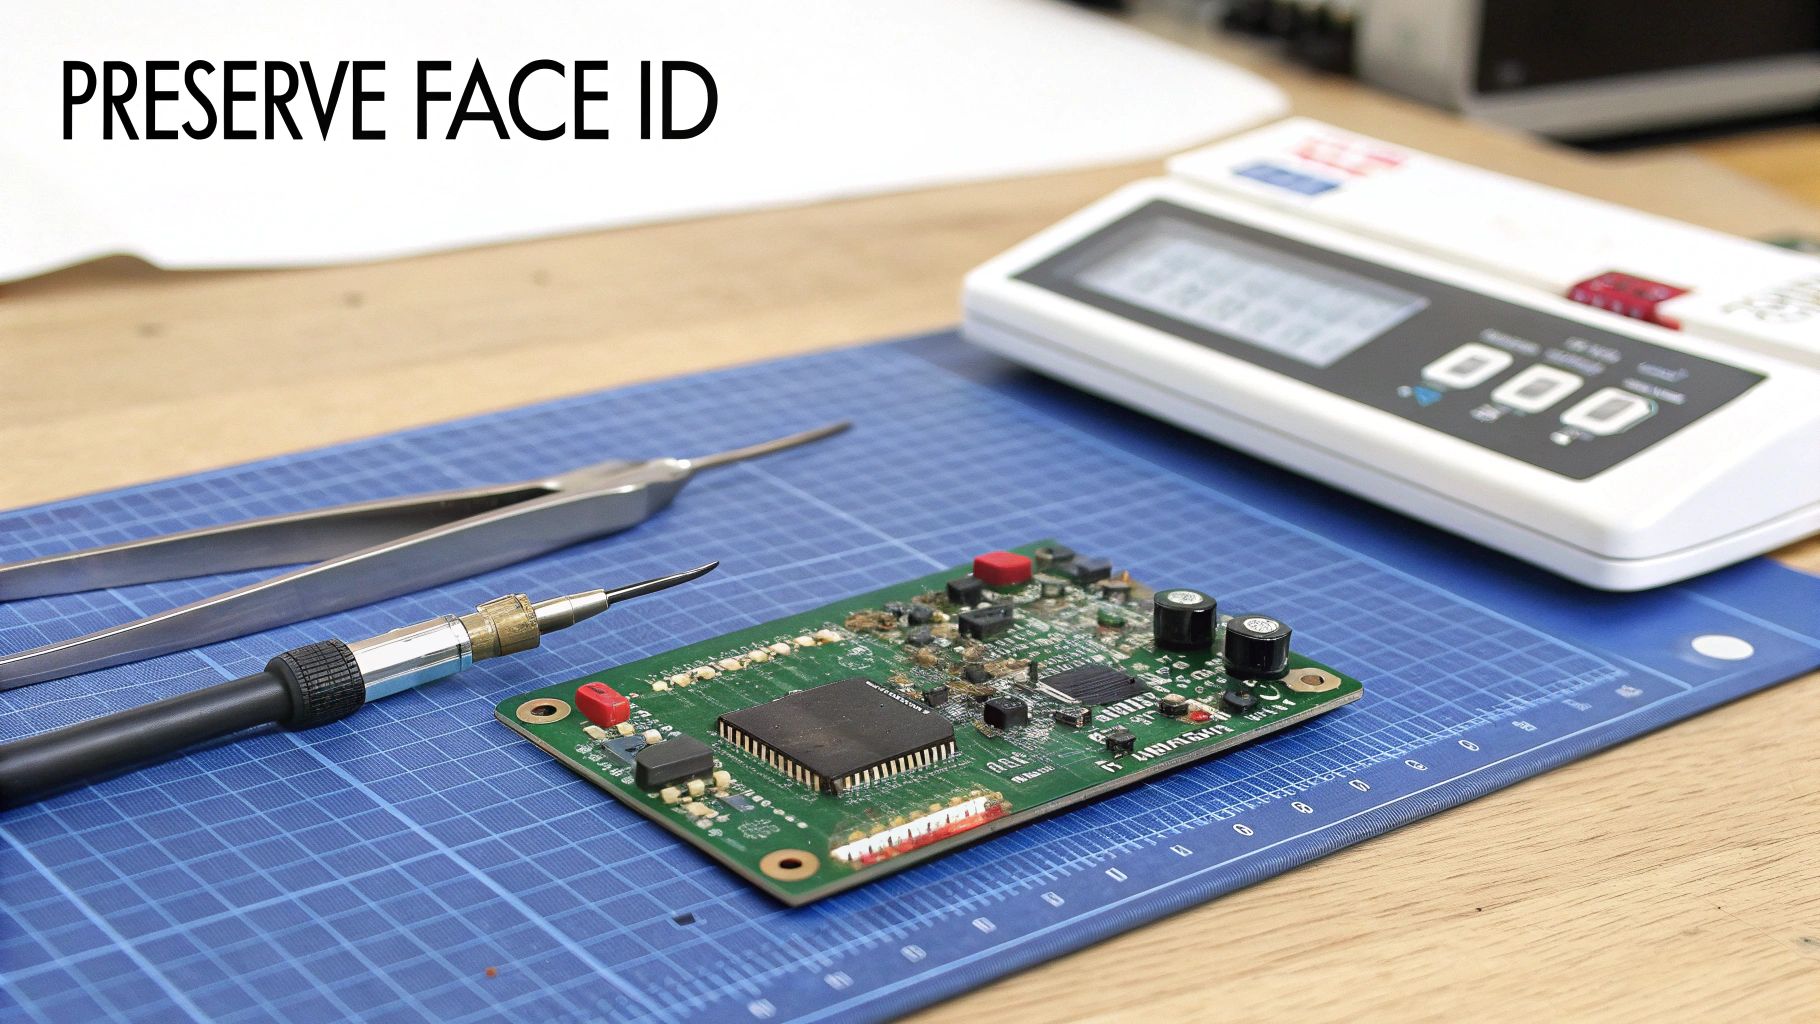
How to Preserve Face ID and True Tone Functionality
Swapping out the screen on an iPhone 13 Pro Max isn't just a simple glass replacement anymore. Modern iPhones tie crucial features like Face ID and True Tone directly to the original display hardware. A proper repair means knowing how to navigate these software-to-hardware pairings to get the phone back to 100% functionality.
Honestly, messing this up is the calling card of an amateur. Whether you're a professional repair shop in Brisbane or a serious DIYer, getting this right is non-negotiable. It's what separates a phone that simply works from one that works like new.
 Precision tools are essential for transferring delicate components during an iPhone screen repair.
The Secret to Saving True Tone
You know that feature that automatically adjusts your screen's warmth to match the room's lighting? That's True Tone, and it relies on data stored in a tiny microcontroller chip on the original display. When you install a new screen, that unique data is gone, and True Tone simply vanishes.
To fix this, professional technicians use a handy tool called an EEPROM programmer. This little device is a lifesaver. It reads the calibration data from the original screen’s chip and then writes it onto the chip of the new replacement screen.
The process is pretty straightforward:
- Plug the original screen into the programmer.
- Read and save its unique display data.
- Connect the new screen.
- Write the saved data onto the new screen.
This 'data transplant' effectively tells the iPhone that it still has its original screen, bringing True Tone back to life. It’s a quick but absolutely essential step that any reputable repair shop will do as standard practice.
Carefully Transferring the Face ID Assembly
Losing True Tone is annoying, but losing Face ID is a deal-breaker. The front sensor assembly—which houses the dot projector and flood illuminator—is cryptographically paired to your specific iPhone’s logic board right from the factory.
If this assembly gets damaged, replaced, or isn't transferred perfectly during a screen repair, Face ID is gone for good. There's no software fix, no workaround. The phone needs that original, paired hardware to function.
This makes the careful transfer of this module from the old screen to the new one the single most critical part of the entire job. The assembly is held on with tiny screws and incredibly delicate, paper-thin flex cables that are glued down.
Patience is everything here. You'll need to apply a tiny bit of heat to soften the adhesive, then use fine-tipped tweezers and a spudger to gently lift the assembly without creasing or tearing the cables. One wrong move, one slip of the tool, and the module is toast. It's a high-stakes step that demands a steady hand and your full attention. For a closer look at how the iPhone 13's internals are structured, you can see just how tight the tolerances are.
Why Professionals Get It Right
The delicate nature of these procedures really underscores the value of professional repair services. While tackling it yourself is rewarding, the risk of permanently killing key features is high if you don't have the right tools and, more importantly, the experience.
It's also why picking a good repairer matters. While official Apple repairs can set you back $400-$450, skilled independent shops can often do the same job for a lot less—we're talking 60-80% savings. With a big 6.7-inch screen, the iPhone 13 Pro Max is prone to damage, contributing to a good chunk of the 2.5 million annual iPhone repairs in Australia. Finding a service that's both reliable and affordable is key.
A pro technician has done the delicate Face ID sensor transfer hundreds of times. They've got the muscle memory and the EEPROM programmer for True Tone, which minimises the risk of something going wrong and ensures your iPhone comes back to you working exactly as it should.
Got Questions About Your iPhone 13 Pro Max Screen Repair? We’ve Got Answers
Even with the best guide in front of you, taking on an iPhone 13 Pro Max screen replacement can feel a little daunting. It's a premium device, and you want to get it right. Let's tackle some of the most common questions we hear from both first-time DIYers and seasoned technicians.
Will I Lose My Data During the Screen Replacement?
This is probably the biggest worry for most people, but you can relax. The answer is no, a screen replacement won't wipe your data.
The repair is purely a hardware job. We're just swapping out physical components, which has no effect on the phone's logic board where all your photos, apps, and memories are stored. That said, it's always smart to back up your device before starting any repair. Think of it as a free insurance policy—just in case the unexpected happens, you're covered.
What Happens to the Water Resistance After a Screen Repair?
Simply put, it's compromised. When your iPhone leaves the factory, it has a precisely applied adhesive seal that gives it that IP68 water resistance rating. The second you open the phone, that factory seal is broken.
Professional repair shops, like our team at Screen Fixed Brisbane, use high-quality, pre-cut replacement adhesive gaskets to properly reseal the device. This does a great job of restoring protection against things like dust and light splashes.
It's critical to understand this: no third-party repair can ever officially guarantee the original IP68 rating. The safest bet is to treat your iPhone as not water-resistant after a repair and keep it away from liquids.
What's the Real Difference Between OEM and Refurbished Screens?
Getting your head around screen quality is crucial for a lasting repair. An OEM (Original Equipment Manufacturer) screen is a brand-new part, made to Apple's exact specifications. It’s what you’d get from an official repair, delivering flawless performance.
But for many experienced repairers, a refurbished original screen is the go-to choice. Here’s the deal: it’s a genuine Apple display where the original OLED panel is perfectly fine, but the cracked outer glass has been professionally replaced. Because you're keeping the authentic Apple display tech, you get the absolute best colour accuracy and ProMotion touch response—it’s often impossible to tell it apart from a brand-new screen.
Can I Really Do This Myself With No Experience?
Technically, yes, it's possible. But the iPhone 13 Pro Max is a seriously complex and delicate piece of kit. This repair demands a lot of patience, a very steady hand, and the right specialised tools. If you’re not comfortable working with tiny screws and fragile ribbon cables, the risk of causing permanent damage is pretty high.
For most people, going to a professional is the safer, more reliable option. Technicians performing an iPhone 13 Pro Max screen replacement every day have the muscle memory and tools to nail the tricky steps—like transferring the Face ID sensors—that can easily trip up a beginner. In the long run, it often provides better value and a lot more peace of mind.
For a professional repair you can count on, using the highest quality parts, book your service with Screen Fixed Brisbane today. Let our expert technicians get your iPhone 13 Pro Max looking and working like it just came out of the box.
Disclaimer: iPhone and Apple are trademarks of Apple Inc. Screen Fixed is an independent repair service and is not affiliated with Apple Inc.